

Introduction
This article gives a simple guide on how to plan and set up retention policies in Microsoft Teams. You will learn how to manage what content to keep, apply policies to specific areas, and make sure you follow rules while getting rid of old data. This helps your organization organize its information better and keep important data safe.
Data Lifecycle Management
Data Lifecycle Management (DLM) is a process that helps organizations manage data from its creation to deletion. It includes stages like data creation, storage, active use, sharing, archiving, and secure deletion. DLM ensures data is efficiently managed, reduces risks, and complies with legal requirements, helping organizations optimize their data handling throughout its lifecycle.
What are Data retention policies?
Data retention policies in Microsoft 365 help organizations control how long they keep information like emails, documents, and files. These policies make sure important data is saved for a certain time and that old or unneeded data is deleted. This helps companies follow legal rules, manage storage, and protect important information. Retention policies can be used for emails, SharePoint documents, OneDrive files, and Teams chats. To set up a retention policy, you create the policy, apply it to the needed places, and check to make sure it works as expected.
Data Retention Policies in Microsoft Teams
Data retention policies in Microsoft Teams help organizations control how long chat messages, files, and other data are stored. These policies make sure that important information is kept for a specific time and that old or unneeded data is deleted when it's no longer necessary. This is useful for meeting legal rules and keeping storage organized. In Teams, these policies can be applied to both private chats and group conversations, so data is saved or removed based on what the organization needs. You can set up and manage these policies through Microsoft 365's security and compliance settings.
Step 1. Sign in to Microsoft 365
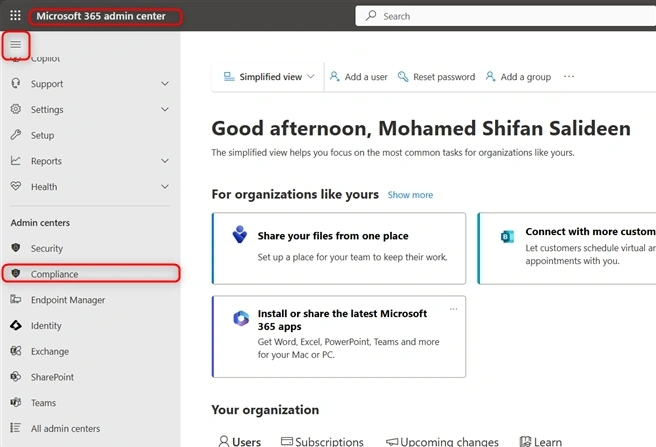
- Go to admin.microsoft.com/ and log in with your account.
- Click on the navigation menu icon
- Select Compliance to open Microsoft Purview.
Step 2. Go to Data Lifecycle Management
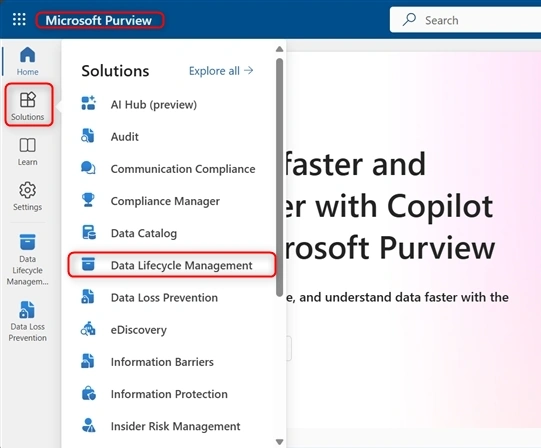
- Once in Microsoft Purview, Click on Solutions
- Then Select Data Lifecycle Management
Step 3. Start a Retention Policy
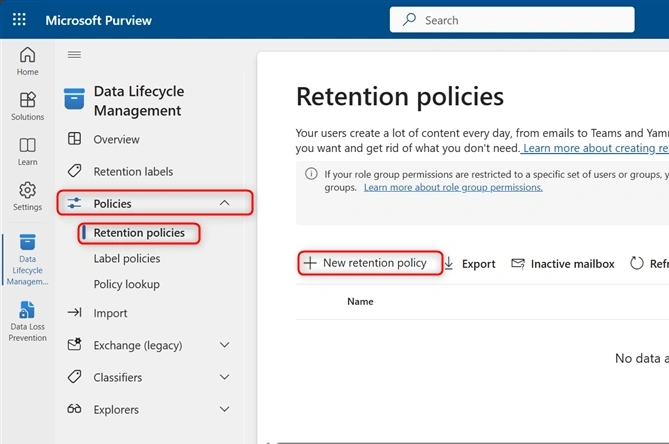
- Click on Policies.
- Then select the Retention Policies
- Click + New Retention Policies to start a new policy.
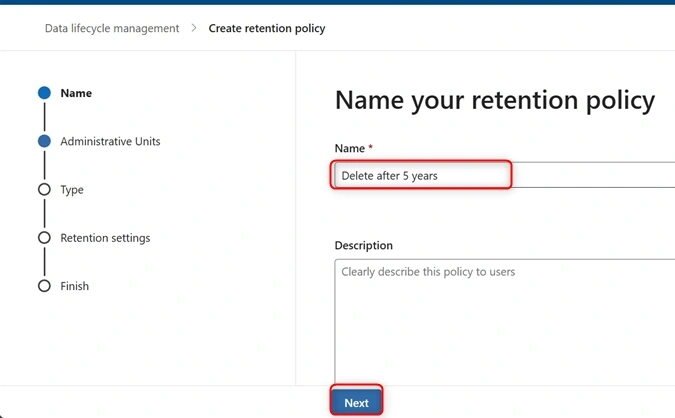
- Name Eg: Delete after 5 years,
- Then click Next.
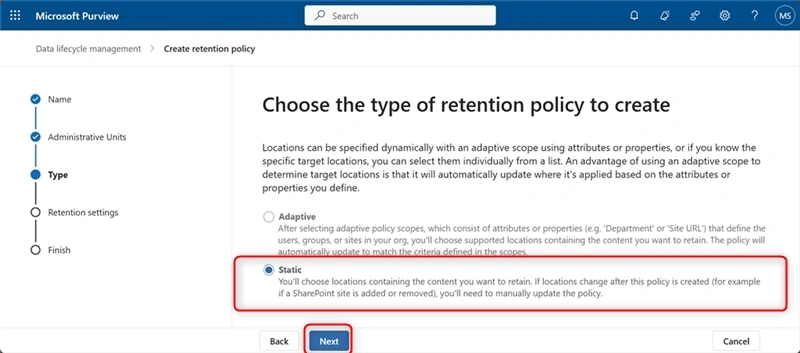
Step 4. Choose the Policy Type
You can choose between two options:
- Static: Applies to a fixed set of places like email or SharePoint.
- Adaptive: Automatically changes based on people or groups.
Select Static and press Next.
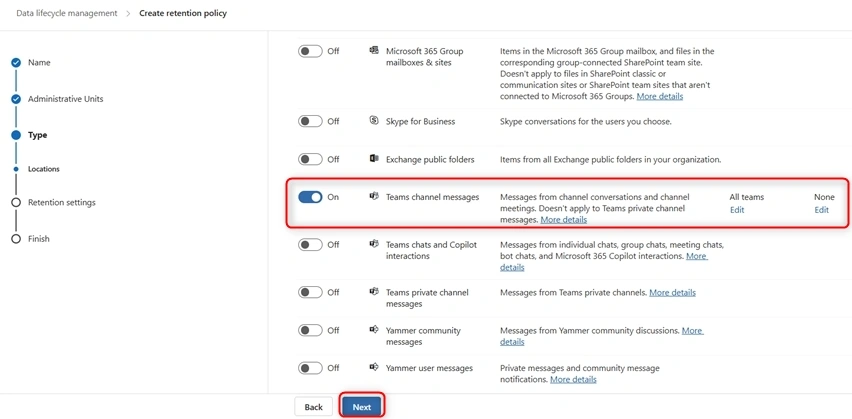
Step 5. Pick Locations
- Decide where this policy will apply (such as Exchange email, SharePoint, Teams, etc.).
- You can also include or exclude specific groups or users if needed.
- After choosing, click Next.
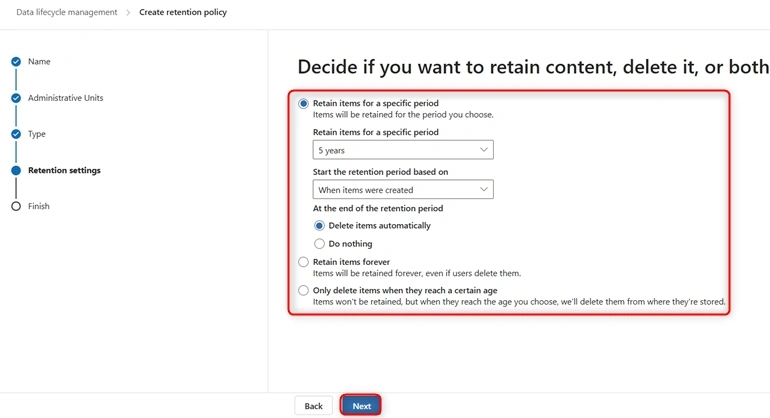
Step 6. Set Retention Rules
- Choose how long to keep items (for example, 5 years).
- Decide whether the time is based on when the item was created or last changed.
- (Decide what happens after this time) Automatically delete items Or keep them forever, if needed.
- Then Press Next.
Step 7. Review and Submit
- Review your settings to make sure everything is correct.
- Note that older items (older than 5 years, in this example) will be deleted once the policy starts.
- Press Submit to activate the policy.
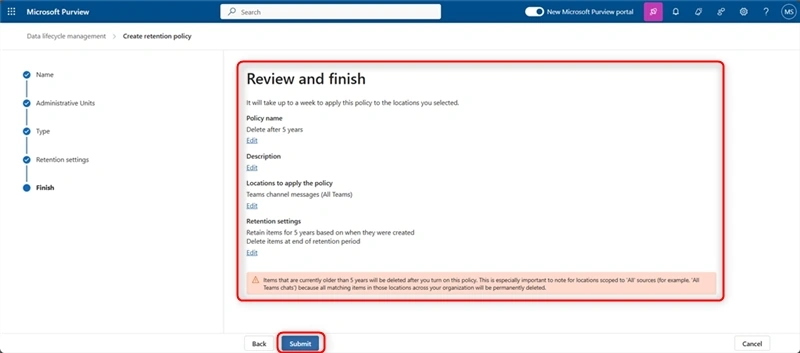
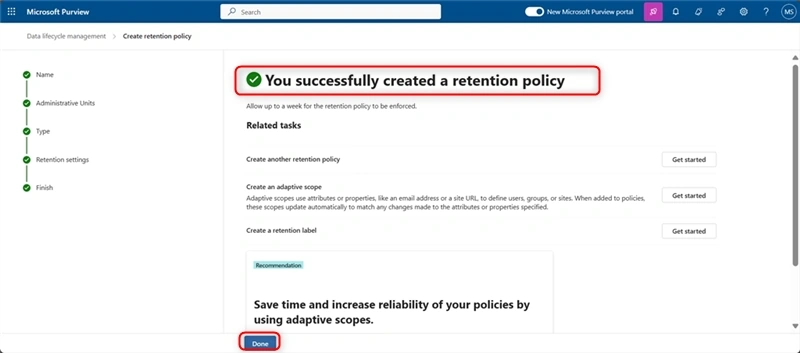
- The retention policy has been successfully created.
Conclusion
Setting up data retention policies in Microsoft Teams is important for organizations that want to manage their information well and follow legal rules. By following the steps in this guide, you can create policies that keep important data for the right amount of time and delete old or unnecessary information securely. This helps keep your data organized and safe. Regularly checking and updating these policies makes sure they fit your organization’s needs and legal requirements, leading to better management of data throughout its life cycle.
Join the conversation! Your thoughts help the community grow.