

Introduction
This article explains how to configure an Azure Virtual WAN hub and connect virtual networks to it. The hub serves as a central routing point, providing seamless and scalable connectivity across your Azure resources. You can also refer to my previous article on creating a Virtual WAN: Create Virtual WAN
Step 01: Go to the Azure portal and search for Virtual WAN and pick your created V WAN
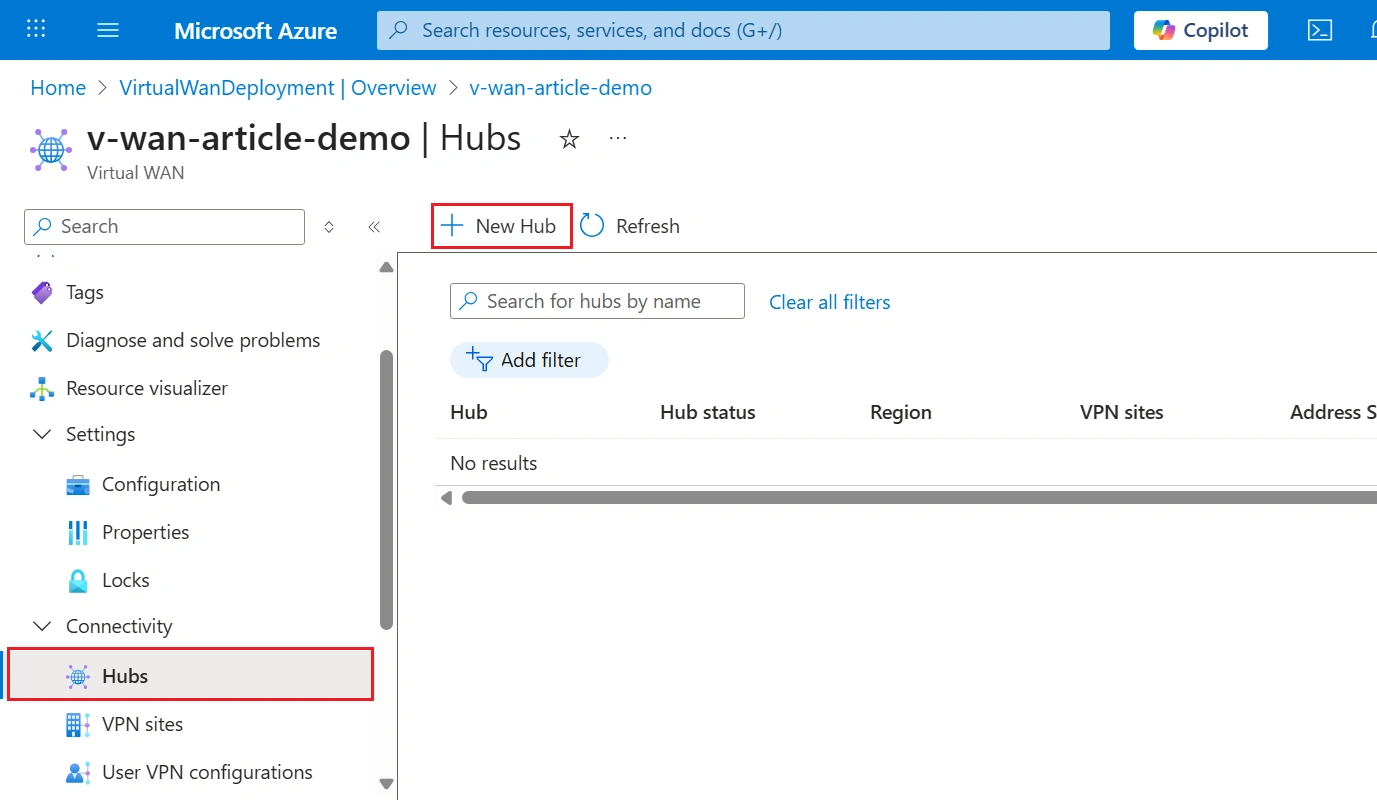
Step 02: Once you have selected your V-WAN, go ahead and create the virtual Hub as follows.
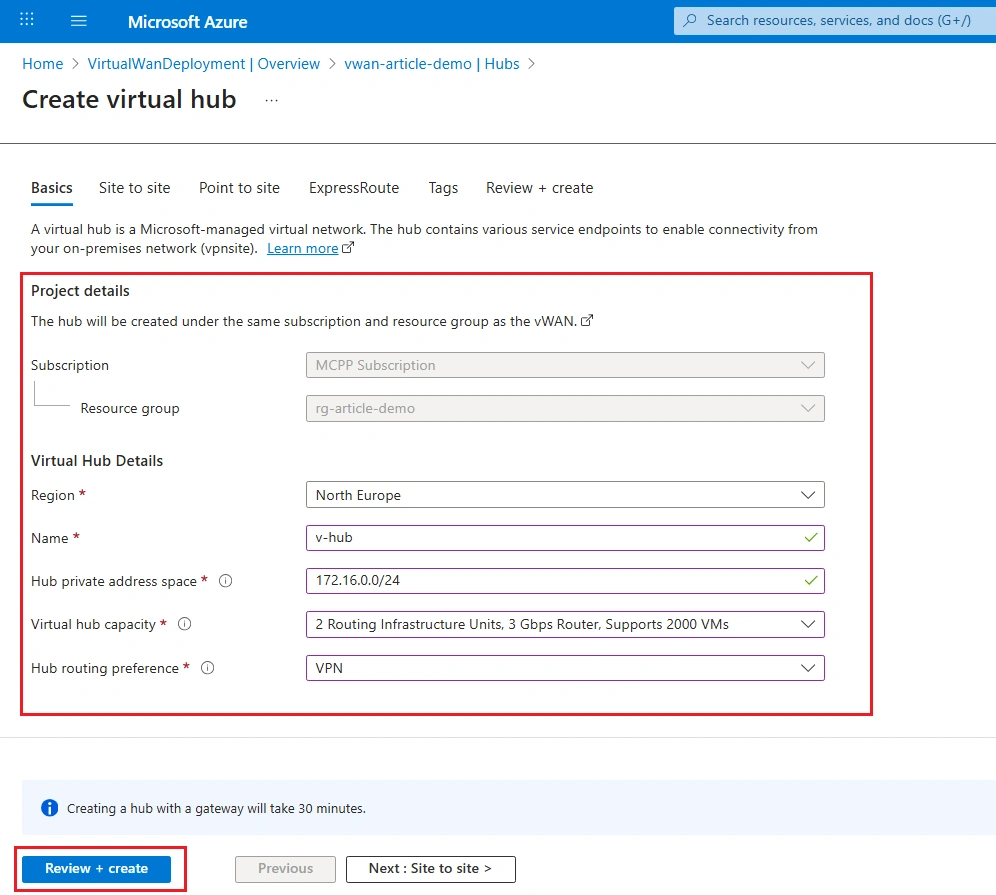
Note: I have provided the basic information and selected the minimum Virtual Hub
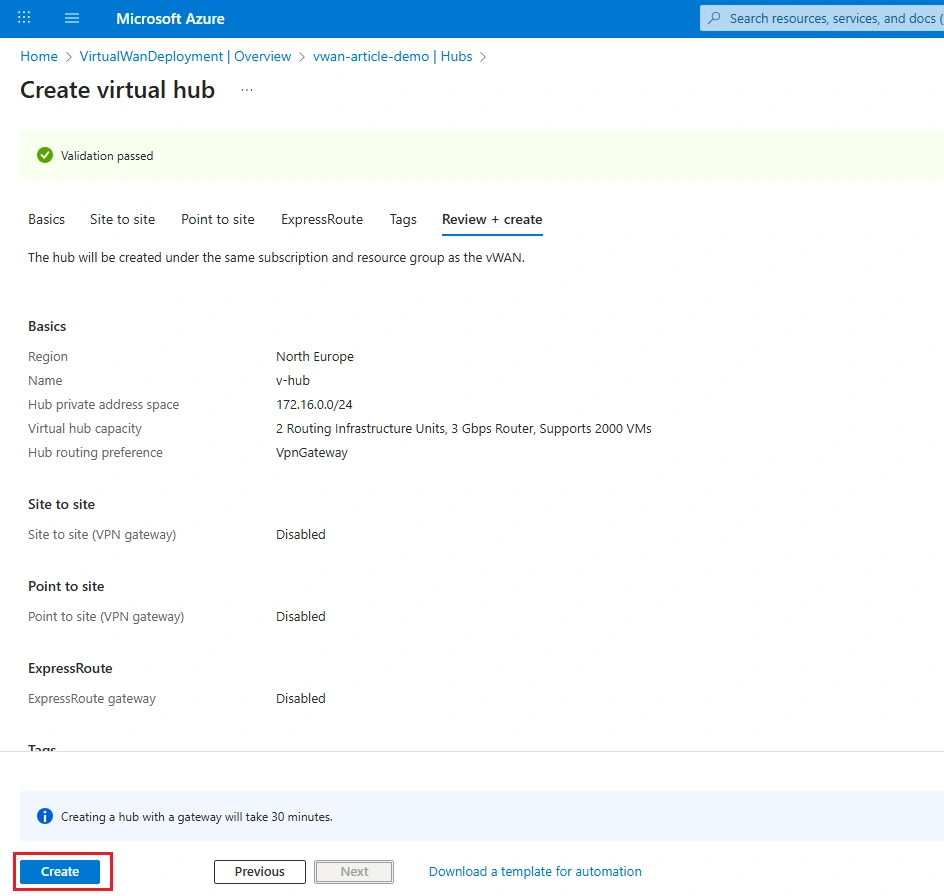
Step 03: After verifying the details, click Create to deploy the Virtual Hub. The deployment process may take up to 15 minutes to complete.
Step 04: The Virtual Hub has been successfully created.
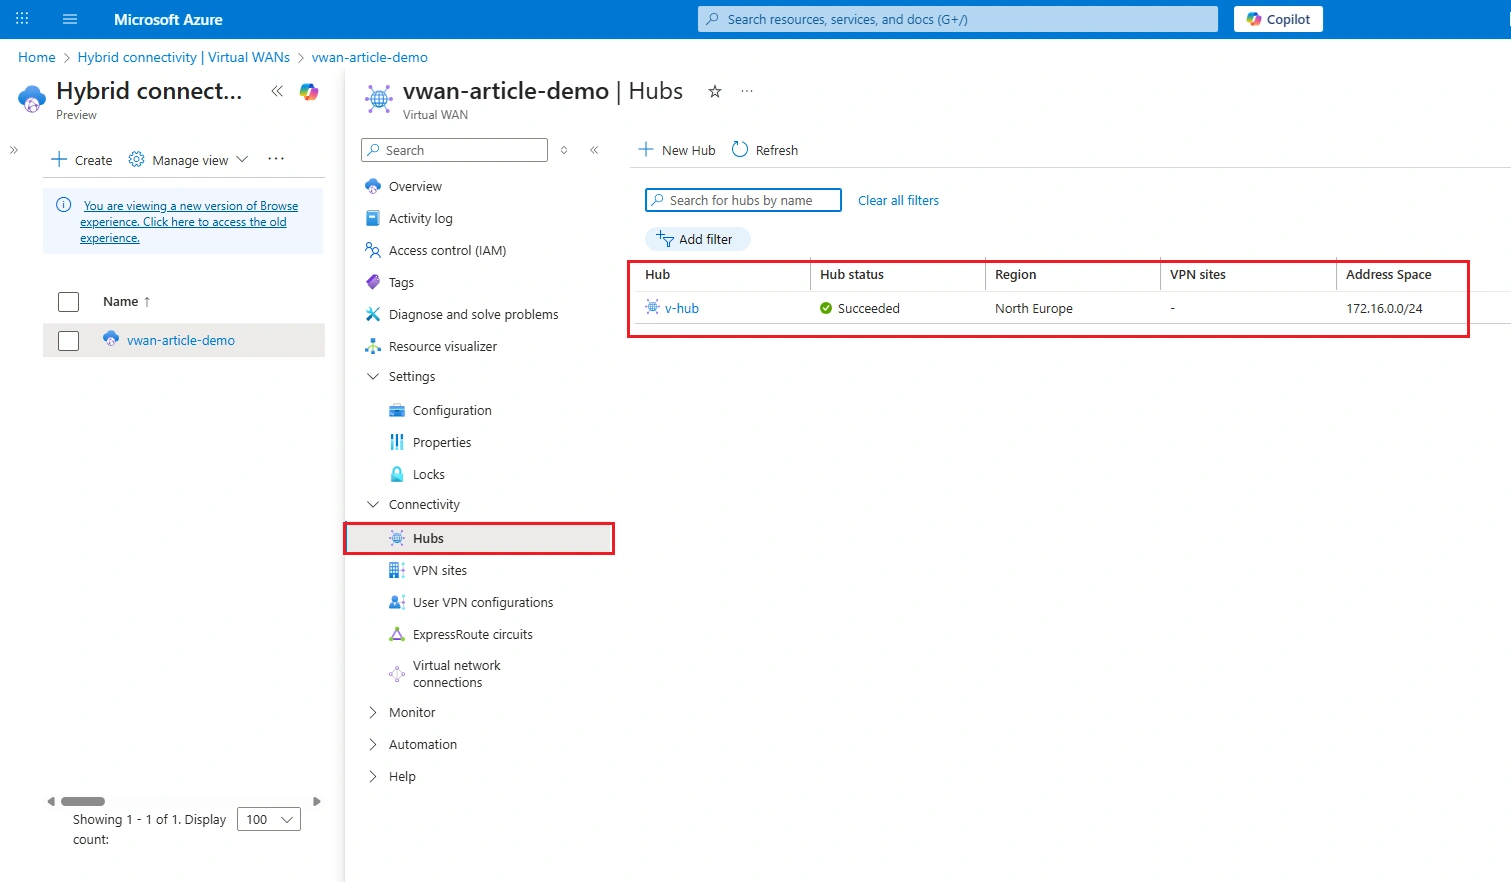
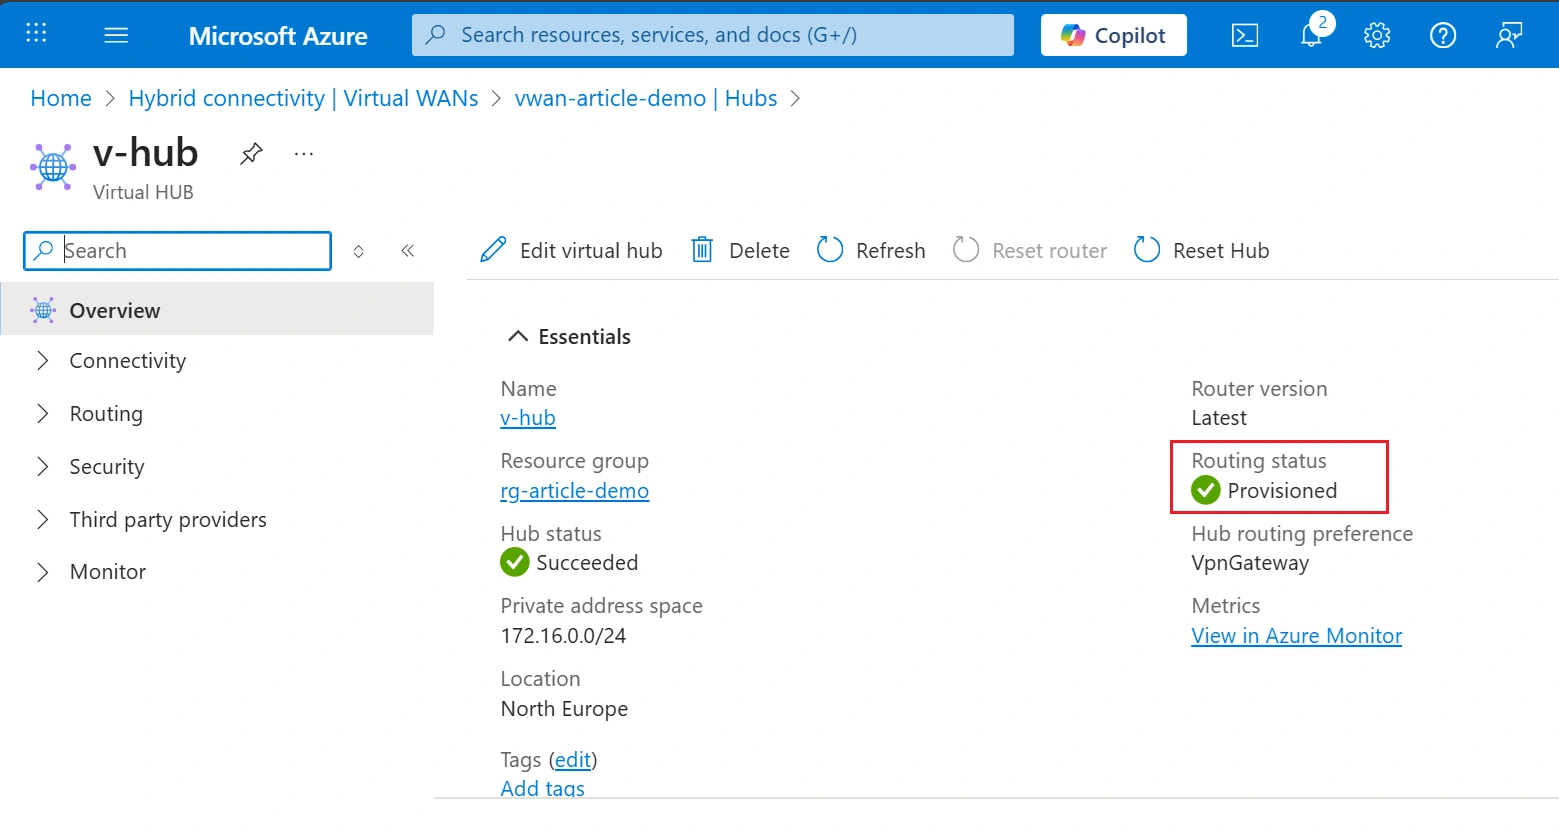
Note: After the hub is created, allow at least 30 minutes for the routing status to be fully provisioned. If you attempt to create a VPN site before this completes, the operation may fail.
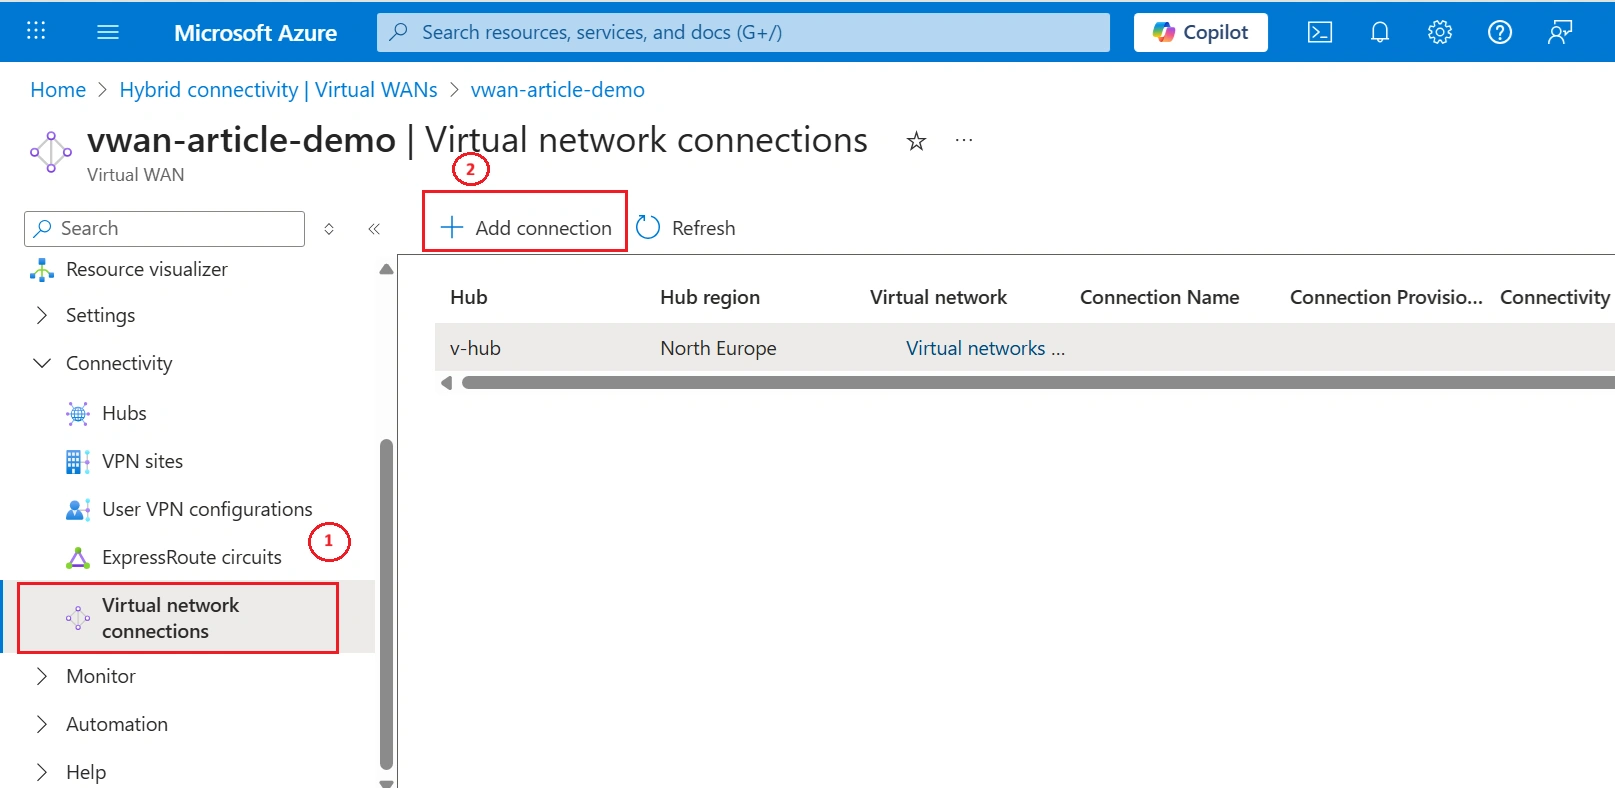
Step 05: Navigate to your Virtual WAN , then select Virtual network connections and click Add connection.
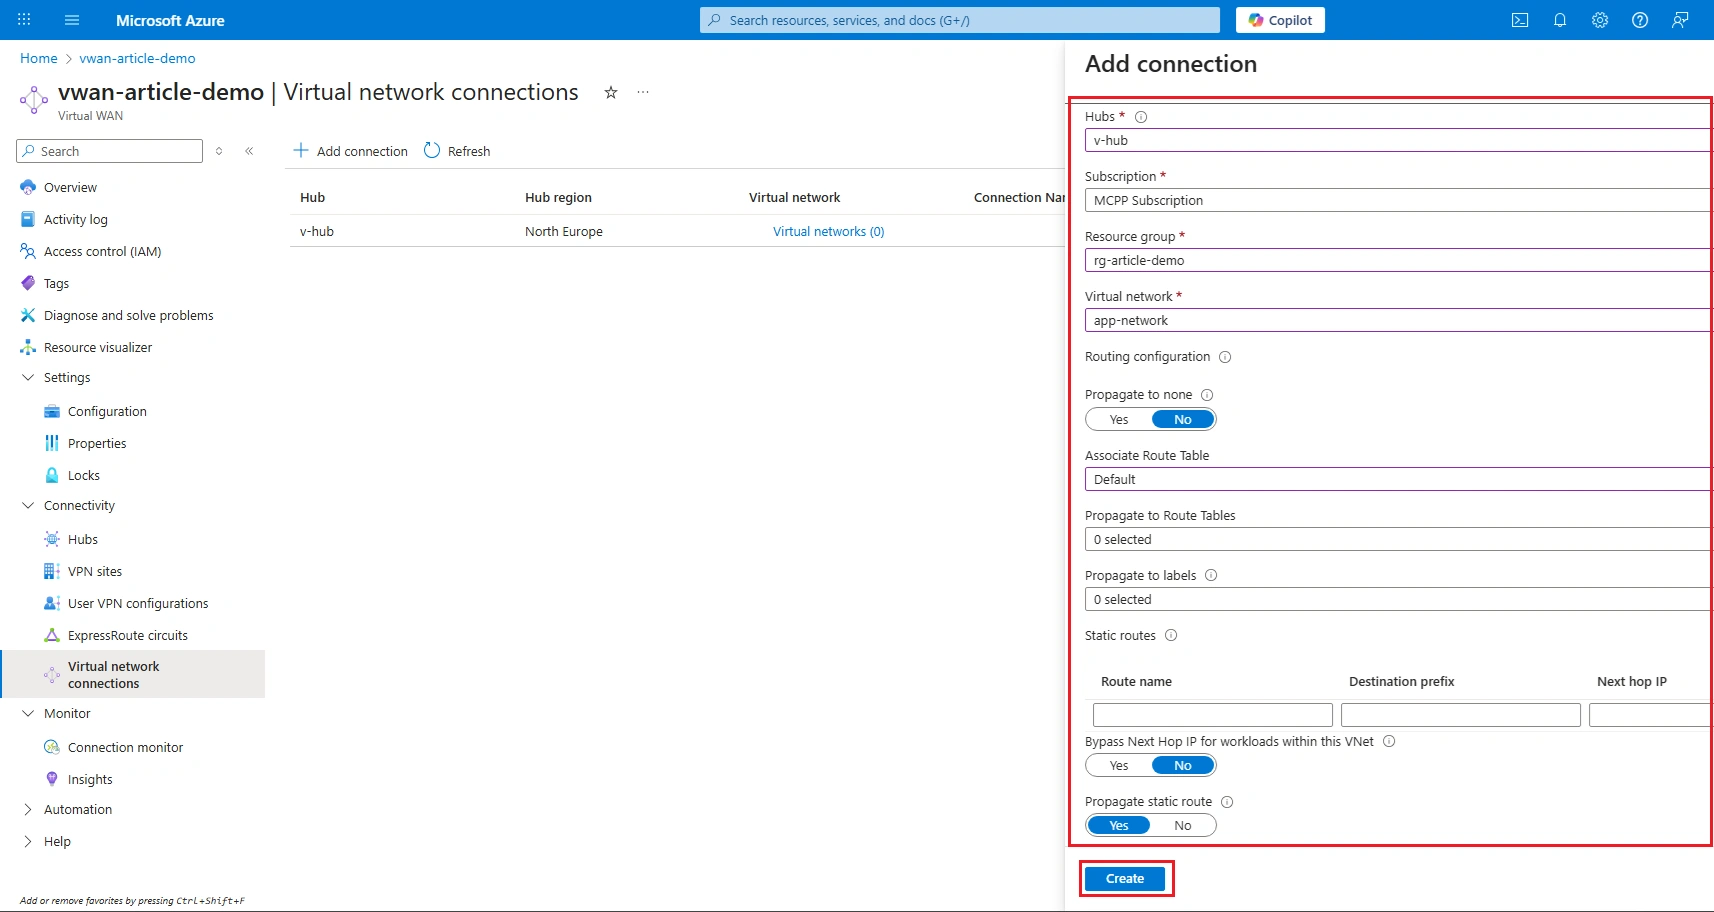
Step 06: Provide a name for the connection, select the appropriate hub, and configure the settings as shown below. For this article, the configuration is kept simple, as there are no complex routing table requirements at this stage. Once completed, click Create .
Step 07: Once the virtual networks are added to the hub, there is no need to peer with each other. The peering is automatically established when they are connected to the hub.
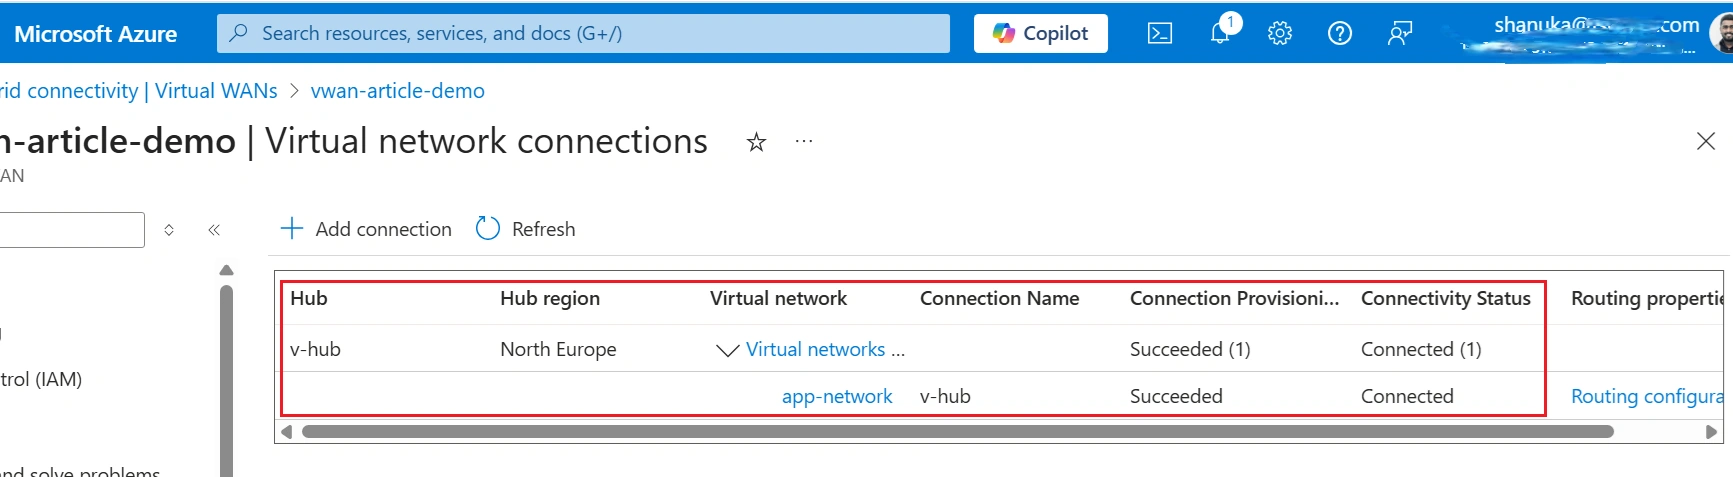
Note: In my case, I do not have multiple virtual networks.
Conclusion
We configured an Azure Virtual WAN hub and connected virtual networks, providing centralized routing and scalable connectivity for Azure resources.
Join the conversation! Your thoughts help the community grow.