

In this article, we are going to learn about how we can setup Angular 6.0 in ASP.Net Core Web API project and develop the contact list & form component using Angular Material UI.
- In the Part 1 article, we set up ASP.NET Core Web API and developed the API for contact CRUD operation. Please go through Contact Application using ASP.NET Core Web API, Angular 6.0, and Visual Studio Code Part 1 once before proceeding with this article.
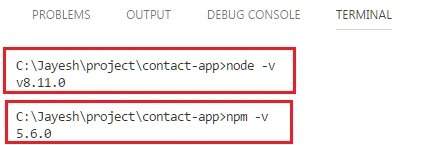
To setup Angular 6.0 in the project, first, we have to install NodeJS in the development environment. We can download NodeJS installer from NodeJS website. and then check the version on NodeJS as below.
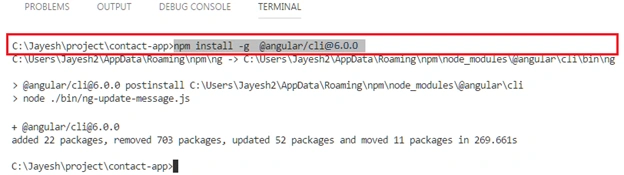
Now, let us globally install Angular CLI package by enter “npm install –g angular/[email protected]”, as shown in below screenshot.
Scaffold Angular
To scaffold Angular, enter “ng new Contact-App --skip-install” command in VS code terminal as below.
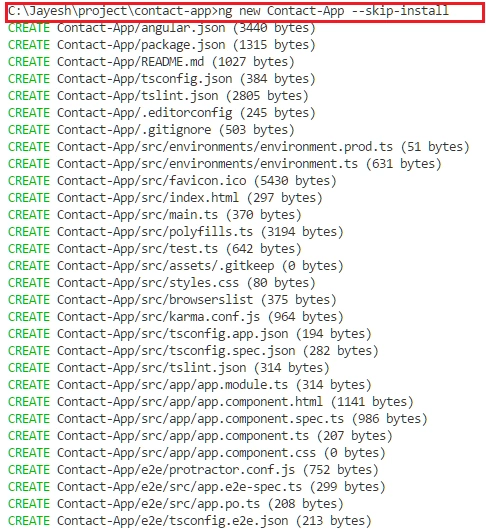
Here, --skip-install option is used to skip installation of the npm packages. And Contact-App is our Angular app name.
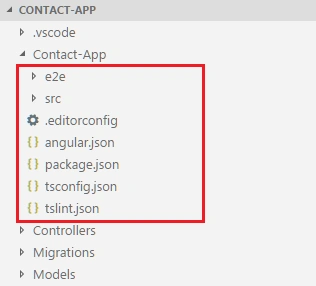
After the project is created, we move all the files & folders from Contact-App to Root folder as below:
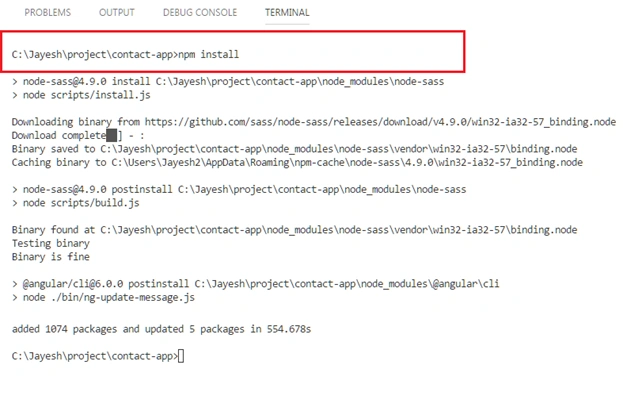
Change Angular Configuration
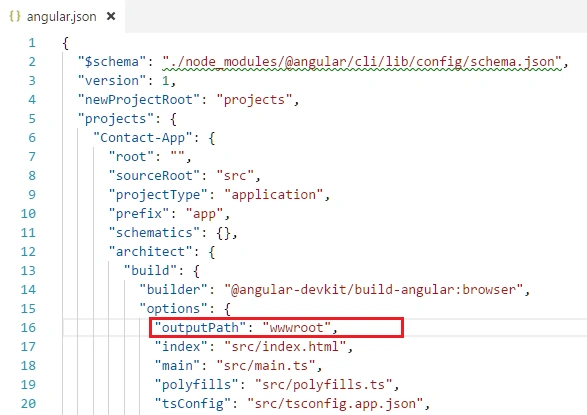
Go to ‘angular.json’ file, it is a configuration schema file.
We changed ‘wwwroot’ folder path in OutputPath.
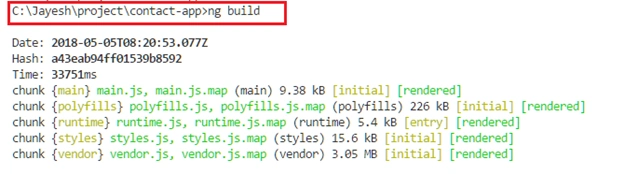
Then enter ng build command in terminal.
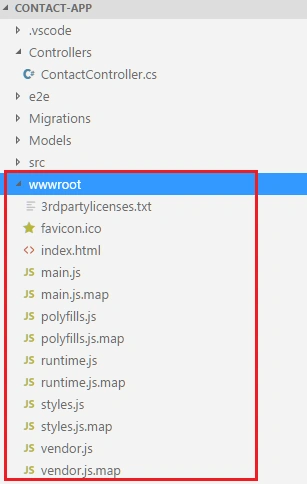
We can see generated files under wwwroot folder.
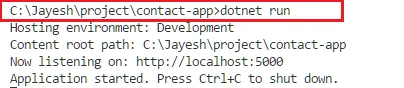
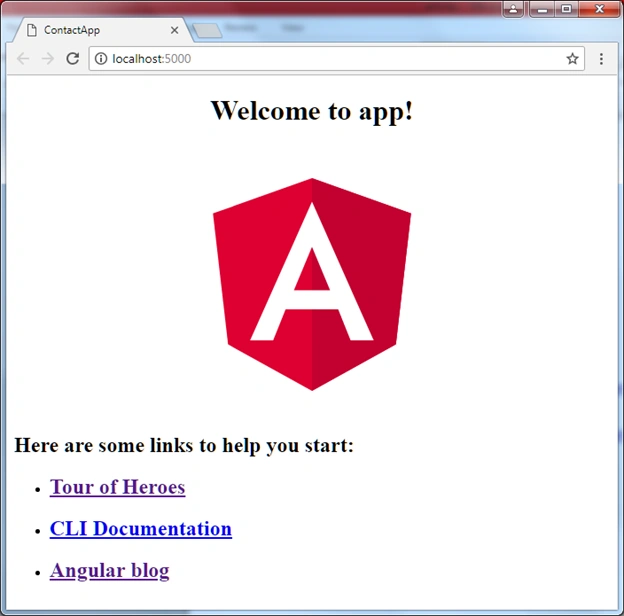
Configure startup to route to angular application
We have added the following code to configure method in ‘startup.cs’. Here we have setup mvc default rout to index.html that generates under wwwroot folder.
- //Redirect non api calls to angular app that will handle routing of the app.
- app.Use(async (context, next) => {
- await next();
- if (context.Response.StatusCode == 404 && !Path.HasExtension(context.Request.Path.Value) && !context.Request.Path.Value.StartsWith("/api/")) {
- context.Request.Path = "/index.html";
- await next();
- }
- });
- // configure the app to serve index.html from /wwwroot folder
- app.UseDefaultFiles();
- app.UseStaticFiles();
- // configure the app for usage as api
- app.UseMvcWithDefaultRoute();
Setup angular material UI
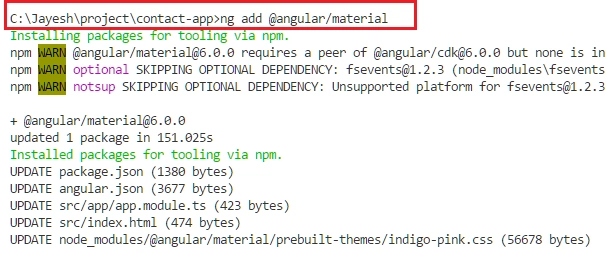
Install angular material packages and dependencies.
Please go through this article to get more details about material components.
- ng add @angular/material
- npm install -d @angular/cdk hammerjs
To use angular material UI components in our Angular contact application, we have created a separate module named ‘app.material.module.ts’ in app folder.
In this module, we imported all dependant material components and we have included in our main app module in this module .
Then, we have imported Angular material theme in the main style.css in src folder
- @import '~@angular/material/prebuilt-themes/deeppurple-amber.css';
Then, we added this link of material icons into index.html in src folder:
- <link href="https://fonts.googleapis.com/icon?family=Material+Icons" rel="stylesheet">
Generate contact list & form component
To generate new component, we used ‘ng generate component’ command as below,
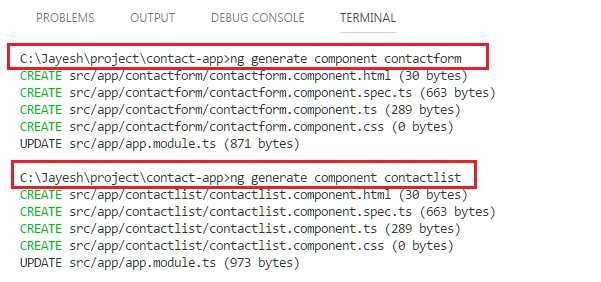
This we have set up routing for that component in ‘app.routing.ts’.
- import {
- ModuleWithProviders
- } from '@angular/core';
- import {
- Routes,
- RouterModule
- } from '@angular/router';
- import {
- AppComponent
- } from './app.component';
- import {
- ContactlistComponent
- } from './contactlist/contactlist.component';
- import {
- ContactformComponent
- } from './contactform/contactform.component';
- const appRoutes: Routes = [{
- path: '',
- pathMatch: 'full',
- component: ContactlistComponent
- }, {
- path: 'contactform',
- component: ContactformComponent
- }];
- export const Routing: ModuleWithProviders = RouterModule.forRoot(appRoutes);
Create angular services
To create a consumed contact API that we have created Part 1; we are generating Angular contact services class in app folder using this command:
‘ng generate service contact’

- import {
- Injectable
- } from '@angular/core';
- import {
- HttpClient,
- HttpParams,
- HttpErrorResponse
- } from '@angular/common/http';
- import {
- HttpHeaders
- } from '@angular/common/http';
- import {
- Observable,
- throwError
- } from 'rxjs';
- import {
- catchError
- } from 'rxjs/operators';
- import {
- IContact
- } from '../model/contact';
- const httpOptions = {
- headers: new HttpHeaders({
- 'Content-Type': 'application/json'
- })
- };
- @Injectable()
- export class ContactService {
- constructor(private http: HttpClient) {}
- // get all contact data
- getAllContact(url: string): Observable < IContact[] > {
- return this.http.get < IContact[] > (url).pipe(catchError(this.handleError));
- }
- // insert new contact details
- addContact(url: string, contact: IContact): Observable < any > {
- return this.http.post(url, JSON.stringify(contact), httpOptions).pipe(catchError(this.handleError));
- }
- // update contact details
- updateContact(url: string, id: number, contact: IContact): Observable < any > {
- const newurl = `${url}?id=${id}`;
- return this.http.put(newurl, contact, httpOptions).pipe(catchError(this.handleError));
- }
- // delete contact information
- deleteContact(url: string, id: number): Observable < any > {
- const newurl = `${url}?id=${id}`; // DELETE api/contact?id=42
- return this.http.delete(newurl, httpOptions).pipe(catchError(this.handleError));
- }
- // custom handler
- private handleError(error: HttpErrorResponse) {
- if (error.error instanceof ErrorEvent) {
- // A client-side or network error occurred. Handle it accordingly.
- console.error('An error occurred:', error.error.message);
- } else {
- // the backend returned an unsuccessful response code.
- // the response body may contain clues as to what went wrong,
- console.error(`Backend returned code ${error.status}, ` + `body was: ${error.error}`);
- }
- // return an observable with a user-facing error message
- return throwError('Something bad happened; please try again later.');
- }
- }
Update main app html template
We have included router outlet place holder to render component based on Angular route.
- <!--The content below is only a placeholder and can be replaced.-->
- <mat-toolbar> <span>Contact Application</span> </mat-toolbar>
- <router-outlet></router-outlet>
Update contact form component
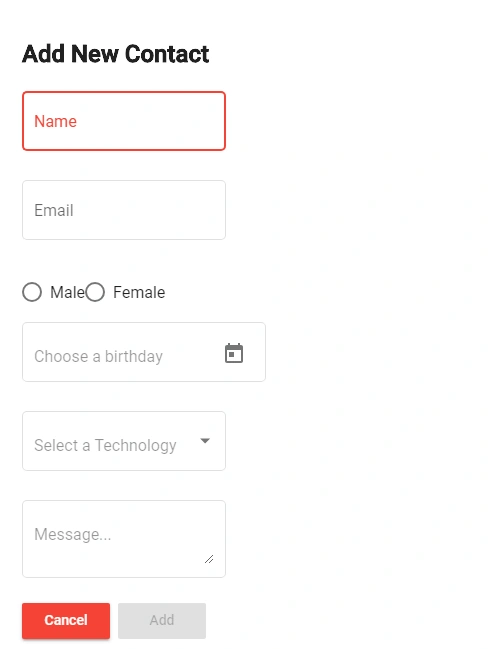
contactform.component.html
- <form (ngSubmit)="onSubmit(contactFrm)" [formGroup]="contactFrm">
- <h2>{{data.modalTitle}}</h2>
- <div>
- <mat-form-field appearance="outline">
- <mat-label>Name</mat-label>
- <input matInput placeholder="Name" formControlName="name">
- <!-- <mat-icon matSuffix>sentiment_very_satisfied</mat-icon> -->
- <!-- <mat-hint>Hint</mat-hint> -->
- <mat-error *ngIf="formErrors.name">
- {{ formErrors.name }}
- </mat-error>
- </mat-form-field>
- </div>
- <div>
- <mat-form-field appearance="outline">
- <mat-label>Email</mat-label>
- <input type="email" matInput placeholder="email" formControlName="email">
- <mat-error *ngIf="formErrors.email">
- {{ formErrors.email }}
- </mat-error>
- </mat-form-field>
- </div>
- <p>
- <mat-radio-group class="contact-radio-group" formControlName="gender" >
- <mat-radio-button class="contact-radio-button" *ngFor="let gndr of genders" [value]="gndr.id">
- {{ gndr.name }}
- </mat-radio-button>
- </mat-radio-group>
- <mat-error *ngIf="formErrors.gender">
- {{ formErrors.gender }}
- </mat-error>
- </p>
- <div>
- <mat-form-field appearance="outline">
- <input matInput [matDatepicker]="picker" placeholder="Choose a birthday" formControlName="birth">
- <mat-datepicker-toggle matSuffix [for]="picker"></mat-datepicker-toggle>
- <mat-datepicker #picker></mat-datepicker>
- <mat-error *ngIf="formErrors.birth ">
- {{ formErrors.birth }}
- </mat-error>
- </mat-form-field>
- </div>
- <div>
- <mat-form-field appearance="outline">
- <mat-select placeholder="Select a Technology" formControlName="techno">
- <mat-option>-- None --</mat-option>
- <mat-option *ngFor="let techno of technologies" [value]="techno">
- {{ techno }}
- </mat-option>
- </mat-select>
- <mat-error *ngIf="formErrors.techno ">
- {{ formErrors.techno }}
- </mat-error>
- </mat-form-field>
- </div>
- <div>
- <mat-form-field appearance="outline">
- <textarea matInput placeholder="Message..." formControlName="message"></textarea>
- <mat-error *ngIf="formErrors.message ">
- {{ formErrors.message }}
- </mat-error>
- </mat-form-field>
- </div>
- <div>
- <button type="button" mat-raised-button color="warn" (click)="dialogRef.close()">Cancel</button>
- <button type="submit" mat-raised-button color="primary" [disabled]="contactFrm.invalid">{{data.modalBtnTitle}}</button>
- </div>
- </form>
- <div class="spinner" *ngIf="loadingState; else contactlist">
- <mat-spinner></mat-spinner>
- </div>
- <ng-template class="contactlist" #contactlist>
- <h2 style="text-align: center;">Contact List</h2>
- <div class="contactlist-container mat-elevation-z8">
- <div><button title="Create" mat-raised-button color="accent" (click)="addContact()">Create</button></div>
- <table mat-table #table [dataSource]="dataSource">
- <!-- Id Column -->
- <!-- <ng-container matColumnDef="id">
- <th mat-header-cell *matHeaderCellDef> Id </th>
- <td mat-cell *matCellDef="let element"> {{element.id}} </td>
- </ng-container> -->
- <!-- Name Column -->
- <ng-container matColumnDef="name">
- <th mat-header-cell *matHeaderCellDef> Name </th>
- <td mat-cell *matCellDef="let element"> {{element.name}} </td>
- </ng-container>
- <!-- Email Column -->
- <ng-container matColumnDef="email">
- <th mat-header-cell *matHeaderCellDef> Email </th>
- <td mat-cell *matCellDef="let element"> {{element.email}} </td>
- </ng-container>
- <!-- Gender Column -->
- <ng-container matColumnDef="gender">
- <th mat-header-cell *matHeaderCellDef> Gender </th>
- <td mat-cell *matCellDef="let element"> {{getGender(element.gender)}} </td>
- </ng-container>
- <!-- Birth Column -->
- <ng-container matColumnDef="birth">
- <th mat-header-cell *matHeaderCellDef> Birthday </th>
- <td mat-cell *matCellDef="let element"> {{element.birth | date: 'MM-dd-yyyy' }} </td>
- </ng-container>
- <!-- Technology Column -->
- <ng-container matColumnDef="techno">
- <th mat-header-cell *matHeaderCellDef> Technology </th>
- <td mat-cell *matCellDef="let element"> {{element.techno}} </td>
- </ng-container>
- <!-- Message Column -->
- <ng-container matColumnDef="message">
- <th mat-header-cell *matHeaderCellDef> Message </th>
- <td mat-cell *matCellDef="let element"> {{element.message}} </td>
- </ng-container>
- <ng-container matColumnDef="action">
- <th mat-header-cell *matHeaderCellDef> Action </th>
- <td mat-cell *matCellDef="let element">
- <button title="Edit" mat-raised-button color="primary" (click)="editContact(element.id)">Edit</button>
- <button title="Delete" mat-raised-button color="warn" (click)="deleteContact(element.id)">Delete</button>
- </td>
- </ng-container>
- <tr mat-header-row *matHeaderRowDef="displayedColumns"></tr>
- <tr mat-row *matRowDef="let row; columns: displayedColumns;"></tr>
- </table>
- </div>
- </ng-template>
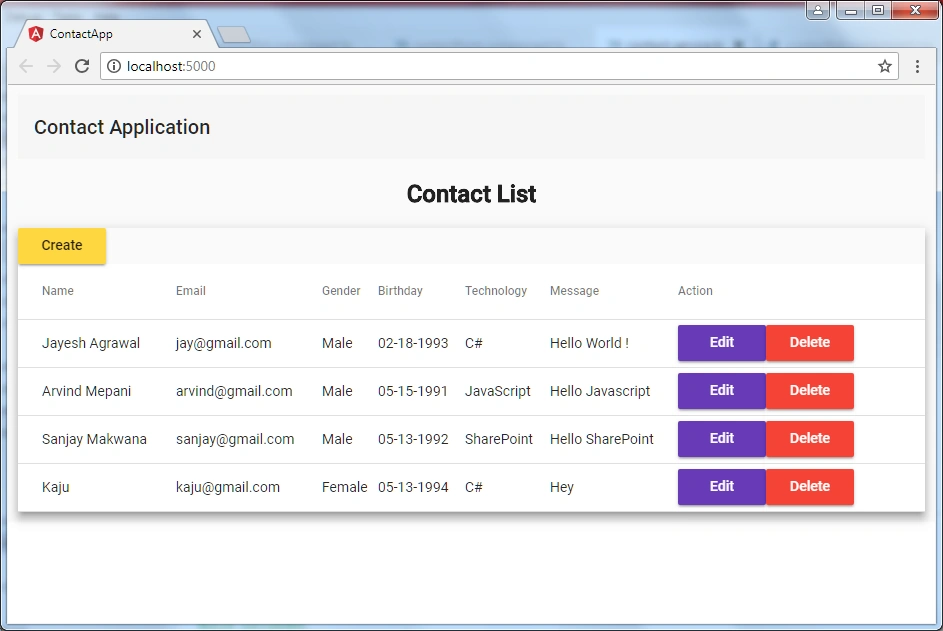
Build components and run the project
Conclusion
This is how we created contact application using ASP.Net Core Web API, Angular 6.0, and Visual Studio code.
You can see the entire code on GitHub and fork it for the starter project.
Please let me know your feedback.
Salome NuñezPosted Feb 6, 2019, 4:11 PM
Hi dear Jayesh, I have one problem. When I call my api .net core "deleteContact" from my service in angular, i received parameter id=0 in my webapi. I can test my data than me send. why i received this value if i send diferent value of "zero". Can you help me plase.
Shuva DebNathPosted Nov 5, 2018, 5:40 AM
How could you write ng build command without install node-modules ??? When i set outputpath:wwwroot and then write ng build shell show me an error message.Here it is: Could not find module "@angular-devkit/build-angular" from "D:\\S\\contact-app".Error: Could not find module "@angular-devkit/build-angular" from "D:\\S\\contact-app".
Goutham KattaPosted Oct 16, 2018, 2:23 PM
Thanks Jayesh! Great Article :)
Jose Carlos MacorattiPosted Oct 15, 2018, 8:36 AM
I'm new in Angular and I following your articles step by step. I finished it and I can build and run the app without any errors. But the app don't show the Contact List, it shows the Angular welcome Page. It seems the app call the page index.html from the wwwroot but can't display the contact list. Certainaly I'm missing some details configuration, but I checked the entire project's code and can?t find any error. Any clue ?
Kennedy Castro SilvaPosted Sep 13, 2018, 12:51 PM
Good afternoon, how do you do to the grid data in the row that I click edit go to form? I have seen that you passed puts inside the date in the openDialog method, but it does not appear when the form opens
nirmala valluriPosted Jul 3, 2018, 4:04 PM
Thank you for the very useful end-to-end application. You touched many points and technologies.
Angel CaballeroPosted Jun 6, 2018, 1:26 AM
Thank you for this. You are a super hero. Oh, and thanks about the migration stuff in the part 1 of this wonderful article.
Francesco BelaccaPosted May 29, 2018, 11:52 AM
Hello man, thank you for this precious and updated material! Do you also know how can i debug this app from VS2017 or from VSCode? Not the server(.NET Core part) but the client logic(Typescript code) it would be very useful, i'm asking in case you know.