

Introduction
In this article, I am going to talk about deploying of microservices (.NET Core) using Azure container registry and container instance. And the service can be consumed by any front-end application like HTML, etc., I will be demonstrating in a step-by-step manner how to deploy ASP.NET Core application docker image into Azure and creating container instance from it.
Create local asp.net core image using docker
1. Download the attached code and run the below command to execute the docker file to build new image docker "build -t yourImagename:tagname .", you can either follow my article " https://www.c-sharpcorner.com/blogs/deploying-netcore-application-to-docker-container" to build a local image using docker.
Azure Container Registry
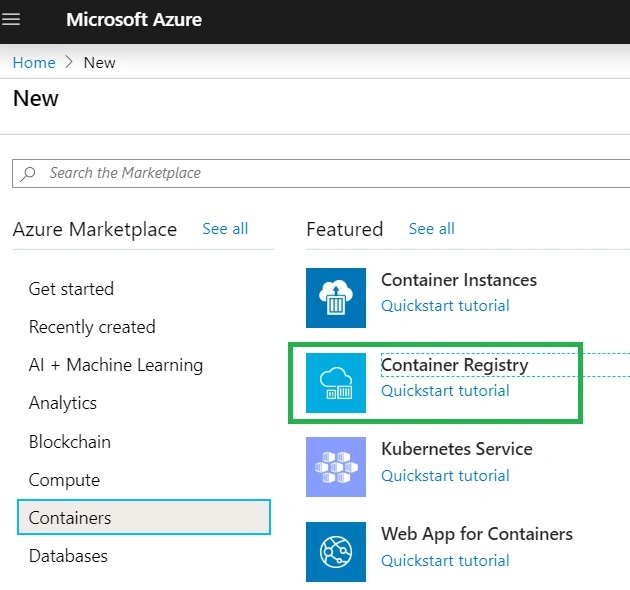
2. Open Azure Portal and Go to Create Resource -> Containers -> Container Registry.
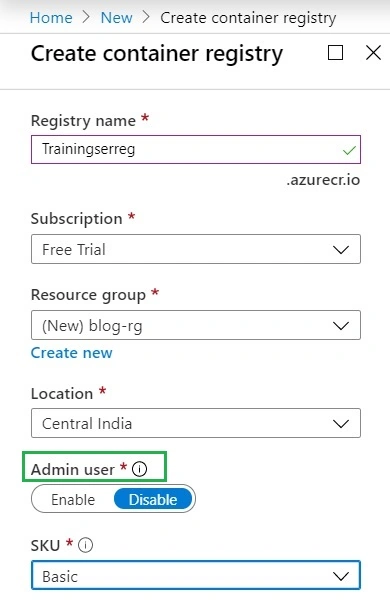
3. Create new Container Registry, enable admin user to generate userid and password of this registry, this information will be used later when you push the local docker image into Azure. you can also enable admin user later in case you forget to enable when you create a registry.
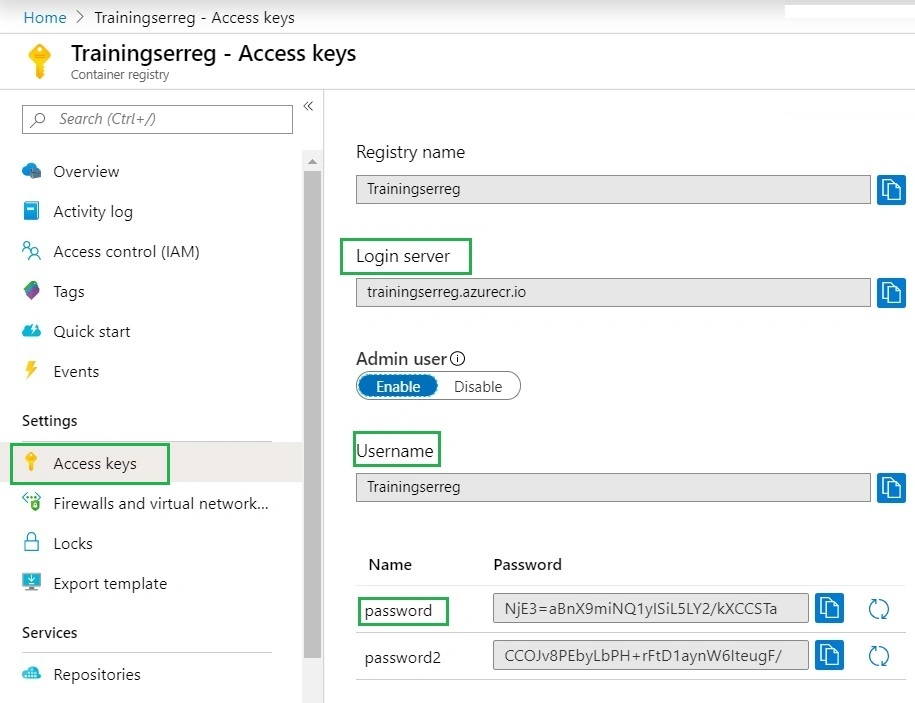
4. Once the Azure Registry is created successfully, keep Login server, Admin user and password details with you to push your local image into this Azure registry.
Tag and push the local image into the Azure Registry
5. Tag your local image with a new name "loginservername/imagename" using docker command "docker tag localimage newimageName", verify new tagged image again with the same command docker images.
- docker tag trainingservice1:v2 trainingservice1.azurecr.io/trainingservice

6. The next step is to log in to the Azure container registry using loginserver/imagename, username, and password.
- dokcer login loginserver/imagename(......azureecr.io/imagename:tagname) -u username -p password
e.g. docker login trainingservice1.azurecr.io/trainingservice -u trainingservice1 -p lddH+ejcVXQf81nNWP3C9bTOA
After successful login, push the image into Azure repository using docker push.
- docker push trainingservice1.azurecr.io/trainingservice

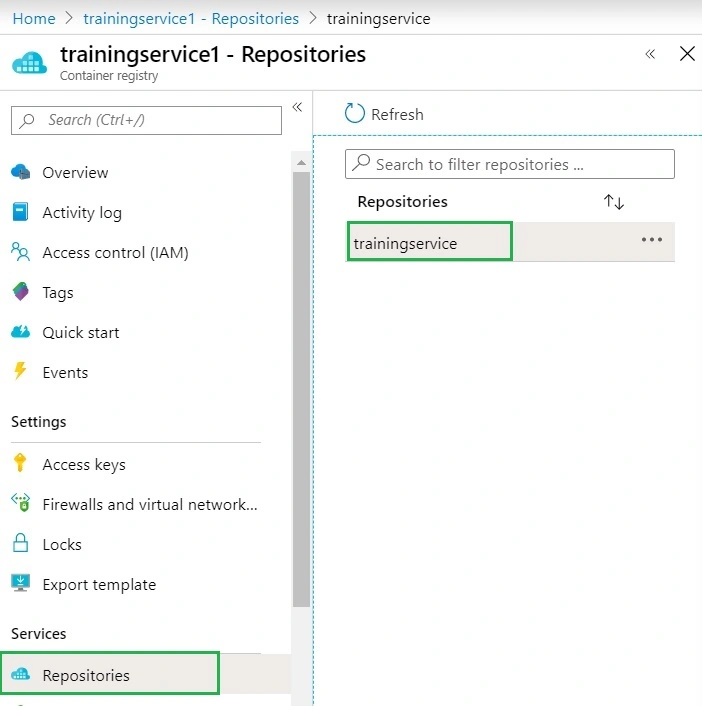
7. Once your local image is pushed to Azure container repository and it is part of the Azure registry which you created in step 2, that can also be verified under your registry-> Repositories
The final step is to create container instance using this image and consume it on any front-end application.
Azure Container Instance
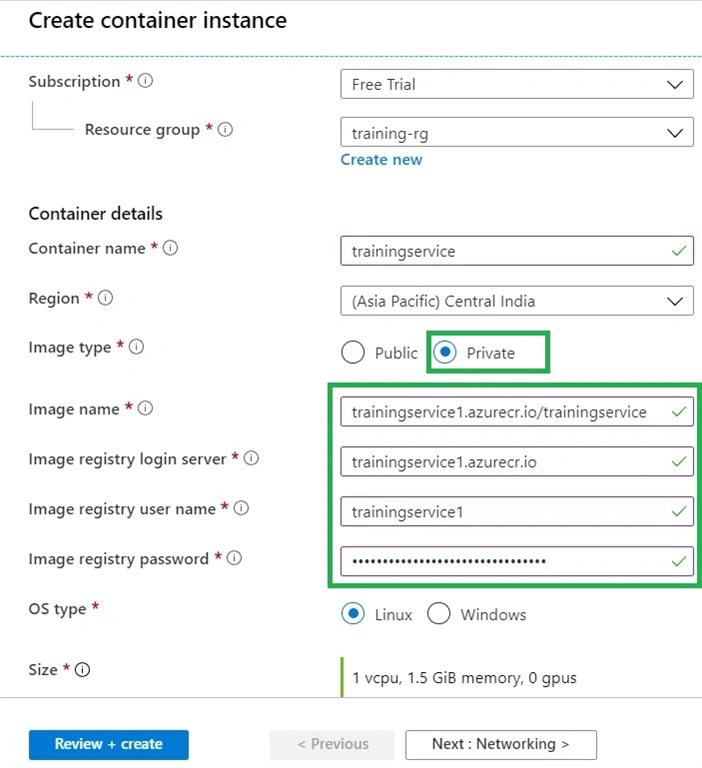
There are a few parameters to be taken care of while creating new container instances, like Image type; i.e. private, as we are using the Azure repository, Image Name i.e. Loginserver/imagename and user name and password are the same which were used for login.
9. Once your container instance is ready, go to overview and copy the public IP address to get your new service URL.
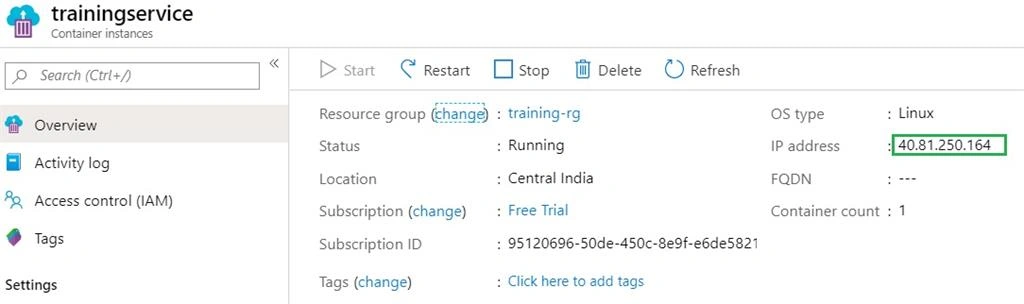
When we deployed this service into docker on a local machine, the service URL was generated as https://localhost:44382/TrainingService and after deploying the same service into the Azure container the URL of service is https://40.81.250.164/trainingservice, where trainingservice is the controller name of my asp.net core application created in the previous article. Finally, this Azure service can be deployed/consumed by any of your front-end applications.
DeepikaPosted Dec 16, 2019, 11:06 AM
Can you explain more on what is microservices and why it is required.