

Introduction
We can configure our Visual Studio Team Service project, which can automatically build and deploy to Azure app Services. This article tells you how to configure a basic ASP.NET WEB API application in Visual Studio Team service with automatic build and release to Azure app service.
Prerequisites
- Visual Studio 2015+
- Azure subscription
This article flows, as per the following,
- Create a new project in VSTS with GIT version control
- Add a existing project to the newly created GIT repo from visual studio
- Configure a build in VSTS
- Configure a release in VSTS with continues deployment in Azure App Service
Create a new project in VSTS with GIT version control
Sign in to your Visual Studio Team Service account
Click on new project from the home page
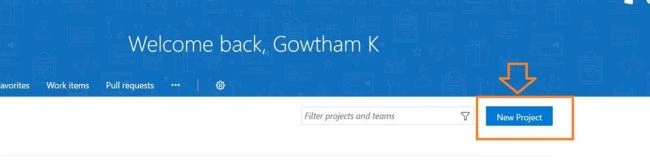
Name your team project, in my case I named it KendoGrid, I have selected a GIT from the version control with agile work process, we can choose either GIT or Team Foundation Version control based on project need,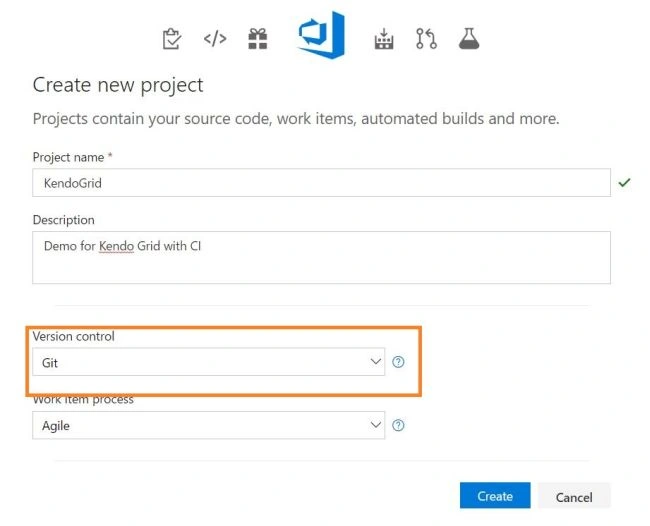
Add an existing project to the newly created GIT repo from visual studio
I have an existing project in my local machine which I’m going to publish to VSTS GIT, open the existing project in visual studio, File->open
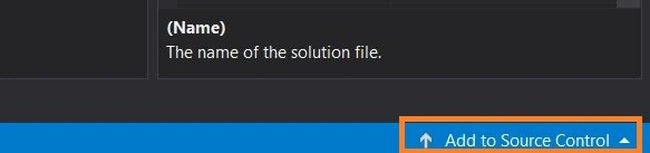
Once the project is opened, in the right bottom
of visual studio you can find Add to source control, click it, as shown in the below figure,
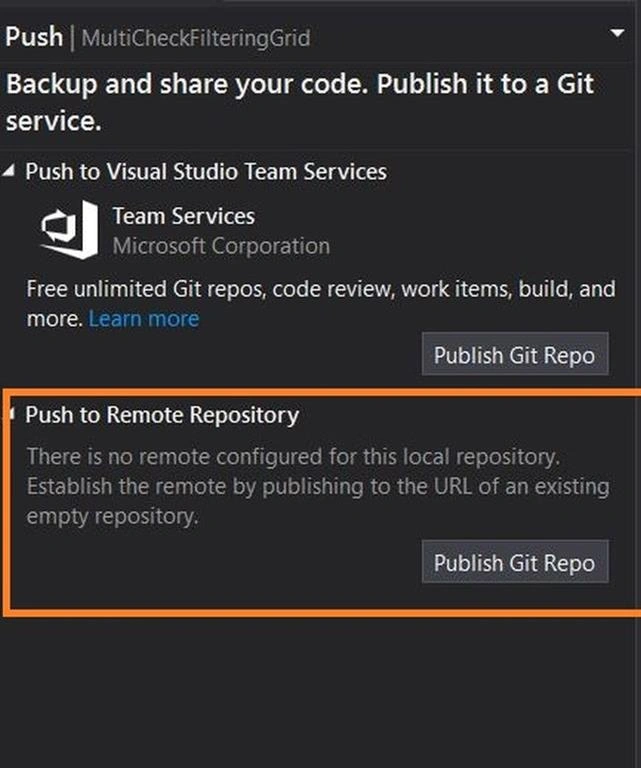
The team explorer window will be opened, you can find two options 1. Push to Visual Studio Team Service.
and 2. Push to Remote Repository We already created a GIT repo in TFS so we can do push to remote repository.
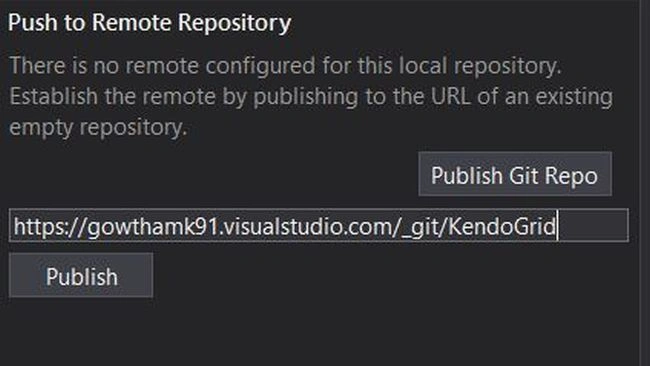
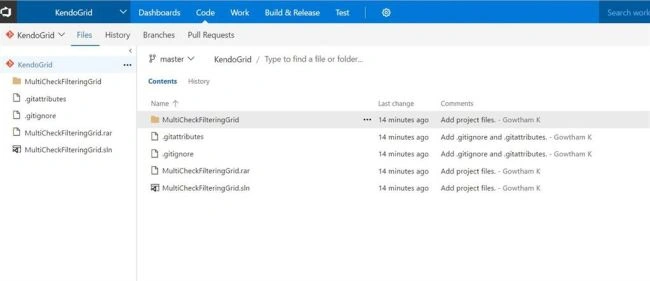
Configure a build in VSTS
Open the repository in VSTS you can find set up a build in right top corner, just click on it to configure a build,
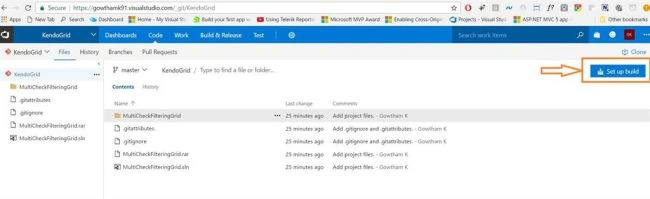
The create new build definition window will be opened as shown in the below figure,
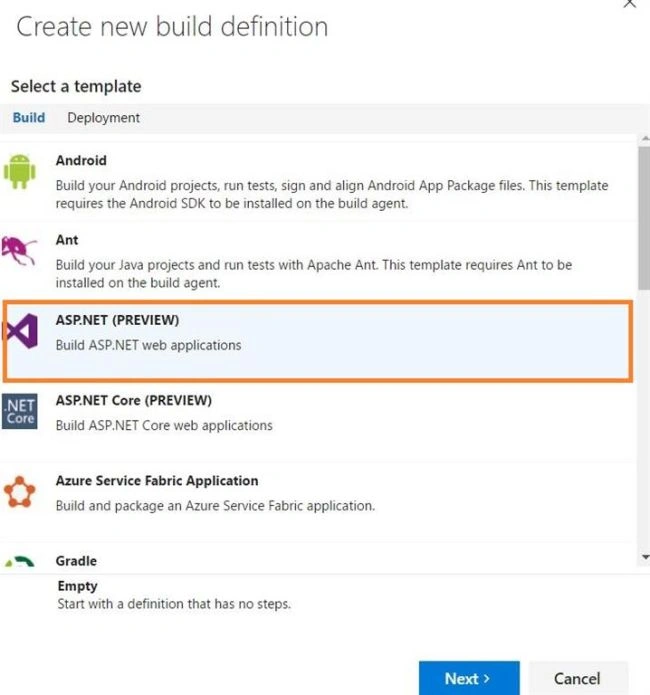
A new create build definition window will be opened with some list of templates, as we are working on an ASP.NET site I’m going to select ASP.NET(Preview) Template, click on next to change the settings,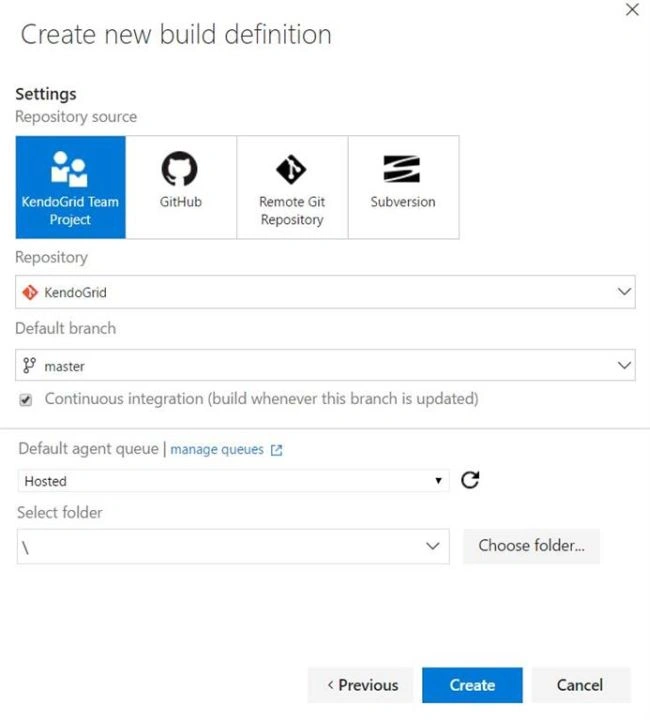
In the settings window check Continue Integration as shown in the above figure and click create. Now all the packages which we need for the build will be automatically loaded up as shown in the below figure.
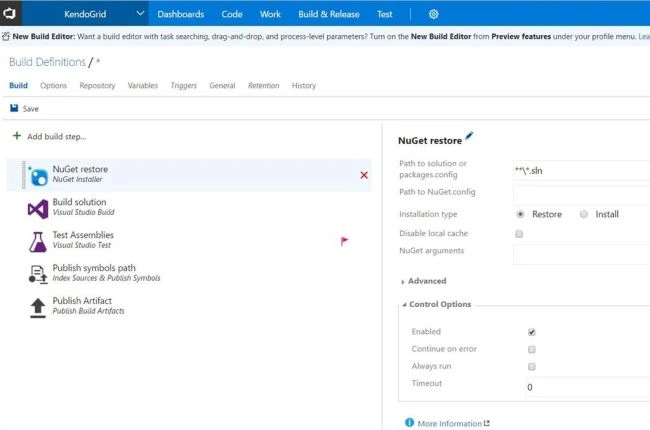
Once all changes are done just click on save, from my side I haven't done any changes I'm just left with default settings
Login to your azure portal
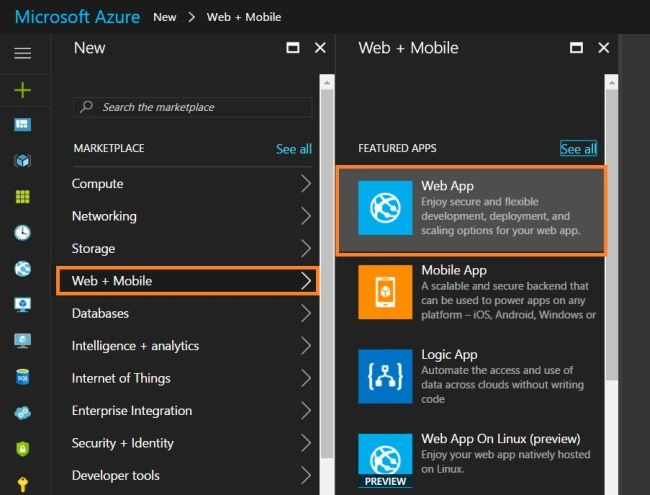
Quickly create a new web app new->Web+Mobile-> Web app as shown in below figure
Overview of our WEB APP ,
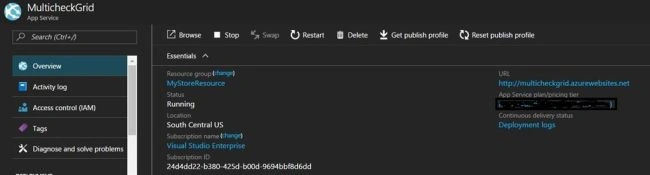
The URL(http://multicheckgrid.azurewebsites.net ) which is generated from the newly created web app
Configure a Release in VSTS
Go to newly created GIT repo page, select release from build & release menu,
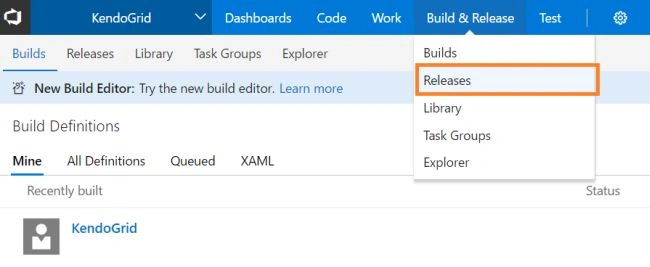
The release page will be opened as shown in the below figure,
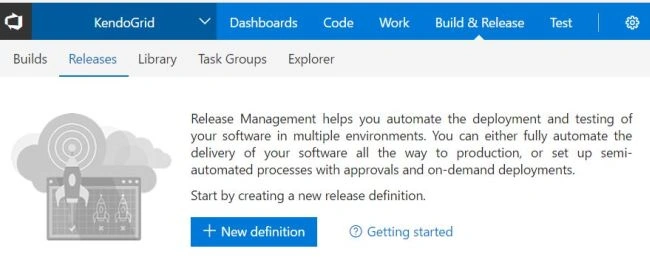
Click on new definition
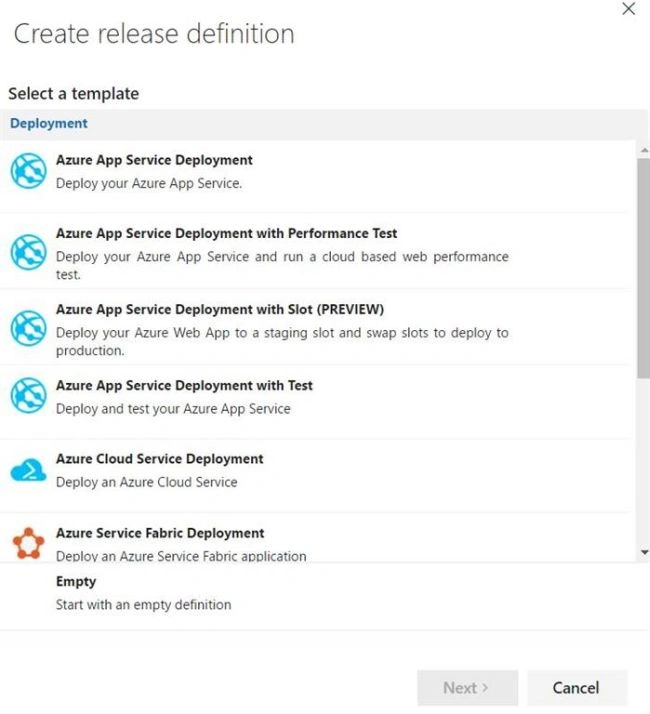
The created release definition window will be opened with a list of deployment templates, let's select Azure App service Deployment and click next,
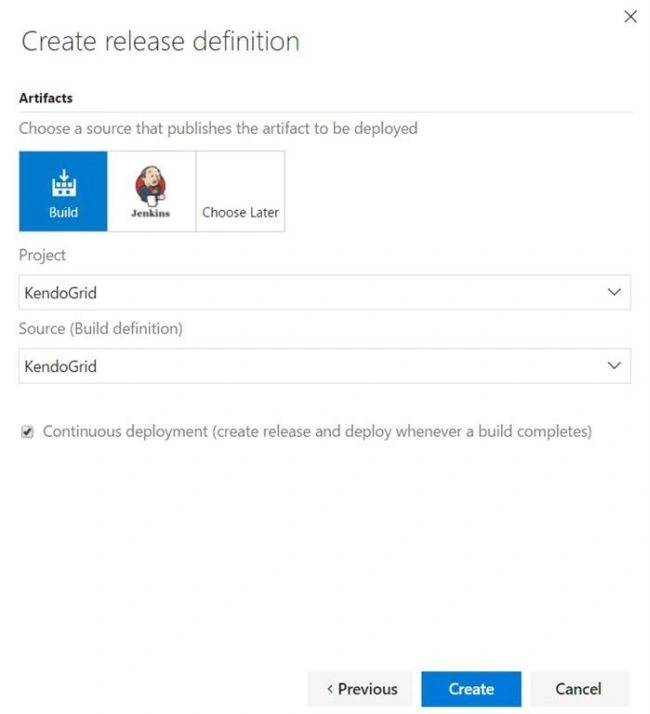
Choose the respective project and build definition then check on continous deployment, Click on create to open the release definition page as shown in below figure,
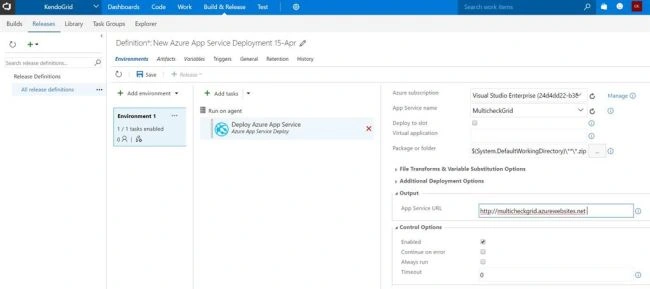
VSTS will bring your Azure subscriptions automatically based on login, we just need to select the respective subscription, click on authorize and it will do an authorization process to get app service name
I have not created any deployment slot so I will skip it in settings, finally give your URL in APP service URL and click on Save
Make Change and commit
Just go to the build definition page, you can notice as of now there won’t be any status, as shown in the below figure

Let’s make some change in application and commit to it, you can notice that the build and deployment will happen automatically once the commit is done
I’m going to change the title in the HTML page, once the changes are done I’m going to commit it,
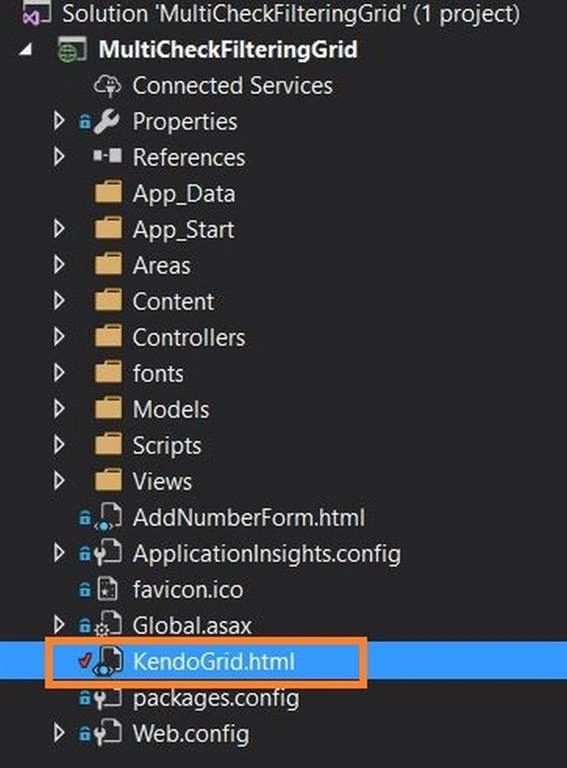
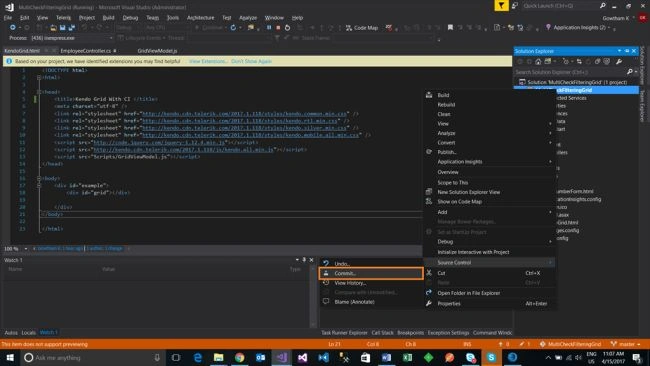
Once the commit is done, sync it.
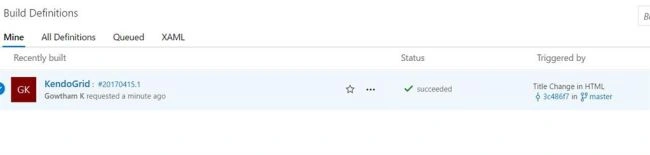
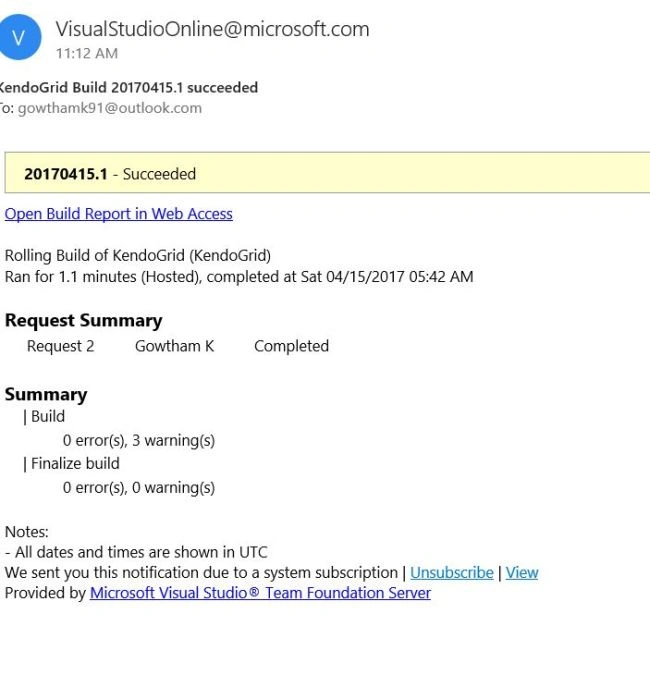
You can notice there is a change in build status once the commit is done, after build you will get the build status mail as shown in below figure
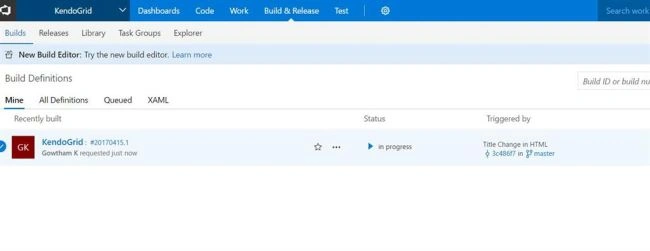
Build succeeded
Once the build is successfully done, it will automatically deploy your application in azure web app, we can get the deployment status in release page of repective project in VSTS, as shown in below figure

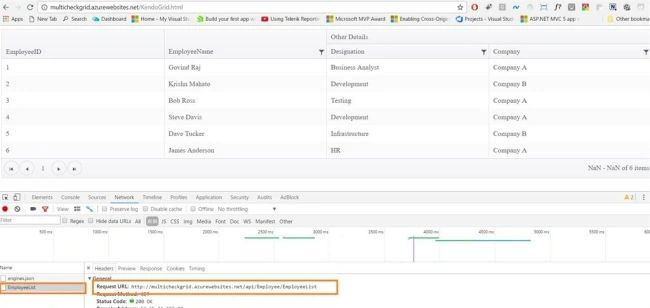
Yes, the deployment is sucessfully completed, let's open the site
Summary
- We started with creating a project in VSTS
- Added the existing project to our GIT repo which is created in VSTS from Visual Studio 2017
- Created a web app in azure to deploy our application
- Configured a Build and release in VSTS with continous integration
Join the conversation! Your thoughts help the community grow.