

Introduction
In this article, we will talk about how you can convert excel to DataTable using the EPPlus package in the Asp.Net Core MVC application. You can use this method in any .Net project, not only .Net Core MVC.

Create ASP.Net Core MVC Project
Step 1
Open Visual Studio and Click on New Project.
Step 2
Select the ASP.Net Core Web Application MVC template and click the Next button.
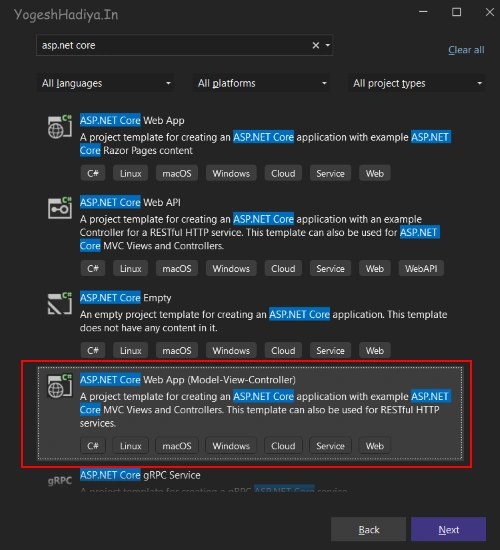
Step 3
Give the Project Name, specify the location where you want to store this project, and click on the Next button.
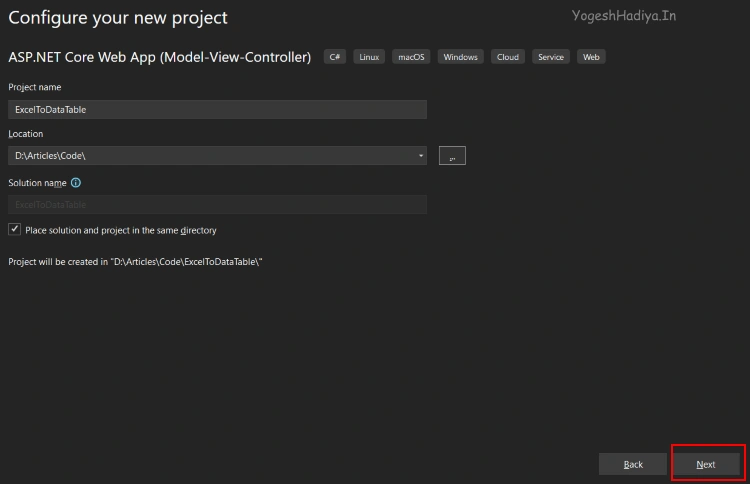
Step 4
Select Framework which you want to use. Here I'm using .Net 7 and then clicking on Create Button.
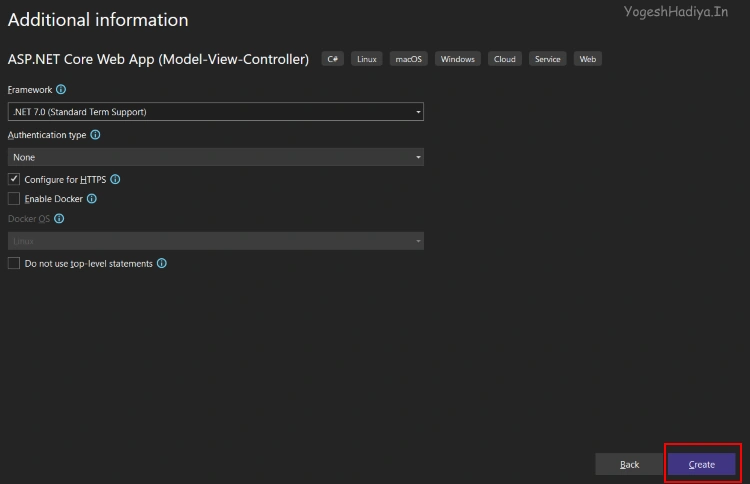
Here I'm going to use IFormFile to upload a file. If you are not familiar with IFormFile, you can visit this article.
Create Controller and View
Here I will use a different controller instead of the Home Controller already created in the project. You can use existing ones or create new ones as per your requirement.
For passing data between view and controller, I’m using the Model class. For that, I’m creating a new class "FileUploadModel" in the Model folder. In this model, there is only one property, as you can see in below code snipped.
public class FileUploadModel {
    [Required(ErrorMessage = "Please select file")]
    public IFormFile File {
        get;
        set;
    }
}
Design view for uploading an excel file.
@model FileUploadModel

@{
    ViewData["Title"] = "Convert Excel To DataTable";

}
<form asp-action="Convert" asp-controller="ExcelToDataTable" method="post" enctype="multipart/form-data">

    <div class="row mt-2">
        @if (ViewBag.SuccessMessage != null)
        {
            <div class="alert alert-success">
                @ViewBag.SuccessMessage
            </div>
        }
        @if (ViewBag.ErrorMessage != null)
        {
            <div class="alert alert-danger">
                @ViewBag.ErrorMessage
            </div>
        }
    </div>
    <div class="row mt-2">
        <div class="col-6">
            <label class="col-form-label">Select File</label>
            <input asp-for="File" class="form-control" />
            <span asp-validation-for="File" class="text-danger"></span>
        </div>
    </div>


    <div class="row mt-2">
        <div class="col-6">
            <button type="submit" class="btn btn-success">Upload File</button>
        </div>
    </div>
</form>
Code Explanation
- In the above code, I first import the model class we created.
- Shows Success and Error message in alter from ViewBag if ViewBag is not null.
- Specify action and controller in the form tag and specify the method as POST. We must also specify enctype=”multipart/form-data” to pass files to the controller.
- Bind File, which is the property of IFormFile type to input tag.
- Add button of Submit type.
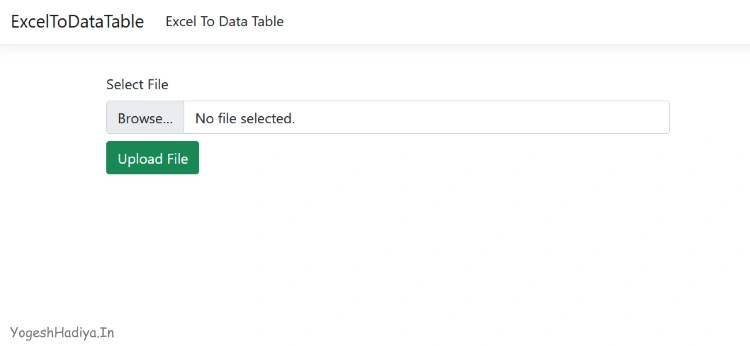
Install NuGet Package
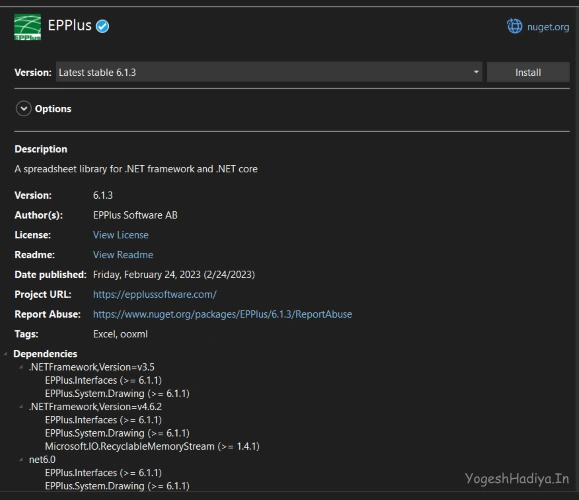
In this article, we will use the EPPlus NuGet package to read data from an excel file.
EPPlus is a .NET Framework/.NET Core library for managing Office Open XML spreadsheets distributed via NuGet. Version 5 supports .NET Framework from version 3.5 and .NET Core from version 2.0. EPPlus has no dependencies on any other library, such as Microsoft Excel.
From version 5 onward, EPPlus is licensed under the Polyform noncommercial license, which means that its code is freely available and can be used for noncommercial purposes.
Step 1
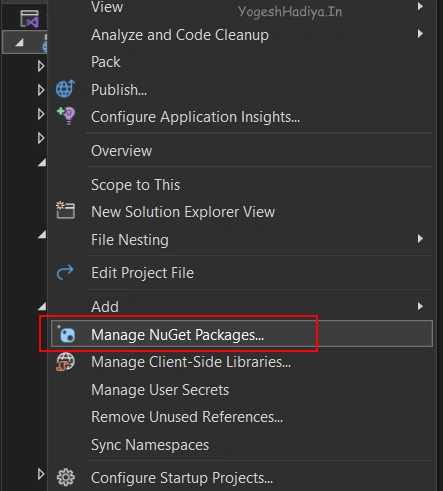
Right-click on your project and click on Manage NuGet Packages.
Step 2
Search for EPPlus and install it.
Code for Converting Excel to Data Table
Create a new action method in your controller and add the following code.
[HttpPost]
public IActionResult Convert(FileUploadModel model)
{
    DataTable table = new DataTable();
    try
    {
        if (model.File != null)
        {
            //if you want to read data from a excel file use this
            //using (var stream = File.Open(filePath, FileMode.Open, FileAccess.Read))
            using (var stream = model.File.OpenReadStream())
            {
                ExcelPackage.LicenseContext = LicenseContext.NonCommercial;

                ExcelPackage package = new ExcelPackage();
                package.Load(stream);
                if (package.Workbook.Worksheets.Count > 0)
                {
                    using (ExcelWorksheet workSheet = package.Workbook.Worksheets.First())
                    {
                        int noOfCol = workSheet.Dimension.End.Column;
                        int noOfRow = workSheet.Dimension.End.Row;
                        int rowIndex = 1;

                        for (int c = 1; c <= noOfCol; c++)
                        {
                            table.Columns.Add(workSheet.Cells[rowIndex, c].Text);
                        }
                        rowIndex = 2;
                        for (int r = rowIndex; r <= noOfRow; r++)
                        {
                            DataRow dr = table.NewRow();
                            for (int c = 1; c <= noOfCol; c++)
                            {
                                dr[c - 1] = workSheet.Cells[r, c].Value;
                            }
                            table.Rows.Add(dr);
                        }

                        ViewBag.SuccessMessage = "Excel Successfully Converted to Data Table";
                    }
                }
                else
                    ViewBag.ErrorMessage = "No Work Sheet available in Excel File";

            }
        }

    }
    catch (Exception ex)
    {
        ViewBag.ErrorMessage = ex.Message;
    }
    return View("Index");
}
Code Explanation
- Here first, we are creating an object of DataTable named table.
- Then start Try and Catch Block in case of any error occurs. In catch block pass error message in ViewBag.ErrorMessage, which shows the error on the view side.
- Check that the file property of IFormFile is not null.
- Then reading the stream data of the file from the File object using the Build In Method of IFormFile called OpenReadStream In Using block so it will automatically dispose after use.
- If you don’t want to use IFormFiledon'tread data from an already saved file, you can get a stream from that file. Just replace this using (var stream = File.Open(filePath, FileMode.Open, FileAccess.Read))
- Then specifying that we are using a NonCommercial license of EPPlus package by LicenseContext.NonCommercial.
- Then, create a new Object of ExcelPackage and load the stream using the load Method.
- Then checking if the uploaded excel file has any worksheet or not. If not, then return an error message.
- Then get the first worksheet from the excel file using block.
- Then get the Number of Rows and Number of Columns of the excel file using workSheet.Dimension.End.Row and workSheet.Dimension.End.Column
- Iterate the Loop of columns in excel and Add columns in DataTable. Note: The excel cell starts from 1, so we must also start the loop from 1. We can get the text of the excel cell by workSheet.Cells[rowIndex, c].Text. Here rowIndex is currently 1, the first row of the excel file. After adding columns to DataTable, set rowIndex to 2.
- Now we have to iterate the loop to read all the other rows. For that, iterate loop from rowIndex which is 2 to noOfRow.
- In this loop, create an object of DataRow in which we pass data of iterate rows.
- Iterate the child loop for reading cells of the worksheet. Start loop from 1 to the number of columns.
- Assign the cell's text to the data row object in the loop. Remember that we are iterating a loop from 1, but the data row’s index starts from 0, rows must use c-1 while assigning text to the data row.
- After completing one child loop, add Data Row to our Data Table object.
- After completing the main loop, set a success message in viewbag.
- Lastly, return the same view, which is Index in my case.
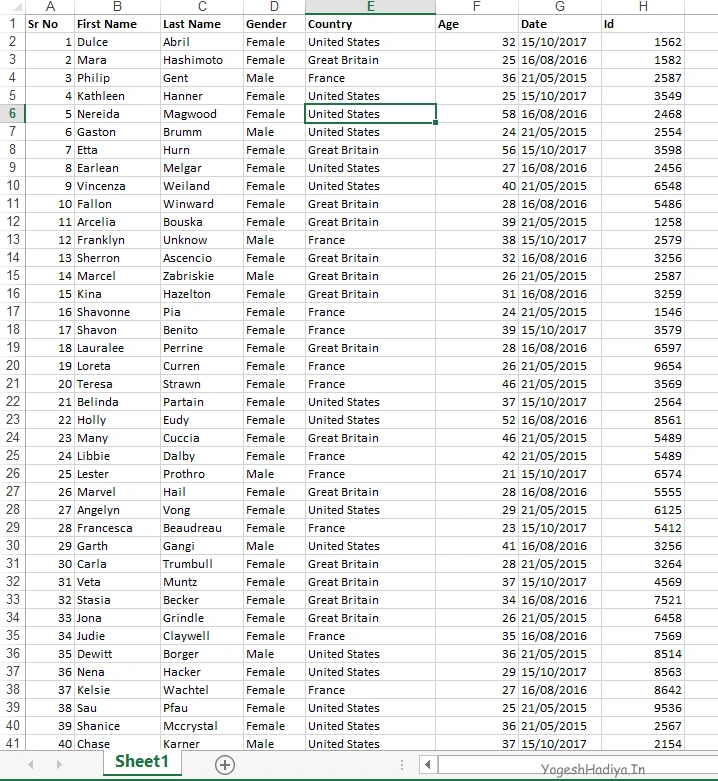
Excel File Records
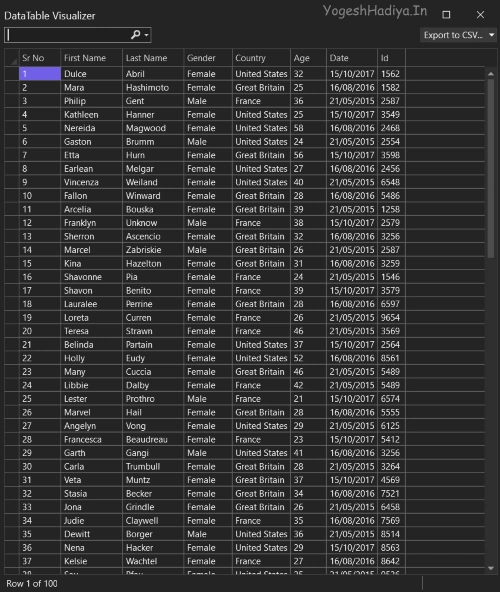
Data Table Records
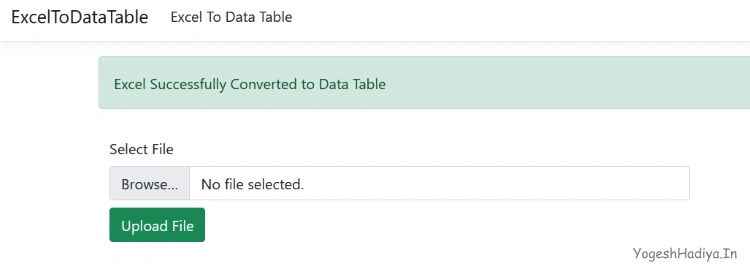
Success Message on View Side
Conclusion
You can use this example in any .Net project, not only MVC. Reading data from excel and converting it into DataTable will remain the same in all .Net projects. I hope you find this article helpful. If you have any doubts, you can ask them in the comments.
You can download the source code of this project from my GitHub Account.
Join the conversation! Your thoughts help the community grow.