

Introduction
AZCopy is the command-based tool to migrate our on-premises data to Cloud storage. AZCopy is preferred if you have hundreds of GBs of data to migrate using sufficient bandwidth. We can use this tool on Windows and Linux.
Step 1
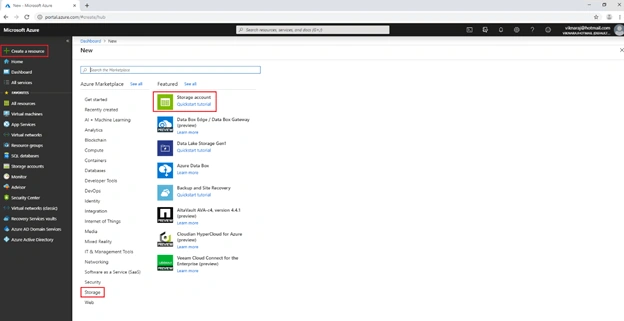
In the Azure portal, click the “+Create a resource” and click “Storage”. In the storage, select “Storage Account”.
Step 2
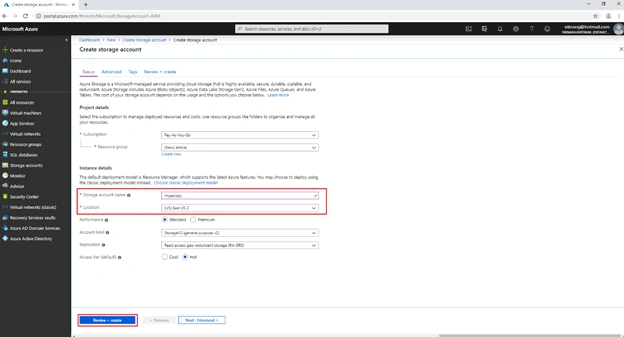
Select the Subscription, Resource group, enter the Storage Account Name, and click “Review + Create”. Then, click “Create”. In this demo, our storage account name is “myazcopy”.
Step 3
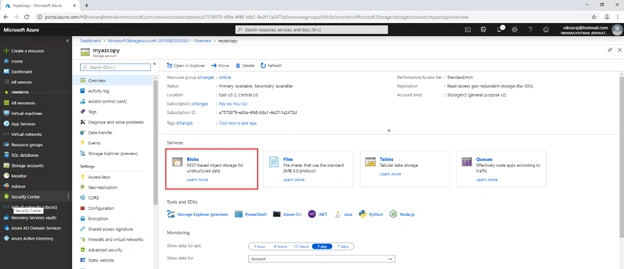
After successfully creating the storage account, open the storage account “myazcopy” and click “Blobs”.
Step 4
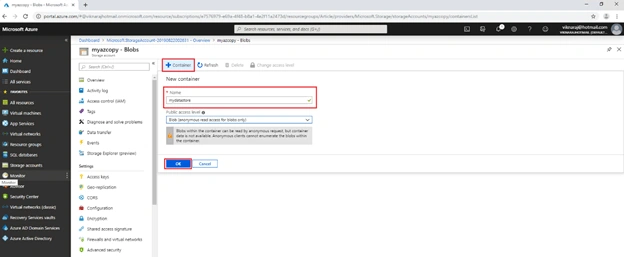
In the Blobs, click “+Container” and enter the name for the container and click “Ok”. In this demo, our container name is “mydatastore”.
Step 5
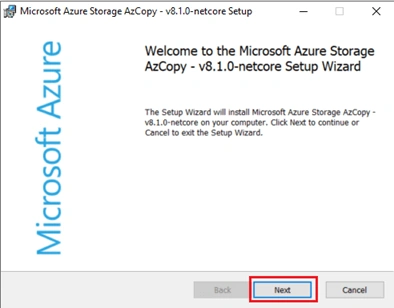
Download and Install the Microsoft Azure Storage AzCopy. To download the software, click here.
Step 6
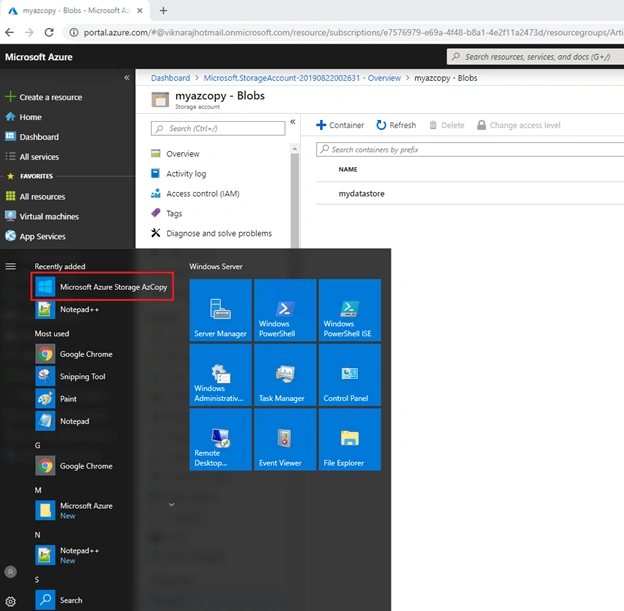
Open the start menu and click “Microsoft Azure Storage AzCopy”.
Step 7
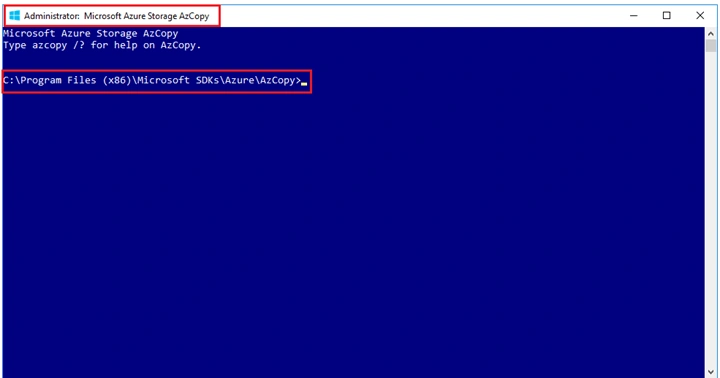
In the Azure Storage AzCopy, we need to enter the following command.
Azcopy /source:<source path> /dest:<destination path> /destkey:<Access key of destination blob> /s
Here -
<source path> - Our On-Premises Location
<destination path> - Our Blob Storage Location
<Access key of destination blob> - Our Storage Account Key
Step 8
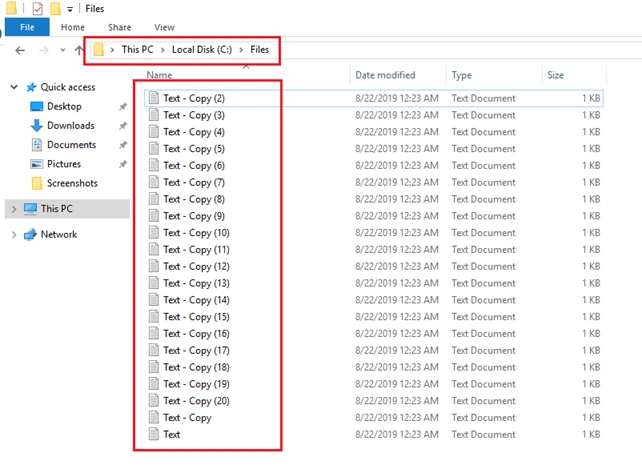
For source path, open your on-premises location and copy the path in this demo. Our path is “C:\Files”.
Step 9
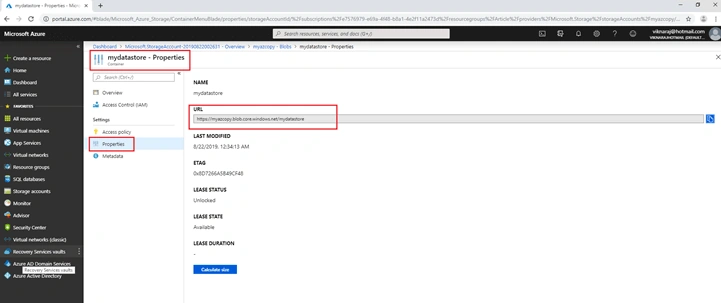
For Destination Path, open the blob storage “mydatastore” and click “Properties” and then copy the URL. In this demo, our URL is “https://myazcopy.blob.core.windows.net/mydatastore”.
Step 10
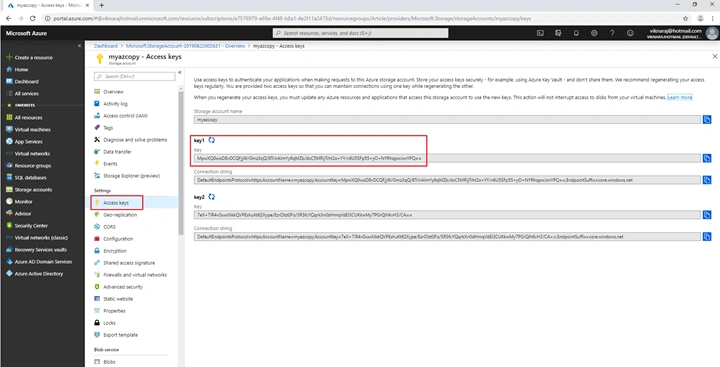
For Access Key of Destination Blob, open the Storage account “myazcopy”, and click “Access keys” and then copy the “Key1”. In this demo, our key is “MpwXQ0woD8vDCQFjjW/Gmz3qQ/8TrJrAImYy6qMZb/dxC5MRijTrhl2o+YY/v6U5SFp55+yO+NYRhqpwJxnYPQ==”
Step 11
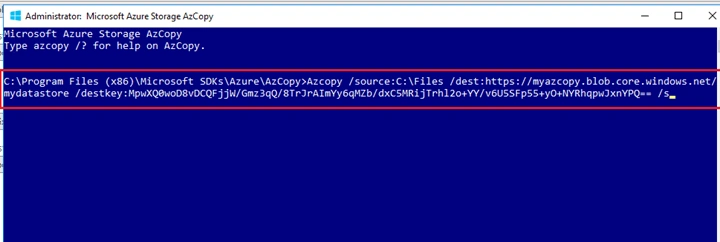
Paste the “Azcopy /source:C:\Files /dest:https://myazcopy.blob.core.windows.net/mydatastore /destkey:MpwXQ0woD8vDCQFjjW/Gmz3qQ/8TrJrAImYy6qMZb/dxC5MRijTrhl2o+YY/v6U5SFp55+yO+NYRhqpwJxnYPQ== /s” command and hit Enter.
Step 12
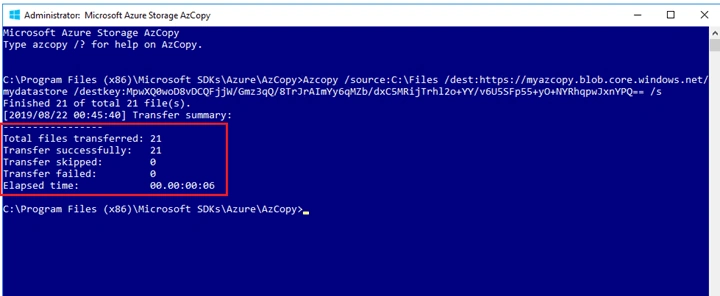
Now, we can verify if our files are copied successfully.
Step 13
Now, open your Blob account “mydatastore”.
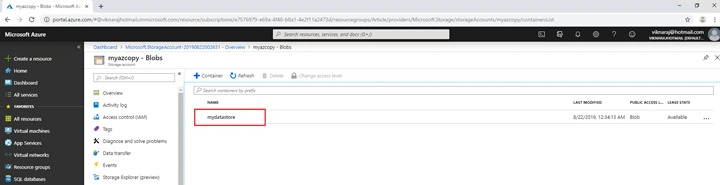
Step 14
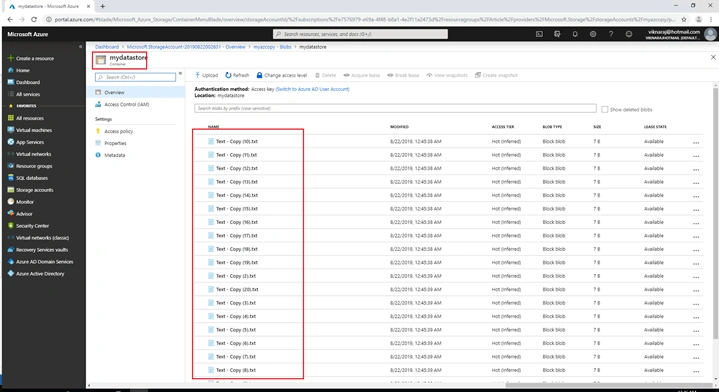
Now, we can verify that our all files are uploaded to our Blob container.
Summary
In this article, we learned how to migrate our on-premises data to Azure Blob storage using AZCopy. If you have any questions, feel free to comment under the article.
Kurt GuntherothPosted Aug 24, 2021, 11:45 AM
Great info in your article and I would say Azcopy was my best, and because of CLI headache and some other reasons like Azcopy consumes all our bandwidth while transferring from windows server to Azure blob, we switched to Gs Richcopy 360 which has very helpful features like it can control the transferring speed, it has a nice and easy GUI , also it is so fast
Santhosh SreshtaPosted Apr 19, 2021, 11:53 AM
Can you please share for linux as well?
Hemant KumarPosted Aug 23, 2019, 2:05 AM
Thanks this is a really helpful article. I was trying to copy the premises data to azure storage using azcopy but was facing some issues and now I'm sure I'll do it easily. Thanks again for this.
Hadshana KamalanathanPosted Aug 23, 2019, 1:04 AM
Nice Article