
Step 1
Login to the SharePoint 2013 site as an administrator (System Account).
Step 2
Clicking the settings menu near User account (System Account), the following window will appear. In that item details click the Site contents.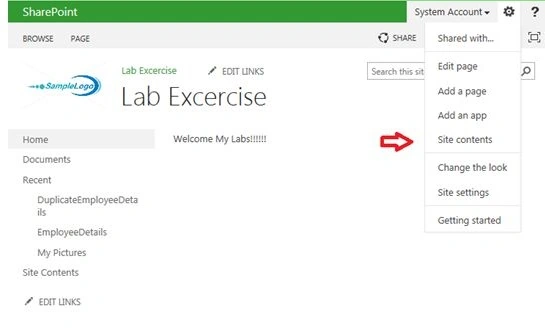
Step 3
Once clicking the Site Contents, the following screen will open. Click the new subsite item.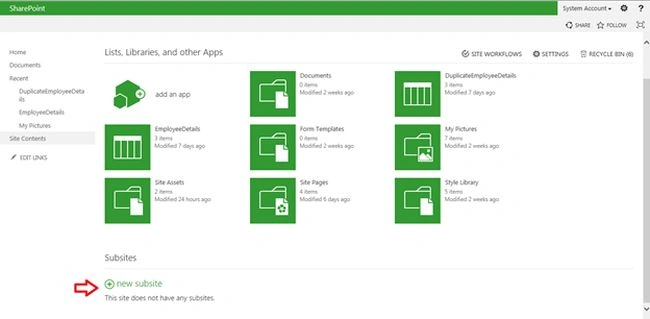
Enter the Community site title and select Community site template in the template section.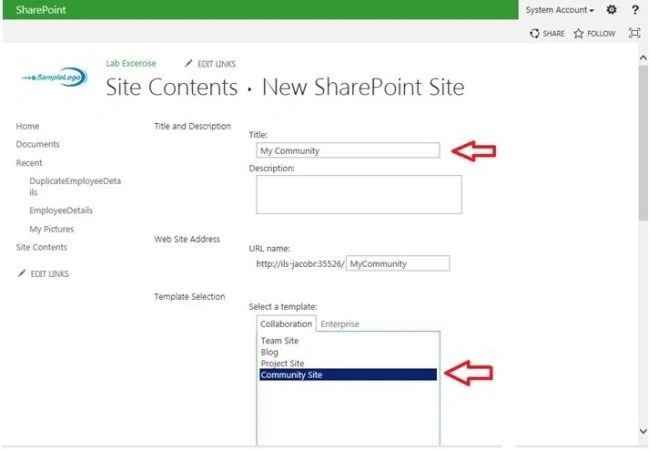
Click the Create button.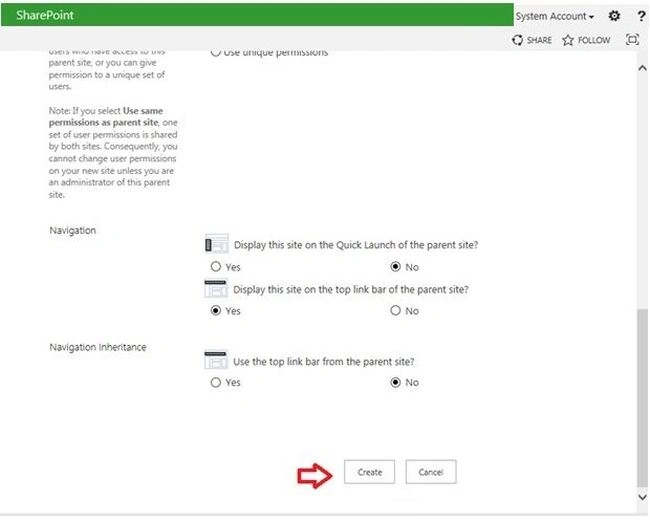
The Community site will be created successfully with community site lists.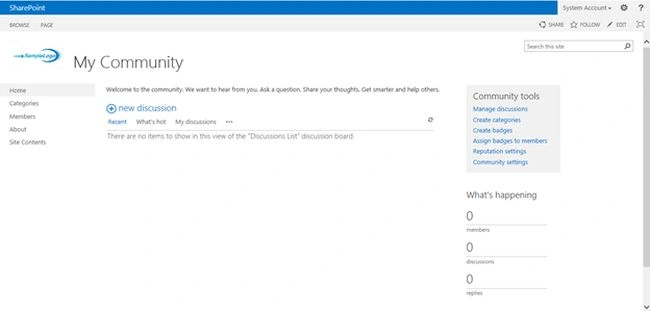
Summary
In this article we explored how to create a community subsite in SharePoint 2013.

Create a Community SubSite in SharePoint 2013
Join the conversation! Your thoughts help the community grow.
Sign in to leave a comment
It is the same account you read, post and publish with — and you will come straight back to this page.
Rajkiran SwainPosted Jul 6, 2015, 4:05 AM
nice
SriramPosted Jul 6, 2015, 3:26 AM
Good job..............
Jacob RobinsonPosted Jul 3, 2015, 1:45 AM
Thanks All....
Abhay ShankerPosted Jul 2, 2015, 11:25 AM
Nice One
Sibeesh VenuPosted Jul 1, 2015, 6:36 AM
Good one.
Gopi ChandPosted Jul 1, 2015, 6:26 AM
Good one