

Today I will explain Setup Projects and how to create a custom setup that can change our app.config.
1: Installing our environment
I will use Visual Studio 2013 and we need to install the following tool:
Microsoft Visual Studio 2013 Installer Projects:
- Download here.
- Follow the installation (next, next, next).
2: Creating a simple setup project
Before we start, I created a solution with the following two projects:
- Console Application (the application that we want to install);
- Setup Project (Setup to install our application)
My console application has the following code:
- using System;
- using System.Collections.Generic;
- using System.Linq;
- using System.Text;
- using System.Threading.Tasks;
- namespace ApplicationToInstall
- {
- class Program
- {
- static void Main(string[] args)
- {
- Console.WriteLine("Hellow World!!!");
- Console.ReadKey();
- }
- }
- }
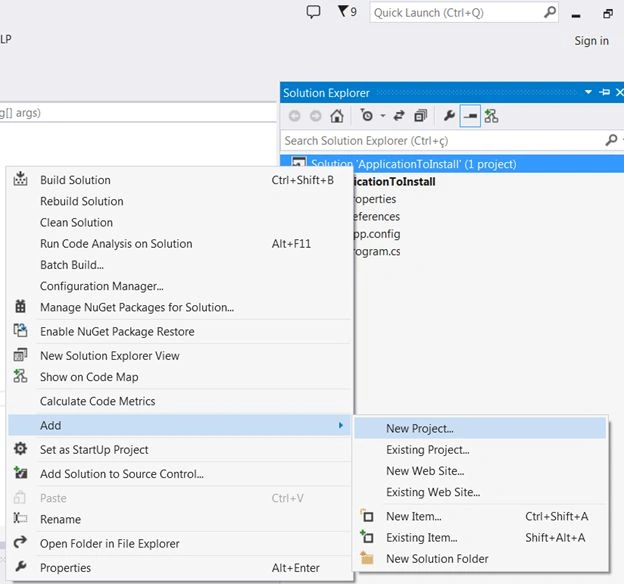
- Solution Explorer, then click on Add and select New Project.
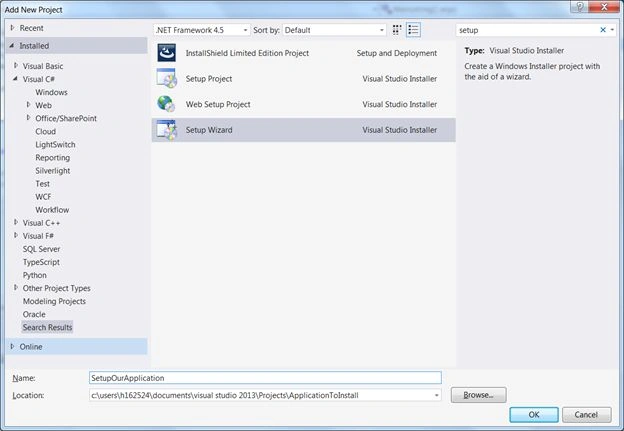
- Add a Setup Wizard.

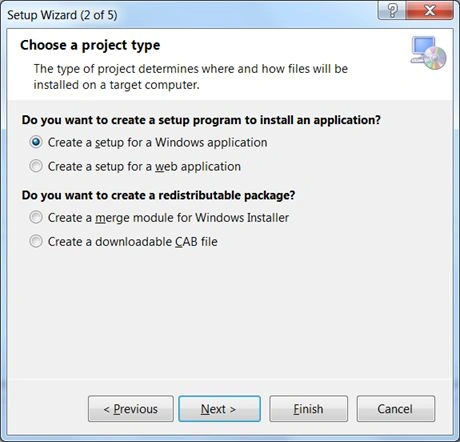
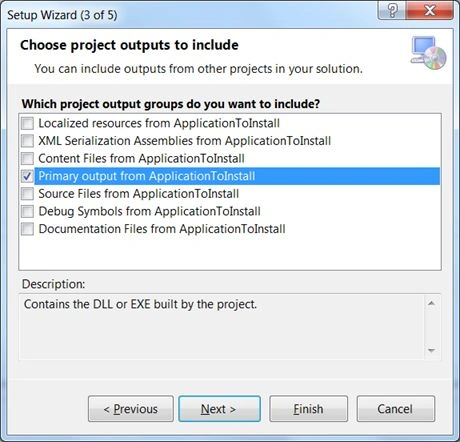
- If you want to add some icon file, I suggest you include in the next form:
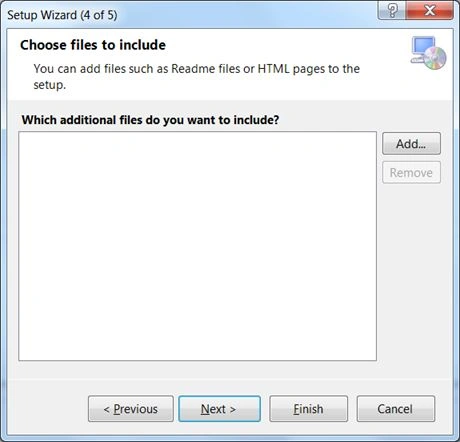
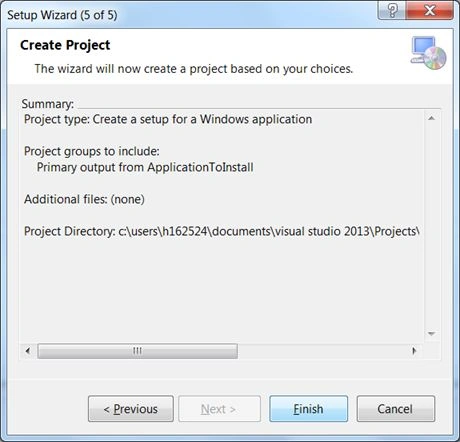
- When the wizard ends (finish), the following tab will open:
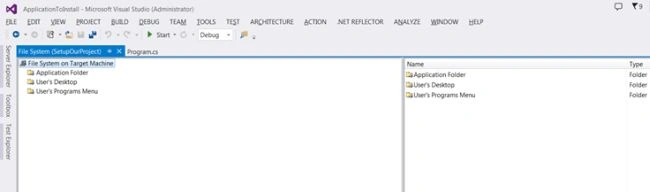
- On “application folder”, right-click “Primary Output from ApplicationToInstall (Active)” and select “Create Shortcut to Primary”.
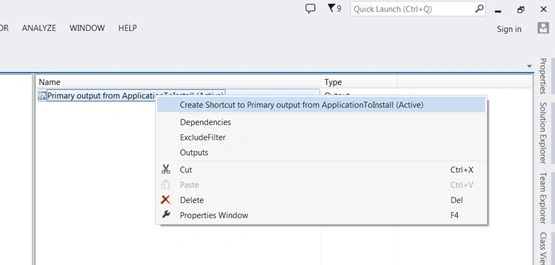
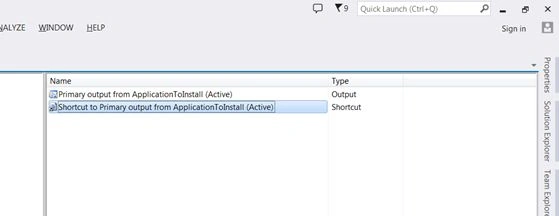
- Drag and Drop the shortcut to “User's Desktop”:

- If you want to set an icon, press “F4” at shortcut and change the icon property.
- Build our setup project:

- Now let's install:


- At the end of installation, the shortcut will be at our desktop, if we open:

3: Incrementing functionalities
Now we will make some increments at our setup, right-click at Setup Project and go to “View" and select "User Interface”: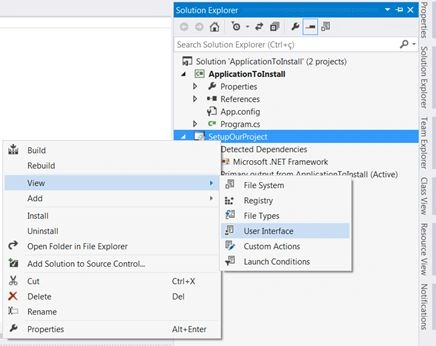
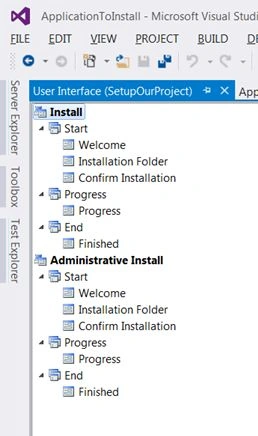
We can insert steps by right-click and Add Dialog: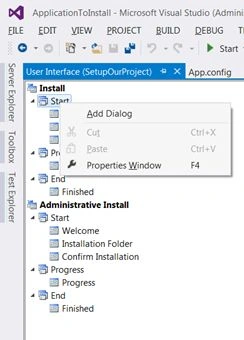
For this article we will add TextBoxes:
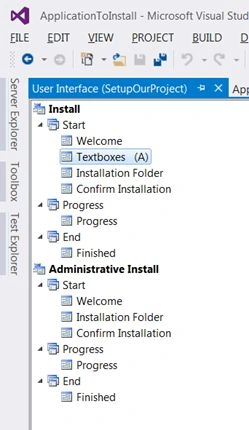
Open the Property window (F4):
Now we can change any of these values, I will configure it as follows:
I will mark the textboxes that I don't want to show to false (visible as false). Let's test our setup, just rebuild and try to install: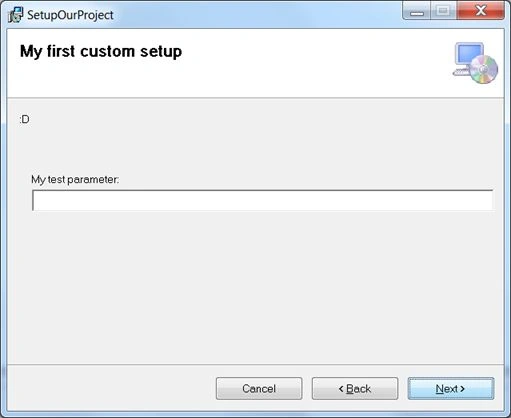
It worked, but it doesn't do anything. Now we need to pass this parameter to some code and use them to do something. To do that, we will need to create an Installer Class for our main application (in my case, console application).
Go to Solution Explorer, select your main application, then click Add and select New Item:
And I will write the following code:
- using System;
- using System.Collections;
- using System.Collections.Specialized;
- using System.ComponentModel;
- using System.Text;
- using System.Windows.Forms;
- using System.Xml;
- namespace ApplicationToInstall
- {
- [RunInstaller(true)]
- public partial class InstallerSetup : System.Configuration.Install.Installer
- {
- public InstallerSetup()
- {
- InitializeComponent();
- }
- public override void Install(System.Collections.IDictionary stateSaver)
- {
- base.Install(stateSaver);
- }
- public override void Commit(IDictionary savedState)
- {
- base.Commit(savedState);
- try
- {
- AddConfigurationFileDetails();
- }
- catch (Exception e)
- {
- MessageBox.Show("Falha ao atualizar o arquivo de configuração da aplicação: " + e.Message);
- base.Rollback(savedState);
- }
- }
- public override void Rollback(IDictionary savedState)
- {
- base.Rollback(savedState);
- }
- public override void Uninstall(IDictionary savedState)
- {
- base.Uninstall(savedState);
- }
- private void showParameters()
- {
- StringBuilder sb = new StringBuilder();
- StringDictionary myStringDictionary = this.Context.Parameters;
- if (this.Context.Parameters.Count > 0)
- {
- foreach (string myString in this.Context.Parameters.Keys)
- {
- sb.AppendFormat("String={0} Value= {1}\n", myString,
- this.Context.Parameters[myString]);
- }
- }
- MessageBox.Show(sb.ToString());
- }
- private void AddConfigurationFileDetails()
- {
- try
- {
- string TESTPARAMETER = Context.Parameters["TESTPARAMETER"];
- // Get the path to the executable file that is being installed on the target computer
- string assemblypath = Context.Parameters["assemblypath"];
- string appConfigPath = assemblypath + ".config";
- // Write the path to the app.config file
- XmlDocument doc = new XmlDocument();
- doc.Load(appConfigPath);
- XmlNode configuration = null;
- foreach (XmlNode node in doc.ChildNodes)
- if (node.Name == "configuration")
- configuration = node;
- if (configuration != null)
- {
- //MessageBox.Show("configuration != null");
- // Get the ‘appSettings’ node
- XmlNode settingNode = null;
- foreach (XmlNode node in configuration.ChildNodes)
- {
- if (node.Name == "appSettings")
- settingNode = node;
- }
- if (settingNode != null)
- {
- //MessageBox.Show("settingNode != null");
- //Reassign values in the config file
- foreach (XmlNode node in settingNode.ChildNodes)
- {
- //MessageBox.Show("node.Value = " + node.Value);
- if (node.Attributes == null)
- continue;
- XmlAttribute attribute = node.Attributes["value"];
- //MessageBox.Show("attribute != null ");
- //MessageBox.Show("node.Attributes['value'] = " + node.Attributes["value"].Value);
- if (node.Attributes["key"] != null)
- {
- //MessageBox.Show("node.Attributes['key'] != null ");
- //MessageBox.Show("node.Attributes['key'] = " + node.Attributes["key"].Value);
- switch (node.Attributes["key"].Value)
- {
- case "TestParameter":
- attribute.Value = TESTPARAMETER;
- break;
- }
- }
- }
- }
- doc.Save(appConfigPath);
- }
- }
- catch
- {
- throw;
- }
- }
- }
- }
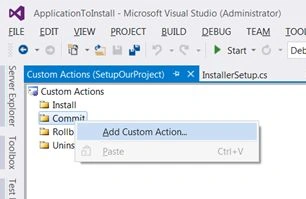
Before running the installation we need to link our TextBox with our installer class. Go to the setup project and open the “Custom Actions”:

As we override the commit method we need to insert a custom action on the commit step:
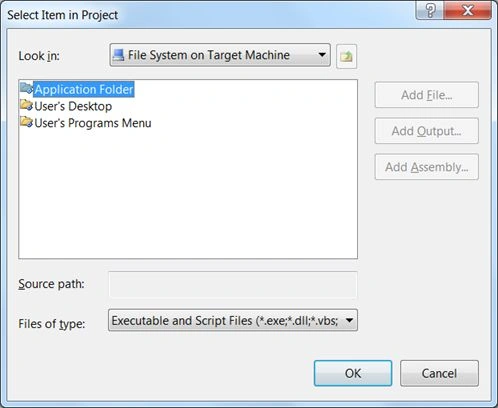
Click twice the “Application Folder”:
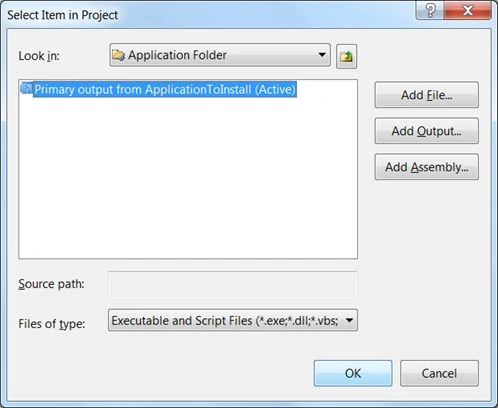

Press “F4” or go to properties:

At “CustomActionData” use the following value:
/{our parameter key}=[{our textbox edit property value}]
For our application:
/TESTPARAMETER=”[TESTPARAMETER]”
If you need more than one parameter just put like as follow:
/TESTPARAMETER=”[TESTPARAMETER]” /TESTPARAMETER2=”[TESTPARAMETER2]”
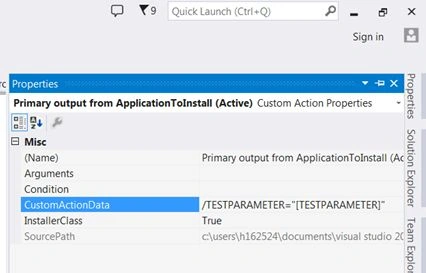
Now we can test our application, our current config will look like the following:
- <?xml version="1.0" encoding="utf-8" ?>
- <configuration>
- <startup>
- <supportedRuntime version="v4.0" sku=".NETFramework,Version=v4.5" />
- </startup>
- <appSettings>
- <add key="TestParameter" value="ThisValueHasToChange" />
- </appSettings>
- </configuration>
Let's run our setup (rebuild/install) and change the parameter:
Open the config file at the install folder: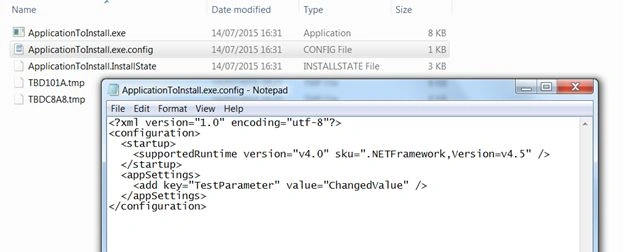
That's it guys, enjoy.
4: Errors that can happen
If you receive the following error: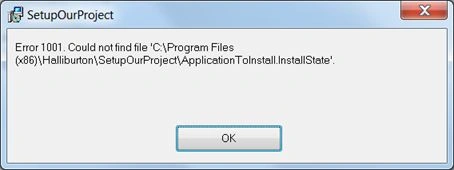
Put a custom action at the “Install” step (no need to configure, it can be empty).
meir rotfPosted Jun 13, 2021, 7:11 AM
Thanks for your article. Its well written and helpful. I followed your steps. My install was working but now I get an error 1001 "Could not find file ......"...InstallState and does a rollback?? any suggestions what could the problem be?
Akanksha TripathiPosted Apr 22, 2019, 7:09 AM
I want to validate text box value and need to disable/enable next button based on the condition
Sowmiya PachiappanPosted Jan 23, 2019, 4:26 AM
If we need 5 text box in user interface,how to achieve it
Naveed ButtPosted Apr 10, 2018, 12:38 PM
Thanks a lot for the detailed step by step guide. This was very useful.. :)
Pax ObiPosted Jan 19, 2018, 12:36 AM
I do not wish to write to app.config but rather I want to pass the string Context.Parameters["TESTPARAMETER"]; to another class in form1.cs on load function. I tried string test = InstallerSetup.Context.Parameters["TESTPARAMETER"]; but getting InstallerSetup.Context is null . Please Help.
Santhakumar MunuswamyPosted Jul 16, 2015, 3:46 PM
Welcome
Santhakumar MunuswamyPosted Jul 16, 2015, 3:46 PM
Good Article! Thanks for sharing
Narasimha Reddy ChennupalliPosted Jul 16, 2015, 8:45 AM
Good one..
Ehsan SajjadPosted Jul 15, 2015, 11:17 AM
intersting thanks for the article
Chervine BhiwooPosted Jul 15, 2015, 10:40 AM
Thanks for sharing
Rajeesh MenothPosted Jul 15, 2015, 10:31 AM
Nice Share...
Dinesh BeniwalPosted Jul 15, 2015, 9:25 AM
Thanks for sharing, Welcome to C# Corner.
Sibeesh VenuPosted Jul 15, 2015, 5:32 AM
Nice Share Thank you :)
RakeshPosted Jul 15, 2015, 4:52 AM
Good