

Here you will learn step by step how to create a screen that can Edit and Add Records in a LightSwitch Application:
Step 1: Add screen->New data screen->Change screen name (CreateNewCustomerEdit)->Check Customer HeaderOrders->Ok.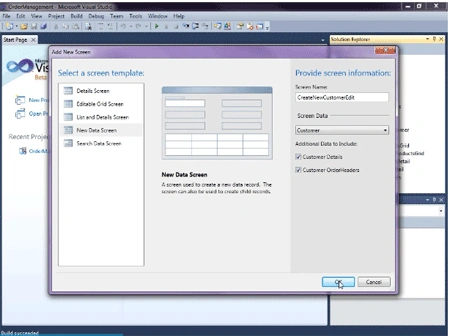
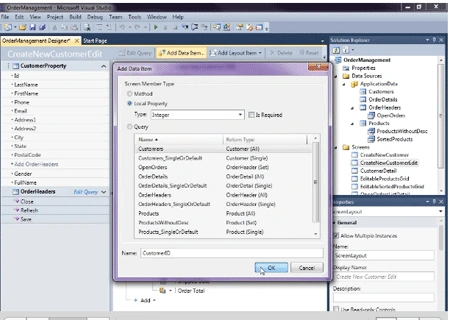
Step 2: Add data item->Click local property->Type (Integer) and uncheck Is Required->Ok.
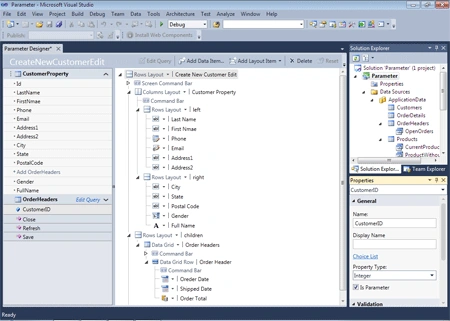
Step 3: Go to CustomerID properties->Check Is Parameter.
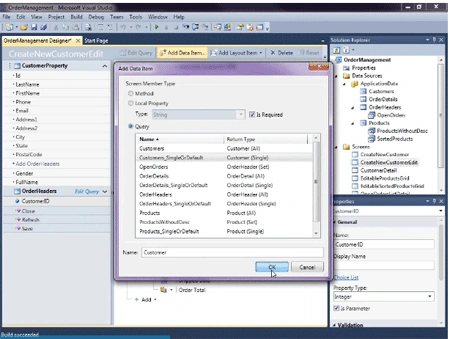
Step 4: Add data item->Click query->Select Customer_SingleOrDefault->Ok.
Step 5: Go to Id properties->Select parameter binding (CustomerID).
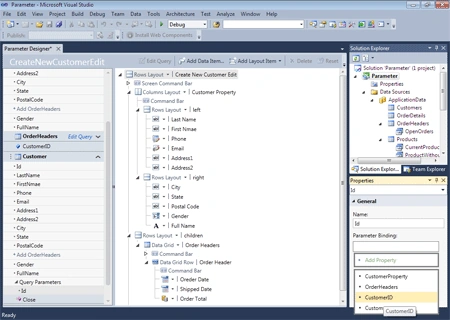
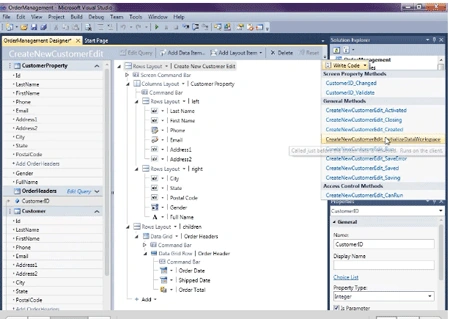
Step 6: Go to write code->Select CreateNewCustomerEditInitializeDataWorkSpace.
using System;
using System.Linq;
using System.IO;
using System.IO.IsolatedStorage;
using System.Collections.Generic;
using Microsoft.LightSwitch;
using Microsoft.LightSwitch.Framework.Client;
using Microsoft.LightSwitch.Presentation;
using Microsoft.LightSwitch.Presentation.Extensions;
using System.Collections.Generic;
namespace LightSwitchApplication
{
public partial class CreateNewCustomerEdit
{
partial void CreateNewCustomerEdit_InitializeDataWorkspace(List<IDataService> saveChangesTo)
{
// Write your code here.
if (this.CustomerID.HasValue)
{
this.CustomerProperty = this.Customer;
}
else
{
this.CustomerProperty = new Customer();
}
}
partial void CreateNewCustomerEdit_Saved()
{
// Write your code here.
this.Close(false);
Application.Current.ShowDefaultScreen(this.CustomerProperty);
}
}
}
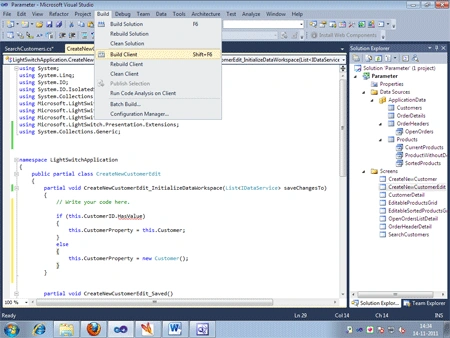
Step 7: Save->Build client.
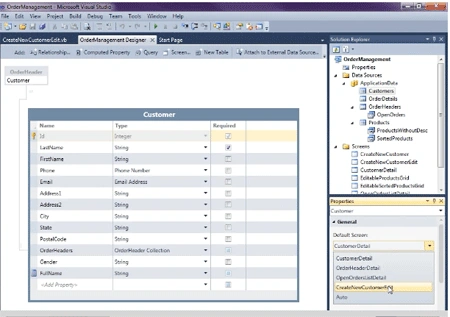
Step 8: Open customer table->properties->Select default screen (CreateNewCustomerEdit).
Step 9: Open search customer screen->Add..->Right click->Override code.
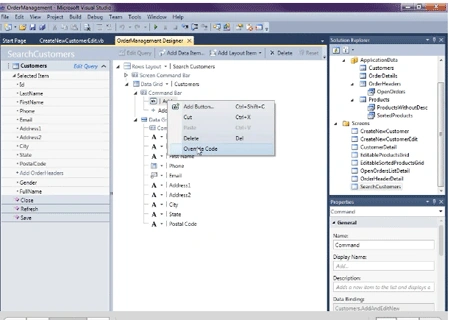
using System;
using System.Linq;
using System.IO;
using System.IO.IsolatedStorage;
using System.Collections.Generic;
using Microsoft.LightSwitch;
using Microsoft.LightSwitch.Framework.Client;
using Microsoft.LightSwitch.Presentation;
using Microsoft.LightSwitch.Presentation.Extensions;
namespace LightSwitchApplication
{
public partial class SearchCustomers
{
partial void gridAddAndEditNew_CanExecute(ref bool result)
{
// Write your code here.
}
partial void gridAddAndEditNew_Execute()
{
// Write your code here.
this.Application.ShowCreateNewCustomerEdit();
}
}
}
Step 10: Run application->Click + sign.
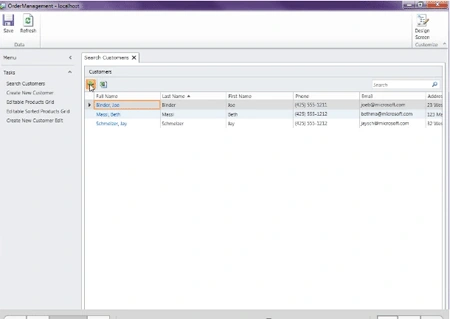
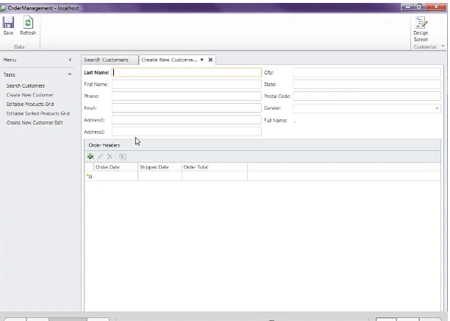
Step 11: Now you can add and edit any records->Save.
Tushar BhattPosted Dec 19, 2012, 12:15 PM
Hello Vinit, Very nice article. However, will you please clarify what is this.CustomerProperty in following section of code. I am not able to find out from your article, and hence I am not able to implement in my code. partial void CreateNewCustomerEdit_InitializeDataWorkspace(List<IDataService> saveChangesTo) { // Write your code here. if (this.CustomerID.HasValue) { this.CustomerProperty = this.Customer; } else { this.CustomerProperty = new Customer(); } } Can I have complete source code for this article as well. Tushar
suwan moonchomphuPosted Jun 27, 2012, 3:15 AM
this.Application.ShowCreateNewGBHEmployee(argument?);
bhuvenPosted Nov 27, 2011, 7:30 AM
Hello Vineet Thank you for this article. How can you handle a situation where from the master screen you access from has child screen that is different from LS autogenerated screen. In this case OrderHeaders will have its own screen, the Add command in grid for OrderHeaders is changed to show this custom screen. Many thanks, Bhuven