

Introduction
Amazon Bedrock Knowledge Bases allow you to answer user queries by retrieving relevant information from various data sources, including SharePoint Online. This helps generate accurate responses, with the option to include citations for added reference. In this article, you’ll learn how to create and configure an Amazon Bedrock Knowledge Base using SharePoint Online as a data source and test it to generate responses based on SharePoint data.
Data source
SharePoint is a website-based collaboration system that is used as a secure place to store, organize, share, and access information from any device. SharePoint empowers teamwork with dynamic and productive team sites for every project team, department, and division. I have created a SharePoint site and added Wikipedia documents to the document library, as shown below.

Pre-requisites
- AWS account and the required permissions to access Amazon Bedrock.
- Administrator access to SharePoint Online site.
- Administrator access to register an app in Microsoft Entra ID.
- Access to Amazon Bedrock foundation model to validate the knowledge base.
Register an app in Microsoft Entra ID
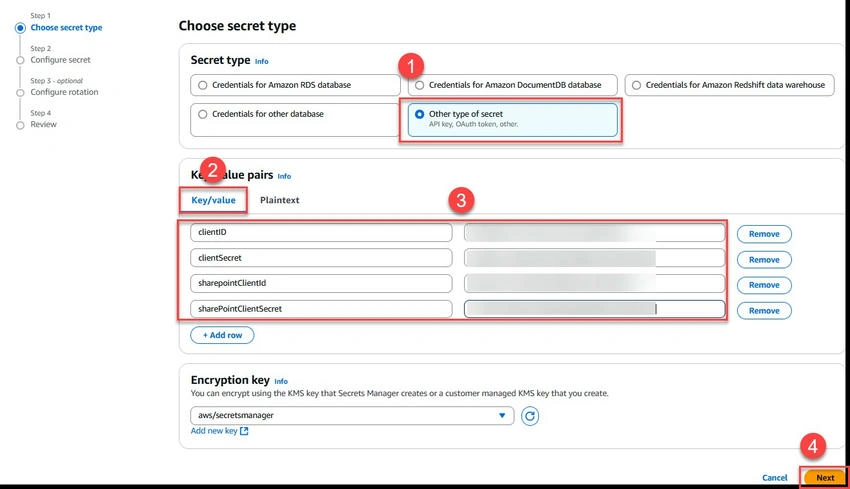
OAuth 2.0 and SharePoint App-Only are the supported authentication methods currently available for connecting Amazon Bedrock Knowledge Base to SharePoint Online. In this article, we will use OAuth 2.0 authentication to connect to the SharePoint Online data source. The following values are required and should be stored in AWS Secrets Manager.
- username: SharePoint admin username
- password: SharePoint admin password
- clientId: OAuth app client ID
- clientSecret: OAuth app client secret
Perform the following steps to register an application using Microsoft Entra ID.
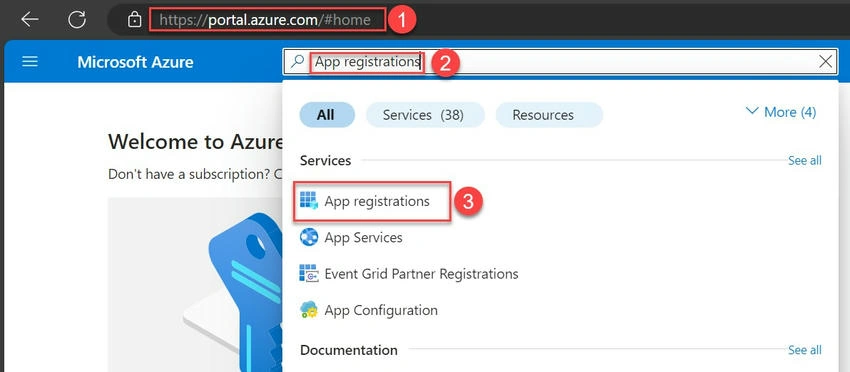
- Navigate to Microsoft Azure Portal.
- Search for and click App registrations.
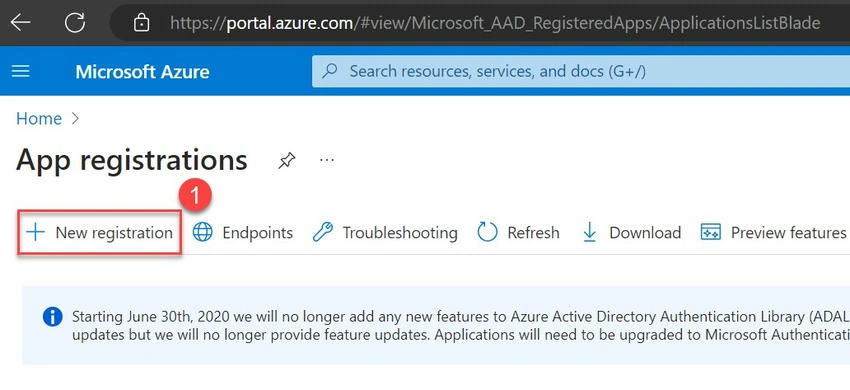
- Click New Registration.
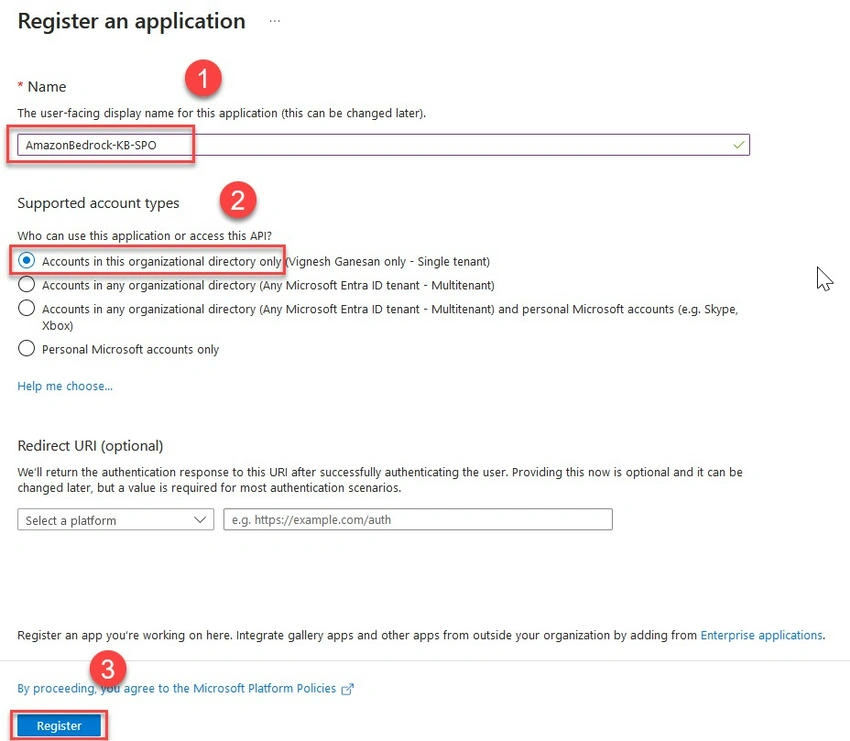
- Enter a name for your application, select who can use this application, and click Register.
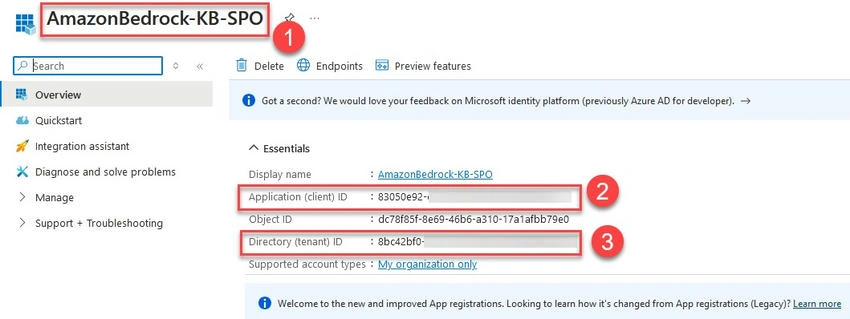
- An application will be created. You will see a page like the following screenshot. Note the application (client) ID and the directory (tenant) ID.
- Select Certificates & secrets in the navigation pane. Select Client Secrets and then click New client Secrets.
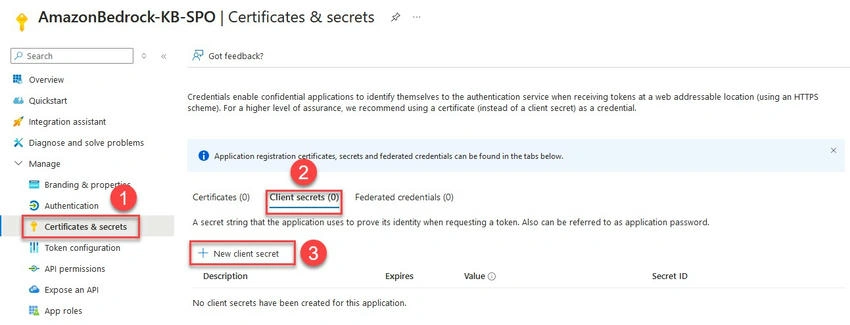
- Enter the description, select expiry, and choose Add. Note the secret value.
- Select API permissions in the navigation pane and click Add a permission. Select SharePoint from the list of applications. Select Delegated permissions and then select AllSites.Read permission. Click Add Permissions.
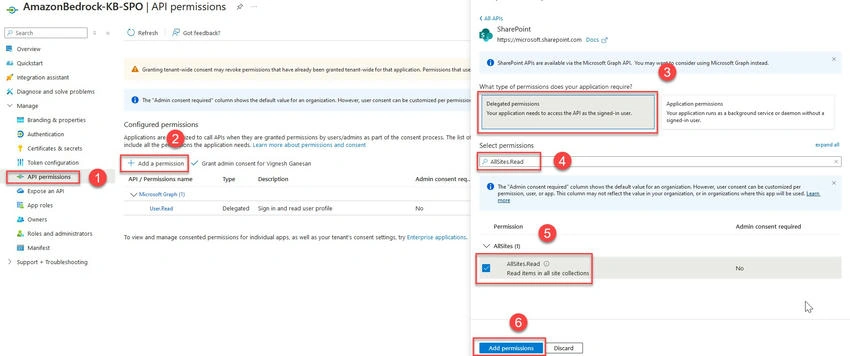
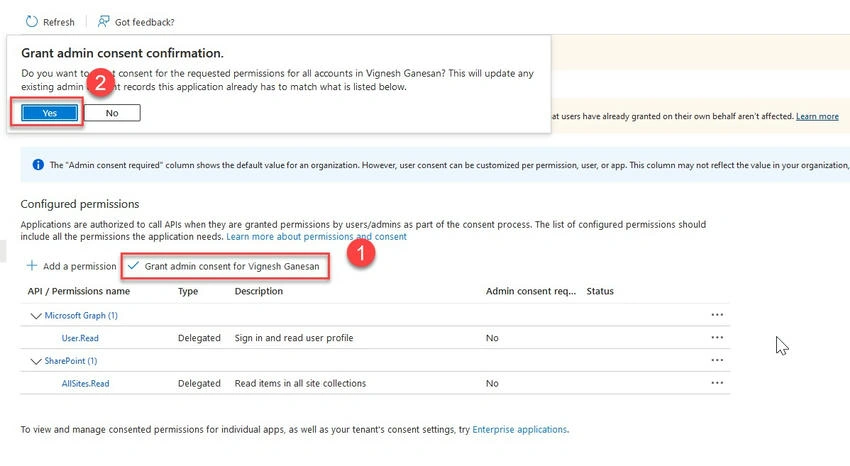
- Click Grant admin consent and select yes for confirmation.
Create a Knowledge Base in Amazon Bedrock
Perform the following steps to create and configure the knowledge base in Amazon Bedrock using the AWS console.
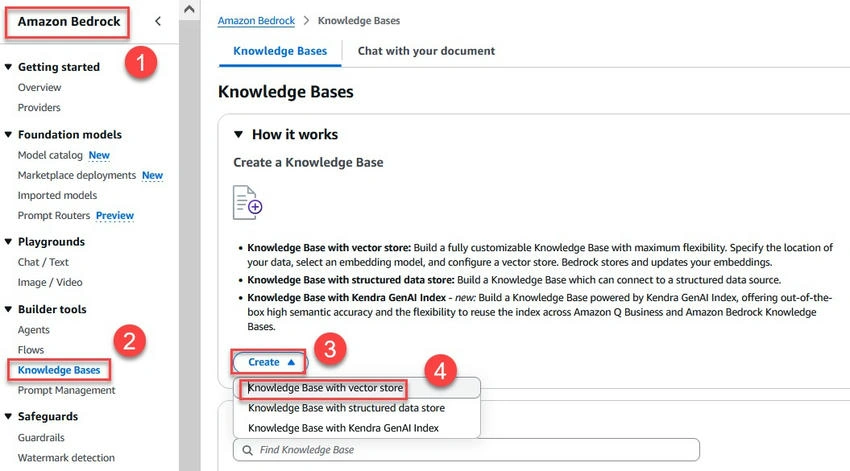
- Navigate to Amazon Bedrock service in AWS Console.
- Select Knowledge Bases in the navigation pane. Select Create and click Knowledge Base with vector store.
- Enter the knowledge base name, and description and select Create and use a new service role.

- Select SharePoint as the data source.
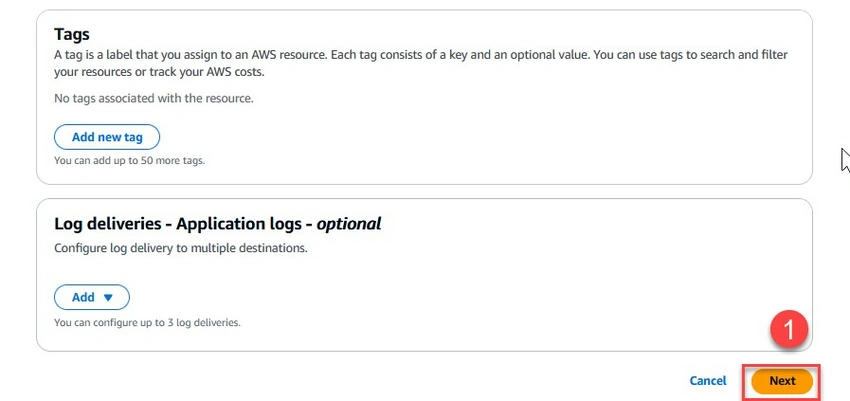
- Optional: Add tags and configure log delivery. Click Next.
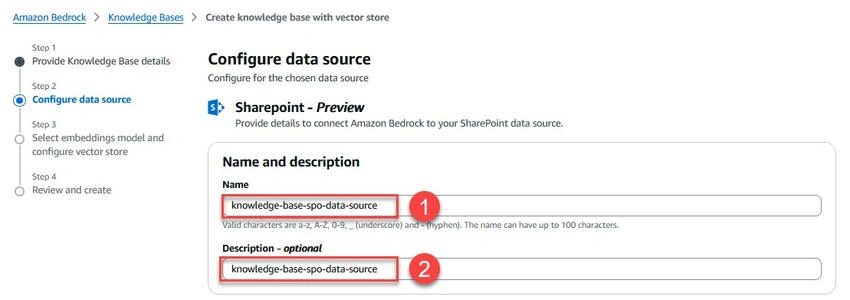
- Enter the data source name and description.
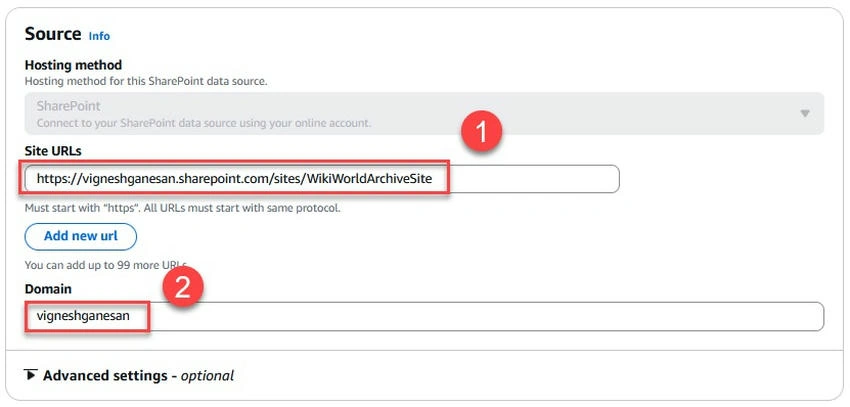
- Enter the SharePoint site URL and domain name.
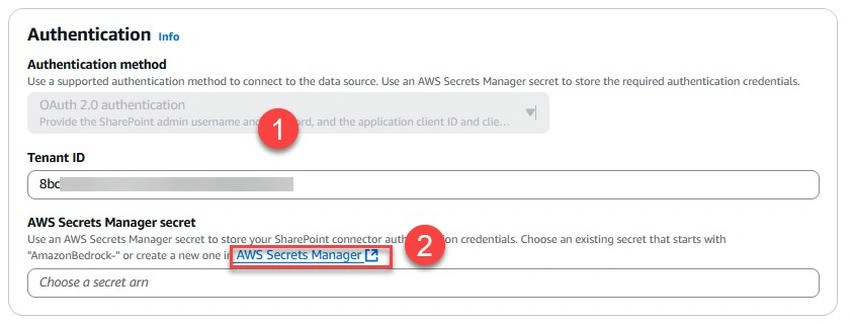
- Under the Authentication section, select OAuth 2.0 authentication, and click AWS Secrets Manager to create a new secret.
- Choose another type of secret option and enter the key-value pairs as shown below. Click Next.
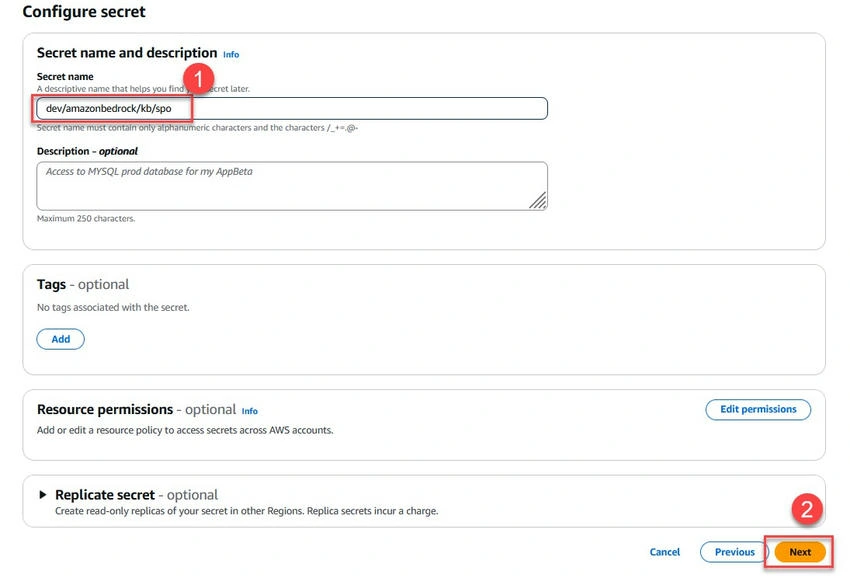
- Enter the secret name and click Next. Review all the settings and click Store. Note the secret ARN.
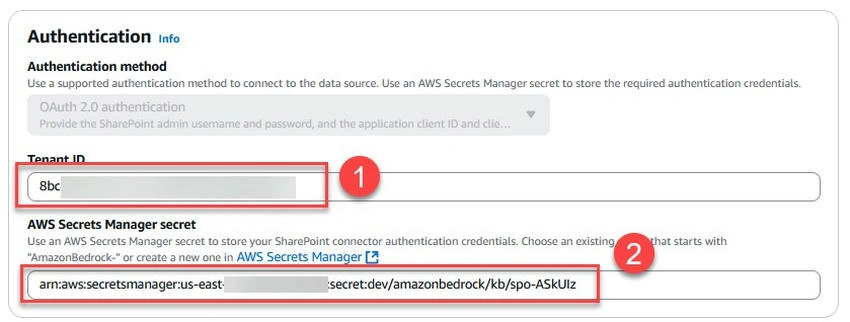
- Go back to the knowledge base creation page. Enter the tenant ID and secret ARN. Click Next.
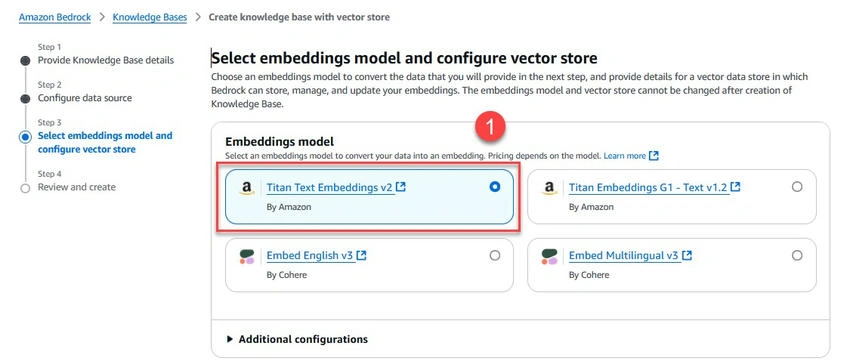
- Under the embeddings model section, select the embedding model as shown below.
- Leave the default selected values for the vector database and click Next.
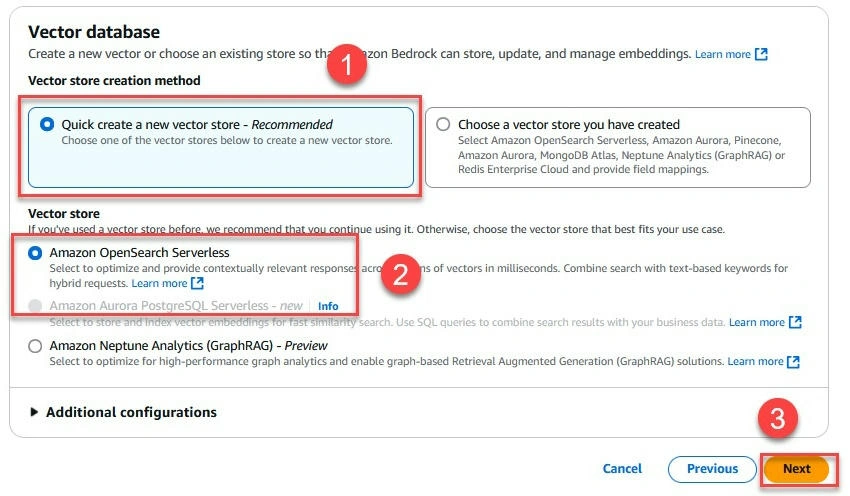
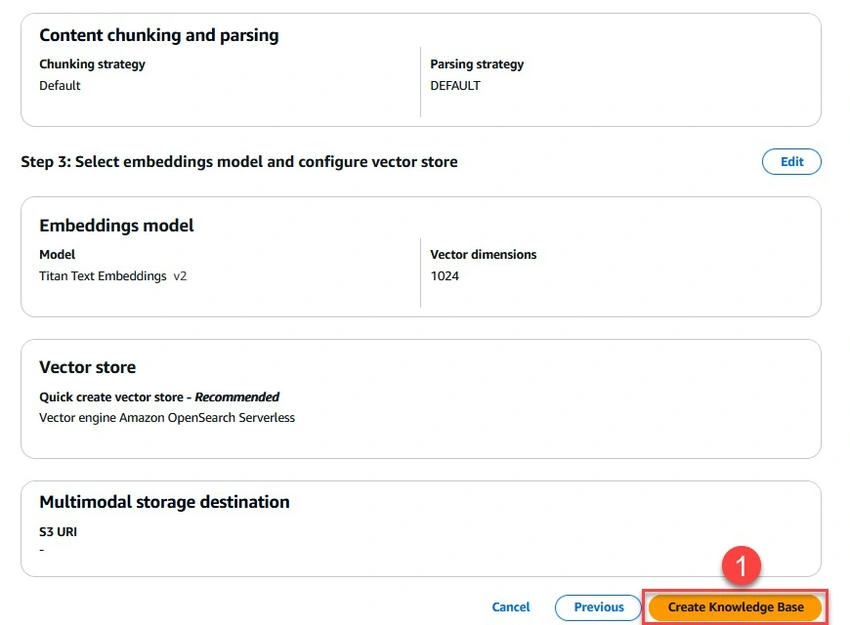
- Review the configuration and click Create Knowledge Base.
- Once the knowledge base is created, select the newly created data source and click Sync.
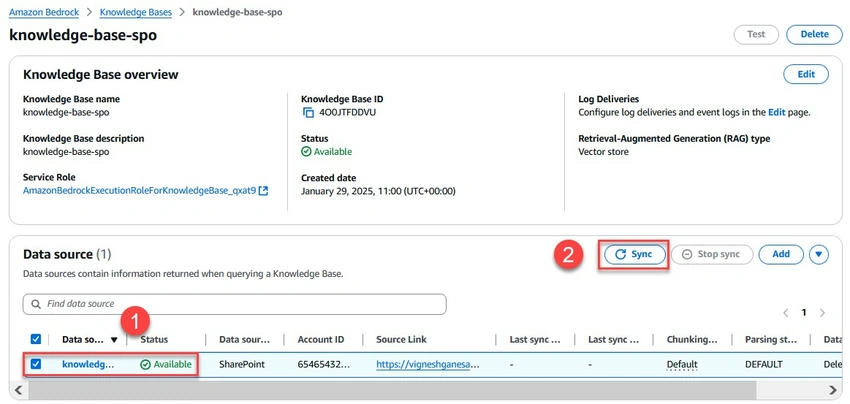
- It could take a few minutes to hours to sync, depending on the size of your data. Once the sync is completed successfully, test the knowledge base.
Validate the knowledge base
Perform the following steps to validate the newly created knowledge base using AWS Console.
- Navigate to Amazon Bedrock service in AWS Console.
- Select Knowledge Bases in the navigation pane.
- Select the newly created knowledge base. On the right-hand side, you will see the "Test Knowledge Base" section. Click on Select Model.
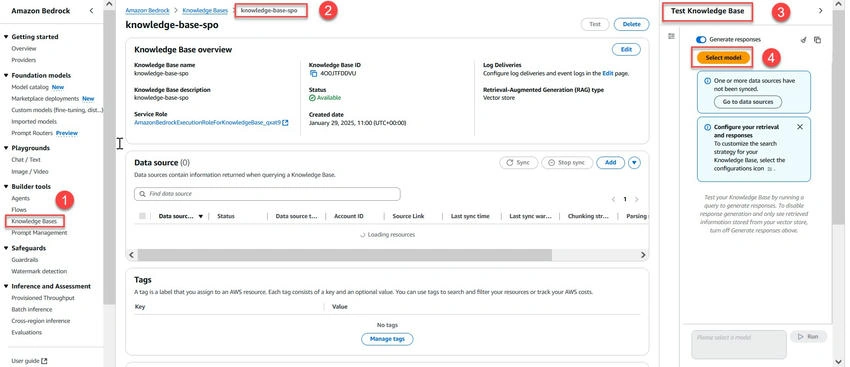
- Choose any model based on your requirements. Click Apply.
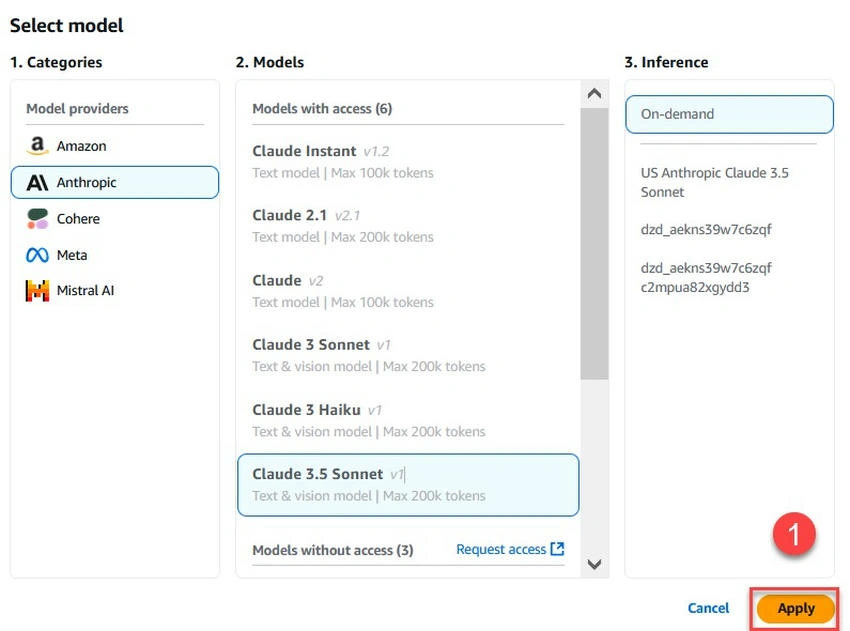
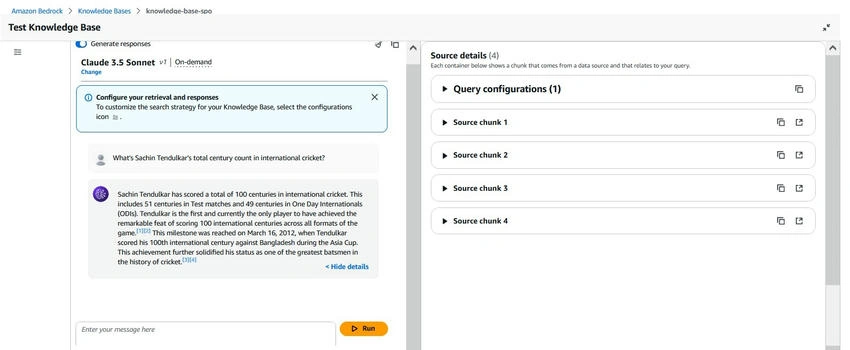
- Enter the prompt and you can see the response generated from the knowledge base as shown below.
References
Summary
This article describes how to create and configure an Amazon Bedrock Knowledge Base using SharePoint Online as a data source.
Vijai Anand RamalingamPosted Mar 25, 2025, 5:00 PM
Store the following values in the Secrets Manager: In the screenshot instead of username and password key value pairs, sharepointClienId and sharepointClientSecret values are provided. username: SharePoint admin username password: SharePoint admin password clientId: OAuth app client ID clientSecret: OAuth app client secret
Vijai Anand RamalingamPosted Feb 24, 2025, 10:09 PM
For OAuth Authentication - MFA should be disabled for the user used to connect to SHarePoint site configured in the data source.