

Introduction
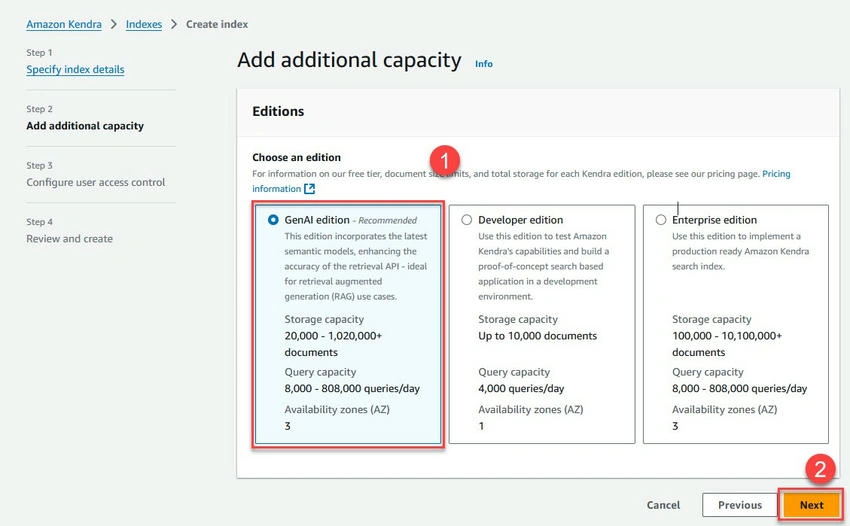
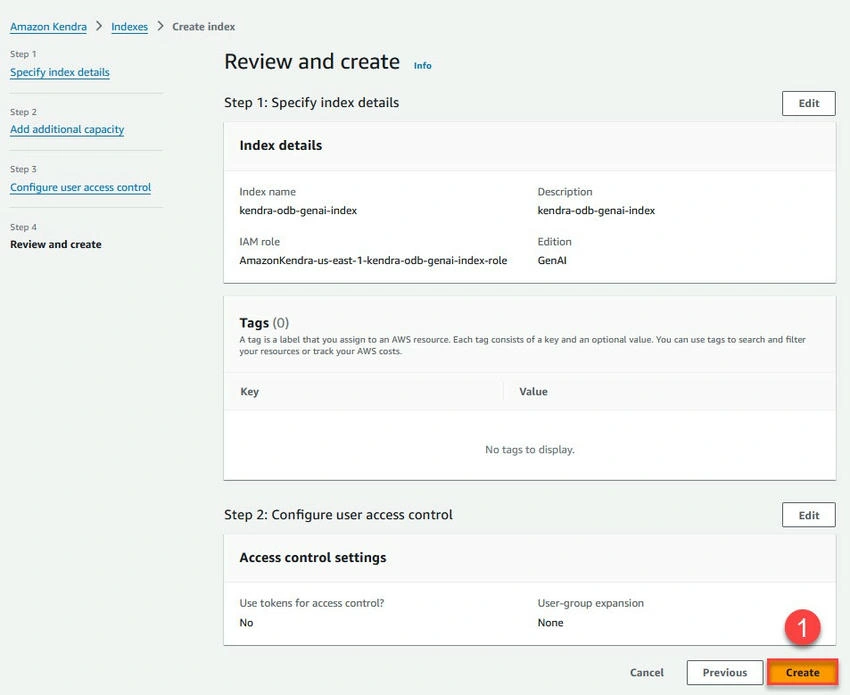
Amazon Kendra GenAI index enhances semantic search by combining traditional search relevance with Large Language Model (LLM)-powered scoring to deliver accurate, contextual results. This feature extends beyond keyword matching to understand the semantic meaning of queries and documents, enabling natural and precise information retrieval. This article demonstrates how to create an Amazon Kendra GenAI index using Microsoft OneDrive as a data source.
Data source
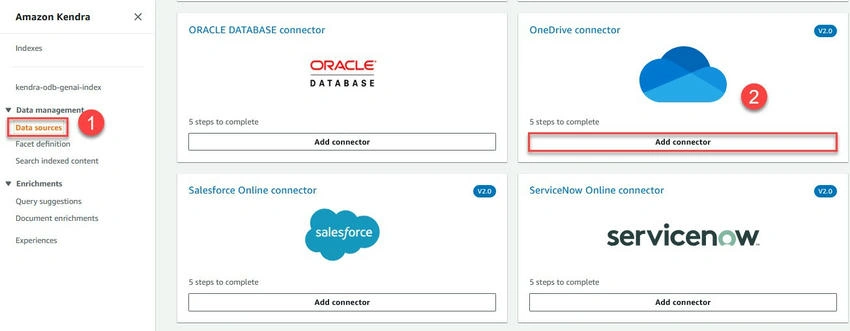
Microsoft OneDrive is a secure cloud storage platform that allows users to store, share, and collaborate on documents from any device. For this demonstration, OneDrive accounts contain documents that will be indexed using Amazon Kendra GenAI. The OneDrive connector in Amazon Kendra enables direct integration with user accounts, supporting authentication via OAuth 2.0 to access files for indexing and searching.
Pre-requisites
- An AWS account with permissions to.
- Create and manage an Amazon Kendra index
- Configure AWS Secrets Manager
- Set up IAM roles and permissions
- Application Developer permission role or the Global Administrator permission role to register a Microsoft Entra ID app.
Register an app in Microsoft Entra ID
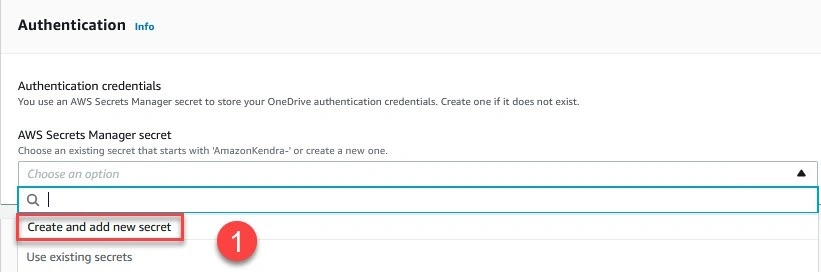
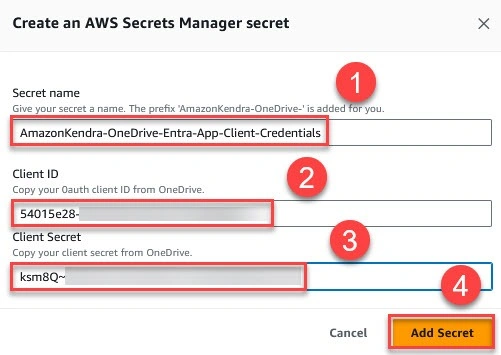
We will use OAuth 2.0 authentication to connect to the Microsoft OneDrive data source. The following values will be required and should be securely stored in AWS Secrets Manager.
- clientId: OAuth app client ID
- clientSecret: OAuth app client secret
Perform the following steps to register an application in Microsoft Entra ID.
- Navigate to the Microsoft Azure Portal.
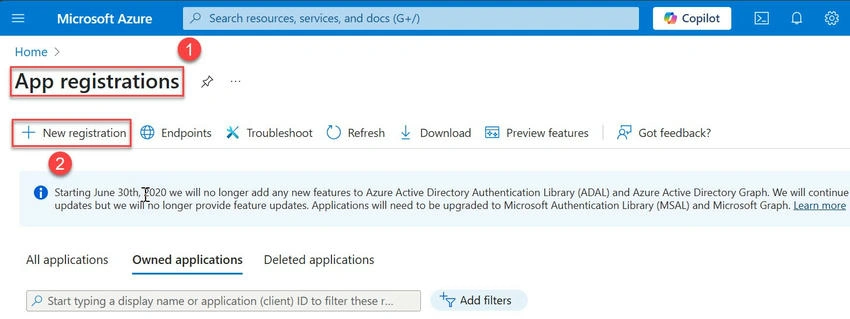
- Search for and click App registrations.
- Click New registration.
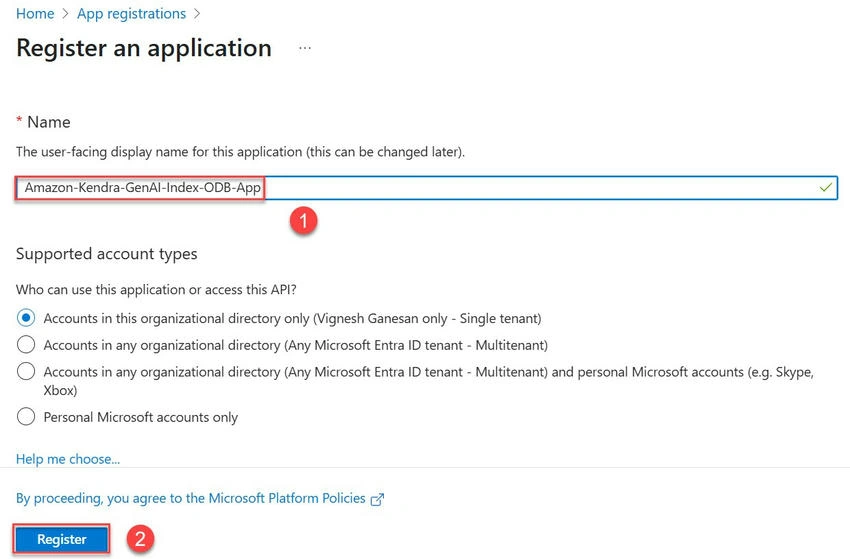
- Enter a name for your application, select who can use this application, and click Register.
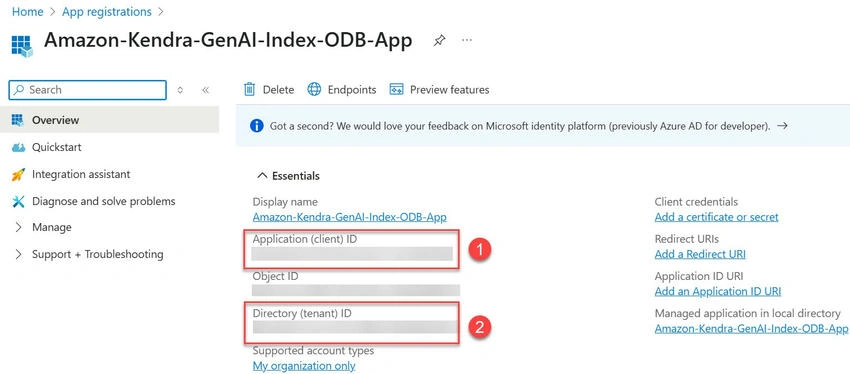
- An application will be created. You will see a page like the following screenshot. Note the application (client) ID and the directory (tenant) ID.
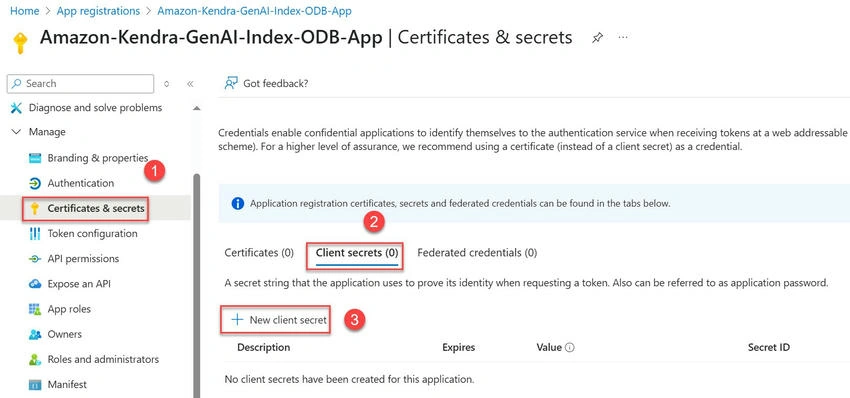
- Select Certificates & secrets in the navigation pane. Select Client secrets and then click New client secret. Note the secret value.
- Enter the description, select expiry, and choose Add.
- Select API permissions in the navigation pane and click Add a permission. Select Microsoft Graph from the list of applications.
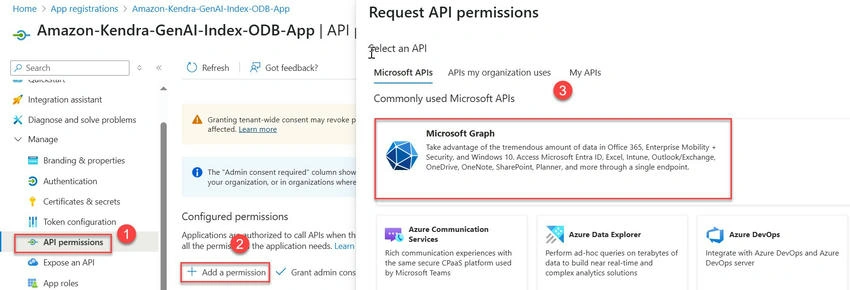
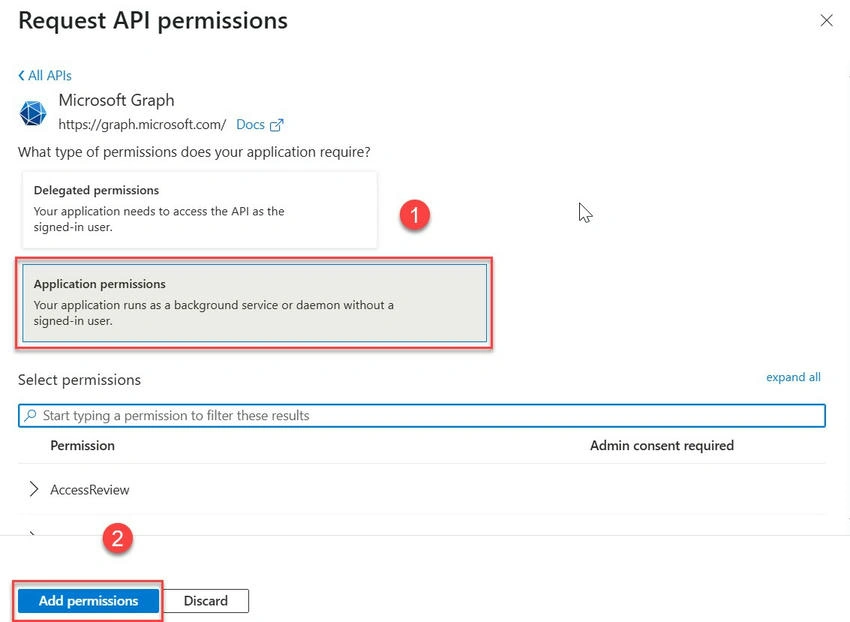
- Select Application permissions and then select the following permissions.
- Files.Read.All
- User.Read.All
- Group.Read.All
- Notes.Read.All
- Click Add permissions.
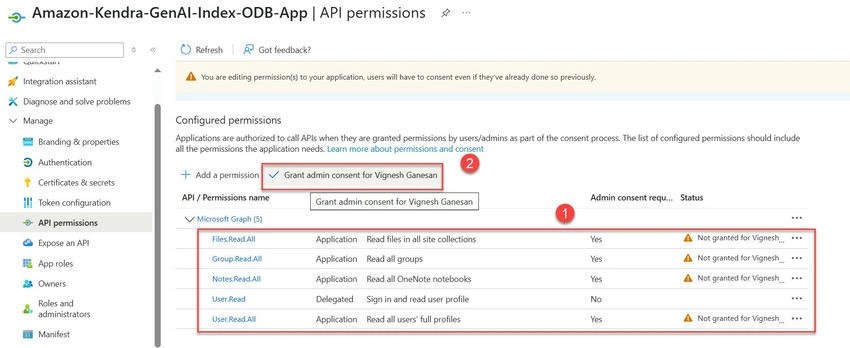
- Click Grant admin consent and select Yes for confirmation.

Join the conversation! Your thoughts help the community grow.