

Introduction
In a real-world scenario, your physical machine is running out of storage. You need to buy a physical hard drive to store a small amount of data for a small duration of time you spend more money.
Read my previous article:
At the same time you’re running a virtual machine in Azure, that virtual machine needs additional storage, what can you do? You cannot buy and install hard disk from locally. Azure can provide a storage disk to store data in a cloud-like physical hard drive.
A storage disk is the same concept as a physical hard disk, it's available in two types:
-
HDD (Hard Disk Drive)
-
SSD (Solid State Drive)
By reading this article, you will learn about how to create and add a storage disk in virtual machine.
Prerequisites:
-
Azure cloud account
-
Edge (or) other browsers
-
Stable internet connection
-
Windows Virtual machine in Azure (Running state)
Creating a Storage Disk
Step 1
Login to Azure Portal
Step 2
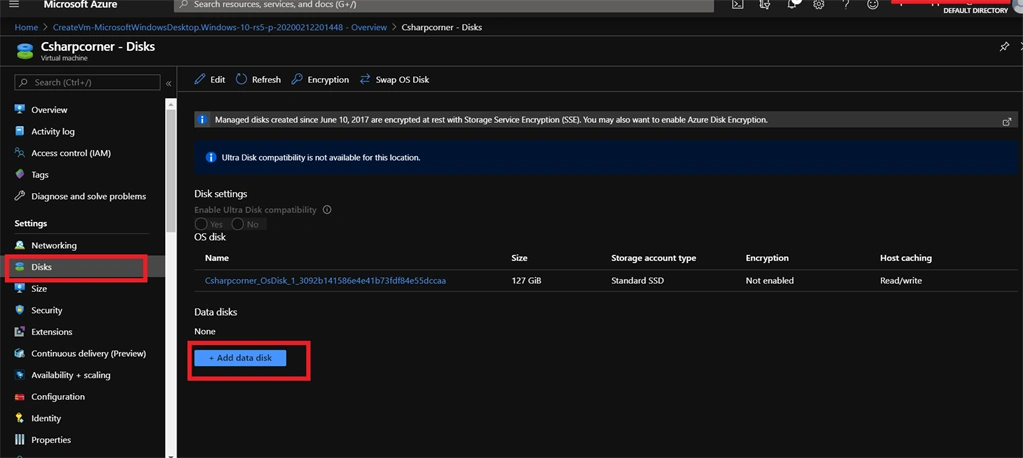
Go to the virtual machine dashboard, select “Disks” and then click the “Add” button.
Step 3
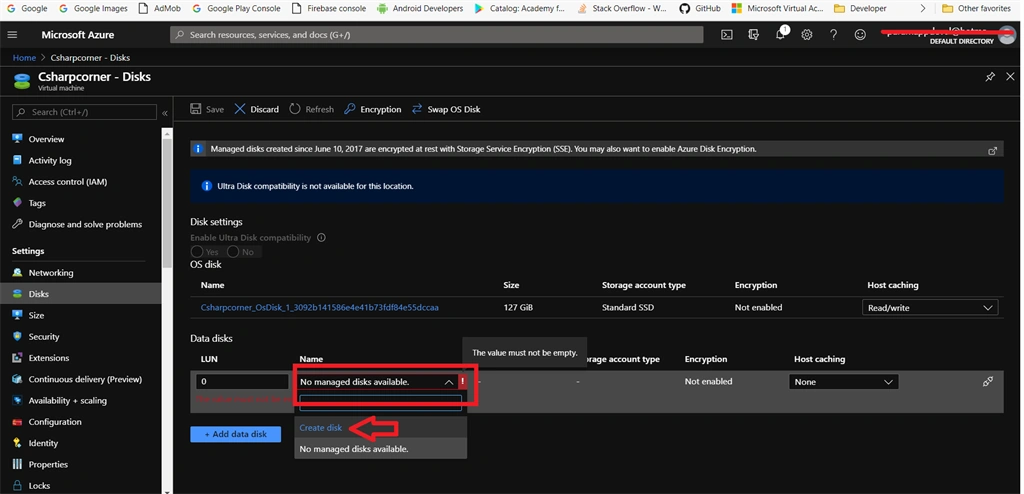
Click the “Name” dropdown list and then select the “Create Disk” option.
Step 4
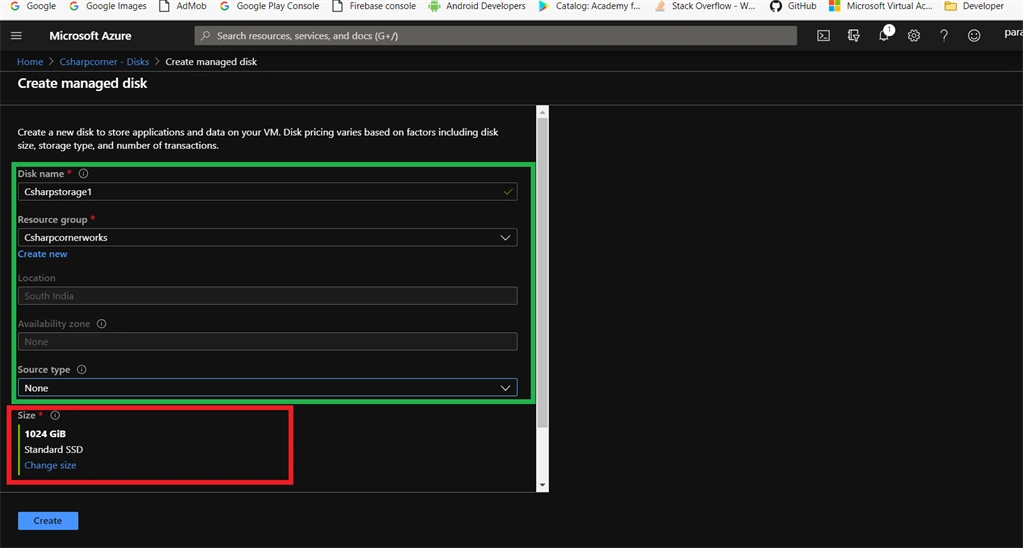
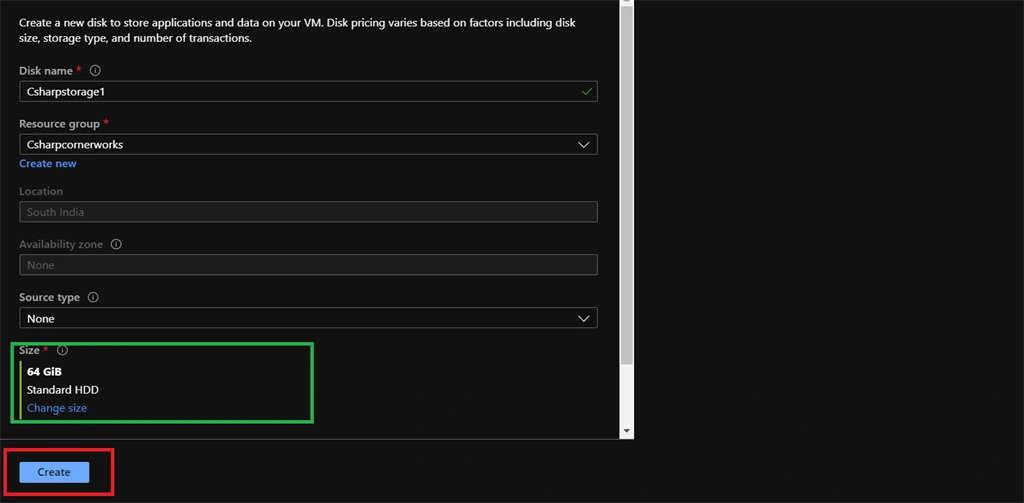
In “Create a Managed disk” page, fill the disk name, resource group name. Next, click the “Change Size” option to select the disk type and size.
Step 5
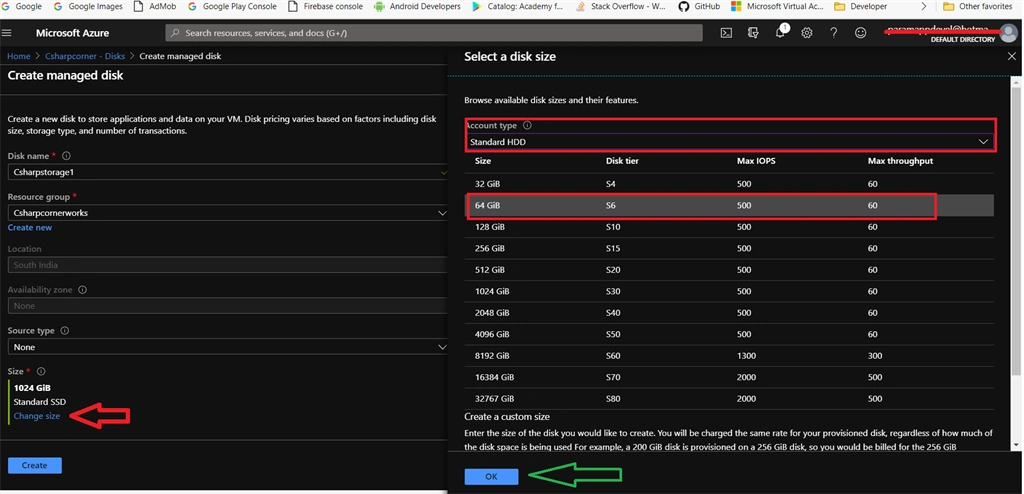
In “Select Disk Size pane”, first select the “Account type” as the standard HDD.
Azure can provide many disk size variants, now I am selecting 64 GB disk and finally, click the OK button.
Step 6
Our disk size is selected as our requirement, finally click the “Create” Button.
Step 7
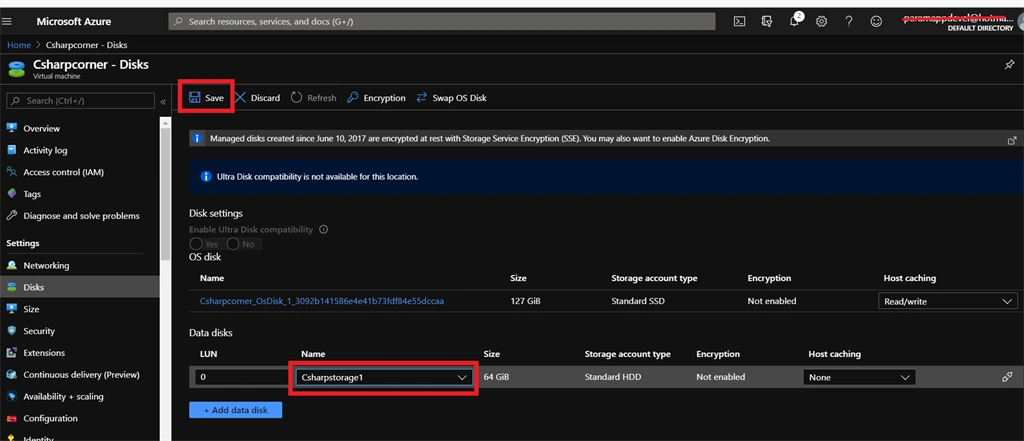
Now, we select the created disk name and click the “Save button”.
Adding Storage Disk in Virtual machine
Step 1
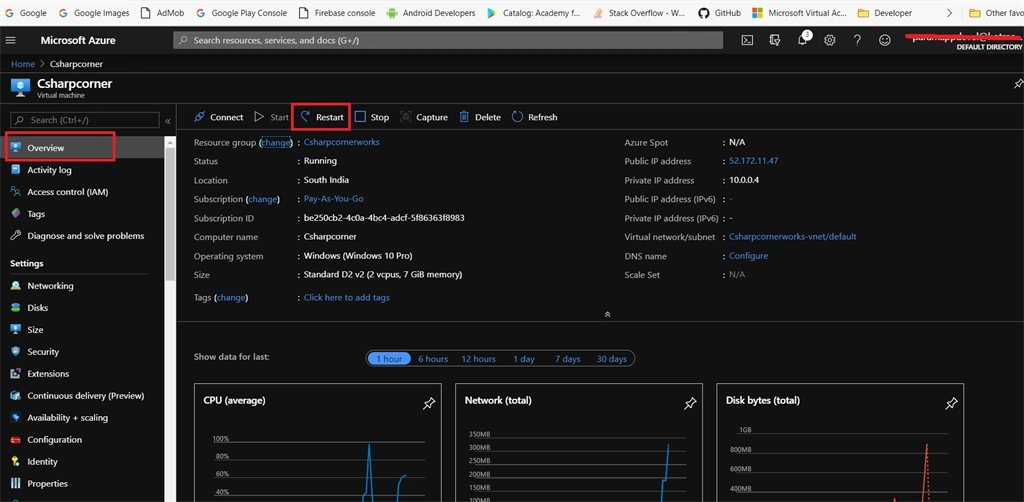
Click the “Overview” and then click the “Restart” button, our virtual machine is restarting.
Step 2
Afterward, connect your virtual machine by using the RDP software.
Step 3
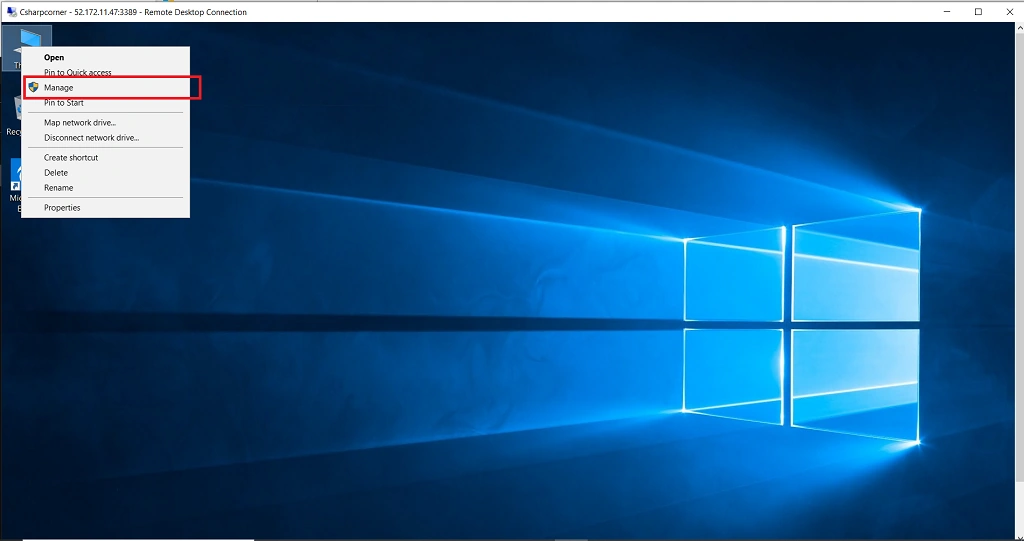
Right-click “This PC” and select “Manage” in the popup menu.
Step 4
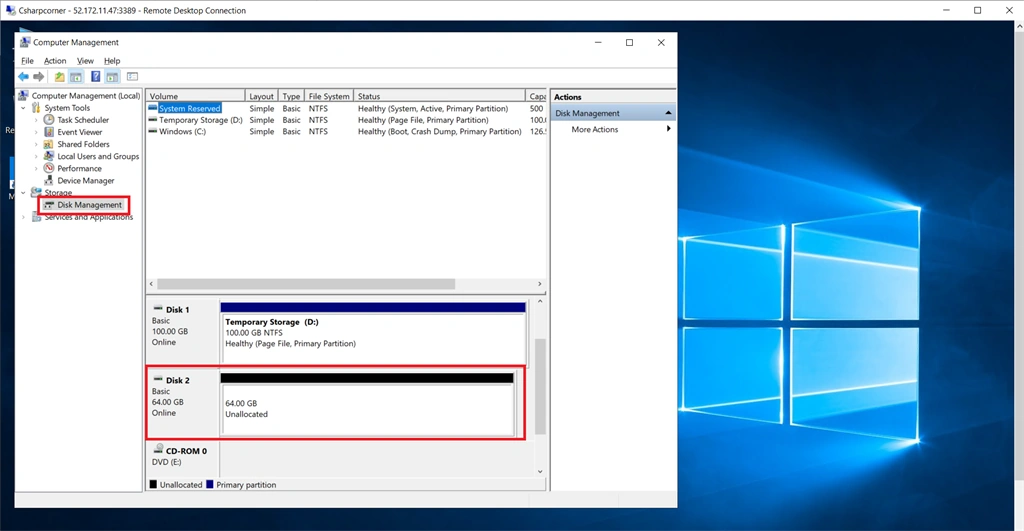
In the computer management window, select “Disk Management”. In the center panel, display the unallocated storage disk.
Step 5
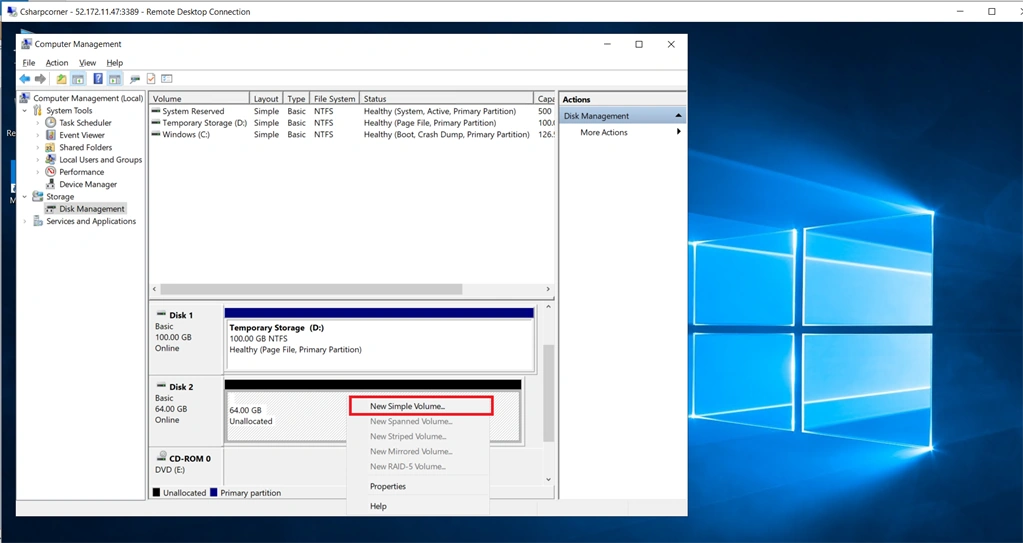
Right-click the Unallocated disk and then click the “New Simple Volume”. When configuration wizard opens click the Next button.
Step 6
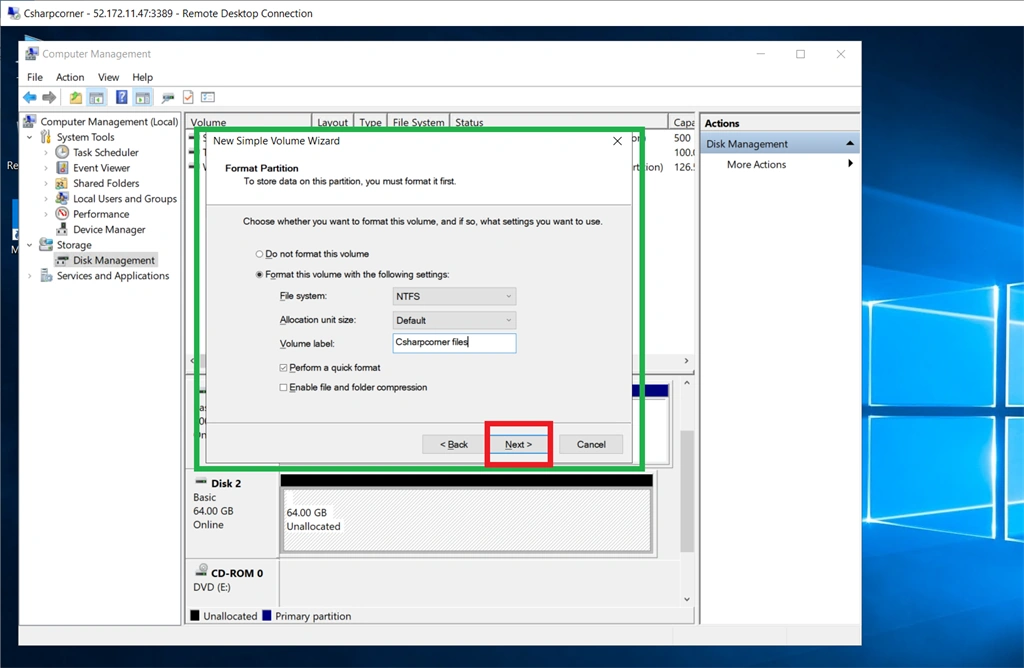
Give the volume a label name and then click the next button. Finally, the disk can start formatting for normal use.
Step 7
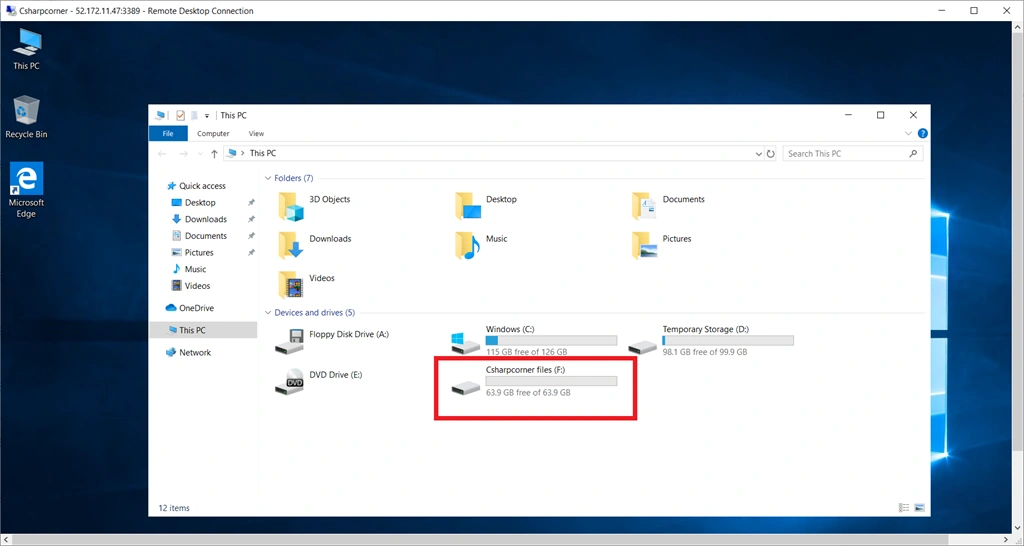
Next, open “This PC” to check the disk.
Summary
Our storage disk is successfully added in our virtual machine, and it's ready to store our virtual machine data.
Dipa MehtaPosted Feb 19, 2020, 5:48 PM
Good one Naveen.