

Create An Azure Kubernetes Service Using Azure Portal
Step 1
Step 2
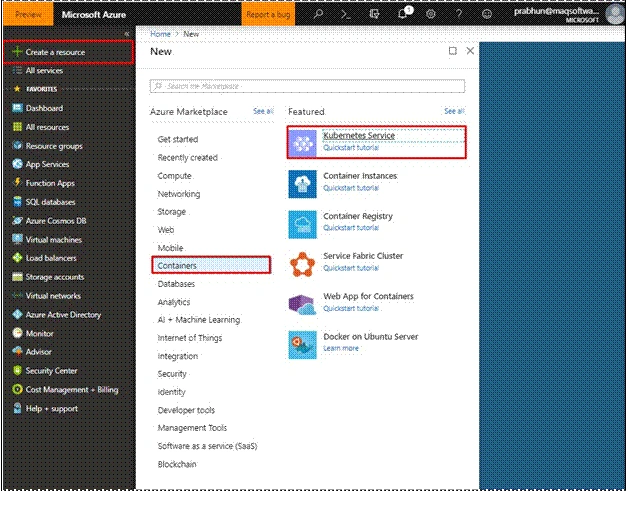
Provide a cluster name (), DNS name prefix (it is used to connect to the Kubernetes API when managing the containers after creating the cluster), the number of nodes, and their size based on your need (Node represents the number of agent servers, not the number of containers).
Note
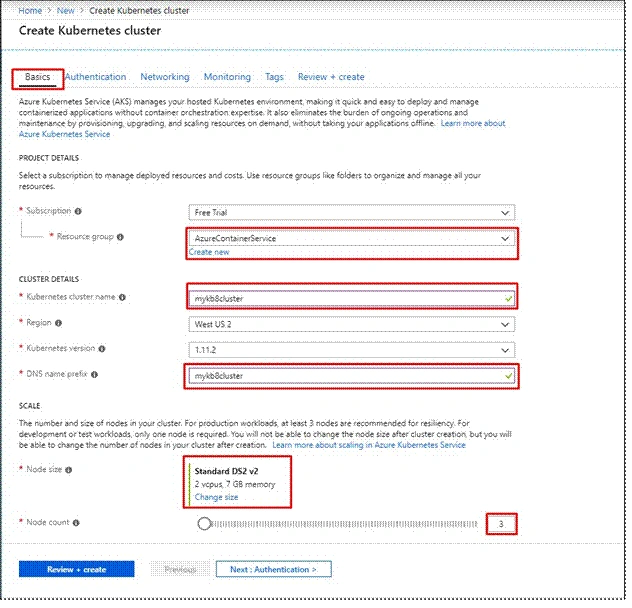
The size of the node is not changeable once created, whereas you can change the number of nodes as per the requirement. Cost mentioned is per node cost, not the cost of the Azure Kubernetes Service (AKS) Cluster.
Step 4
Step 5
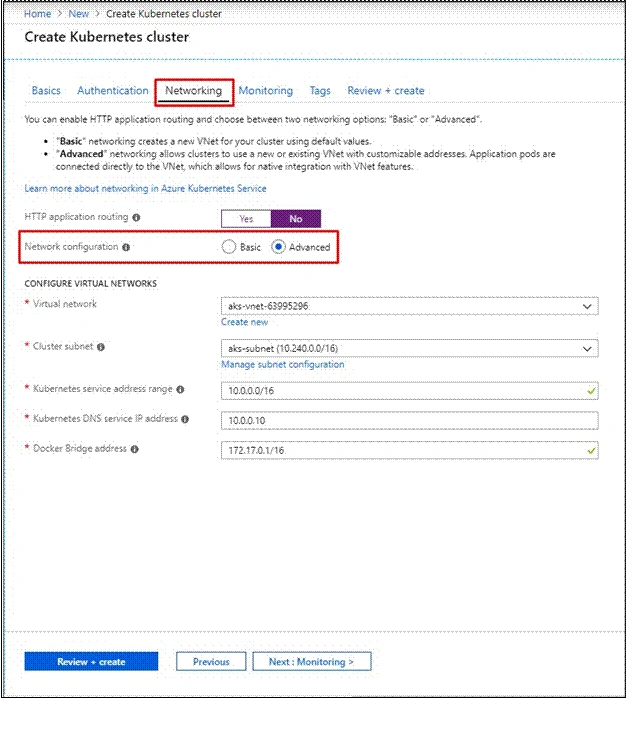
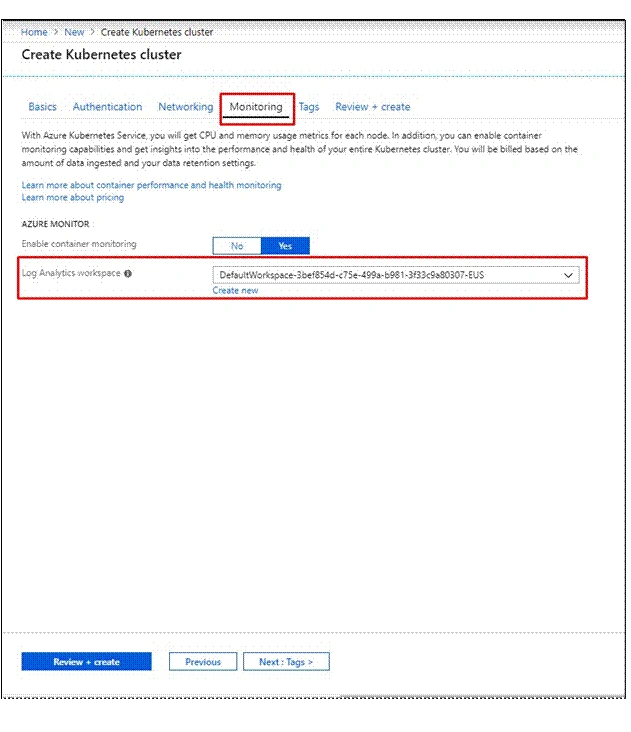
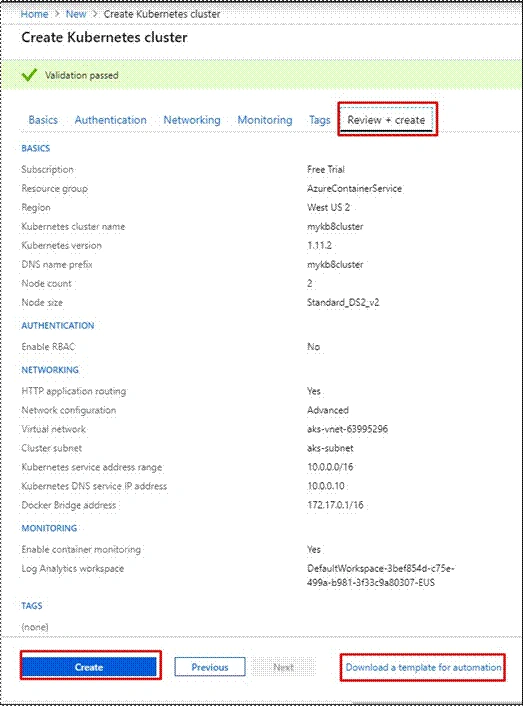
Note
You can download and keep the deployment if you are planning for automation or keeping the record of the deployment files.
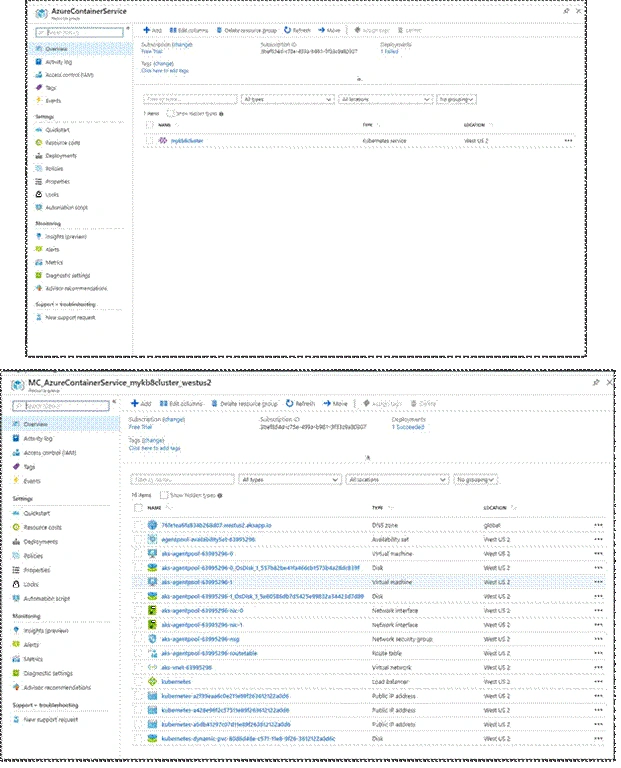
After the successful deployment, you should be able to see your cluster, as shown below. But all the resources required for the cluster orchestration are created in different resource group (by default).
How to connect to Kubernetes Cluster
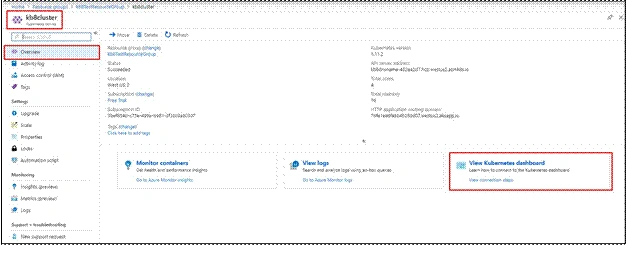
To manage the cluster and create applications, pods, etc., you need to connect using Azure CLI 2.0 which will launch the Kubernetes Web UI Management Interface. To connect to a cluster, click on the "View Kubernetes dashboard" option in your Kubernetes Cluster under the Overview section.
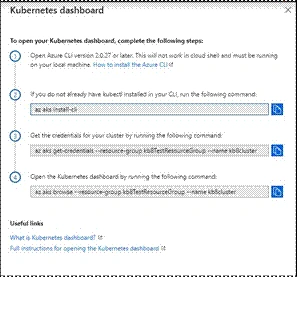
Step 1
Step 2
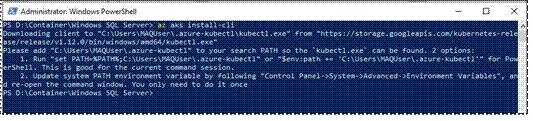

Note
The config file on the mentioned path is used as the authentication for Kubernetes Web UI management interface.
Step 4
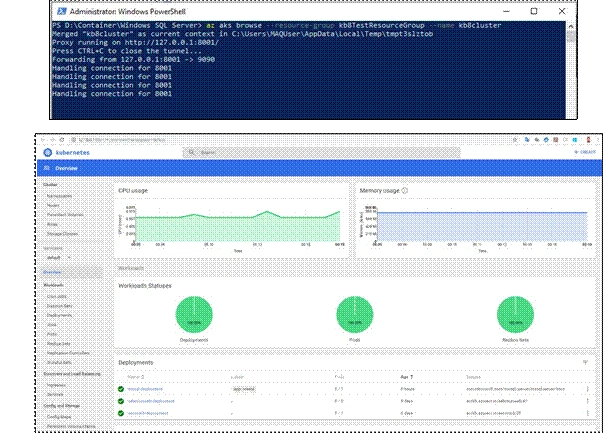
Deploy a SQL Server Container in Kubernetes with Azure Kubernetes Services (AKS) using Kubernetes Web UI Management Interface
You can configure a SQL Server instance on Kubernetes in Azure Kubernetes Service (AKS), with persistent storage for high availability (HA). The solution provides resiliency. If the SQL Server instance fails, Kubernetes automatically re-creates it in a new pod. Kubernetes also provides resiliency against node failure.
Step 1
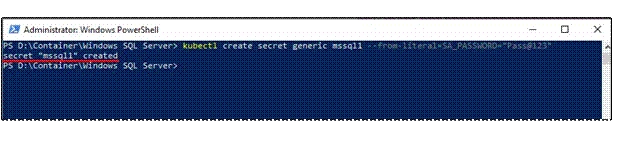
Kubernetes can manage sensitive configuration information, like passwords as secrets
Open Azure CLI or local PowerShell and run get credentials command:

The following command creates a password for the SA account:
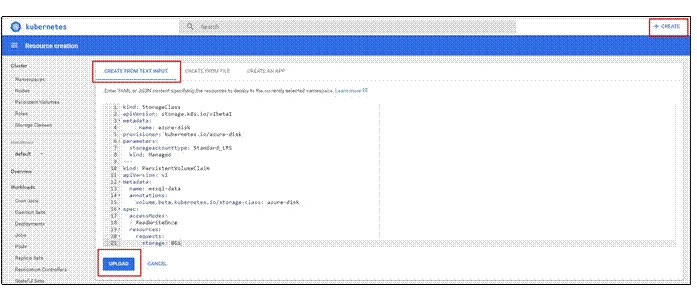
Create a manifest/ docker deployment script to define the storage class and the persistent volume claim, which specifies the storage provisioner, parameters, and reclaim policy.
The below-mentioned code represents an Azure Managed disk with 8GB storage of type standard HDD.
- kind: StorageClass
- apiVersion: storage.k8s.io/v1beta1 metadata: name: azure-disk
- provisioner: kubernetes.io/azure-disk parameters: storageaccounttype: Standard_LRS kind: Managed
- ---
- kind: PersistentVolumeClaim apiVersion: v1 metadata:
- name: mssql-data annotations:
- volume.beta.kubernetes.io/storage-class: azure-disk
- spec: accessModes: - ReadWriteOnce resources: requests:
- storage: 8Gi
To deploy the persistent storage on Azure Kubernetes Services (AKS), open your Kubernetes management portal.
Click on “Create” and paste the script, or you can save the above script as a yaml file and upload the script.

Step 3
Create a manifest/ docker deployment script which describe the container based on the SQL Server mssql-server-linux Docker image (make sure it fetches password from the secret created).
- apiVersion: apps/v1beta1 kind: Deployment metadata: name: mssql-deployment spec: replicas: 1 template: metadata: labels:
- app: mssql spec: terminationGracePeriodSeconds: 10 containers: - name: mssql
- image: mcr.microsoft.com/mssql/server/mssql-server-linux ports:
- - containerPort: 1433 env:
- - name: ACCEPT_EULA value: "Y" - name: SA_PASSWORD valueFrom: secretKeyRef: name: mssql key: SA_PASSWORD volumeMounts: - name: mssqldb
- mountPath: /var/opt/mssql volumes: - name: mssqldb persistentVolumeClaim: claimName: mssql-data
- ---
- apiVersion: v1 kind: Service metadata:
- name: mssql-deployment spec: selector: app: mssql ports:
- - protocol: TCP port: 1433 targetPort: 1433 type: LoadBalancer
To deploy the SQL Services on a container on Azure Kubernetes Services (AKS) go your Kubernetes management portal, click on “Create” and paste the script, or you can save the above script as a yaml file and upload the script.
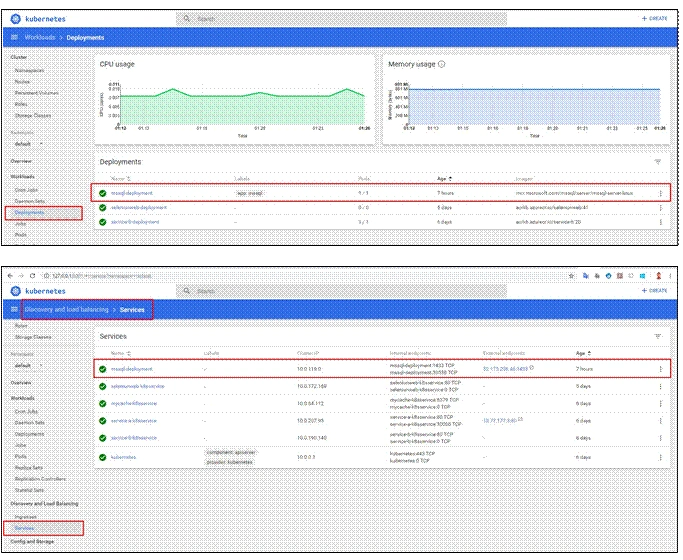
To check the deployment status, go to “Deployments” blade and check for the deployment name, if deployment is successful you should see a green check as shown below. Go to Services blade to check your SQL Service and collect the Public IP and connect to SQL Server using SSMS.
Join the conversation! Your thoughts help the community grow.