

In this article, we will learn how we can create an image slider using Angular's ngx-slick-carousel library. Image slider, also called image carousels, is very useful to display multiple images to create a slide show.
Prerequisites
- Knowledge of Angular 2 or higher
- Visual Studio Code
- Node and NPM installed
Technologies we will use to build this demo
- Angular 7
- Bootstrap
- HTML and CSS
- ngx-slick-carousel library
Step 1
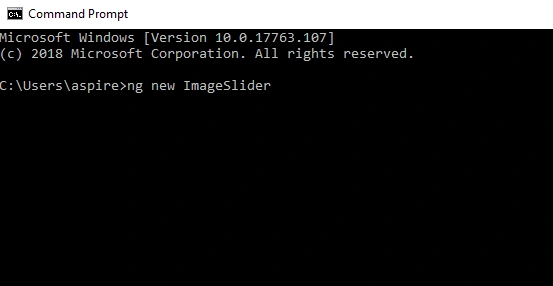
Create an Angular project by using the following command.
ng new ImageSlider
Step 2
Open this project in Visual Studio Code.
Now, open the integrated terminal by pressing Ctrl + ~ and install ngx-slick-carousel library and bootstrap by using following commands
- npm install slick-carousel –save
- npm install ngx-slick-carousel --save
- npm install bootstrap --save

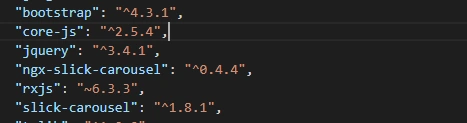
Now open the package.json file and check these packages installed in this project.
Step 3
Open the angular.json file and include the required slick CSS file in 'styles'.
- "styles": [
- "src/styles.css",
- "node_modules/slick-carousel/slick/slick.scss",
- "node_modules/slick-carousel/slick/slick-theme.scss"
- ],
Include the required JS files in 'scripts'.
- "scripts": [
- "node_modules/jquery/dist/jquery.min.js",
- "node_modules/slick-carousel/slick/slick.min.js"
- ],
Step 4
Configure ngx-slick module in app.module.ts file. Let's import the required module in this file.
- import { BrowserModule } from '@angular/platform-browser';
- import { NgModule } from '@angular/core';
- import { AppRoutingModule } from './app-routing.module';
- import { AppComponent } from './app.component';
- import { SlickCarouselModule } from 'ngx-slick-carousel';
- @NgModule({
- declarations: [
- AppComponent
- ],
- imports: [
- BrowserModule,
- AppRoutingModule,
- SlickCarouselModule
- ],
- providers: [],
- bootstrap: [AppComponent]
- })
- export class AppModule { }
Step 5
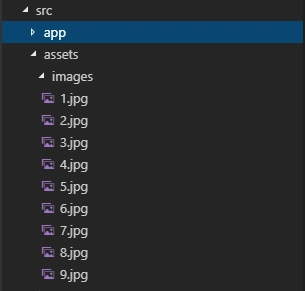
Expand the src folder and right-click on the Assets folder. Add a new folder under it and rename that to 'images' and add some demo images to this folder.
Step 6
Now, open app.component.css and add the following lines,
- .slick-slider {
- width: 90%;
- margin: auto;
- }
Step 7
Now, open app.component.ts and add the following lines.
- import { Component } from '@angular/core';
- @Component({
- selector: 'app-root',
- templateUrl: './app.component.html',
- styleUrls: ['./app.component.css']
- })
- export class AppComponent {
- images = [
- { img: "../assets/images/1.jpg" },
- { img: "../assets/images/2.jpg" },
- { img: "../assets/images/3.jpg" },
- { img: "../assets/images/4.jpg" },
- { img: "../assets/images/5.jpg" },
- { img: "../assets/images/6.jpg" },
- { img: "../assets/images/7.jpg" },
- { img: "../assets/images/8.jpg" },
- { img: "../assets/images/9.jpg" },
- ];
- slideConfig = {
- "slidesToShow": 3,
- "slidesToScroll": 3,
- "dots": true,
- "infinite": true
- };
- }
Step 8
Now, open app.component.html and add the following HTML.
- <div>
- <div class="row">
- <div class="col-sm-12 btn btn-primary">
- Image Slider
- </div>
- </div>
- </div>
- <hr style="background-color:black" />
- <div class="row">
- <ngx-slick-carousel class="carousel" #slickModal="slick-carousel" [config]="slideConfig">
- <div ngxSlickItem *ngFor="let image of images" class="slide">
- <img src="{{ image.img }}" width="100%">
- </div>
- </ngx-slick-carousel>
- </div>
Now run the project and check the result.

Summary
In this article, we learned how we can create an image slider using Angular.
Nrusinha MahapatraPosted Jul 10, 2020, 7:52 AM
I don't see any image on my screen. What did I do wrong?
Deepak AnandPosted Jan 6, 2020, 5:32 AM
No doubt, its's perfect but is there any way to make it moving continuous ( i.e, no need to click on left or right arrow )
Lahari AddasarigariPosted Jun 26, 2019, 4:25 AM
Error: ENOENT: no such file or directory, open 'C:\Users\ojas\Desktop\lahari\myapp\node_modules\jquery\dist\jquery.min.js' I STOP HERE ,PLZ SHARE WHAT MISTAKE I DID
Humayun Kabir MamunPosted Jun 20, 2019, 7:30 AM
Helpful...