

Introduction
REST
Representational State Transfer is an architectural style where we use a standard to implement it.
The browser is an HTTP client. While it points to any URI, it sends the HTTP request to the server. The server will process it and send back the HTTP Response which contains the representation of the page, probably it can be HTML, JSON or XML and many more media types, based on the response the browser will change its state. The client changes its state depending on the representation of the resource which is accessed is called as representational state transfer or REST.
ASP.NET Core
ASP.NET Core is an open source, cross-platform framework for building modern internet connected applications, click here to learn more about ASP.NET Core. ASP.NET Core MVC is a middleware which provides a framework for building the APIs and web application using MVC pattern
Tooling
- Visual Studio 2017
- Postman
Download the latest Version of .NET CORE. Currently, I used ASP.NET Core 2.2 to develop the application.
Create an ASP.NET Core application
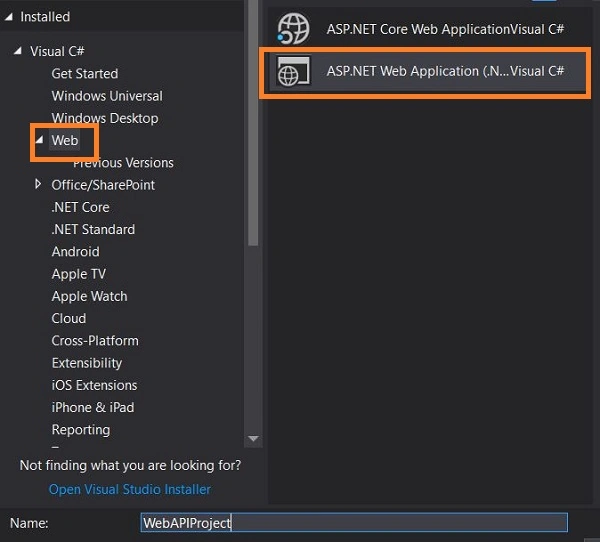
Open Visual Studio, File -> New ->Project, select ASP.NET Core web application template and click OK.
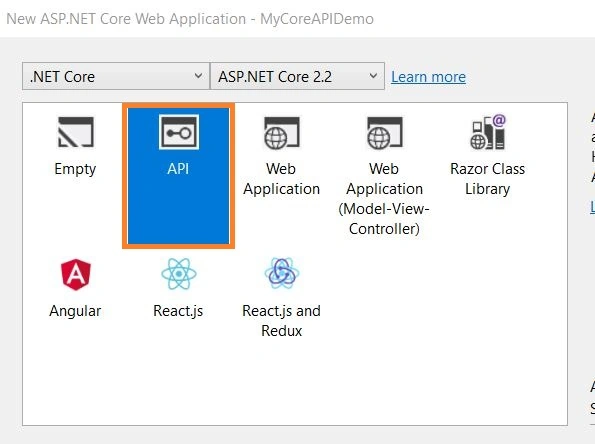
Choose an API template as shown in the below figure.
By clicking on OK, it will create a new ASP.NET Core project with some pre-defined configuration files and controller.
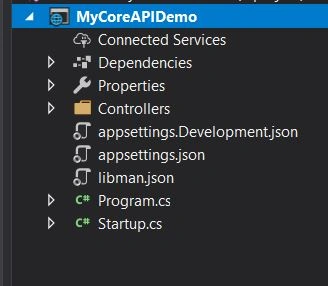
The program.cs class which contains the main method with a method called Createwebhostbuilder(), is responsible for running and configuring the application. The host for the application is set up with the startup type as startup class.
ConfigureServices() - it is used to add service to build dependency injection containers and configure those services,
Configure() - it is used to configure how the ASP.NET Core application will response to an individual HTTP request.
Configure the Entity Framework Core
Create a folder called Entities to organize the entity model classes. Let’s create an entity model class.
Author.cs
- [Table("Author",Schema ="dbo")]
- public class Author
- {
- [Key]
- public Guid AuthorId { get; set; }
- [Required]
- [MaxLength(50)]
- public string FirstName { get; set; }
- [Required]
- [MaxLength(50)]
- public string LastName { get; set; }
- [Required]
- [MaxLength(50)]
- public string Genre { get; set; }
- public ICollection<Book> Books { get; set; } = new List<Book>();
- }
Book.cs
- public class Book
- {
- [Key]
- public Guid BookId { get; set; }
- [Required]
- [MaxLength(150)]
- public string Title { get; set; }
- [MaxLength(200)]
- public string Description { get; set; }
- [ForeignKey("AuthorId")]
- public Author Author { get; set; }
- public Guid AuthorId { get; set; }
- }
Creating a context file
Let’s create a context file, add a new class file, and name it as LibraryContext.cs.
LibraryContext.cs
- public class LibraryContext:DbContext
- {
- public LibraryContext(DbContextOptions<LibraryContext> options):base(options)
- {
- Database.Migrate();
- }
- public DbSet<Author> Authors { get; set; }
- public DbSet<Book> Books { get; set; }
- }
Let’s define the database connection in the appsettings.json file.
- {
- "Logging": {
- "LogLevel": {
- "Default": "Warning"
- }
- },
- "ConnectionString": {
- "BookStoreDB": "server=server name;database=BookStore;User ID= server user id;password= your server password;"
- },
- "AllowedHosts": "*"
- }
Finally, let’s register our context in Startup.cs.
- public void ConfigureServices(IServiceCollection services)
- {
- services.AddMvc().SetCompatibilityVersion(CompatibilityVersion.Version_2_2);
- services.AddDbContext<LibraryContext>(op => op.UseSqlServer(Configuration["ConnectionString:BookStoreDB"]));
- }
Generate Database from code-first approach
Run the following command in the Package Manager console.
- Add-Migration MyCoreAPIDemo.Entities.LibraryContext
This will create a class for migration. Run the following command to update the database.
- Update-database
Let’s verify that database and tables from server explorer in Visual Studio.
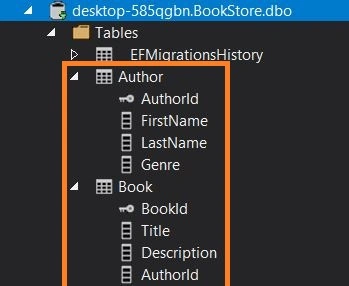
From the above image, you can notice the tables are created based on our model.
Seeding data
Let’s add some data to the Author table. For this, we need to override a method OnModelCreating in the LibraryContext class.
LibraryContext.cs
- protected override void OnModelCreating(ModelBuilder modelBuilder)
- {
- modelBuilder.Entity<Author>().HasData(new Author
- {
- AuthorId= Guid.NewGuid(),
- FirstName = "Bob",
- LastName = "Ross",
- Genre = "Drama"
- }, new Author
- {
- AuthorId=Guid.NewGuid(),
- FirstName = "David",
- LastName = "Miller",
- Genre = "Fantasy"
- });
- }
Let’s run the migration and update command once again.
- Add-Migration MyCoreAPIDemo.Entities.LibraryContextSeed
- Update-database
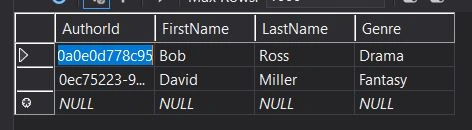
From the above image, you can notice we got the data in the table based on our update from code.
Creating a Repository
Let’s add a repository folder to implement the repository pattern to access the context method.
Create two more folders - Contract and Implementation - under the repository folder.
Create an interface ILibraryRepository.cs under Contract folder.
ILibraryRepository.cs
- public interface ILibraryRepository<T>
- {
- IEnumerable<T> GetAllAuthor();
- }
LibraryRepository.cs
- public class LibraryRepository: ILibraryRepository<Author>
- {
- readonly LibraryContext _libraryContext;
- public LibraryRepository(LibraryContext context)
- {
- _libraryContext = context;
- }
- public IEnumerable<Author> GetAllAuthor()
- {
- return _libraryContext.Authors.ToList();
- }
- }
Let’s configure the repository using dependency injection. Open Startup.cs file, add the below code in ConfigurationServices method.
- services.AddScoped<ILibraryRepository<Author>, LibraryRepository>();
Create API Controller
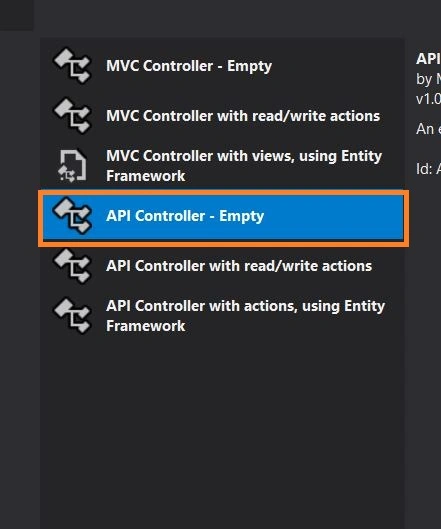
Right-click on controller and go to Add->Controller. Choose an empty API template and name the controller. I named the controller as LibrariesController.
LibrariesController.cs
- [Route("api/Libraries")]
- [ApiController]
- public class LibrariesController : ControllerBase
- {
- private readonly ILibraryRepository<Author> _libraryRepository;
- public LibrariesController(ILibraryRepository<Author> libraryRepository)
- {
- _libraryRepository = libraryRepository;
- }
- // GET: api/Libraries/GetAllAuthor
- [HttpGet]
- [Route("GetAllAuthor")]
- public IActionResult GetAllAuthor()
- {
- IEnumerable<Author> authors = _libraryRepository.GetAllAuthor();
- return Ok(authors);
- }
- }
Yes, we have created a WEB API with an endpoint api/Libraries/GetAllAuthor to get an author list from the database.
Let’s test the API using Postman tool.
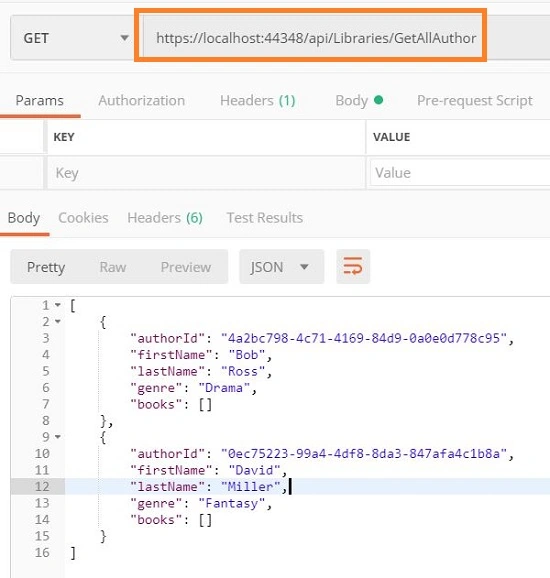
Yes, we got an author list as a response.
Click here to get the source code.
Conclusion
We have seen how to create a REST API using the ASP.NET Core with Entity Framework core, will see how to create a CRUD APIs using ASP.NET Core in my future article.
Khaja MoizuddinPosted Aug 3, 2020, 2:16 PM
Good article for getting started for beginners, one thing noticed here EFCore adding of references missed in the article.
Sagar ChowdhuryPosted Jul 17, 2020, 6:10 AM
One issue was with HttpDelete. May be you have missed to add "SaveChanges" after remove call in your LibraryRespository class. And for a standard type we can change the return type of that method to string to show some generic message . I have made changes like this way : public string DeleteAuthor(Guid authorId) { try { if (_libraryContext != null) { var author = _libraryContext.Authors.FirstOrDefault(x => x.AuthorId== authorId); if(author!=null) { _libraryContext.Remove(author); _libraryContext.SaveChanges(); return "Record has deleted successfully"; } else { return "Couldn't remove data properly"; } } else { return "Record hasn't deleted properly"; } } catch(Exception ex) { //log exception return ex.Message; } }
Sagar ChowdhuryPosted Jul 14, 2020, 3:41 PM
Nice article . Once I downloaded your code from github getting issue while opening that solution.
George PPosted Mar 12, 2020, 2:41 PM
You could get the same thing with no code: InstantWebAPI.com
John SomervillePosted Sep 5, 2019, 7:59 AM
Thank you so much for this excellent tutorial!!!
Thomas AthanasiouPosted Aug 10, 2019, 11:55 AM
I cannot connect to sql server. When i type Add-Migration command i get a network-related error.
Dheeraj KumarPosted Jul 2, 2019, 7:37 AM
But url that is being used here not according to REST
Dylan HughesPosted May 31, 2019, 11:59 PM
Nice one, best tutorial I have seen out there so far. Relevant, clear and simple.