

Xamarin Introduction
Xamarin is the best cross platform tool to develop mobile applications. It provides cross platform app development in C#, so we don’t need to write java or Objective C. We can just use C# and leverage the same for all the platforms. Xamarin also helps us by providing the designers with the different platforms like Android,IOS,etc.
Working with Xamarin application development, we have two gateways- Xamarin Studio and Visual Studio. Xamarin Studio supports for both Windows or Mac. Visual Studio supports only in Windows, provided you can build and debug on Mac.
Prerequisites
- Visual Studio 2017 RC.
The following steps need to be followed in order to create ToolBar in Xamarin.Forms in VS 2017.
Step 1
Go to Visual Studio
On File menu>>New>> Project
Click on C#>>Select Cross Platform>> Then select Cross Platform App(Xamarin.Forms.Portable)
Enter the Application Name, Click ok.
Now you can see the home page of the project.
Step 2
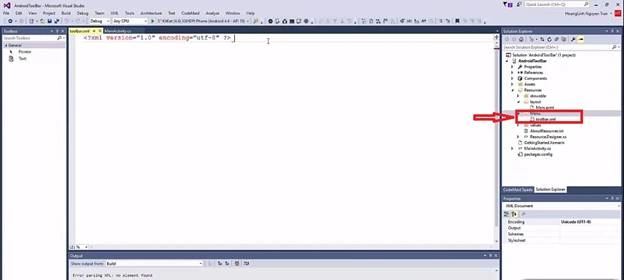
Now create folder with a name “Menu” under Resources folder in Solution Explorer
Step 3
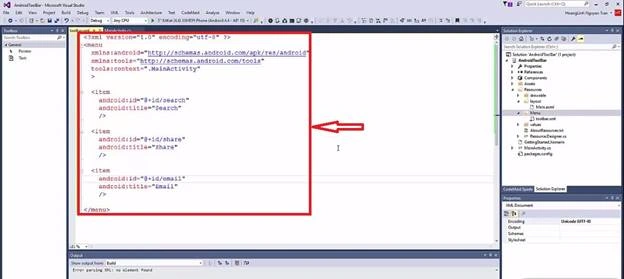
Then create a XML file with a name toolbar.xml. This file contains the options which we are going to give in the toolbar option menu
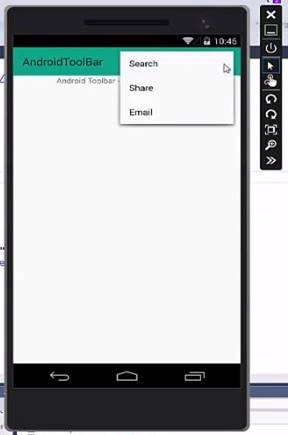
Here I going to give three options in option menu, Search,Share andEmail. Like below,
- <item android:id=”@+id/search” Android:title=”search” />
- <item android:id=”@+id/share” Android:title=”share” />
- <item android:id=”@+id/email” Android:title=”Email” />
If we want to add more titles in option menu we can add them here.
Step 4
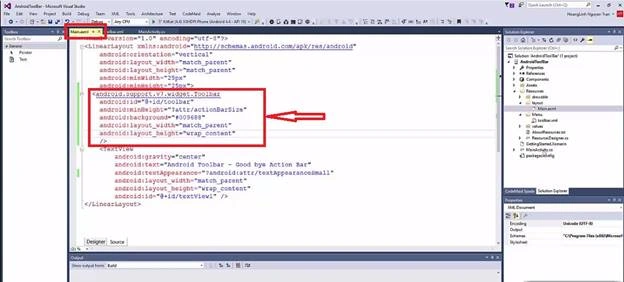
In this step we are going add this toolbar.xml with Main.axml (MainActivity) using the toolbar i.d
- <android.support.v7.widget.Toolbar
- android:id=”@+id/toolbar”
- android:minHeight=”?attr/actionBarSize”
- android:background=”#009688”
- android:layout_width=”match_parent”
- android:layout_height=”wrap_content” />
Step 5
In this step we will add this toolbar activity in MainActivity.cs
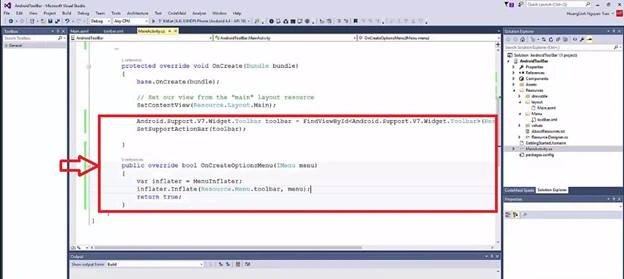
That’s it. Now we added Toolbar successfully in HomePage. In the next step I am going to give the actions to the options which we were given in the toolbar.
Step 6
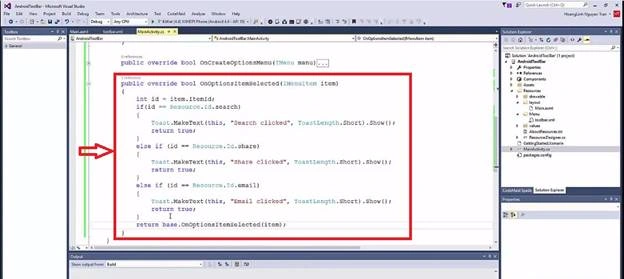
In this step we are going to give the action for the options when we choose it or touch it, like below,
We have written this action under OnOptionsItemSelected(IMenuItem item) method. In this method we can get the I.D of the selected item in menu and perform some action.
- OnOptionsItemSelected(IMenuItem item) {
- Int id = item.ItemId; // getting i.d of the selected item
- If(id == Resource.Id.search) {
- Toast.MakeText(this, ”Search clicked”, ToastLength.Short).Show();
- return true;
- }
- If(id == Resource.Id.share) {
- Toast.MakeText(this, ”Share clicked”, ToastLength.Short).Show();
- return true;
- }
- If(id == Resource.Id.email) {
- Toast.MakeText(this, ”Email clicked”, ToastLength.Short).Show();
- return true;
- }
- Return base.OnOptionsItemSelected(item);
- }
Step 7
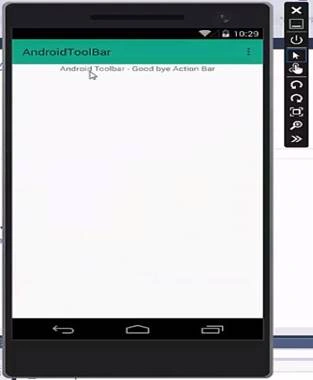
Now run the app.
Ling LuPosted Aug 29, 2023, 3:57 PM
Thanks for your help
Ling LuPosted Aug 29, 2023, 3:57 PM
Can you make Iphone menu like android
Ling LuPosted Aug 29, 2023, 3:57 PM
You did great Job in android.
Ling LuPosted Aug 29, 2023, 3:56 PM
You did great job in menu for android.
Gray HattusPosted Feb 28, 2019, 7:22 PM
What is it about Xamarin.Forms that you don't understand? You other post tagged this too and NEVER delivered.
Arvind ChourasiyaPosted Dec 15, 2017, 10:22 AM
Nice sharing. You have given heading as Xamarin forms but your projet look like Xamarin. Android. As i am able to single project in your solution.
Gayathri AnbazhaganPosted Aug 26, 2017, 12:00 PM
Nice one.....keep sharing...
Alain NataliniPosted Aug 25, 2017, 2:09 AM
Good article. Thanks.