

There are 2 ways for creating a workflow:
- Using SharePoint Designer
- Using Visual Studio
In this article we can experiment with creating a workflow using SharePoint Designer 2010.
Types of Workflow in SharePoint Designer
We can create 3 types of workflows using the SharePoint Designer. They are the following:
- List Workflow
- Reusable Workflow
- Site Workflow
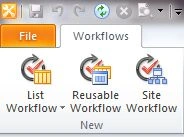
List Workflow can be associated with a list. A reusable workflow can be associated with more general ways like a Content Type. Site Workflow is associated with site items.
Builtin Workflow
Inside Designer we can see the Globally Reusable Workflows which can be globally used inside the site collection. We can copy and modify them instead of modifying directly.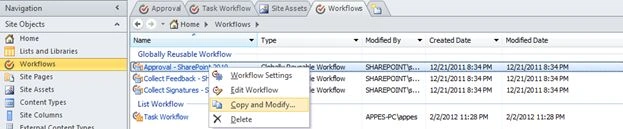
Creating a Workflow
Now we can experiment with creating a workflow using the SharePoint Designer. The following are the steps involved.
Step 1: Create Team Site
Open the SharePoint Designer from the Start menu. Click on the Team Site button and enter the name of the new web site (mynewsite) as shown below: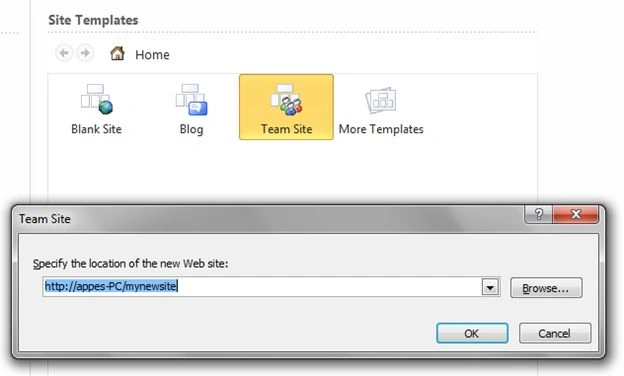
This step will create a new site with a Tasks list.
Step 2: Create Workflow
Select the workflows item from the left side Navigation pane.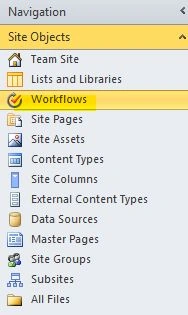
Click on the List Workflow button from the ribbon and click the Tasks item.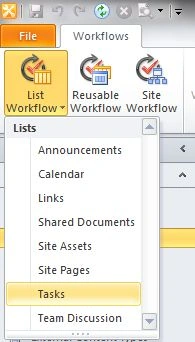
In the dialog enter the name of the new workflow as shown below: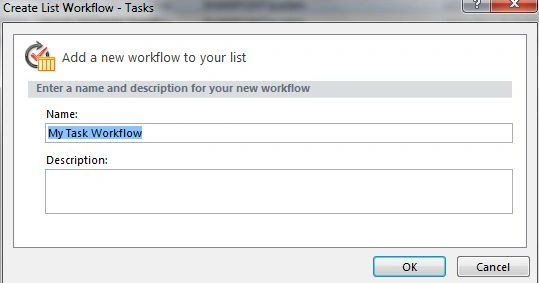
Step 3: Create Condition and Action
Now we need to specify the Condition and Action of the item. Each condition will have one or more action items associated with it.
The condition will be evaluated and the corresponding actions will be executed. The condition could for example be checking a field property of the list or library, checking the user name etc.
The action is the actual performing item. The action could for example be updating a field of the current item, moving the list item to another list, emailing a user, adding a comment, checking out a document, invoking another workflow etc.
You can create a condition and action using the ribbon items.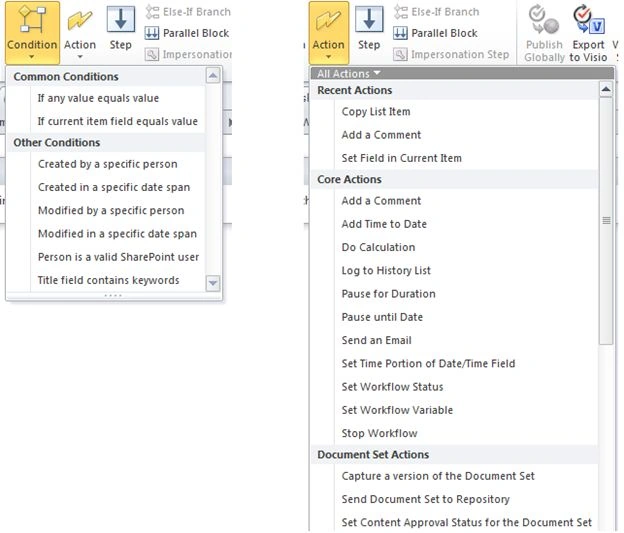
For creating the condition, use the Insert > Condition > If current item field equals value. Your workflow will look like the following. The links field and value must be specified.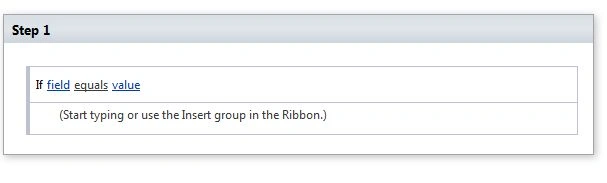
Click on the links above and set the links as shown below: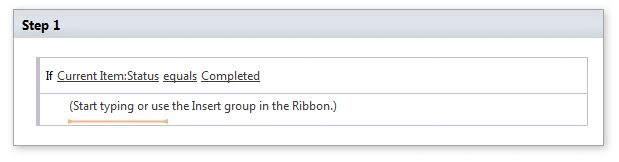
Now click the Insert > Actions > Set field in the current item. Modify the comment to "Good Job Dude!" as shown below: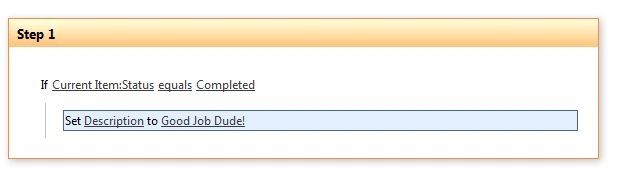
Click on the Save button and we are ready with the Condition and Action. The condition and action checks the item of the task and if the status is "Completed" then the Description column is set to a message.
Step 4: Change Workflow Settings
Go to the Navigation > Workflows list and use the Workflow Settings menu item.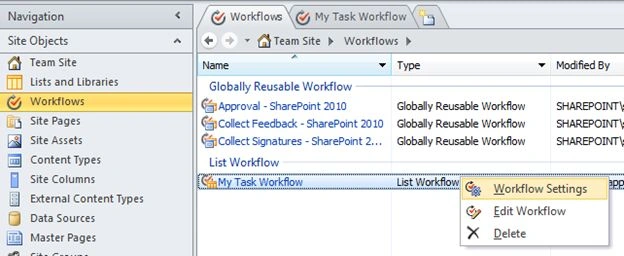
In the Start Options section on the right do the following:
- Uncheck the Allow this workflow to be manually started item
- Check the other two items for ensuring automatic execution of the workflow
This ensures that our workflow will be automatically executed on insert/update of the Task item in the Task List.
Click on the Save button and after then click on the Publish button.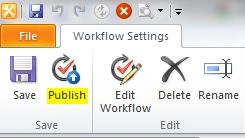
Now our workflow is ready and deployed to the SharePoint site named mynewsite.
Step 5: Test the Workflow
We can test the workflow by opening the above site in a browser.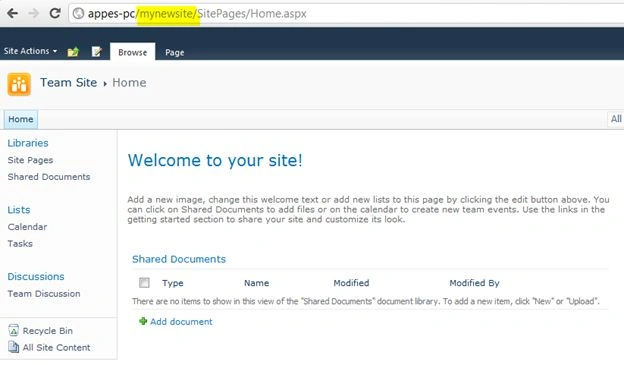
Click on the Tasks list and create a new item. Set the Status of the Task to completed. Leave the Description field as empty as shown below. Click on the Save button.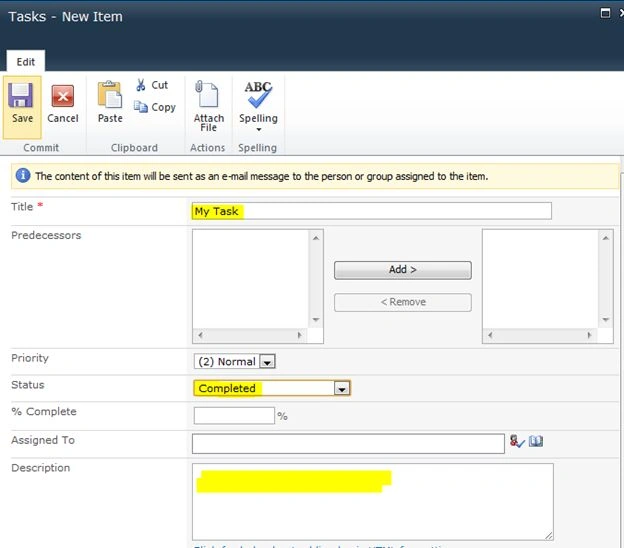
You will see that a new column for the workflow appeared for the above task item. Workflows will add their own columns to the context list. Refresh the page and wait until the workflow status is Completed.
Now try viewing the item again and you will see that the Description has changed to our message.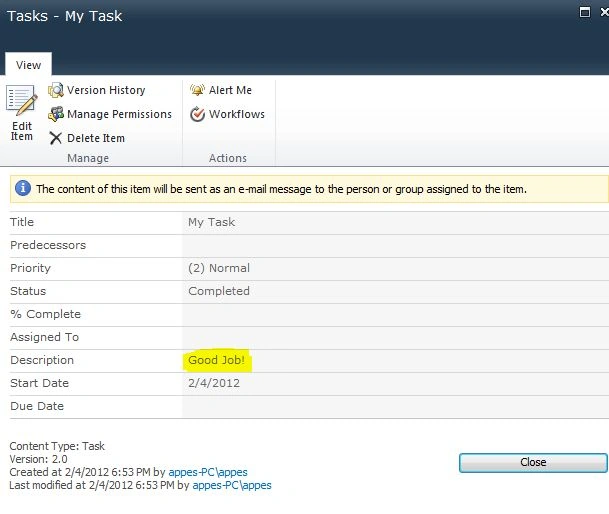
Congratulations! You are done with your first workflow.
References
http://blog.sharepointelearning.com/workflow-designer-in-sharepoint-designer-2010/
Summary
In this article we have experimented with creating a workflow with SharePoint Designer 2010. In the upcoming article we can create a workflow using Visual Studio.
Kiran Kumar TalikotiPosted Jan 30, 2014, 7:11 AM
Thanks You.Working Fine :)
stephanePosted Oct 22, 2012, 10:44 AM
Hello, thanks a lot for those explanations, that's help me a lot. DO you think it's possible to create a workflow in order to execute report instead of use processes options? thanks for your help
Mahesh BabuPosted Sep 21, 2012, 6:46 AM
Hi Jean, Thanks for your nice article... I have installed Sharepoint Foundation 2010 in my PC. When i create workflow , i can able to see only one template i.e three state. I cannot able to see remaining templates. Can you please clarify this?
Jean PaulPosted Aug 14, 2012, 12:16 PM
Thanks a lot Dinesh! I hope to do better.
Dinesh BeniwalPosted Aug 14, 2012, 12:13 PM
Nice Article Jean.