

Before reading this, please go through the following article for gathering some more knowledge on Azure.
The following are some of the requirements needed to set up an alert in Azure Web Services.
- Active Azure account
- Azure web application
- Azure Portal
- PowerShell
- Command-Line Interface
- Azure Monitor Rest API
Log into Azure Management Portal
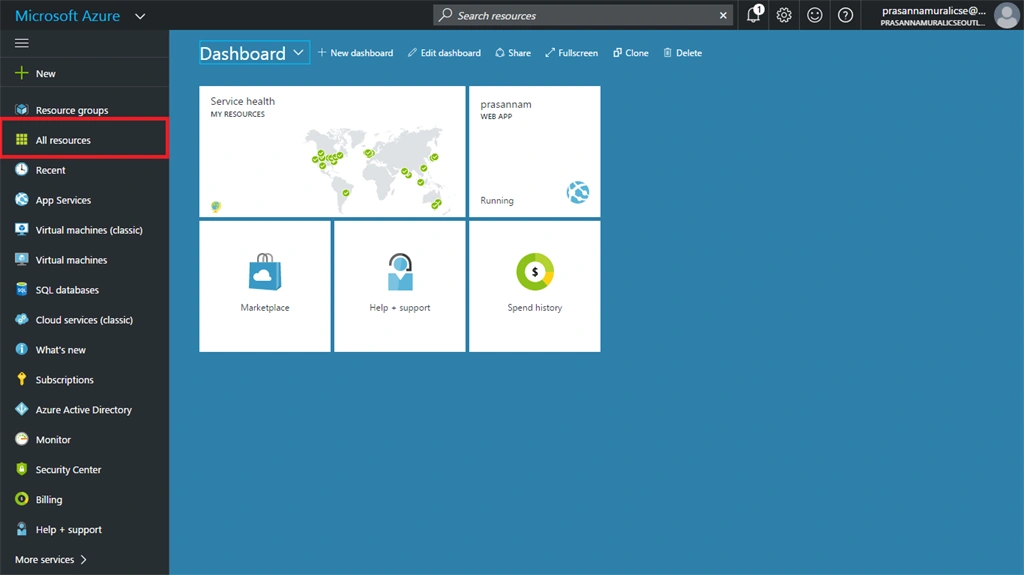
Once the dashboard appears, locate your already created web application. If not, create a new web application. It will take 5 minutes only, to set up a web application.
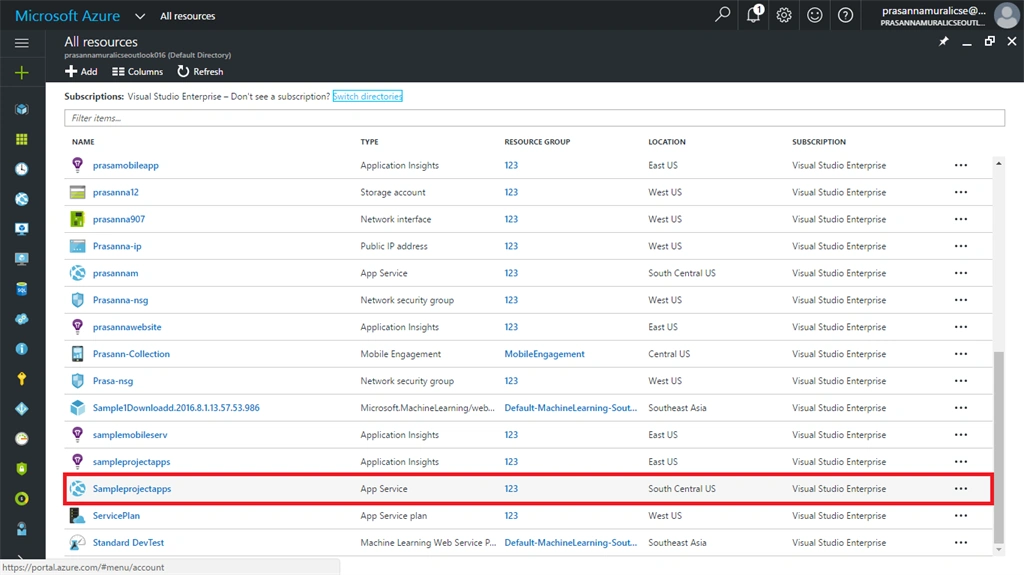
Once a resource is located, select it by clicking on it.
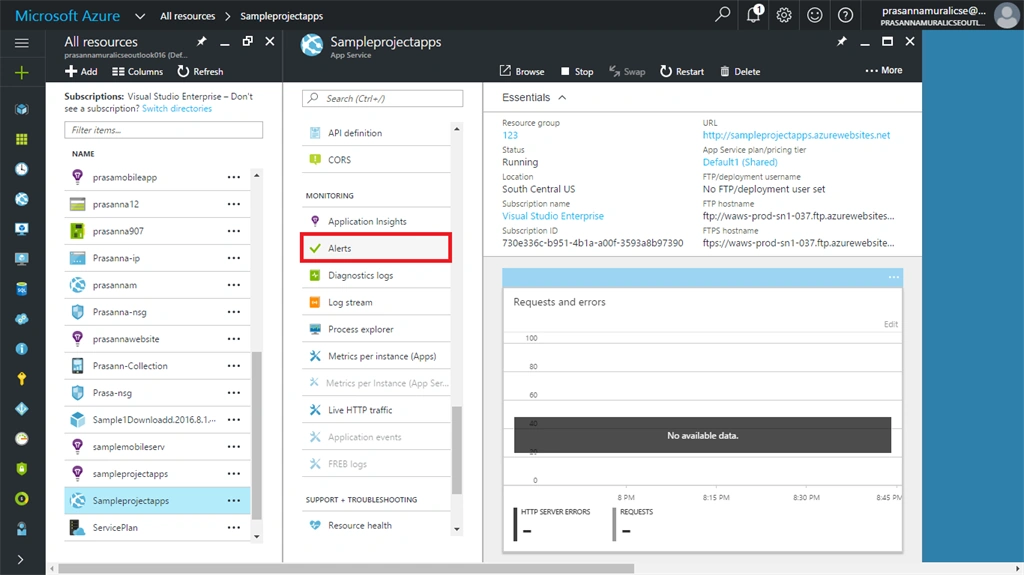
Select "Alerts" under Monitoring section. The "Alerts" or "Alert Rules" blade appears.
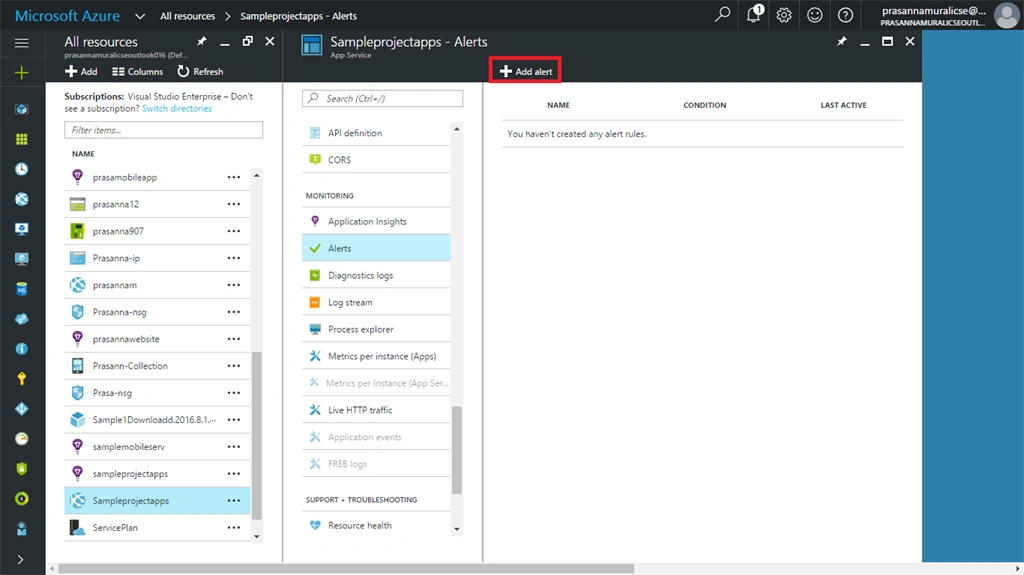
Click "Add alert" option, as shown below, to add a new alert rule in your existing web application.
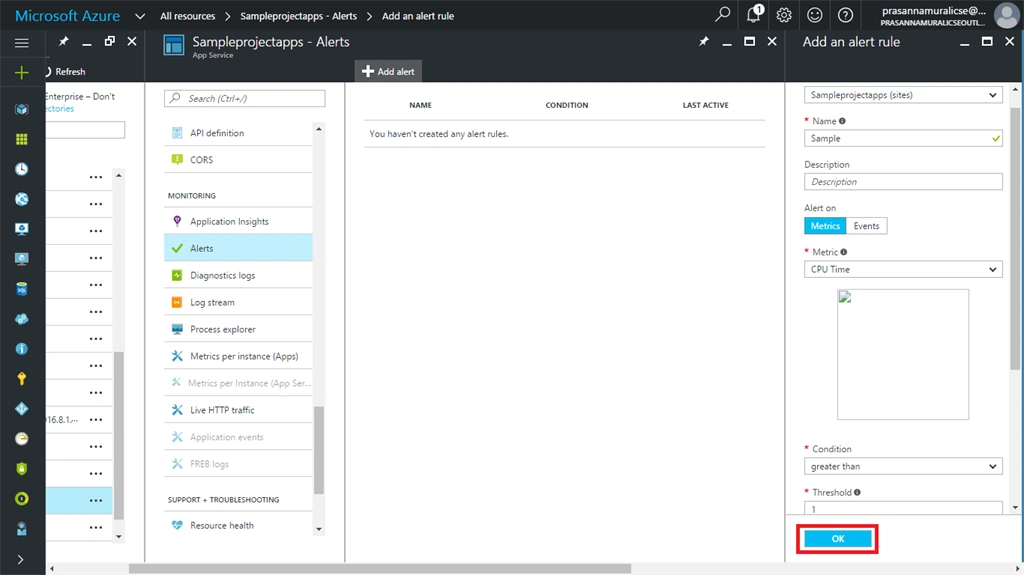
Fill all the mandatory fields that are required to add a rule.
- Resource - Select the application for which you need to add an alert.
- Name - Name of the alert to be created.
- Metrics - Select memory percentage, condition, and threshold value (should be a round off value) and tick Owner Email
- Administrator Email - It is an optional field. Enter your E-Mail ID.
- Webhook - Put your valid webhook URL. This is used when an alert is triggered.
- Action - Run this by using Azure Automation because it automatically deploys an alert when the application starts its execution.
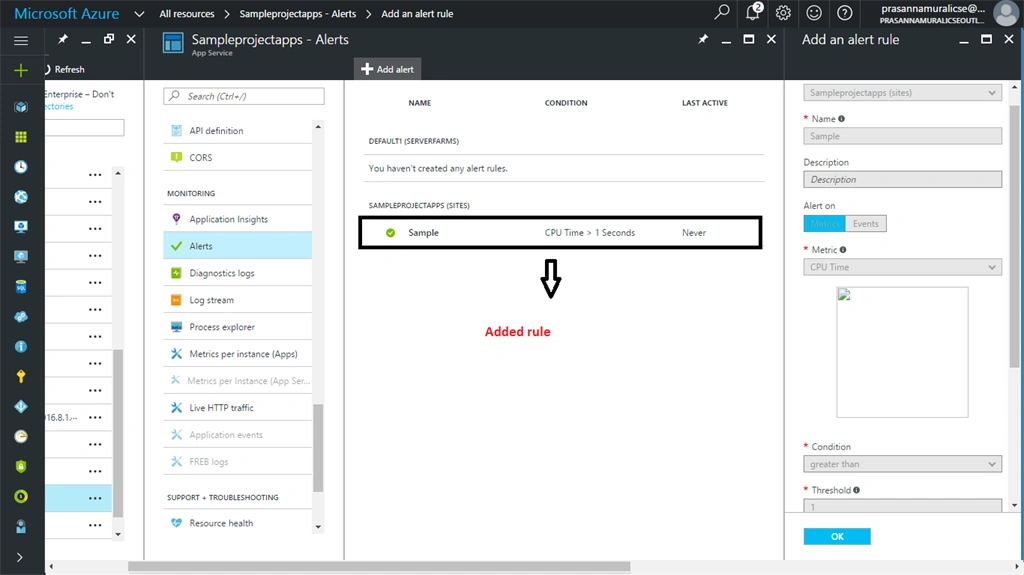
Summary
In this article, we learned about adding a new alert using Azure Portal. I hope you enjoyed reading this article.
Join the conversation! Your thoughts help the community grow.