

When you first step into Microsoft Fabric, one of the very first things you’ll interact with is a workspace. Think of it as your digital project room — a place where everything lives: your data, notebooks, pipelines, reports, and collaborations.
But creating and deleting a workspace isn’t just a technical step. It’s part of how you organize your thinking, your projects, and even your team’s productivity. In this article, I will walk you through it in a simple, real-world way.
Why Workspaces Matter (Before You Even Create One)
Imagine working on multiple projects: sales analytics, HR dashboards, and maybe a machine learning experiment. If everything is dumped into one place, chaos is guaranteed.
A workspace helps you:
Keep projects isolated and clean
Control who has access
Manage development vs production environments
Avoid stepping on your own toes (or someone else’s)
So before you create one, ask yourself:
What is this workspace for? A team? A project? A temporary experiment?
That clarity will save you headaches later.
Creating a Workspace in Fabric
Creating a workspace is straightforward, but doing it thoughtfully makes all the difference.
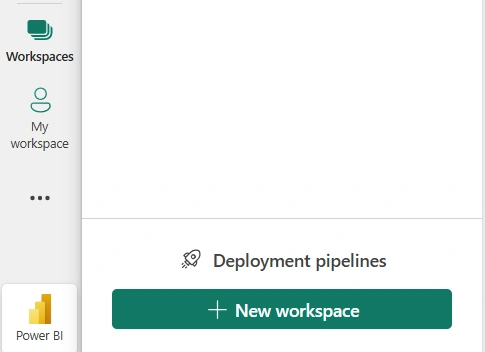
Step 1: Navigate to Workspaces
Open Microsoft Fabric and look at the left-hand menu. Click on Workspaces.
You’ll see a list of existing workspaces or maybe none if you’re just getting started.
Step 2: Click “New Workspace”
This is where it begins.
When you click New Workspace, you’ll be prompted to enter a few details.
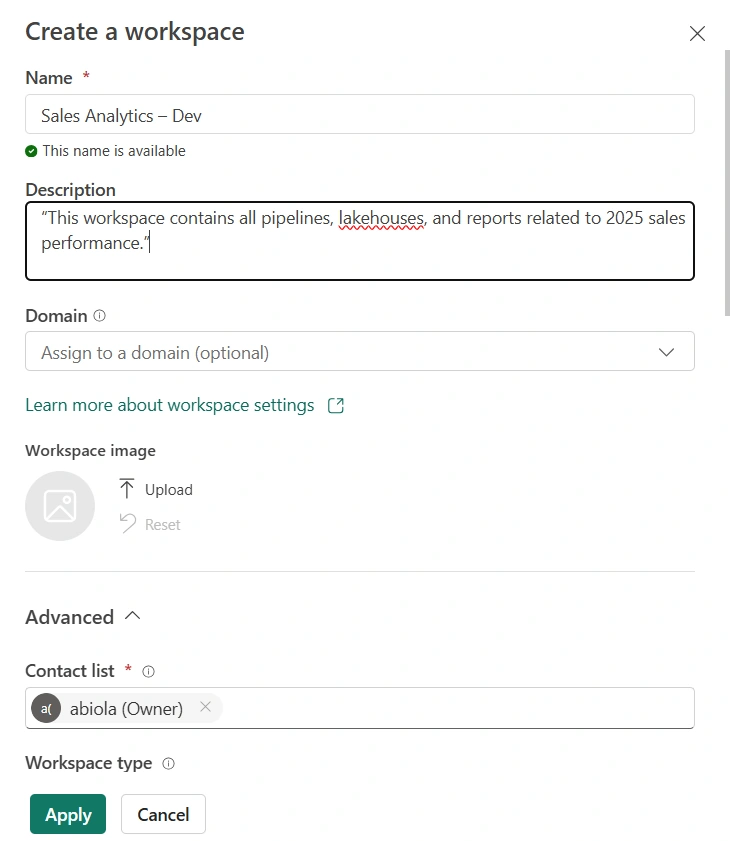
Step 3: Give It a Meaningful Name
Avoid generic names like:
“Test”
“Workspace1”
Instead, go for something clear and intentional:
“Sales Analytics – Dev”
“HR Reporting – Production”
“Marketing Campaign Insights”
A good name tells a story.
Step 4: Add Description (Don’t Skip This)
This might feel optional, but it’s incredibly useful — especially in teams.
Example:
“This workspace contains all pipelines, lakehouses, and reports related to 2025 sales performance.”
Future you (and your teammates) will thank you.
Step 5: Configure Advanced Settings
Depending on your setup, you may see options like:
Capacity assignment
Default storage
Git integration
If you’re working in a structured environment, these settings matter. Otherwise, you can start simple and refine later.
Step 6: Add Members
Workspaces are rarely solo environments.
Assign roles carefully:
Admin – full control
Member – can edit content
Viewer – read-only
A common mistake is giving everyone admin access. Resist that temptation.
Step 7: Click Apply
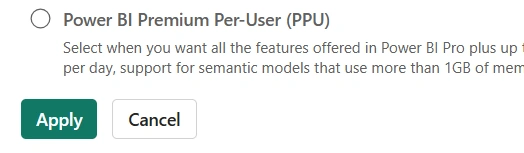
And just like that, your workspace is ready.
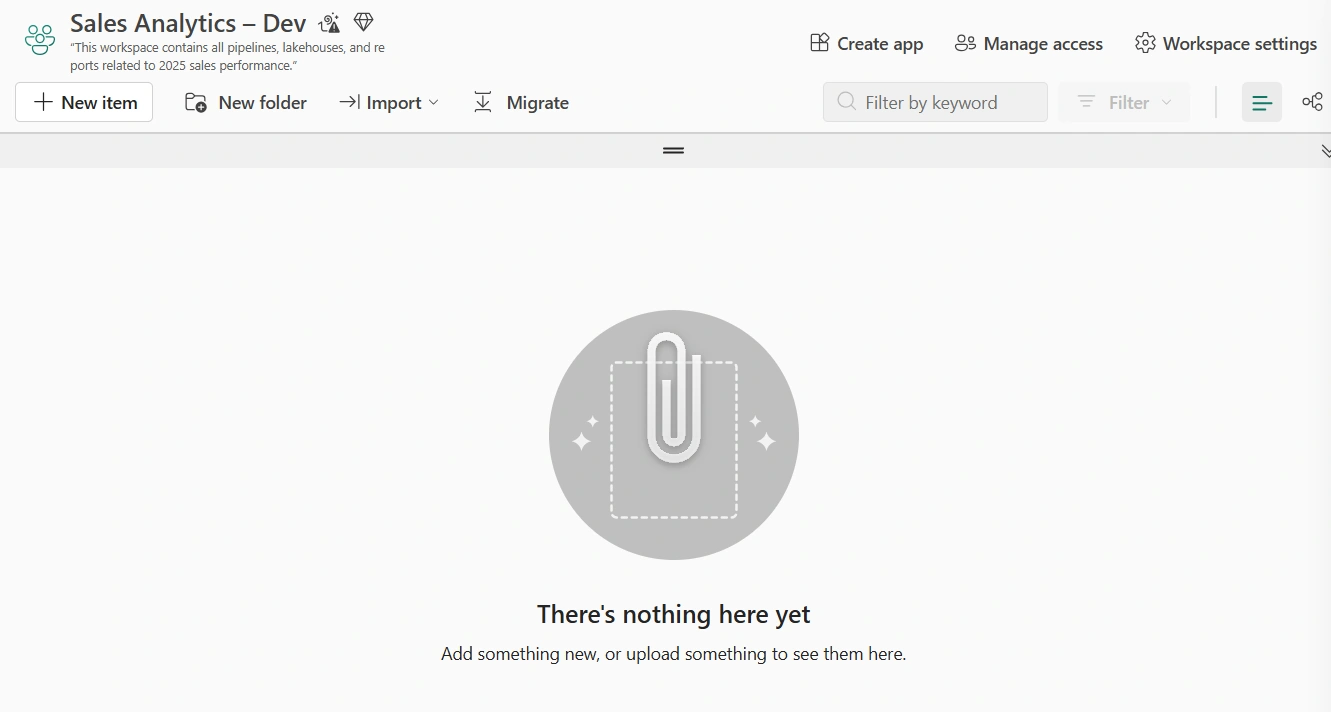
Now it becomes your playground or your production engine.
Deleting a Workspace (Handle With Care)
Deleting a workspace is easy. But it’s also irreversible.
Let that sink in:
Once deleted, everything inside is gone.
So don’t treat this like a casual clean-up task.
When Should You Delete a Workspace?
Good reasons:
The project is completed and archived elsewhere
It was created for testing or experimentation
It’s no longer relevant or maintained
Bad reasons:
“It looks messy”
“I think we don’t need it anymore” (without confirmation)
Step-by-Step Deletion
Go to Workspaces
Find the workspace you want to delete
Click the three dots (⋯) next to it
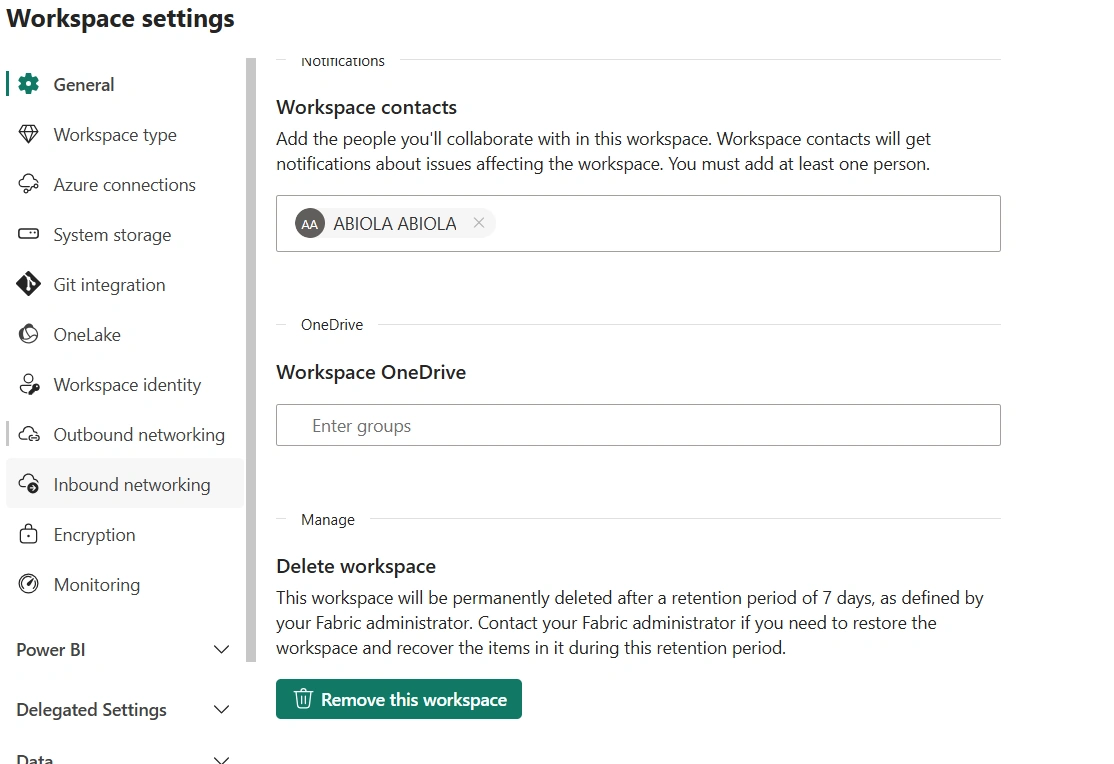
Select Workspace settings
Scroll down and click Delete workspace
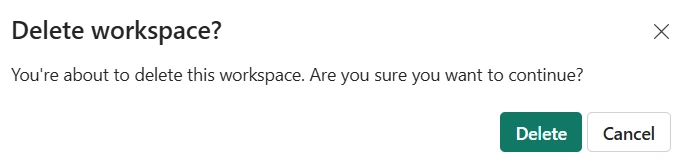
Confirm the deletion
That’s it — technically simple, but strategically important.
A Quick Reality Check Before Deleting
Before you hit delete, ask yourself:
Is there any data we might need later?
Are there reports connected to this workspace?
Is anyone else using it?
Do we have a backup?
If there’s even slight doubt, pause.
A safer approach:
Rename it to something like “_TO_BE_DELETED” and revisit later.
Best Practices (From Real Experience)
Here are a few habits that separate beginners from professionals:
1. Use Naming Conventions
Consistency is everything.
Example:
Sales-DevSales-TestSales-Prod
2. Separate Dev, Test, and Prod
Never mix development work with production.
3. Document Everything
Descriptions, ownership, purpose — they all matter.
4. Limit Admin Access
Too many admins = too many risks.
5. Don’t Rush Deletions
Deleting is easy. Recovering is not.
Conclusion
creating a workspace in Microsoft Fabric is more than just clicking a button — it’s about setting up a structured, scalable environment for your work.
And deleting one? That’s about responsibility.
If you treat workspaces as intentional containers — not just temporary folders — you’ll build cleaner systems, collaborate better, and avoid unnecessary chaos.
In the end, it’s not just about managing data.
It’s about managing clarity.
Join the conversation! Your thoughts help the community grow.