

Introduction
Characteristics of Alarms
- Alarms can let one fire Intents at set times or in certain time intervals.
- Alarms can be used together with the broadcast receiver to notifies the user.
- Alarms can triggers even if the device falls asleep because they run outside the application.
- Alarms can be scheduled to a specific sharp time thus reducing system resources by not relying on background services.
Choosing an Alarm Type
- ELAPSED_REALTIME
Elapsed Time means time including the sleep time from when the device gets booted. It doesn't wake up the device.
- ELAPSED_REALTIME_WAKEUP
In ELAPSED_REALTIME_WAKEUP it wakes up and fires the pending intent after the specified interval of time has elapsed since device has booted.
- RTC
In this case pending intent fired at the specified time but does not wake up the device.
- RTC_WAKEUP
In this case, alarms wake up the device to fire the pending intent at the specified time.
Starting Alarm at Particular Time
- public void startAlertAtParticularTime() {
- // alarm first vibrate at 14 hrs and 40 min and repeat itself at ONE_HOUR interval
- intent = new Intent(this, MyBroadcastReceiver.class);
- pendingIntent = PendingIntent.getBroadcast(
- this.getApplicationContext(), 280192, intent, PendingIntent.FLAG_CANCEL_CURRENT);
- Calendar calendar = Calendar.getInstance();
- calendar.setTimeInMillis(System.currentTimeMillis());
- calendar.set(Calendar.HOUR_OF_DAY, 14);
- calendar.set(Calendar.MINUTE, 40);
- alarmManager = (AlarmManager) getSystemService(ALARM_SERVICE);
- alarmManager.setInexactRepeating(AlarmManager.RTC_WAKEUP, calendar.getTimeInMillis(),
- AlarmManager.INTERVAL_HOUR, pendingIntent);
- Toast.makeText(this, "Alarm will vibrate at time specified",
- Toast.LENGTH_SHORT).show();
- }
The above part of code is just to show how to fire the intent at a particular time now we will see the entire code of MainActivity.java and in this case we will set alarms by the time provided by the user in seconds and thereafter repeat it every 10 seconds.
- package com.example.gkumar.alarmwithbroadcastreceiver;
- import android.app.AlarmManager;
- import android.app.PendingIntent;
- import android.content.Intent;
- import android.support.v7.app.AppCompatActivity;
- import android.os.Bundle;
- import android.view.View;
- import android.widget.Button;
- import android.widget.EditText;
- import android.widget.Toast;
- import java.util.Calendar;
- public class MainActivity extends AppCompatActivity implements View.OnClickListener {
- Button alarmbutton, cancelButton;
- EditText text;
- PendingIntent pendingIntent;
- AlarmManager alarmManager;
- Intent intent;
- @Override
- protected void onCreate(Bundle savedInstanceState) {
- super.onCreate(savedInstanceState);
- setContentView(R.layout.activity_main);
- alarmbutton = (Button) findViewById(R.id.button);
- cancelButton = (Button) findViewById(R.id.button2);
- text = (EditText) findViewById(R.id.editText);
- alarmbutton.setOnClickListener(this);
- cancelButton.setOnClickListener(this);
- /* use this method if you want to start Alarm at particular time*/
- // startAlertAtParticularTime();
- }
- // This method to be called at Start button click and set repeating at every 10 seconds interval
- public void startAlert(View view) {
- if (!text.getText().toString().equals("")) {
- int i = Integer.parseInt(text.getText().toString());
- intent = new Intent(this, MyBroadcastReceiver.class);
- pendingIntent = PendingIntent.getBroadcast(
- this.getApplicationContext(), 280192, intent, PendingIntent.FLAG_CANCEL_CURRENT);
- alarmManager = (AlarmManager) getSystemService(ALARM_SERVICE);
- alarmManager.setRepeating(AlarmManager.RTC_WAKEUP, Calendar.getInstance().getTimeInMillis() + (i * 1000), 10000
- , pendingIntent);
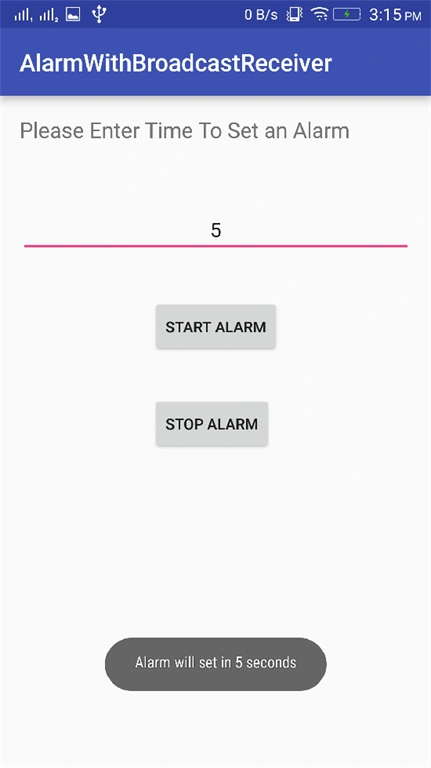
- Toast.makeText(this, "Alarm will set in " + i + " seconds",
- Toast.LENGTH_LONG).show();
- }else {
- Toast.makeText(this,"Please Provide time ",Toast.LENGTH_SHORT).show();
- }
- }
- public void startAlertAtParticularTime() {
- // alarm first vibrate at 14 hrs and 40 min and repeat itself at ONE_HOUR interval
- intent = new Intent(this, MyBroadcastReceiver.class);
- pendingIntent = PendingIntent.getBroadcast(
- this.getApplicationContext(), 280192, intent, PendingIntent.FLAG_CANCEL_CURRENT);
- Calendar calendar = Calendar.getInstance();
- calendar.setTimeInMillis(System.currentTimeMillis());
- calendar.set(Calendar.HOUR_OF_DAY, 14);
- calendar.set(Calendar.MINUTE, 40);
- alarmManager = (AlarmManager) getSystemService(ALARM_SERVICE);
- alarmManager.setInexactRepeating(AlarmManager.RTC_WAKEUP, calendar.getTimeInMillis(),
- AlarmManager.INTERVAL_HOUR, pendingIntent);
- Toast.makeText(this, "Alarm will vibrate at time specified",
- Toast.LENGTH_SHORT).show();
- }
- @Override
- public void onClick(View v) {
- if (v.getId() == R.id.button) {
- startAlert(v);
- } else {
- if (alarmManager != null) {
- alarmManager.cancel(pendingIntent);
- Toast.makeText(this, "Alarm Disabled !!",Toast.LENGTH_LONG).show();
- }
- }
- }
- @Override
- protected void onStop() {
- super.onStop();
- if (alarmManager != null) {
- alarmManager.cancel(pendingIntent);
- }
- }
- }
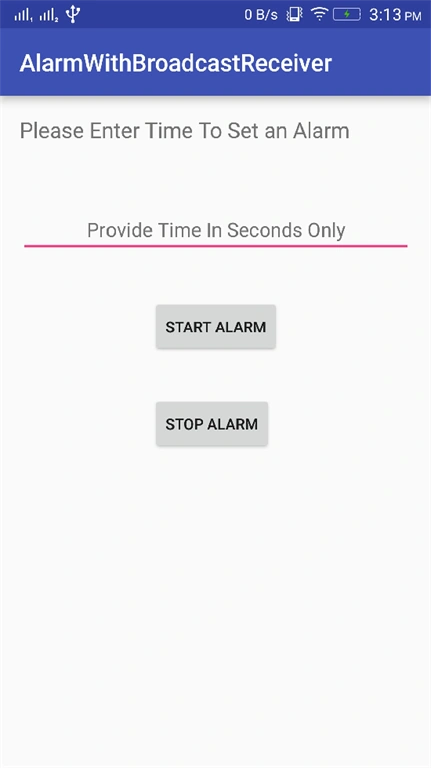
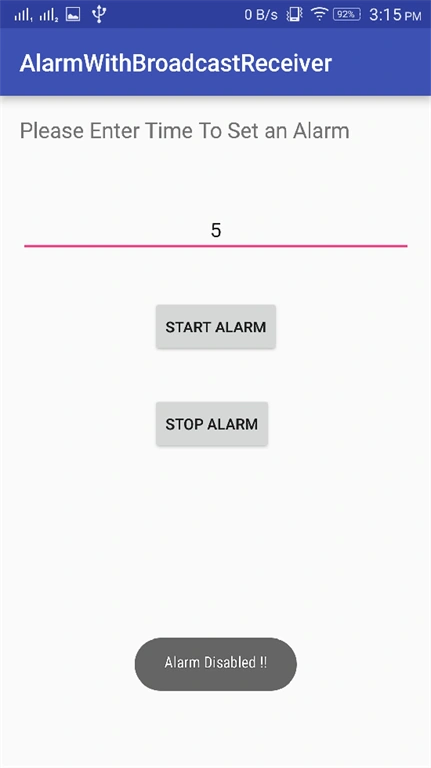
Now its time to look around corresponding UI part given below as activity_main.xml
- <?xml version="1.0" encoding="utf-8"?>
- <RelativeLayout xmlns:android="http://schemas.android.com/apk/res/android"
- xmlns:tools="http://schemas.android.com/tools"
- android:layout_width="match_parent"
- android:layout_height="match_parent"
- android:paddingBottom="@dimen/activity_vertical_margin"
- android:paddingLeft="@dimen/activity_horizontal_margin"
- android:paddingRight="@dimen/activity_horizontal_margin"
- android:paddingTop="@dimen/activity_vertical_margin"
- tools:context="com.example.gkumar.alarmwithbroadcastreceiver.MainActivity">
- <Button
- android:layout_width="wrap_content"
- android:layout_height="wrap_content"
- android:text="start alarm"
- android:id="@+id/button"
- android:layout_below="@+id/editText"
- android:layout_centerHorizontal="true"
- android:layout_marginTop="35dp" />
- <EditText
- android:layout_width="match_parent"
- android:layout_height="wrap_content"
- android:inputType="phone"
- android:hint="Provide Time In Seconds Only"
- android:id="@+id/editText"
- android:gravity="center"
- android:layout_marginTop="50dp"
- android:layout_below="@+id/textView"
- android:layout_alignParentRight="true"
- android:layout_alignParentEnd="true" />
- <TextView
- android:layout_width="wrap_content"
- android:layout_height="wrap_content"
- android:text="Please Enter Time To Set an Alarm"
- android:id="@+id/textView"
- android:textSize="20sp"
- android:layout_alignParentTop="true"
- android:layout_alignParentLeft="true"
- android:layout_alignParentStart="true" />
- <Button
- android:layout_width="wrap_content"
- android:layout_height="wrap_content"
- android:text="Stop Alarm"
- android:id="@+id/button2"
- android:layout_below="@+id/button"
- android:layout_alignLeft="@+id/button"
- android:layout_alignStart="@+id/button"
- android:layout_marginTop="33dp" />
- </RelativeLayout>
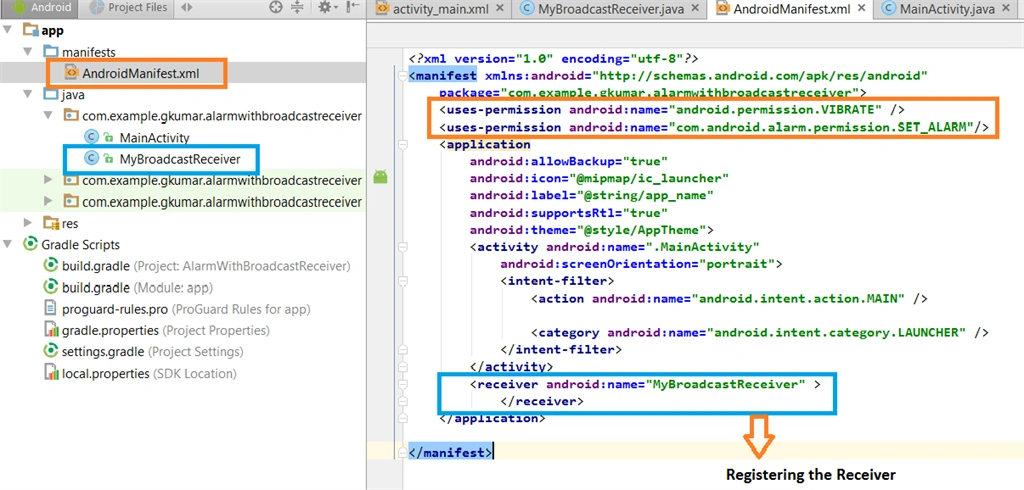
Now After Registering a BroadcastReciever that notifies the user whether it means vibrate or executing the alarm as shown in the code below.
- package com.example.gkumar.alarmwithbroadcastreceiver;
- import android.content.BroadcastReceiver;
- import android.content.Context;
- import android.content.Intent;
- import android.os.Vibrator;
- import android.widget.Toast;
- public class MyBroadcastReceiver extends BroadcastReceiver {
- @Override
- public void onReceive(Context context, Intent intent) {
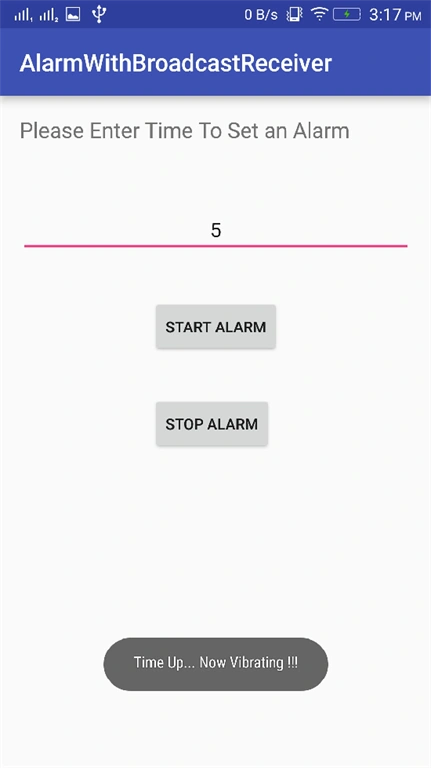
- Toast.makeText(context, "Time Up... Now Vibrating !!!",
- Toast.LENGTH_LONG).show();
- Vibrator vibrator = (Vibrator) context
- .getSystemService(Context.VIBRATOR_SERVICE);
- vibrator.vibrate(2000);
- }
- }
Running the Application
Summary
In this article, we have learned how to create and schedule the alarms and notify user via BroadcastReceiver. Selecting first the Alarm type and appropriate methods to start Alarm using AlarmManager class.
Read more articles on Android:
Fer BPosted Mar 17, 2020, 6:07 PM
Excellent article, Gaurav! I have a question: Is it possible to use only AlarmManager without Calendar? I would like to not depend on a Google account for this to work. Thanks!! :)
Bahman DibaPosted Jan 6, 2019, 8:40 PM
Nice example
Cristian PeresPosted Sep 11, 2018, 8:15 AM
How to set 2 alarms for the same time?
Ashish TiwariPosted May 4, 2016, 5:28 AM
Very Helpful (y)
Debasis SahaPosted Apr 26, 2016, 10:19 AM
Nice One..