

So are you ready to learn how to insert data into a database in ASP.NET. This article will explain step-by-step how to insert data into a database for your web purposes, like:
- Sessions
- User Interaction Page
- Registration Page
- Contact info Page and so on.
Procedure
Step 1
Coding in Class File Page (.cs)
We need code in a .cs file. First of all we need to attempt to add a special file type (class) to an ASP.NET website. In general to use this type of item in your site, you should place it in the "App_Code" folder.
Use the following procedure to do that:
- Open a empty ASP.NET website
- Click on Solution Explorer
- Then right-click on C:\...\website1
- Add a new item
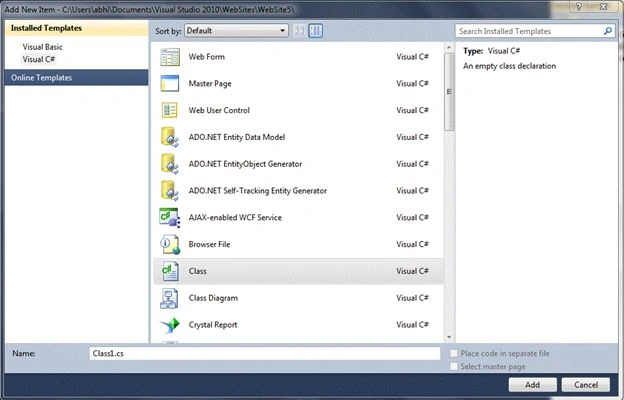
- Select Class file from there and "Add"; a new window like this will open:
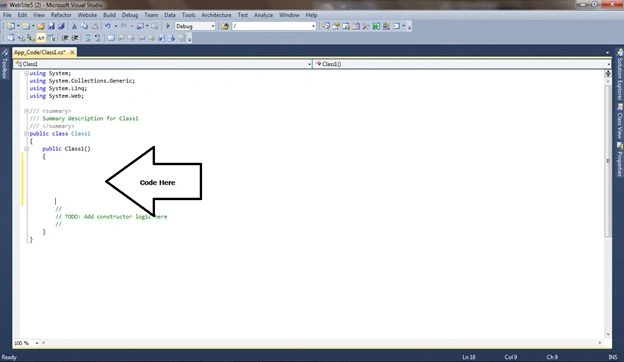
In this page, code according to this:
// APP_Code/Class1.cs
using System;
using System.Collections.Generic;
using System.Linq;
using System.Web;
using System.Configuration;
using System.Data.SqlClient;
/// <summary>
/// Summary description for Class1
/// </summary>
public class Class1
{
public SqlConnection con;
Public void show()
{
con = new SqlConnection(ConfigurationManager.ConnectionStrings["ABC"].ConnectionString);
con.Open();
}
}
Step 2
Now we need to code in the default page, you can find this page in your website named:
Default.aspx.cs
using System;
using System.Collections.Generic;
using System.Linq;
using System.Web;
using System.Web.UI;
using System.Web.UI.WebControls;
using System.Configuration;
using System.Data.SqlClient;
public partial class _Default : System.Web.UI.Page
{
Class1 o = new Class1();
protected void Page_Load(object sender, EventArgs e)
{
o.show();
}
protected void Button1_Click(object sender, EventArgs e)
{
SqlCommand cmd = new SqlCommand("insert into Reg values('" + TextBox1.Text + "','" + TextBox2.Text + "')", o.con);
cmd.ExecuteNonQuery();
Response.Redirect("Default2.aspx");
}
}
Abhishek JaiswalPosted Apr 16, 2014, 1:53 AM
thnk u for ur kind review sir! :) :)
Sandeep SharmaPosted Apr 15, 2014, 10:34 AM
or it could be "" How to populate the database, but all of nice and sweet :-) (y)
Abhishek JaiswalPosted Feb 15, 2014, 12:46 PM
okay sir. :)
Kiran Kumar TalikotiPosted Feb 14, 2014, 3:03 AM
As Mahesh Sir told.. change the title of this article then it looks good
Mahesh ChandPosted Feb 14, 2014, 12:52 AM
I think you should change the title of this article. In this code, you are actually inserting a record in an existing database. You are not creating a database. Here is an article on how to create a database :) Cheers! http://www.c-sharpcorner.com/UploadFile/mahesh/CreatingDBProgrammaticallyMCB11282005064852AM/CreatingDBProgrammaticallyMCB.aspx