

To access a blob within a container of a blob storage, you have to use a URL of the format Storage Account URL followed by Container Name followed by the actual name of the file.For example: https://demostoarge.blob.core.windows.net/[container_name]/filename
There are three different blob types:
- Page blobs – Used to store virtual hard disks optimized for random read/write operations
- Block blobs- Used to store files like images and videos which are comprised of multiple blocks of data
- Append blobs – Typically used with text files or log files where you append a line item to the end of a file.
Here in this article first we will create a storage account and have the keys to use it in our application and then a console application, which connects to the storage account and create a container inside it.
Step 1
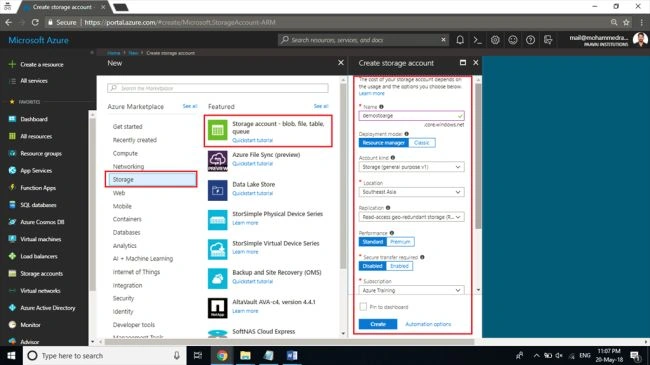
Login to your Microsoft Azure portal, click on Create new resource and select Storage account - blob, file, table, queue from Storage category to create a Storage account and give the necessary details as follows.
- Name: A Unique Name
- Deployment: Resource manager
- Account kind: General purpose (Can’t work with Files, Tables or Queues in case of Blob Storage)
- Location: Nearest to you
- Replication: Read-access geo-redundant storage
- Locally-redundant storage- Three copies within the same data center
- Zone-redundant storage- Three copies within two data centers of same region
- Geo-redundant storage- Three copies in a primary data center and three copies in another data center
- Performance: Standard (For premium only LRS replication is available as of now)
- Secure Transfer Required: Disabled
- Resource group: Create a new as BlobStorageRG
Step 2
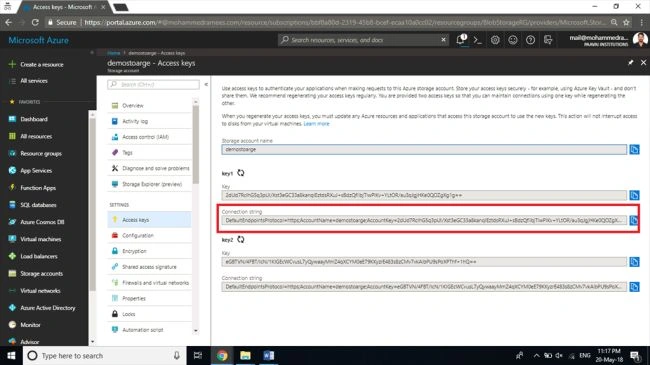
Once the deployment has succeeded, open the resource and click on Access keys and note a key for a later purpose.
Step 3
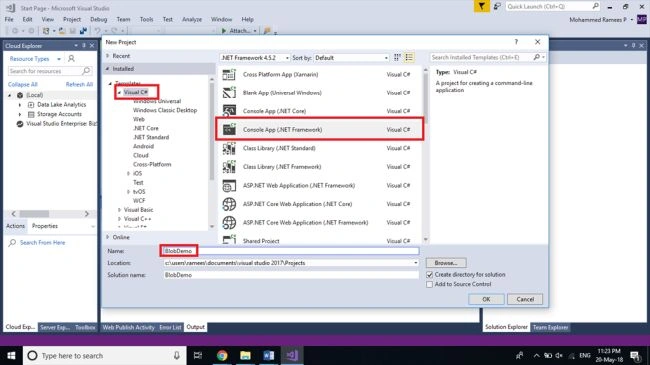
Create a new C# Console Application within Visual Studio and name it as BlobDemo.
Step 4
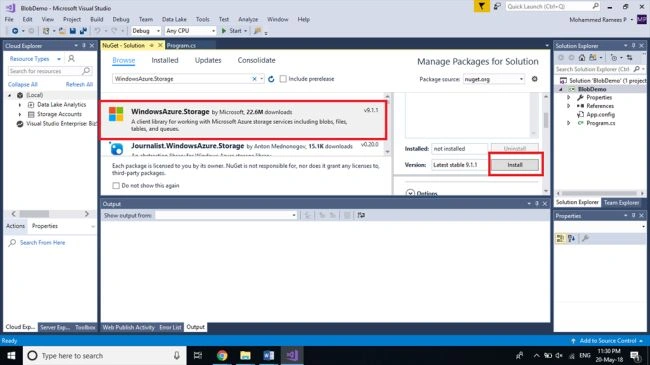
Once the project is created, install two NuGet Packages named WindowsAzure.Storage and WindowsAzure.ConfigurationManager to your solution. You can do this by selecting Tools > NuGet Package Manager > Manage NuGet Packages for Solution. In the Browse tab search for WindowsAzure.Storage and WindowsAzure.ConfigurationManager to get the packages complete the installation by reviewing the changes and accepting the license term for both.
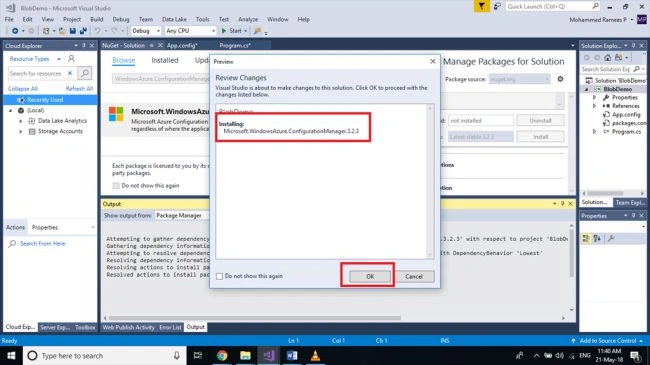
Now we have to add the Connection String to the storage account. For that open the App.config file and add following code snippet within the configuration. Replace the [Connection string] with the connection string value you copied in Step 2.
- <appSettings>
- <add key="StorageConnection" value="[Connection String]" />
- </appSettings>
Step 6
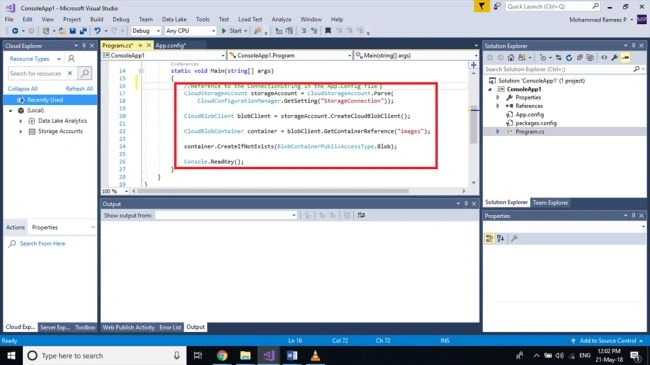
Now go to the Program.cs Page and add the following code to the Main method. This code will create a connection with the storage account and create a container named images in our blob storage with a Public (Blob) access type.
- //Reference to the ConnectionString in the App.Config file
- CloudStorageAccount storageAccount = CloudStorageAccount.Parse(CloudConfigurationManager.GetSetting("StorageConnection"));
- CloudBlobClient blobClient = storageAccount.CreateCloudBlobClient();
- CloudBlobContainer container = blobClient.GetContainerReference("images");
- container.CreateIfNotExists(BlobContainerPublicAccessType.Blob);
- Console.ReadKey();
- using Microsoft.Azure;
- using Microsoft.WindowsAzure.Storage;
- using Microsoft.WindowsAzure.Storage.Blob;
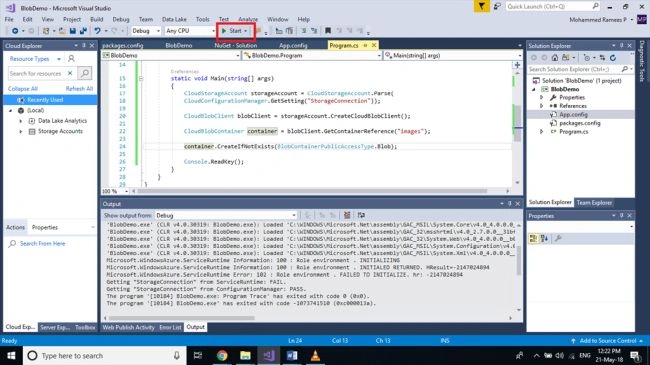
Click on Start to run the program and you will see a console window waiting for an input as we given Console.Readkey() at the end of the code.
Step 8
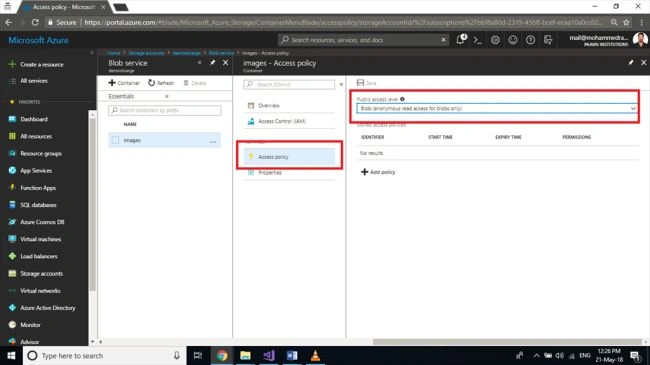
Go back to your storage account and select Blobs service from the overview tab and you can see that we now have an images container there and we can see that the access policy is set to the blob for the container as we set in the code.

Ravishankar NPosted Jul 15, 2018, 10:36 PM
Thanks for sharing .