

This article has been excerpted
from book "Graphics Programming with GDI+".
In this
article we will take an "as needed" approach, discussing only the techniques we
will use in our applications.
To understand ASP.NET and Visual Studio .NET integration, we will write a simple non-GDI+ Web application. In this application we will add some controls to a Web page: a generic button, a text box, and an Image button. After adding these controls, we will write code in the button click event handler that will read the contents of the text box as a file name and display the file in the Image button. Let's get started!
Creating a Web Application Project
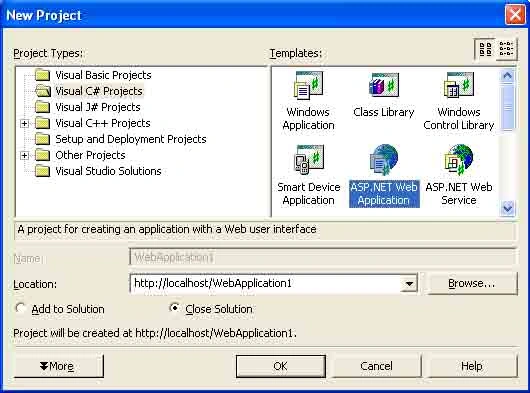
Creating a new ASP.NET Web application using Visual Studio .NET is simple: First we create a new project by choosing File | New | Project | Visual C# Projects and then selecting the ASP.NET Web Application template. As Figure 12.3 shows, we give our application the name FirstWebApp. It resides in the GDIPlusGuide folder of localhost, which is the default Web server on our local machine.
The Location box displays the default option of http://localhost and the application name. Here localhost represents the default the IIS server running on our local machine. The default virtual directory for localhost is c:/Inetpub\wwwroot.
NOTE
If you are using a remote server for you development, you'll need to provide your server name instead of localhost. You can either create the project in the root of the server or create a new folder.
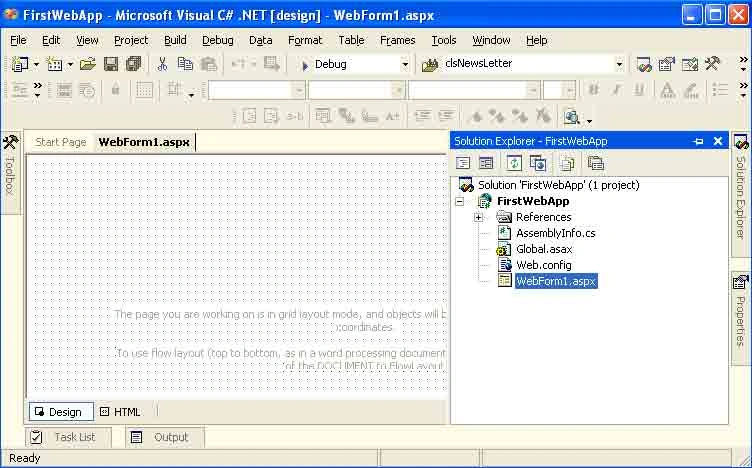
Clicking the OK button creates a new directory, FirstWebApp, in the server's virtual directory. It also creates a new Web application and sends us to the default WebForm1.aspx page (see Figure 12.4)

Join the conversation! Your thoughts help the community grow.