

In this article, we will write our own bootloader using 16-bit assembly language to create our own operating system.
Introduction
Writing an operating system is the most complicated task in the world of programming.
The first part of an operating system is the Bootloader. Bootloader is a piece of program that runs before the operating system starts running. It is used to boot other operating systems and usually each operating system has a set of bootloaders specific for it. Bootloaders usually contain several ways to boot the OS kernel and also contains commands for debugging and/or modifying the kernel environment.
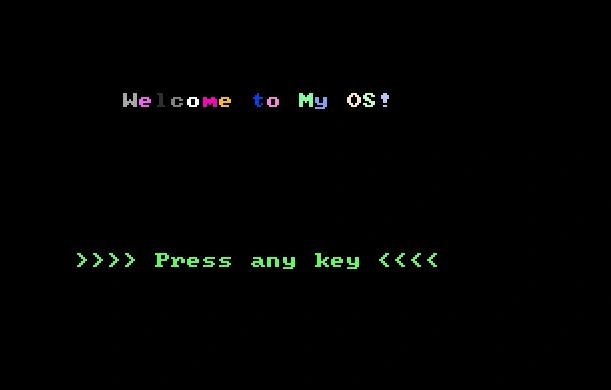
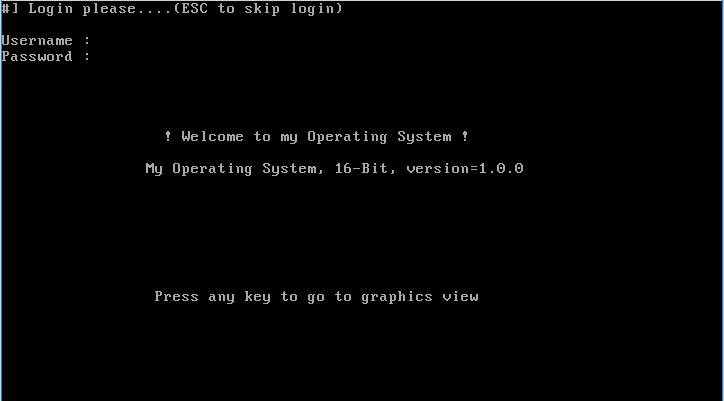
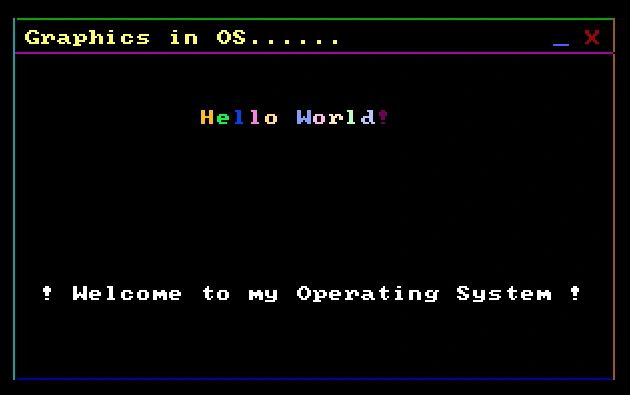
We will create a 3 stage OS. The first stage is to just display messages on the screen with colors, the second is to take input from user, and third stage is for drawing. The bootloaders are generally written in 16-bit assembly (also called Real mode), then the bits can be extended to 32-bit (Protected mode).
So, the bootloaders must be written in 16-bit assembly. Before you move to the next part, you must have some knowledge about 16-bit assembly language. Quick review of 16-bit registers.
Data registers
AX is the primary accumulator; it is used in input/output and most arithmetic instructions.
BX is known as the base register, and it could be used in indexed addressing.
CX is known as the count register; CX registers store the loop count in iterative operations.
DX is known as the data register. It is also used in input/output operations.
Index Registers
- Source Index (SI)
It is used as source index for string operations. - Destination Index (DI)
It is used as destination index for string operations. - Segment registers
Data segment(DS), Code segment(CS), Extra segment(ES), Stack segment(SS) - 8-bit registers AH, AL, BH, BL, CH, CL, DH, and DL.
where H is higher & L is Lower.
AH(8-15)+AL(0-7) = AX
For more, learn 16 bit assembly language tutorial and BIOS interrupts in assembly. Download the source code to view the complete OS code.
Requirements
You need an assembler (that can convert your assembly instructions into raw binary format) and a simulator to view. I am using NASM (Netwide Assembler) and QEMU (Quick Emulator). For Linux, type the following commands to install NASM & QEMU.
- sudo apt-get install nasm
- sudo apt-get install qemu qemu-system-x86_64
For Windows, download them from the following sites respectively and install.
- http://www.nasm.us/
- https://qemu.weilnetz.de/
Coding
Starting of coding always comes with printing Hello World, doesn't it ? Here's the code that prints "Hello World! " on screen.
(file = hello_world.asm)
- [bits 16] ; tell assembler that working in real mode(16 bit mode)
- [org 0x7c00] ; organize from 0x7C00 memory location where BIOS will load us
- start: ; start label from where our code starts
- xor ax,ax ; set ax register to 0
- mov ds,ax ; set data segment(ds) to 0
- mov es,ax ; set extra segment(es) to 0
- mov bx,0x8000
- mov si, hello_world ; point hello_world to source index
- call print_string ; call print different color string function
- hello_world db 'Hello World!',13,0
- print_string:
- mov ah, 0x0E ; value to tell interrupt handler that take value from al & print it
- .repeat_next_char:
- lodsb ; get character from string
- cmp al, 0 ; cmp al with end of string
- je .done_print ; if char is zero, end of string
- int 0x10 ; otherwise, print it
- jmp .repeat_next_char ; jmp to .repeat_next_char if not 0
- .done_print:
- ret ;return
- times (510 - ($ - $$)) db 0x00 ;set 512 bytes for boot sector which are necessary
- dw 0xAA55 ; boot signature 0xAA & 0x55
OK! Now, what the hell is this ?
[bits 16]
This line tells the assember that you are working in 16-bit real mode. It will convert the assembly data to 16-bit binary form.
This line tells the assember that you are working in 16-bit real mode. It will convert the assembly data to 16-bit binary form.
[org 0x7c00]
This is assember directive. 0x7c00 is the memory location where BIOS will load us.
This is assember directive. 0x7c00 is the memory location where BIOS will load us.
xor ax,ax
mov ds,ax
mov es,ax
mov bx,0x8000
First, we are setting the registers (such as ax, ds, and es) to zero, which we will use further. Then, we will copy the memory location 0x8000 to bx register because we want to perform operations/instructions. As we are loaded at 0x7c00 memory location, we need memory location above it.
hello_world db 'Hello World!',13,0
The above line defines the string with label hello_world, where 13 is New line and 0 is end of string.
mov si, hello_world
call print_string
Pointing to the first character of hello_world string to source index (si) register and then calling print_string function. Copying 0x0E to ah register. This will tell to interrupt handler that takes value/ASCII character from al & prints it using int 0x10.
AH = 0x0E
AL = character
BH = page
BL = color (graphics mode)
int 0x10
.repeat_next_char Label for continue to loop until end of string occurs.
lodsb
This instruction loads the first character from si to al register using ASCII code. Then, we will compare whether al contains 0 or not. If not, then print it and jump to loop, otherwise jump to .done_print.
This instruction loads the first character from si to al register using ASCII code. Then, we will compare whether al contains 0 or not. If not, then print it and jump to loop, otherwise jump to .done_print.
int 0x10
This is BIOS video interrupt which takes char value from al register & prints it.
This is BIOS video interrupt which takes char value from al register & prints it.
times (510 - ($ - $$)) db 0x00
A boot sector always be a 512 byte. starting with address 0x00.because on hard drive, there are only 512 bytes of sectors.
A boot sector always be a 512 byte. starting with address 0x00.because on hard drive, there are only 512 bytes of sectors.
dw 0xAA55
This is the magic number of bootable devices. This line is boot signature that makes our code into bootable code. It defines word 0xAA & 0x55. These are last two bytes of our first sector.
Because of this number, BIOS loads us at 0x7c00 location when computer starts.
This is the magic number of bootable devices. This line is boot signature that makes our code into bootable code. It defines word 0xAA & 0x55. These are last two bytes of our first sector.
Because of this number, BIOS loads us at 0x7c00 location when computer starts.
For Linux, type the following command to compile file.
nasm -f bin hello_world.asm -o myos.bin
nasm -f bin hello_world.asm -o myos.bin
Once file is compiled successfully and myos.bin file is created, run it in QEMU.
qemu-system-x86_64 myos.bin
qemu-system-x86_64 myos.bin
For Windows, open NASM application. It will prompt a command at location where NASM is installed. Perform same commands as performed for linux, just with giving full file name path.
Consider I have file in C:\Users\Pritam\Documents\temp folder.
nasm.exe -f bin "C:\Users\Pritam\Documents\temp\hello_world.asm" -o "C:\Users\Pritam\Documents\temp\myos.bin"
Consider I have file in C:\Users\Pritam\Documents\temp folder.
nasm.exe -f bin "C:\Users\Pritam\Documents\temp\hello_world.asm" -o "C:\Users\Pritam\Documents\temp\myos.bin"
and to run in QEMU.
"C:\Program Files\qemu\qemu-system-x86_64.exe" "C:\Users\Pritam\Documents\temp\myos.bin"
"C:\Program Files\qemu\qemu-system-x86_64.exe" "C:\Users\Pritam\Documents\temp\myos.bin"
where i have installed QEMU.
This will print the following output.
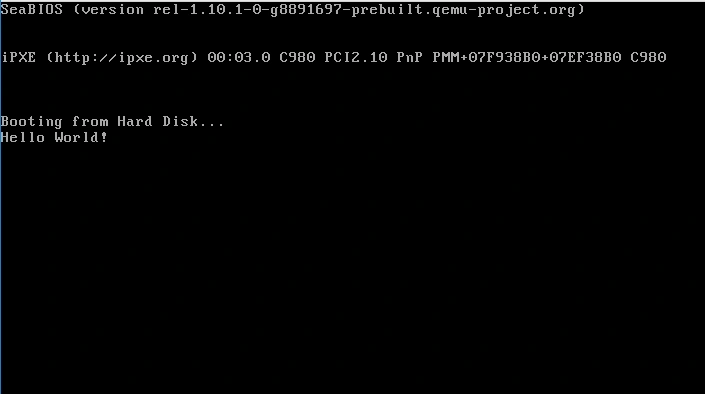
Here, I have created .bin file but you can also create .iso file. Once it successfully prints "Hello World!", attach secondary device/USB drive and boot .bin/.iso in it. You can use dd command on linux or rufus software on Windows.
To print a string on screen at specific location or to set cursor at specific location, use the following actions.
AH = 0x02
BH = page
DH = row
DL = column
- mov ah,0x02 ; set value for change to cursor position
- mov bh,0x00 ; page
- mov dh,0x06 ; y cordinate/row
- mov dl,0x05 ; x cordinate/col
- int 0x10
- mov si, hello_world
- call print_string
puru sidPosted Aug 2, 2021, 10:16 AM
Can we boot from usb
puru sidPosted Aug 2, 2021, 10:15 AM
How to make iso??
puru sidPosted Aug 2, 2021, 10:15 AM
Wow so nice
edeltech infoPosted Jun 26, 2021, 8:49 PM
I cannot compile the program in iso and put it on a USB key
Web LeonardoPosted Jul 12, 2019, 7:54 AM
Where is your MyOS.zip program? Because I can not download this file.
Sagar Pandurang KapPosted Dec 12, 2017, 1:27 AM
Awesome dude..Its fabulous..
Shubham ShaharePosted Apr 25, 2017, 1:38 AM
Great Work Pritam.
Sourabh SomaniPosted Feb 23, 2017, 11:22 PM
Very Nice and Interesting... I remember few years ago I have also written such type of code... awesome article
Pradeep singhPosted Feb 23, 2017, 9:37 AM
Sir great article ...is there any tool to build OS in c#....
Syed ShanuPosted Feb 23, 2017, 2:01 AM
Great article PRITAM ZOPE,I really loved to read the full article and its quite interesting.Thank you for sharing :)
Humayun Kabir MamunPosted Feb 23, 2017, 1:19 AM
Thanks Pritam for this interesting article...
Mahesh ChandPosted Feb 22, 2017, 8:04 PM
Interesting! I remember, I wrote a compiler 20 years ago.