

The previous article demonstrated the “Create”, “Read” and “Update” operations of REST API in SharePoint. This is the last article of this series and explains the “Delete” operation of a list item.
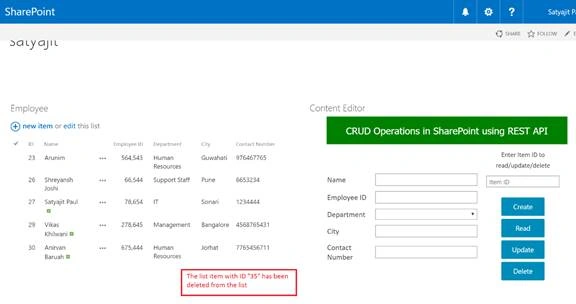
As before, we will start with the assumption that the list in picture “Employee” has some entries in it. We will be deleting the list item based on the ID of the item – you enter the ID, and just click on the “Delete” button to get the list item deleted.
REST Operations in SharePoint – DELETE
Step1
Create a custom list “Employee” as per the schema below. Capture the generated internal names of the columns – you will need it later on.
List Name - Employee
| Column Name | Internal Name | Type |
| Name | Title | Single line of text |
| Employee ID | Employee_x0020_ID | Number |
| Department | Department | Single line of text |
| City | City | Single line of text |
| Contact Number | Contact_x0020_Number | Single line of text |
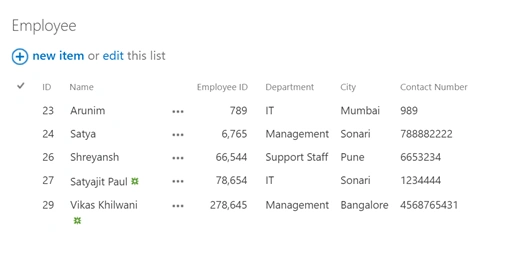
This is how the list looks in my case.
Step2
Create a web part page, and insert the list “Employee” in any of the web part zones.
Step 3
Next step is the addition of the code. The code can be downloaded from – here. In our case, we will be creating a single page HTML file (i.e. the style, scripts and the body elements will be on a single page, with an internal reference to jQuery.min.js file). The HTML can be added to our page in either of the below ways. For this scenario, we have added a Content Editor Web Part (CEWP) in any of the web part zones and then,
- Insert the code directly in the CEWP.
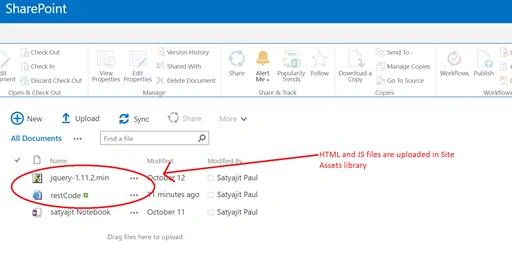
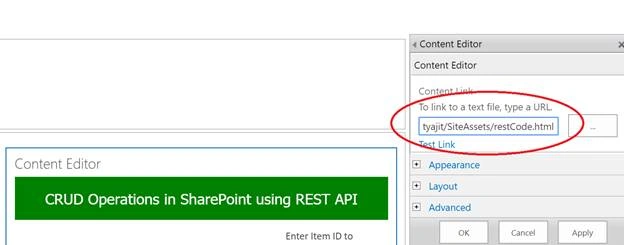
- Upload the HTML and JS file to any document library, and then insert the link to the HTML file in the Content Link as shown below,
Step 4
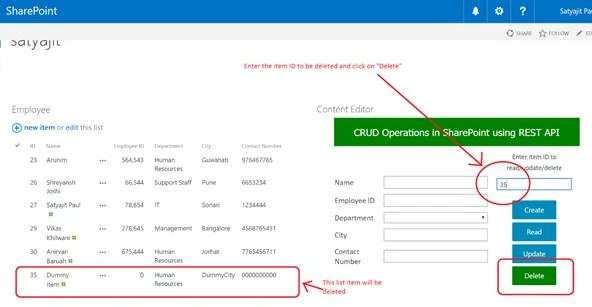
Enter the ID you wish to delete, and click on “Delete” button The list item pertaining to that list ID will be deleted. Visuals are shown in the below images.
Tamrat AmanuPosted Oct 31, 2018, 7:11 PM
Awesome, thank you.