

Introduction
Developing a CRUD (Create, Read, Update, Delete) API using .NET 8 with a SQL Server database is a frequent requirement in web development projects. In this guide, we will delve into constructing a full-featured .NET 8 Web API, utilizing SQL Server for persistent data storage. We’ll cover each stage of the development process, providing a practical example that demonstrates the application of these concepts in a real-world scenario.
Step 1. Setting Up the Project.
Open a visual studio and click on "Create a new project".

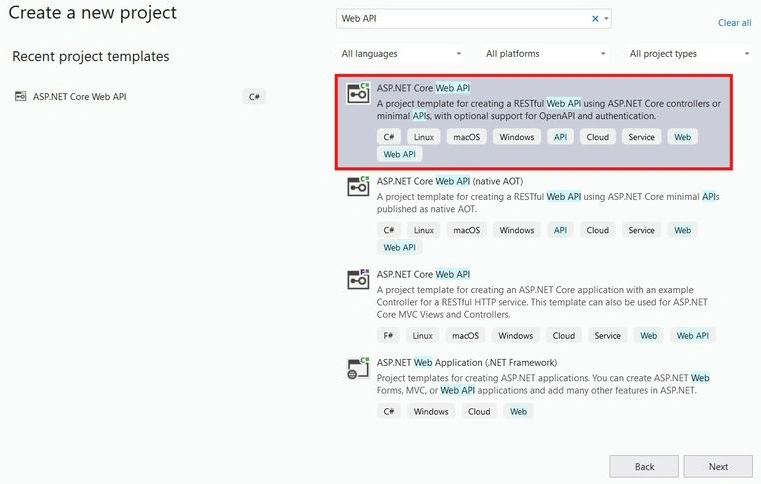
Step 2. Select the "ASP .NET Core Web API" template and click on the "Next" button.
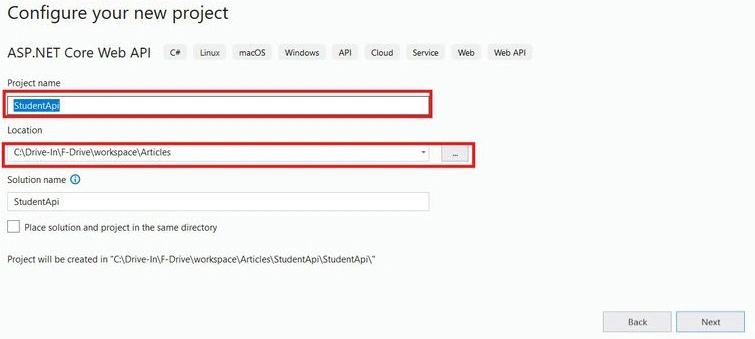
Step 3. Enter the "Project Name" and select the Location.
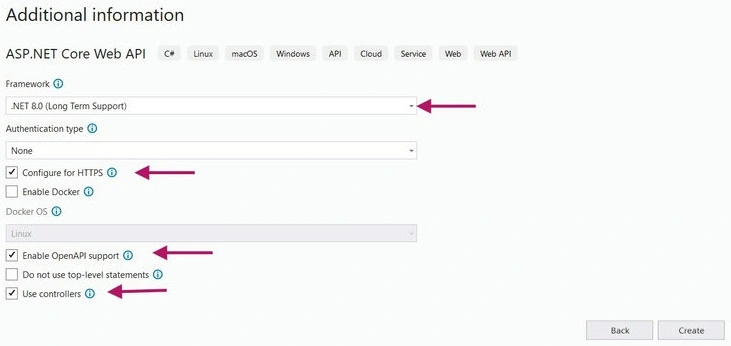
Step 4.
- Select .Net 8.0 (Long-Term Support)
- Ensure "Configuration for HTTPS" is selected - This will enable your application to run using the HTTPS protocol.
- Ensure "Enable Open API Support" is selected - automatically generate interactive documentation using Swagger.
- Ensure "Use Controller" is selected - This will facilitate the creation of a controller-based API.
Step 5. Define the Student Model.
Create a new class in the Models folder to represent the student entity.
Models/Student.cs

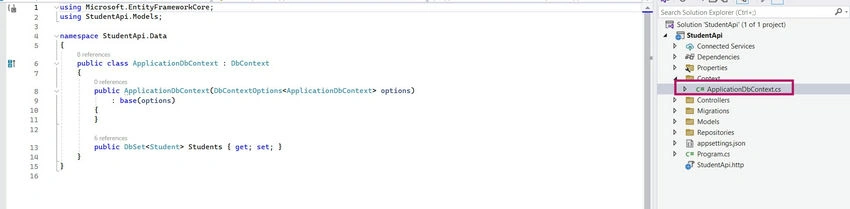
Step 6. Set Up the Data Context.
Create a database context class in the Context folder.
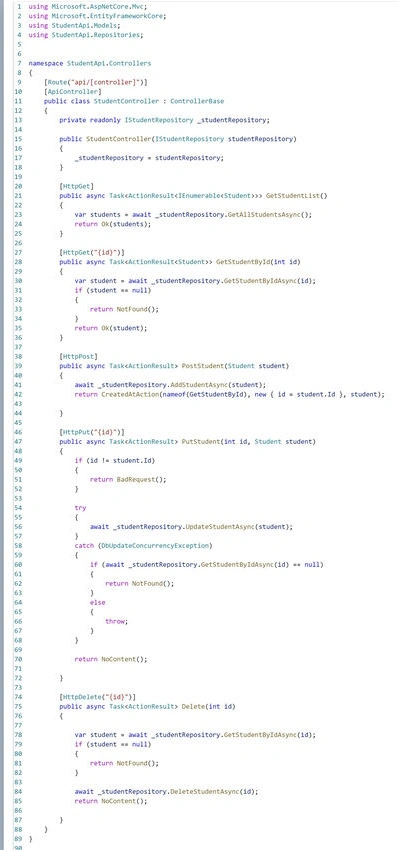
Step 7. Create the Students Controller.
Add a new controller to use the repository for handling CRUD operations.
Controllers/StudentsController.cs
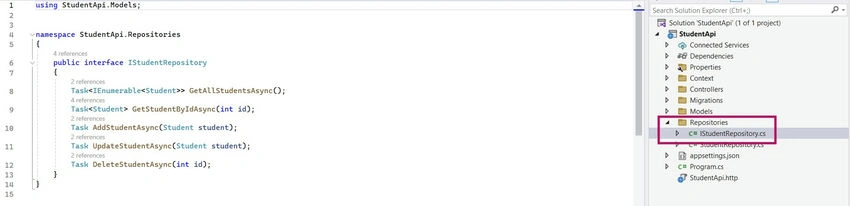
Step 8. Define Repository Interfaces.
Create an interface to define the CRUD operations in the Repositories folder.
Repositories/IStudentRepository.cs
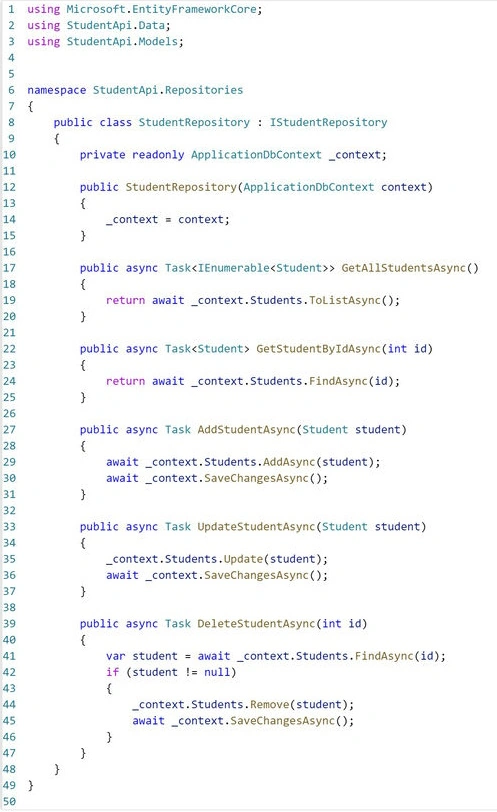
Step 9. Implement Repository.
Create a class that implements the repository interface.
Repositories/StudentRepository.cs
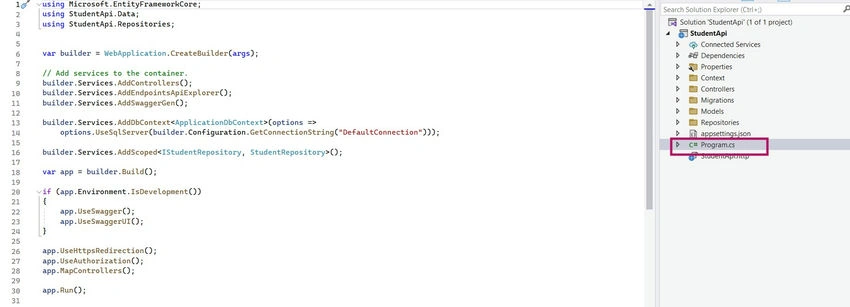
Step 10. Configure Dependency Injection.
In Program.cs, configure the service container to use the repository.
Program.cs
Summary
By using the Repository Design Pattern, you've created a more modular and maintainable Web API. The repository pattern separates data access logic from business logic, allowing you to change the data access implementation without affecting the rest of your application. To enhance your setup further, consider adding features like logging, validation, and exception handling based on your project's requirements.
Join the conversation! Your thoughts help the community grow.