

Introduction
In this article, how to customize the office installer and why do we need to do that?
When we install the Office package all the applications will be installed automatically on our device. However, we can customize the office installer to exclude applications such, as Access, OneDrive, Publisher, OneNote, etc.
The Microsoft 365 Apps Admin Center can help you to customize the office application.
Download and Install Office Deployment Tool (ODT)
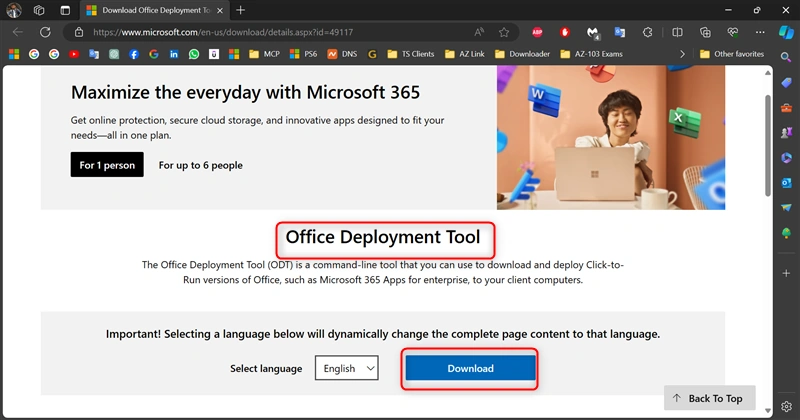
Step 1. Download the office deployment tool
Download the office deployment tool from the Microsoft Download Center using the following Link https://www.microsoft.com/en-us/download/details.aspx?id=49117
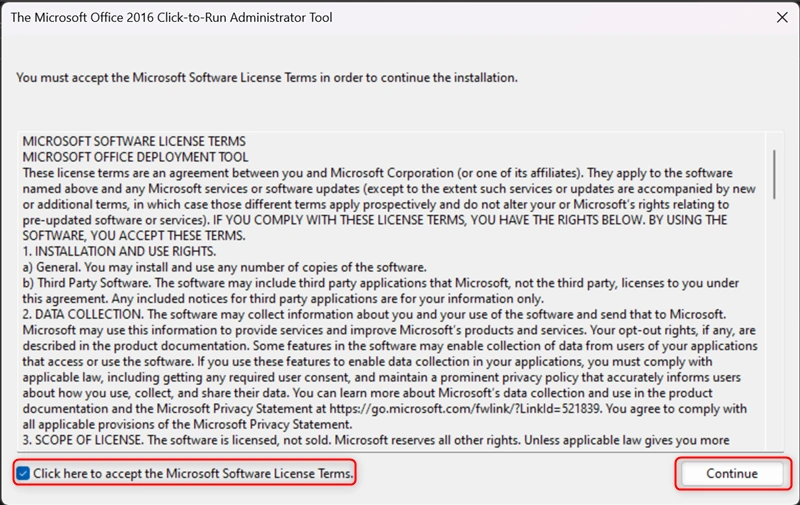
Step 2. Install the Office Deployment Tool
Run the Office Deployment Tool Exe. file by double-clicking on the downloaded file and the Accept the License term then Clicking "Continue".
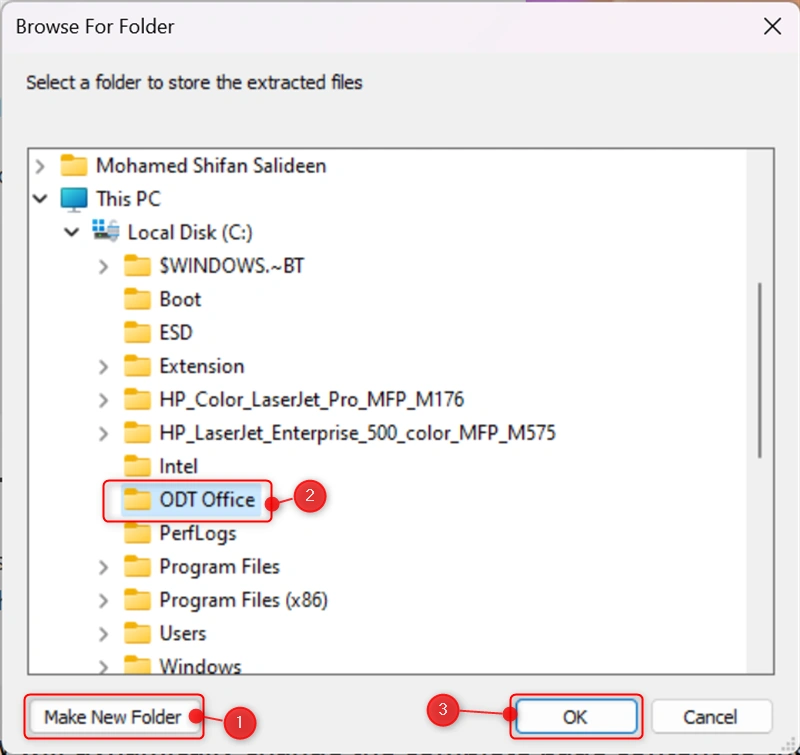
Step 3. Browse For Folder
Create a New Folder and Rename the Folder "ODT Office".Then click "OK".
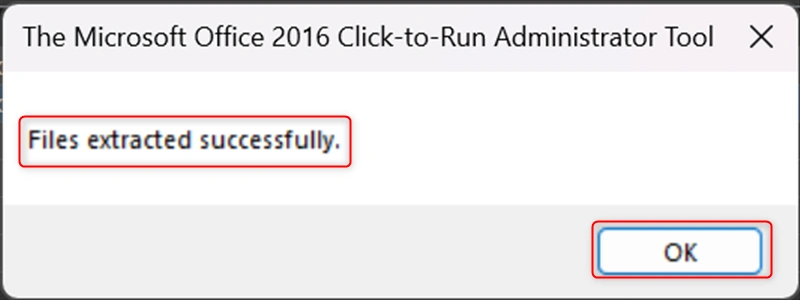
The Files are extracted successfully, Then click "OK".
Create and Export a Configuration File
Step 1. Create a New Configuration
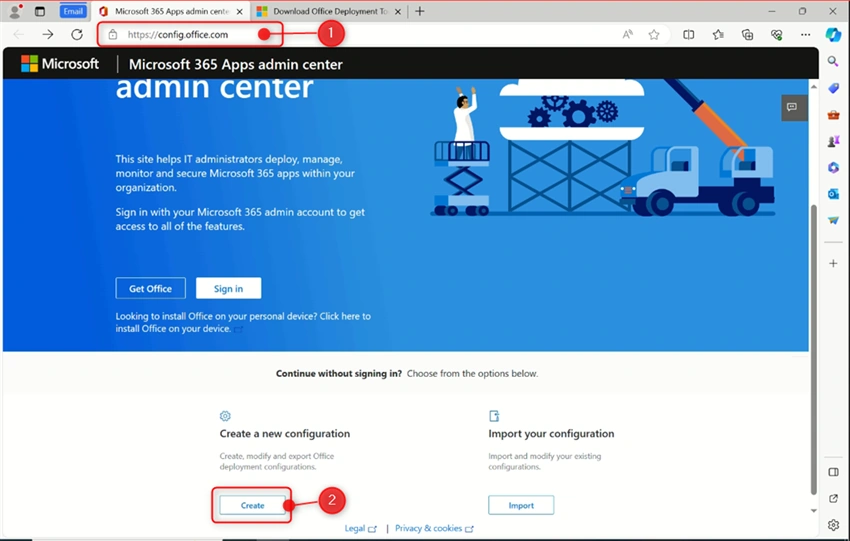
Go to the Microsoft 365 Apps Admin Center to Configure install options with the Office Customization Tool and Go to the https://config.office.com/. Then Click "Create" .
Step 2. Choose the Product and release
Office Customize Tool will help you to deploy a customized version of Office.
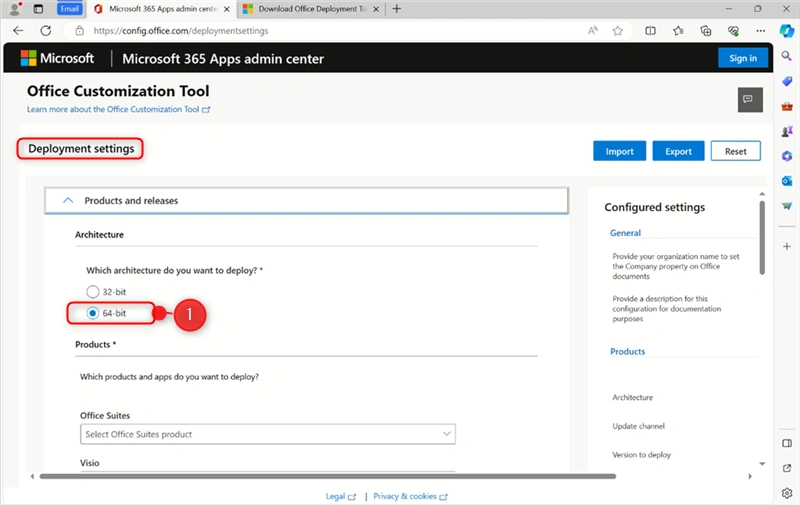
1. Select the architecture (32-bit or 64-bit) based on your Windows architecture.
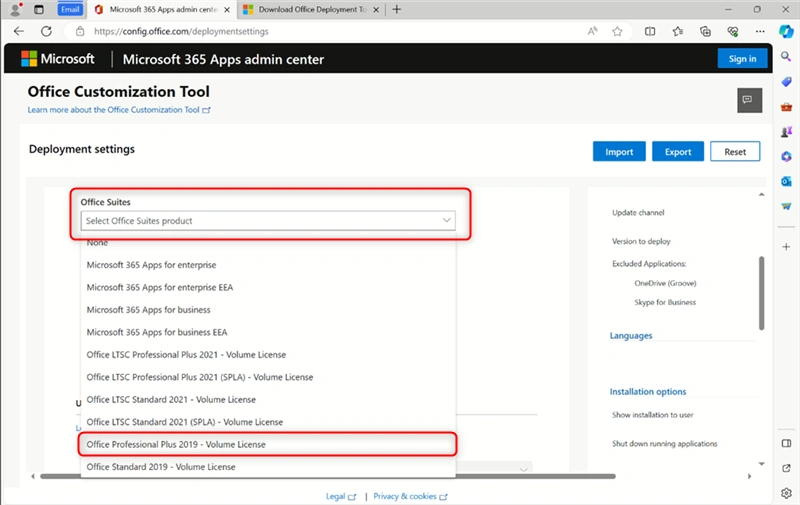
2. Select the Office Suites based on your office licenses.
In this case, I have selected Office Professional Plus 2019 - Volume Licence.
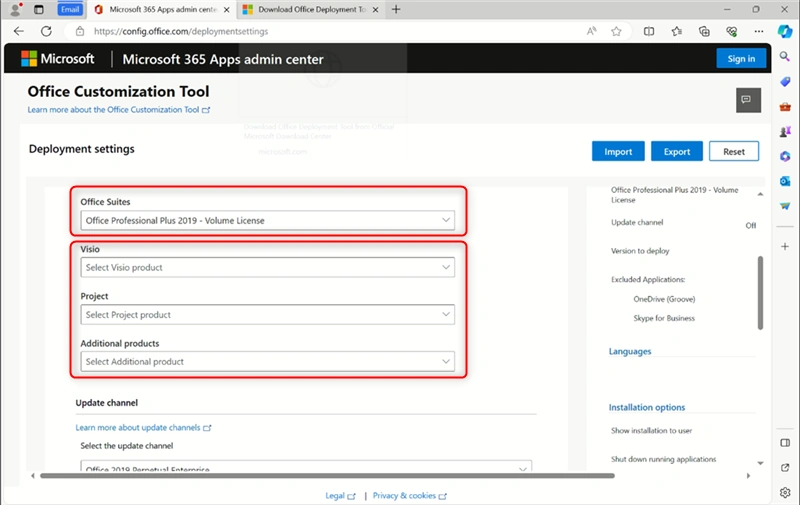
The Office Suites were Successfully selected.
In this case, I do not add any other products such as Visio, Project, or additional products, and keep it as default.
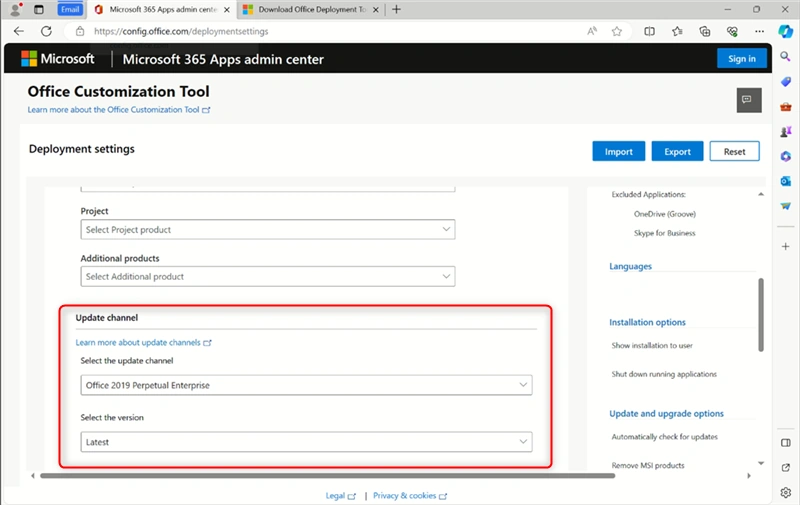
Step 3. Select the Update channel
When you select the Office suites, the update channel will automatically update with the latest channels and versions.
You can also change the version with the available options.
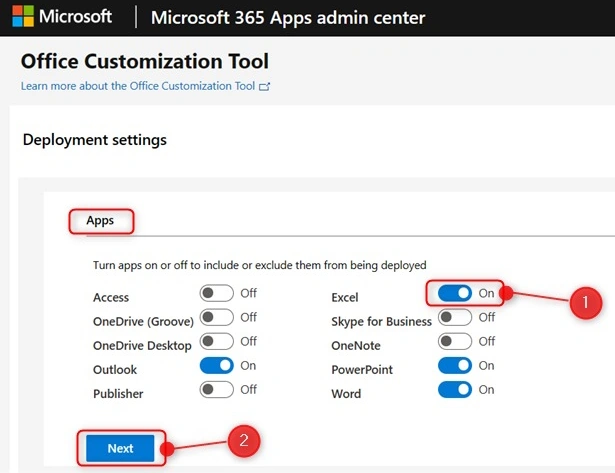
Step 4. Customize the Apps
Click On or Off to include or exclude the app while deploying the Office application on your computer. Then Click "Next".
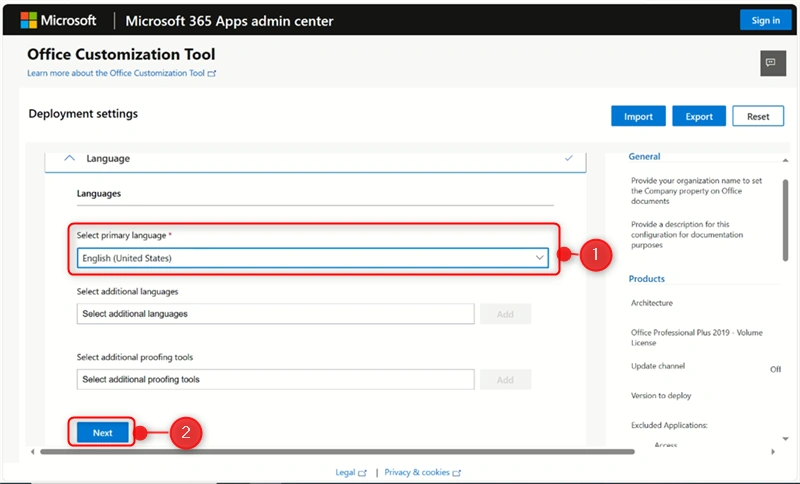
Step 5. Select the Languages
Select the primary language - English (United States). Then Click "Next".
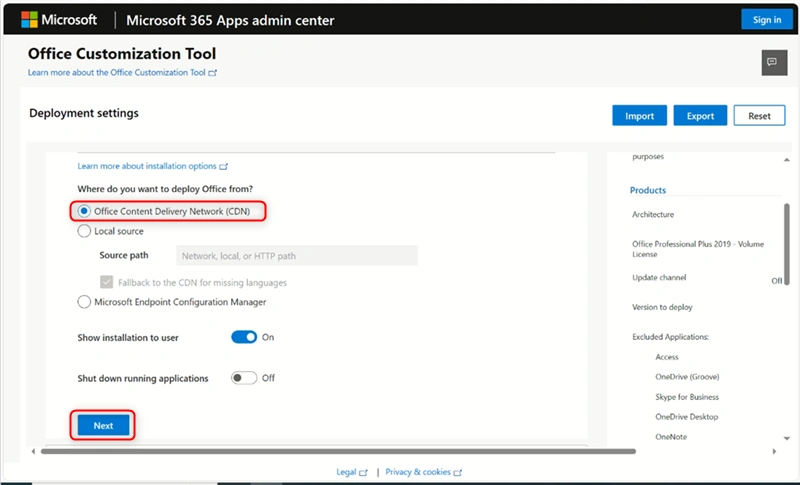
Step 6. Download the installation files
Choose the options available to download the installation files from CDN Local Source or MECM.
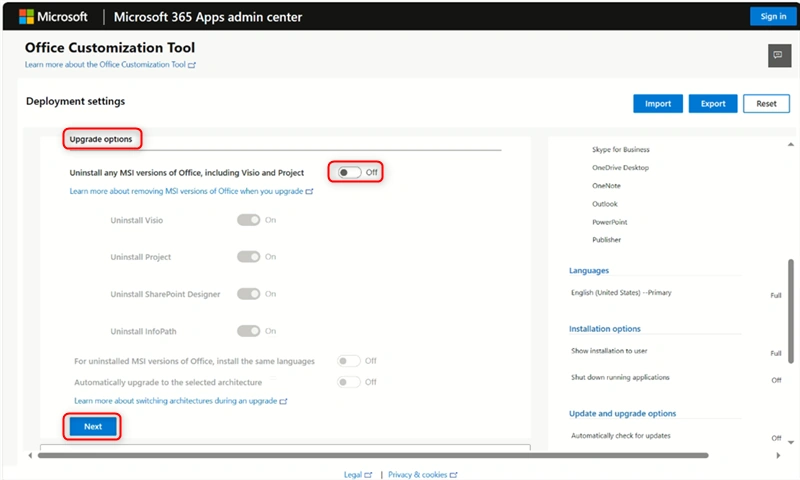
Step 7. Upgrade options
1. Click On or Off to Uninstall any Office version.
2. If you choose to turn them on, your previous Office, Visio, and Project applications will uninstall automatically. Then Click "Next".
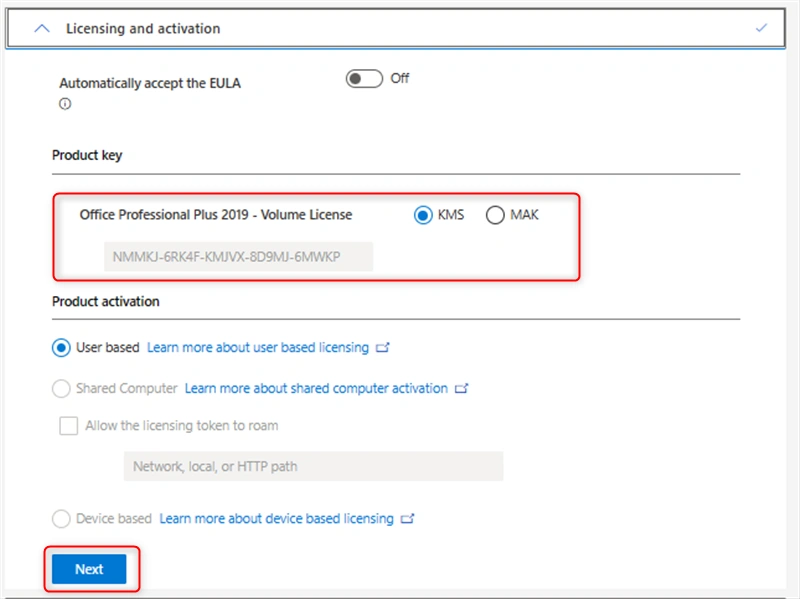
Step 8. Licensing and activation
Choose the License activation method. Then Click "Next".
Then Finish the Configuration.
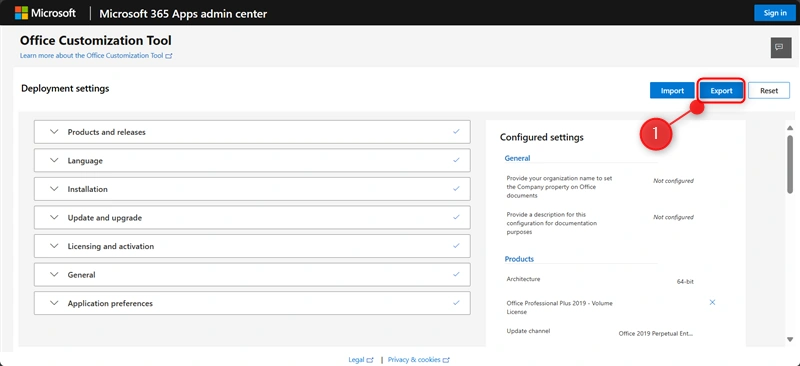
Step 9. Export the Configuration file
1. After finishing the deployment settings, click "Export" to save the configuration file.
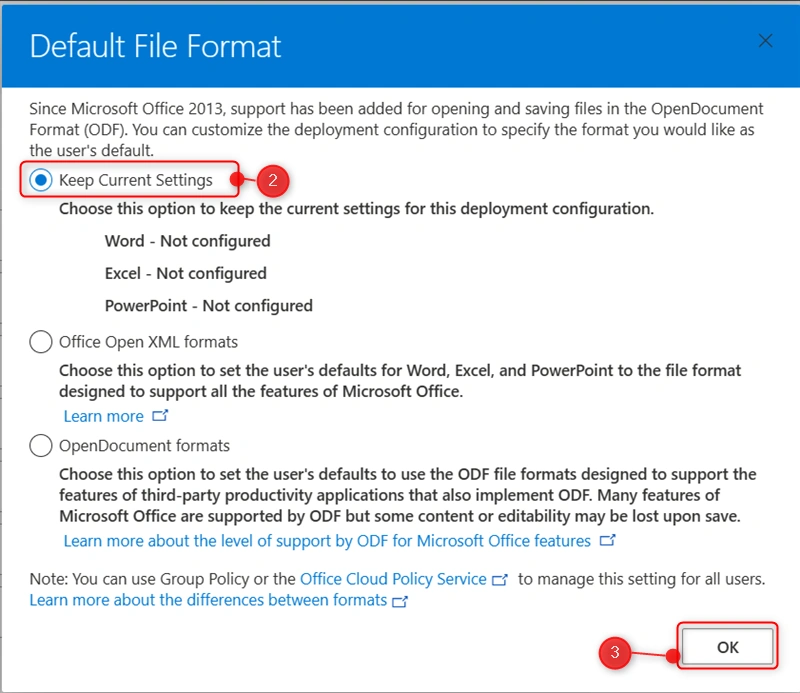
2. Select the Keep Current Settings. Then click "OK"
3. Accept the License agreement
4. File Name
5. Click "Export"
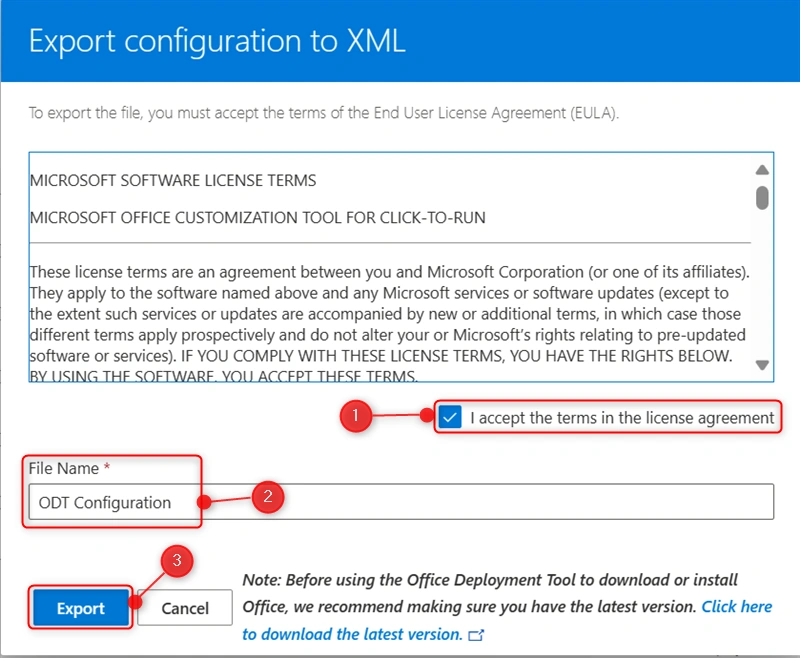
The configuration file has been successfully saved on your local computer.
The configuration file should be moved to the ODT Office Folder "ODT Configuration.xml".
Delete the default configuration files.
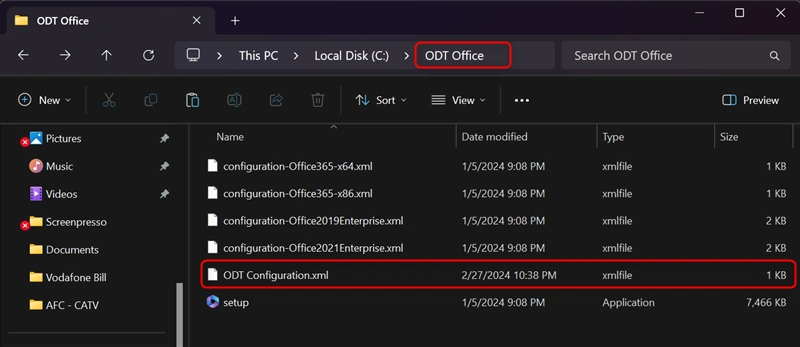
Microsoft Apps product and Language
Run the ODT to download and install the Microsoft Apps product and Language.
Step 1. Download the Microsoft Apps
- Run Command Prompt as Administrator.
- Change the directory to Office Deployment tool setup and configuration Folder Ex. "C:\OTDT Office"
- Use the following command to download Microsoft Office Apps products and languages.

Step 2. Install the Office Package
Type the following command to start "setup /configure configuration.xml" then hit enter.
After downloading, use the following command to install the downloaded products and languages on a client computer.
"setup /configure configuration.xml".
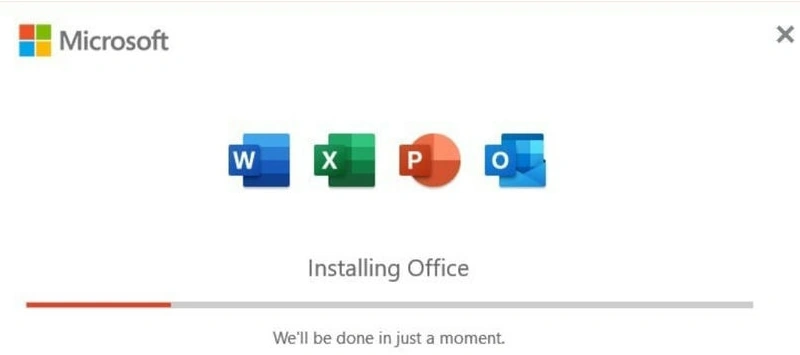
Now, enjoy your selected Microsoft Apps product and language!
Join the conversation! Your thoughts help the community grow.