

Introduction
If you make a layout into a declarative layout with the data binding you can avoid the expensive call findViewById(). Suppose you want to create a calculator application, then you have to place a number of buttons in the layout file for representing the digits and the operator.
That means you have to make a number of calls to findViewById() from the class file. If you convert that layout into a declarative layout with data binding then you can avoid the number of calls to findViewById. And also the data binding makes your layout more flexible.
In this article, I am going to create a simple Android application that demonstrates how to add the data binding library to your Android application and how to convert a layout into the declarative layout with data binding.
First, create your Android application as usual and add the data binding library into the Android studio project. This is already included with the Android SDK and we just need to enable data binding. For this open the module level Gradle file and add the following lines to the file.
- dataBinding {
- enabled true
- }
Now, create a bean class that is going to be used in the layout file.
- public class Student {
- private String firstName;
- private String lastName;
- public Student(String firstName, String lastName) {
- this.firstName = firstName;
- this.lastName = lastName;
- }
- public String getFirstName() {
- return firstName;
- }
- public void setFirstName(String firstName) {
- this.firstName = firstName;
- }
- public String getLastName() {
- return lastName;
- }
- public void setLastName(String lastName) {
- this.lastName = lastName;
- }
- }
- <?xml version="1.0" encoding="utf-8"?>
- <layout xmlns:android="http://schemas.android.com/apk/res/android" xmlns:app="http://schemas.android.com/apk/res-auto" xmlns:tools="http://schemas.android.com/tools">
- <data>
- <variable name="student" type="com.example.pranavjdev.databindingsample.Student" />
- </data>
- android:text="@{student.firstName}"
- <?xml version="1.0" encoding="utf-8"?>
- <layout xmlns:android="http://schemas.android.com/apk/res/android" xmlns:app="http://schemas.android.com/apk/res-auto" xmlns:tools="http://schemas.android.com/tools">
- <data>
- <variable name="student" type="com.example.pranavjdev.databindingsample.Student" />
- </data>
- <LinearLayout android:layout_width="match_parent" android:layout_height="match_parent" android:orientation="vertical" tools:context=".MainActivity">
- <TextView android:layout_width="wrap_content" android:layout_height="wrap_content" android:layout_margin="10dp" android:layout_gravity="center_horizontal" android:text="@{student.firstName}" />
- <TextView android:layout_width="wrap_content" android:layout_height="wrap_content" android:layout_margin="10dp" android:layout_gravity="center_horizontal" android:text="@{student.lastName}" />
- </LinearLayout>
- </layout>
Now go to the Java class and remove the setContentView() for it and initialize the binding variable for the mainactivity. Normally the name of the binding class would be layoutfinename+Binding. Here the layout name is activity_main and hence the binding class name would be like AcivityMainBinding(activity_main.xml). Create an object for the binding class and load the layout in onCreate by using the following codes.
- ActivityMainBinding binding = DataBindingUtil.setContentView(this,R.layout.activity_main);
- Student student = new Student("pranav","JDev");
- binding.setStudent(student);
- @Override
- protected void onCreate(Bundle savedInstanceState) {
- super.onCreate(savedInstanceState);
- ActivityMainBinding binding = DataBindingUtil.setContentView(this, R.layout.activity_main);
- Student student = new Student("pranav", "JDev");
- binding.setStudent(student);
- }
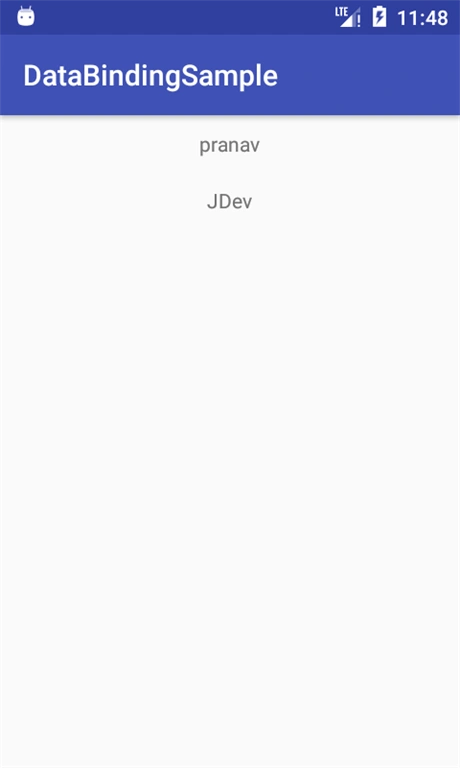
And the output will look like,
Happy coding. Cheers...
Sagar Pandurang KapPosted Jan 3, 2019, 12:03 AM
Nice Article.Keep sharing