

Introduction
Today, in this article let's play around with one of the interesting and most useful concepts in Silverlight.
Question: What is delete data using a Silverlight RIA enabled service?
In simple terms "This application enables deletion of data in the database with the help of a Silverlight RIA enabled service. It uses a base platform of entity framework to communicate with the database".
Step 1: Create a database named "Company" with employee table in it.
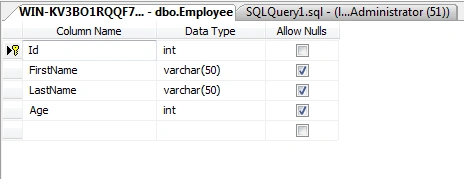
Step 2: Open Visual Studio and create a new Silverlight application enabled with RIA Services
Step 3: When the project is created, right-click on the RIA Service project and add a new entity data model framework and set it up for a previously created database.
Step 4: Again right-click on the RIA service project and add a Domain Service Class as a new item.
Step 5: The complete code of EmployeeDomain.cs looks like this (Domain Service Class):
namespace SilverlightRIAInsert.Web
{
using System;
using System.Collections.Generic;
using System.ComponentModel;
using System.ComponentModel.DataAnnotations;
using System.Data;
using System.Linq;
using System.ServiceModel.DomainServices.EntityFramework;
using System.ServiceModel.DomainServices.Hosting;
using System.ServiceModel.DomainServices.Server;
// Implements application logic using the CompanyEntities context.
// TODO: Add your application logic to these methods or in additional methods.
// TODO: Wire up authentication (Windows/ASP.NET Forms) and uncomment the following to disable anonymous access
// Also consider adding roles to restrict access as appropriate.
// [RequiresAuthentication][EnableClientAccess()]
public class EmployeeDomain : LinqToEntitiesDomainService<CompanyEntities>
{
// TODO:// Consider constraining the results of your query method. If you need additional input you can
// add parameters to this method or create additional query methods with different names.
// To support paging you will need to add ordering to the 'Employee'
query.public IQueryable<Employee> GetEmployee()
{
return this.ObjectContext.Employee;
}
public void InsertEmployee(Employee employee)
{
if ((employee.EntityState != EntityState.Detached))
{
this.ObjectContext.ObjectStateManager.ChangeObjectState(employee, EntityState.Added);
}
else
{
this.ObjectContext.Employee.AddObject(employee);
}
}
public void UpdateEmployee(Employee currentEmployee)
{
this.ObjectContext.Employee.AttachAsModified(currentEmployee, this.ChangeSet.GetOriginal(currentEmployee));
}
public void DeleteEmployee(Employee employee)
{
if ((employee.EntityState != EntityState.Detached))
{
this.ObjectContext.ObjectStateManager.ChangeObjectState(employee, EntityState.Deleted);
}
else
{
this.ObjectContext.Employee.Attach(employee);
this.ObjectContext.Employee.DeleteObject(employee);
}
}
}
}
Step 6: Now rebuild the solution file.
Step 7: The complete code of MainPage.xaml looks like this:
<usercontrolx:class="SilverlightRIAInsert.MainPage"xmlns="http://schemas.microsoft.com/winfx/2006/xaml/presentation"
xmlns:x="http://schemas.microsoft.com/winfx/2006/xaml"xmlns:d="http://schemas.microsoft.com/expression/blend/2008"
xmlns:mc="http://schemas.openxmlformats.org/markup-compatibility/2006"mc:ignorable="d"
d:designheight="300"d:designwidth="543">
<Gridx:Name="LayoutRoot"Width="608">
<TextBlockHeight="23"HorizontalAlignment="Left"Margin="152,29,0,0"Name="textBlock1"Text="Id"FontFamily="Verdana"FontSize="15"VerticalAlignment="Top"/>
<TextBoxHeight="23"HorizontalAlignment="Left"Margin="252,25,0,0"Name="textBox1"VerticalAlignment="Top"Width="120"/>
<ButtonContent="Delete"FontFamily="Verdana"FontSize="19"Background="DeepSkyBlue"Height="44"HorizontalAlignment="Left"Margin="252,67,0,0"Name="button1"VerticalAlignment="Top"Width="120"Click="button1_Click"/>
</Grid>
</usercontrol>
Step 8: The complete code of MainPage.xaml.cs looks like this:
using System;
using System.Collections.Generic;
using System.Linq;
using System.Net;
using System.ServiceModel.DomainServices.Client;
using System.Windows;
using System.Windows.Controls;
using System.Windows.Documents;
using System.Windows.Input;
using System.Windows.Media;
using System.Windows.Media.Animation;
using System.Windows.Shapes;
using SilverlightRIADelete.Web;
namespace SilverlightRIADelete
{
public partial class MainPage : UserControl
{
public MainPage()
{
InitializeComponent();
}
EmployeeDomain objDomain = new EmployeeDomain();
private void button1_Click(object sender, RoutedEventArgs e)
{
EntityQuery<Employee> query = objDomain.GetEmployeeQuery();
objDomain.Load(query, DeleteLoad, null);
MessageBox.Show("Data Deleted Successfully");
}
public void DeleteLoad(LoadOperation<Employee> emp)
{
foreach (Employee e in objDomain.Employees)
{
if (e.Id == int.Parse(textBox1.Text))
{ objDomain.Employees.Remove(e);
objDomain.SubmitChanges(); break;
}
}
textBox1.Text = string.Empty;
}
}
}
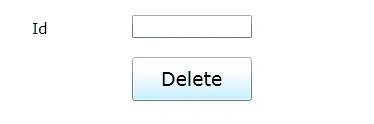
Step 9: The output of the application looks like this:
Step 10: Data entering output of application looks like this:
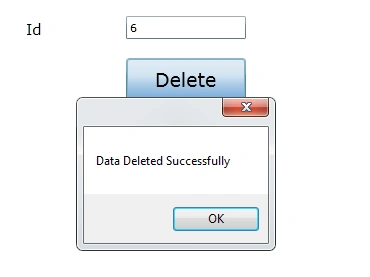
Step 11: Data deleted output of the application looks like this:
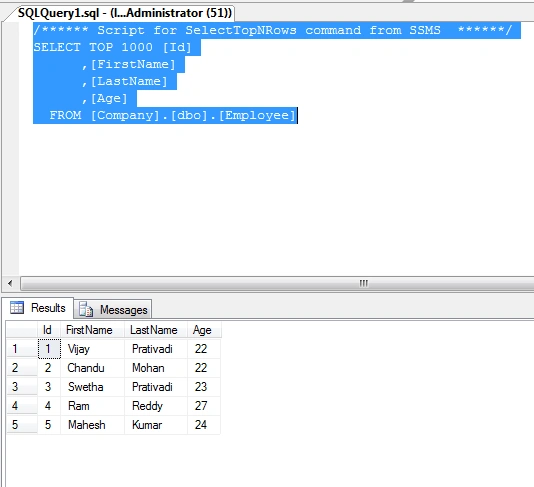
I hope this article is useful for you.
Comments
Join the conversation! Your thoughts help the community grow.