

This is is my third article on Azure Blob Storage in this I just tried to use blob storage in ASP.NET MVC application with helping of ASP.NET Web role it’s a kind of demo project Application to store Images file to blob storage and edit update them and also get the list. Before reading this article I’ll recommend to read the following two previous articles:
- Installation Of Azure SDK And Blob Storage In Azure: Part 1
- Upload Image To Azure Blob Storage In ASP.NET: Part 2
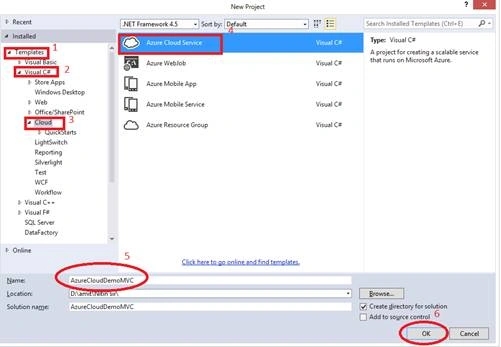
Step 1: Open Visual Studio, Templates, Visual C#, then Cloud.
Step 2: Select “Azure Cloud Service”.
Step 3: In the name section, I have given name to my project “AzureCloudDemoMVC”.
Step 4: Click on OK button.
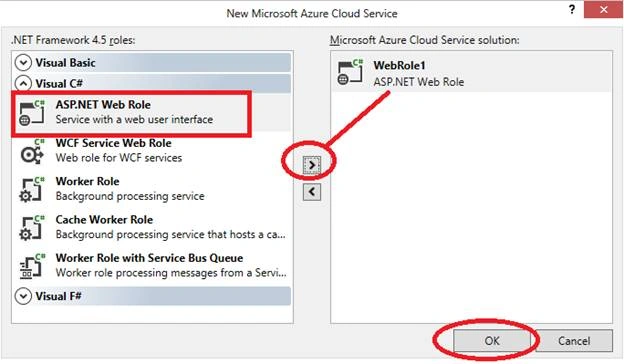
After clicking on “OK” button choose “ASP.NET Web Role”.
Web Role: Web Role is a font and application or we can say a user interface.
Click on (>) button (In the red circle).
Hit on “OK” button.
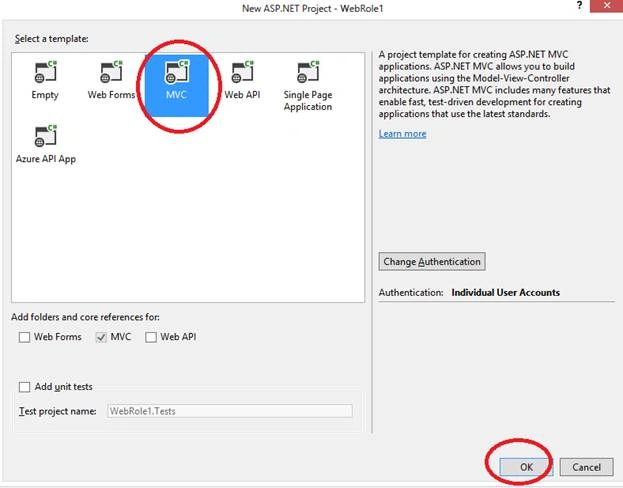
Click on “MVC” because I am going to create an MVC Application.
Click on “OK” button.
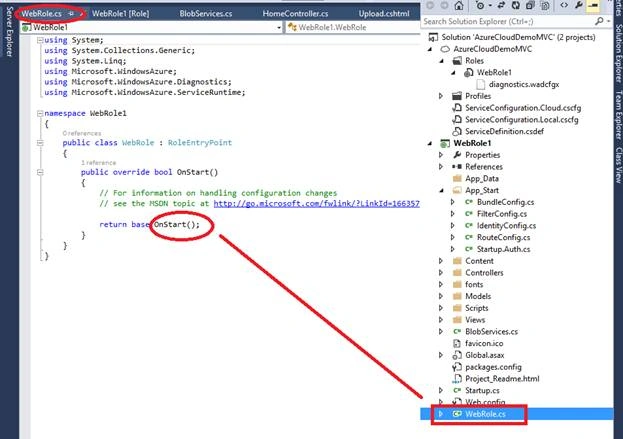
In the following figure, I have a Window Azure Cloud Project with name “AzureCloudDemoMVC”, you can see In Solution Explorer.
And “WebRole1” is a regular MVC project in my Solution Explorer.
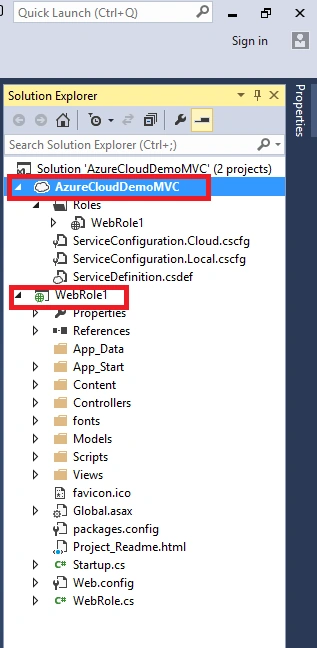
You can notice here, a new file with the name “WebRole.cs”. This file contains entry point settings of MVC application. You need this file while MVC running in Cloud Services. The information written in this file executes before the execution of “Global.asax” file.
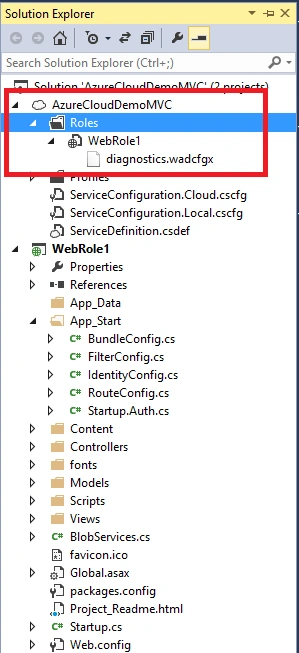
The other project is “AzureCloudDemoMVC”, this is actually a cloud project. Inside this project, you will find the “Roles” folder and in the “Roles” folder you will find “WebRole1”.
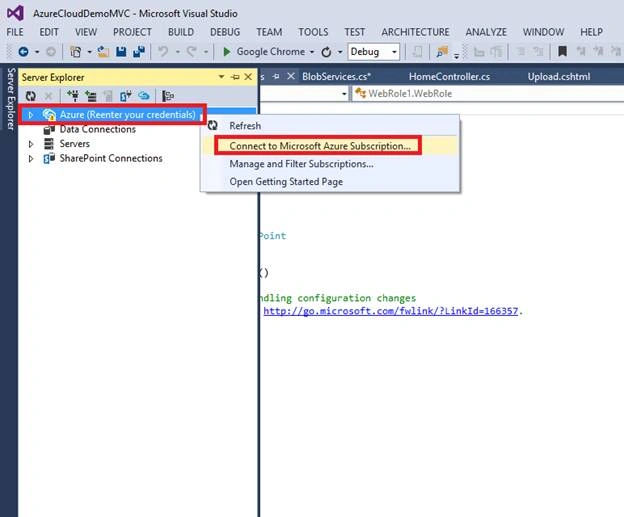
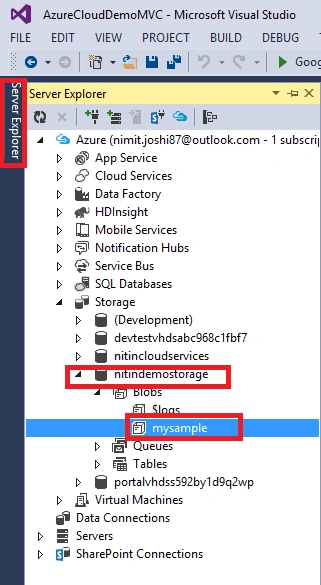
Now we need to connect with Azure, so go in the “Server Explorer” and right click on “Azure (Reenter your credentials)" and go to “Connect to Microsoft Azure Subscription”.
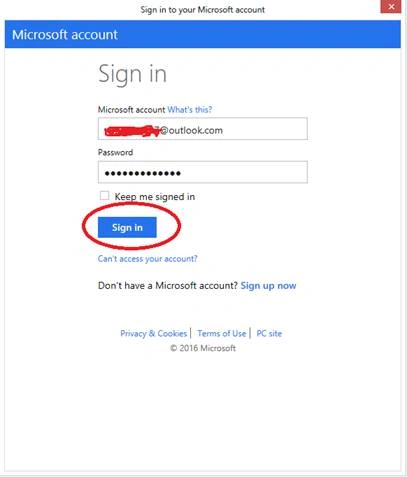
Fill the Login detail and click on “Sign in” button.
So, we have successfully connected with the Azure Account, and right click on the “Storage” and select “Attach External Storage”.
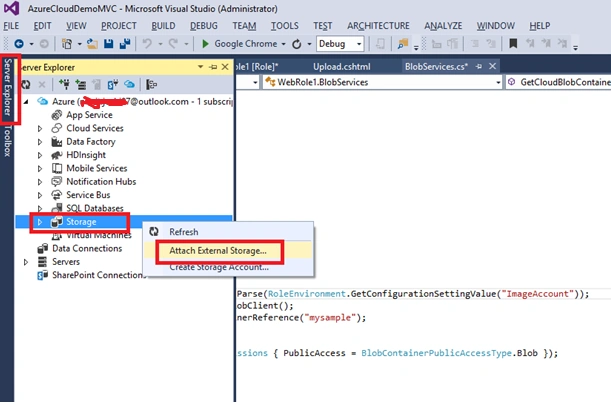
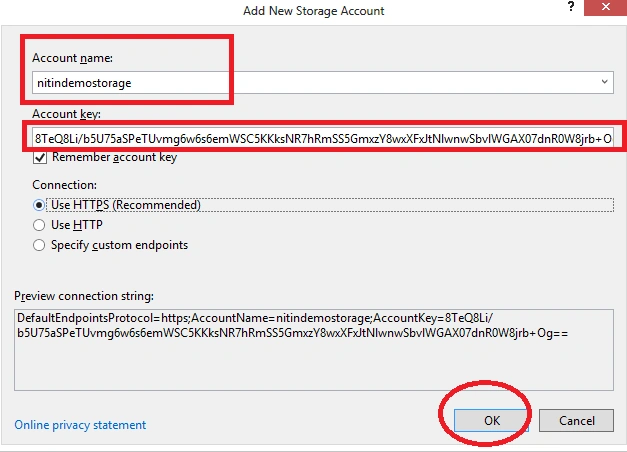
In the “Account Name” section and in “Account key” section provide name and key from the Azure Storage, so go to your Azure Storage and copy name and key from account.
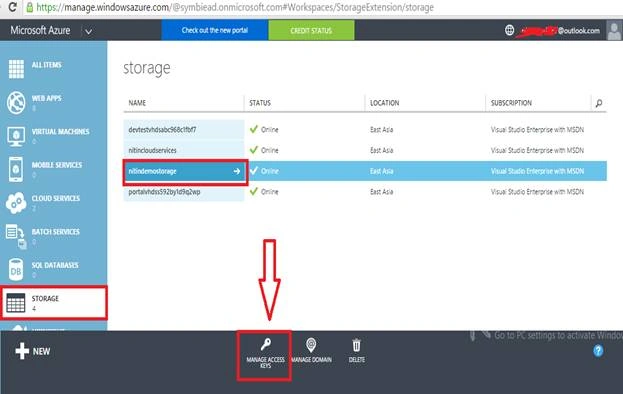
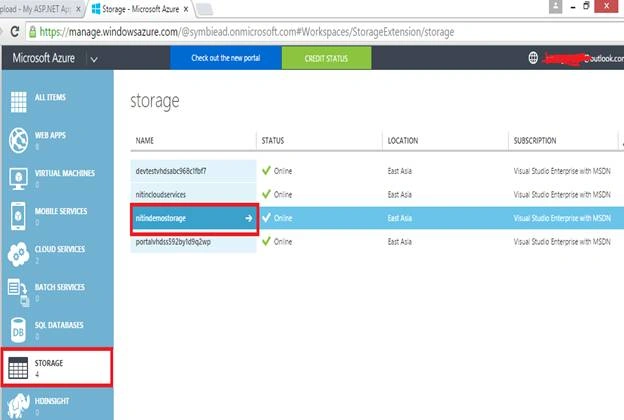
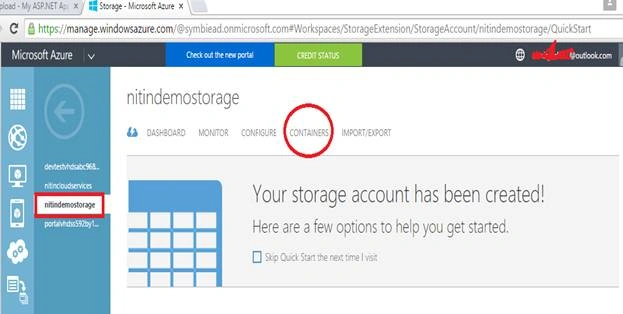
In the Cloud, go to “STORAGE” and click on your storage account, here my storage account is “nitindemostorage”, and click on “MANAGE ACCESS KEYS”.
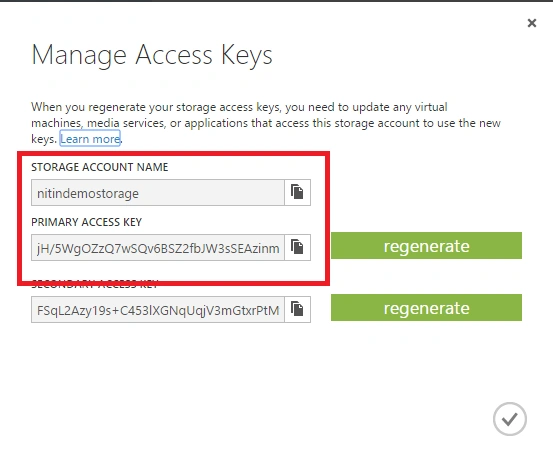
Copy the “Storage Account Name” and "Primary Access Key” from here and paste it over there.
After pasting name and key click on “OK” button.
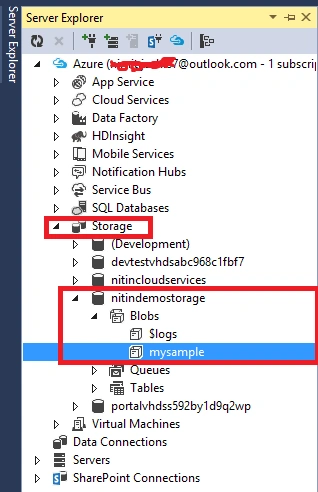
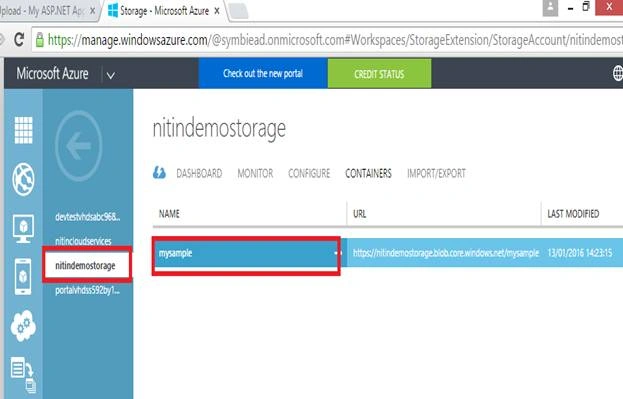
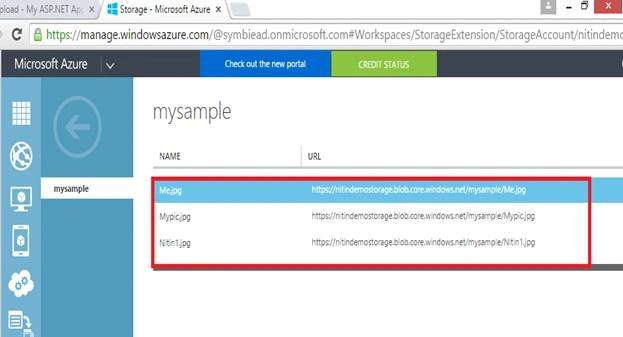
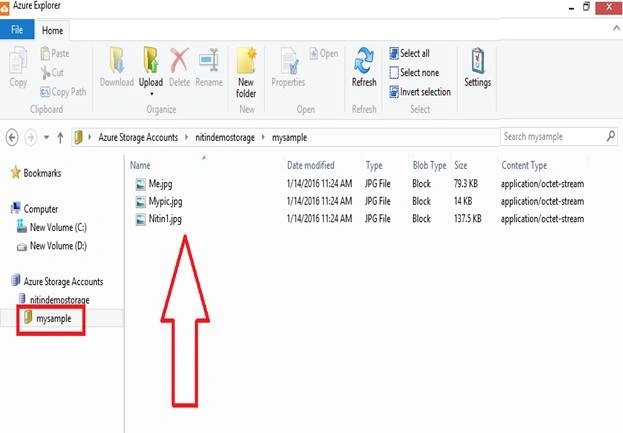
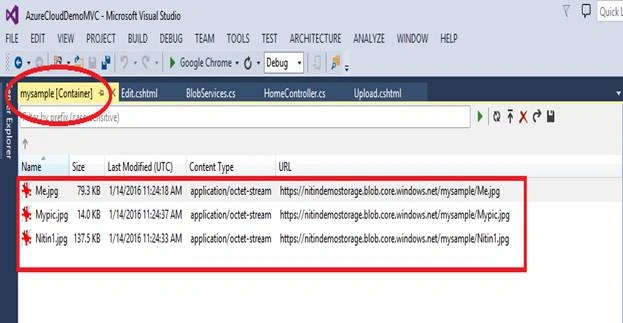
We got my storage account ”nitindemostorage” and in this we have a “Blob” and “mysample” named Blob Container.
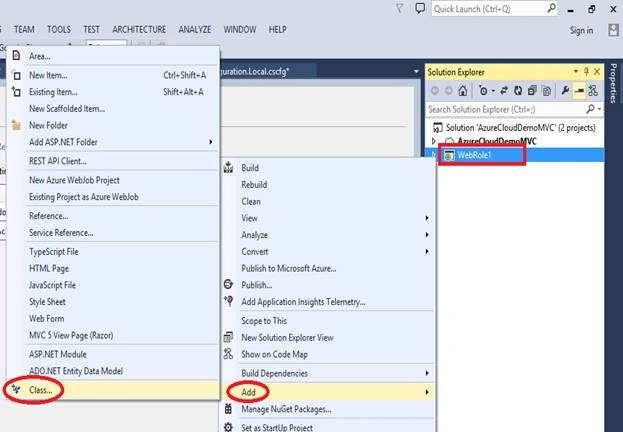
Now go in to project which is “WebRole1”, right click on project, select “Add” and then select a “Class”.
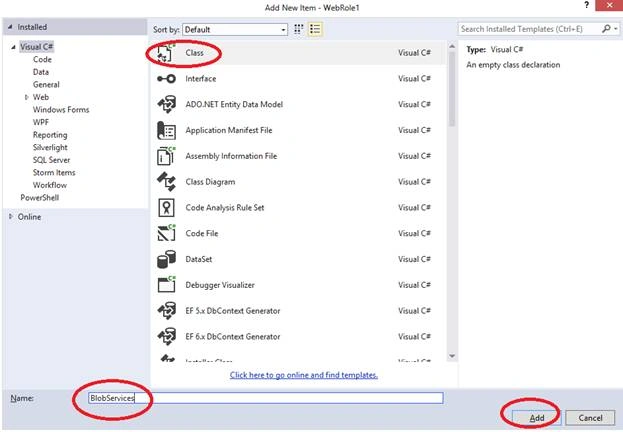
Give a name to your class, whatever you want, here I have given it “BlobServices”.
Then click on “Add” button.
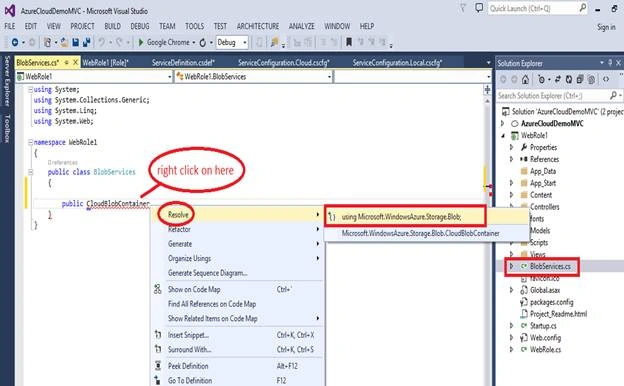
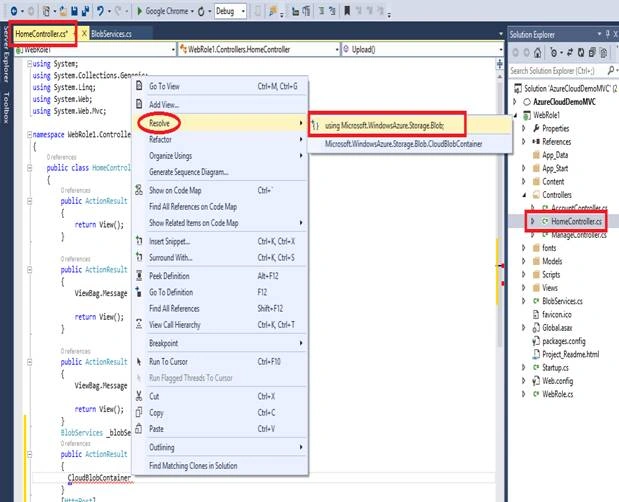
Now, let’s go ahead and add a method that will get cloud blob container information. Right click near “CloudBlobContainer” and import a namespace, select “Resolve” and click on “using Microsoft.WindowsAzure.Storage.Blob”.
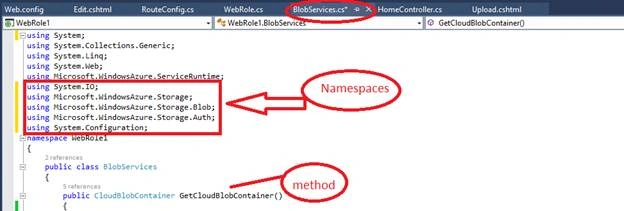
We need to write some important namespaces, so go ahead and type the namespaces.
- using System.IO;
- using Microsoft.WindowsAzure.Storage;
- using Microsoft.WindowsAzure.Storage.Blob;
- using Microsoft.WindowsAzure.Storage.Auth;
- using System.Configuration;
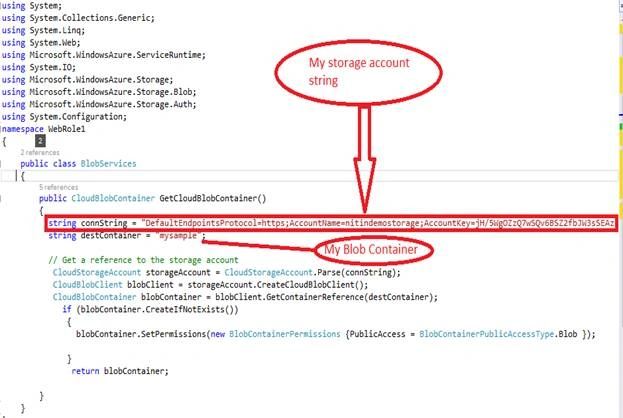
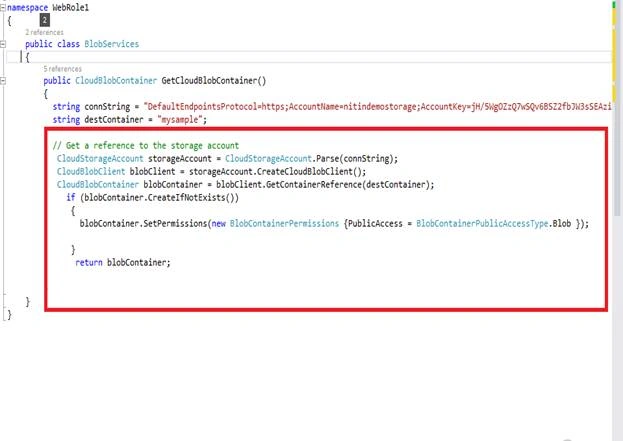
Here, I have creating a string to give the string of my storage account. You can copy the connection string from your Azure Explorer. So go in Azure Explorer and copy the string from Azure Storage.
- public CloudBlobContainer GetCloudBlobContainer()
- {
- string connString = "DefaultEndpointsProtocol=https;AccountName=nitindemostorage;AccountKey=jH/5WgOZzQ7wSQv6BSZ2fbJW3sSEAzinmOUhorUWFpfJSUKPUopAD5uDIP3lvJujmnw1hBoD2RFSzHlPYt2nLw==;";
- string destContainer = "mysample";
- // Get a reference to the storage account
- CloudStorageAccount storageAccount = CloudStorageAccount.Parse(connString);
- CloudBlobClient blobClient = storageAccount.CreateCloudBlobClient();
- CloudBlobContainer blobContainer = blobClient.GetContainerReference(destContainer);
- if (blobContainer.CreateIfNotExists())
- {
- blobContainer.SetPermissions(newBlobContainerPermissions
- {
- PublicAccess = BlobContainerPublicAccessType.Blob
- });
- }
- return blobContainer;
- }
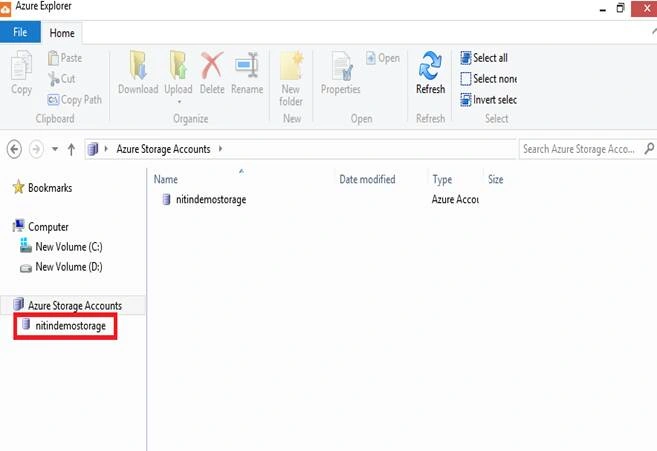
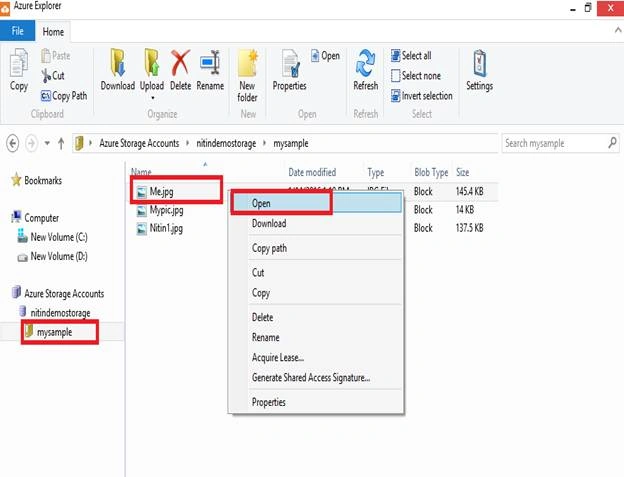
Now go into Azure Explorer and copy the connection string from storage account.
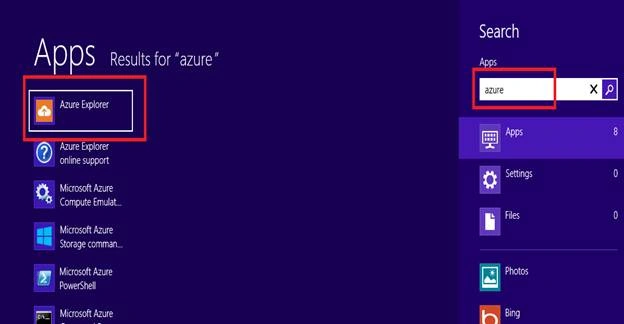
Go into search box and type Azure Explorer.
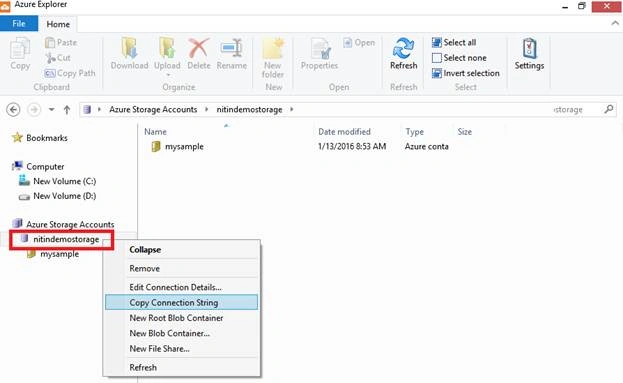
Now right click on Azure Storage account that is “nitindemostorage” and select “Copy Connection string” to copy it. Paste the connection string in the “string connString”.
Now I am going to use here,
CloudBlobClient:- To create the cloud blob service client.
CloudBlobContainer: To check if there is any Blob Container of “mysample” named in the storage account.
And here I have used if condition to check if there is any Blob Container, so just go in to the storage account and create a Blob Storage of name “mysample”.
And finally it will return Blob Container. Container is nothing but just a folder in the cloud.
If there is a blob container then it will use existing.
Now go ahead and use this setup in my Controller.
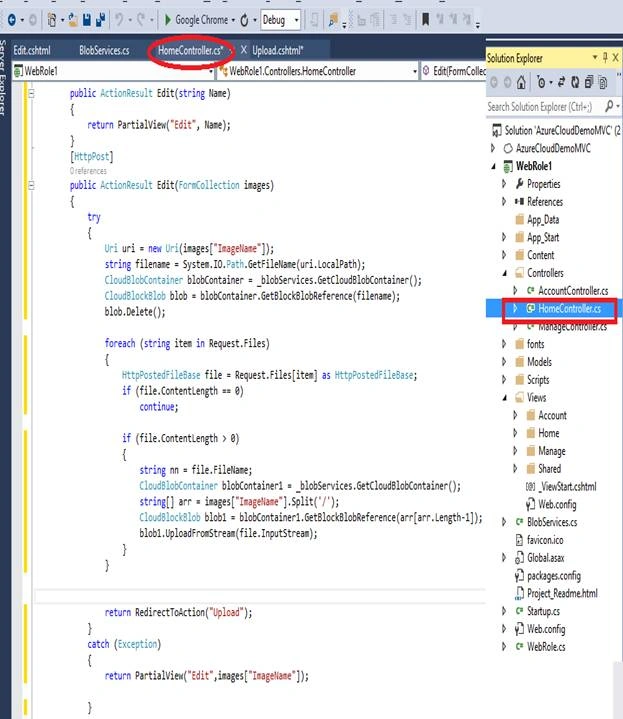
Go to “HomeController.cs”.
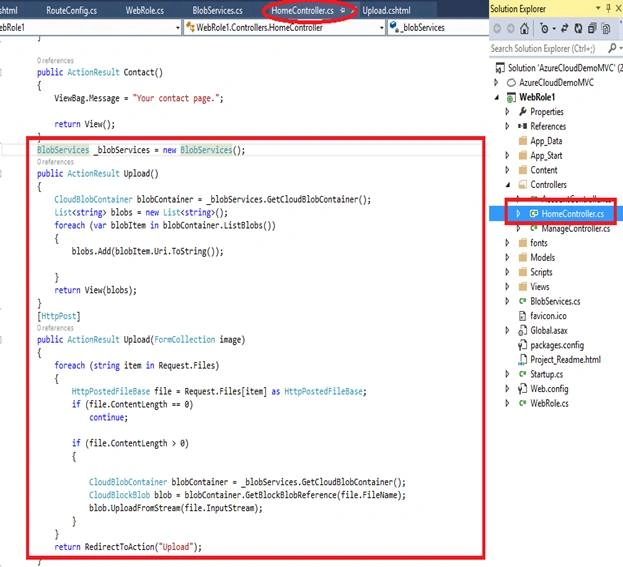
I’m going to add a new Action method inside this “HomeController”.
Blob Services class is nothing but a “BlobServices.cs” class which is used in the previous “BlobServices.cs” class.
We have created a “Upload()” method with ActionResult Return type.
Inside the “Upload()”, create “CloudBlobContainer” and list name all the blobs and “_blobServices” is object of my class.
Inside this Action Result, list available blobs, Uri in the container and return it to the view page to display all the blobs.
Means if you upload the blobs which is image it will list all the images and look through the images and return the Uri of the images to the view page.
- BlobServices _blobServices = newBlobServices();
- publicActionResult Upload()
- {
- CloudBlobContainer blobContainer = _blobServices.GetCloudBlobContainer();
- List < string > blobs = newList < string > ();
- foreach(var blobItem in blobContainer.ListBlobs())
- {
- blobs.Add(blobItem.Uri.ToString());
- }
- return View(blobs);
- }
publicActionResult Upload(FormCollectionimage)- It will collect the posted file image information, and upload it to the Blob Container and at the end this will redirect to the same view to make recently image visible to user.
- [HttpPost]
- public ActionResult Upload(FormCollection image)
- {
- foreach(string item in Request.Files)
- {
- HttpPostedFileBase file = Request.Files[item] asHttpPostedFileBase;
- if (file.ContentLength == 0)
- continue;
- if (file.ContentLength > 0)
- {
- CloudBlobContainer blobContainer = _blobServices.GetCloudBlobContainer();
- CloudBlockBlob blob = blobContainer.GetBlockBlobReference(file.FileName);
- blob.UploadFromStream(file.InputStream);
- }
- }
- return RedirectToAction("Upload");
- }
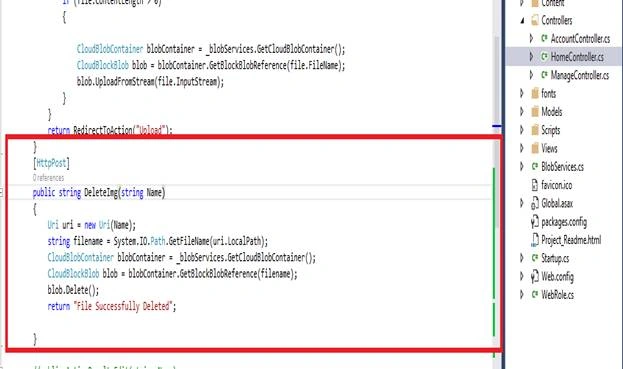
Now we need to create one more method to delete the blobs, so let’s go ahead and create a method for deleting the blob.
You can see, this method will accept name as a parameter and return stream message which is String and will return “File Successfully Deleted”.
“Name” is nothing but “uri” of the images, uri means the complete address of the image.
“uri.LocalPath” is a path that contains the actual description of the images.
- [HttpPost]
- public string DeleteImg(string Name)
- {
- Uri uri = newUri(Name);
- string filename = System.IO.Path.GetFileName(uri.LocalPath);
- CloudBlobContainer blobContainer = _blobServices.GetCloudBlobContainer();
- CloudBlockBlob blob = blobContainer.GetBlockBlobReference(filename);
- blob.Delete();
- return "File Successfully Deleted";
- }
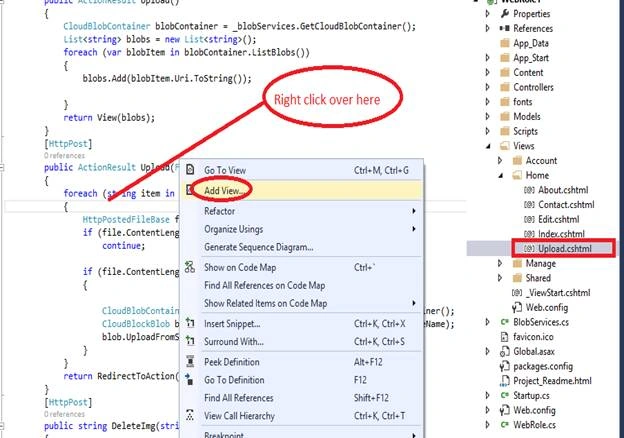
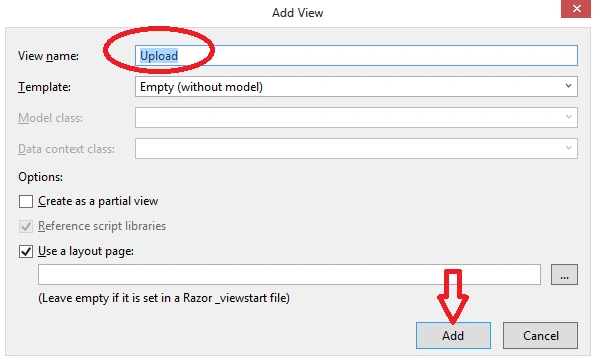
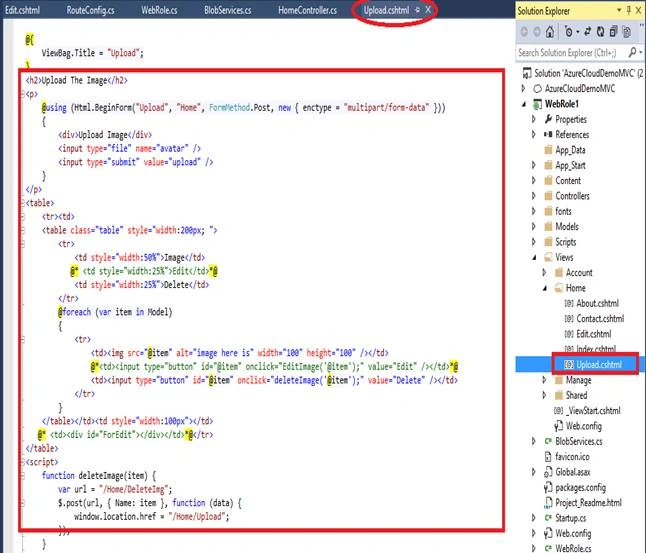
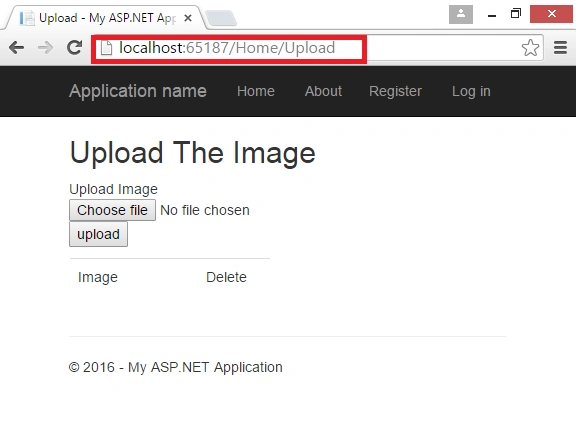
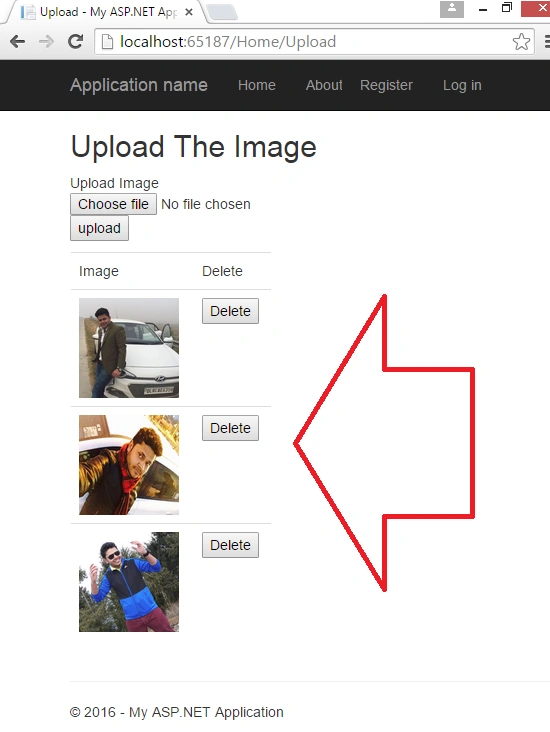
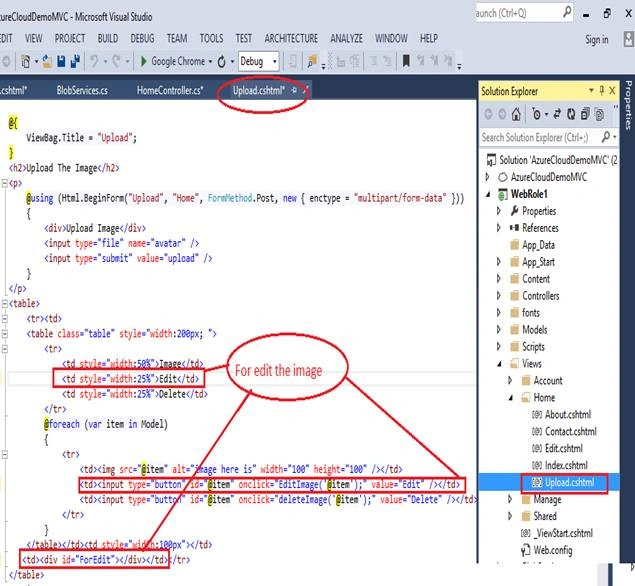
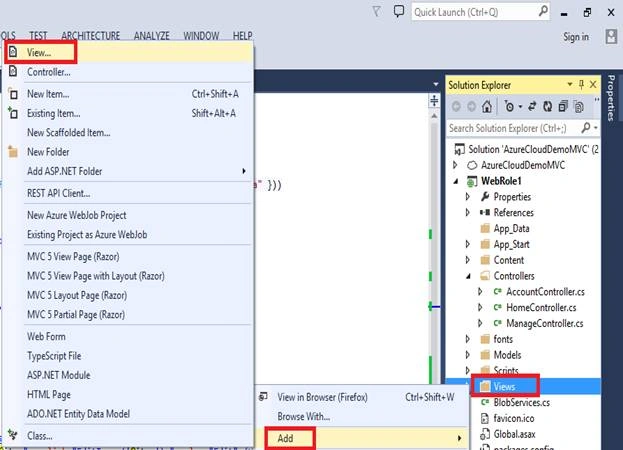
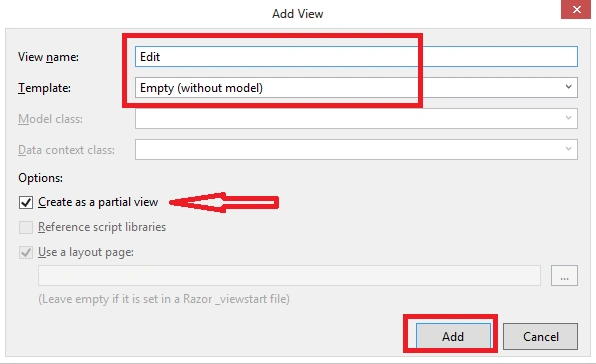
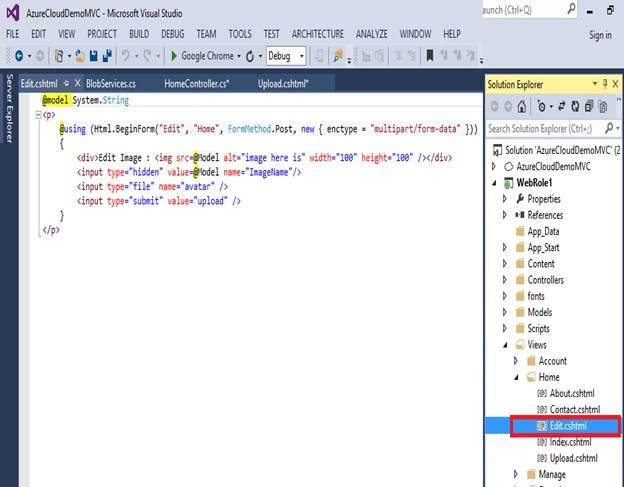
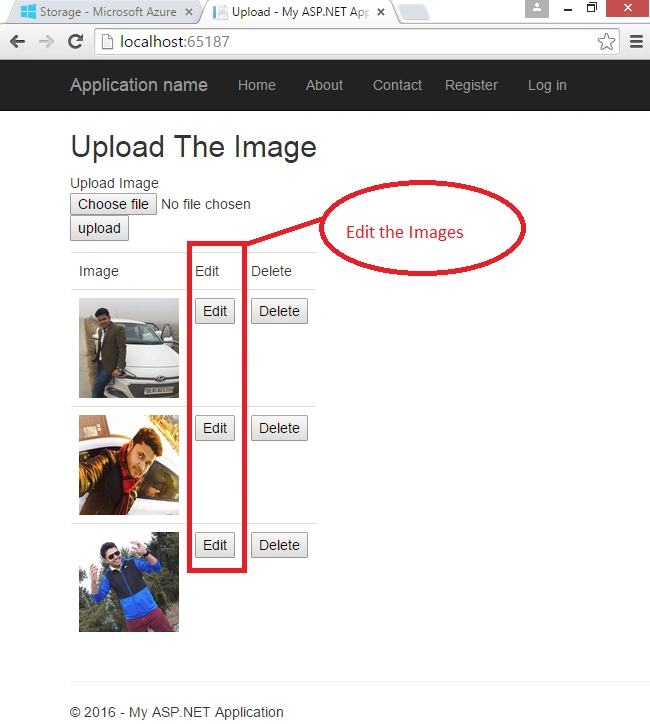
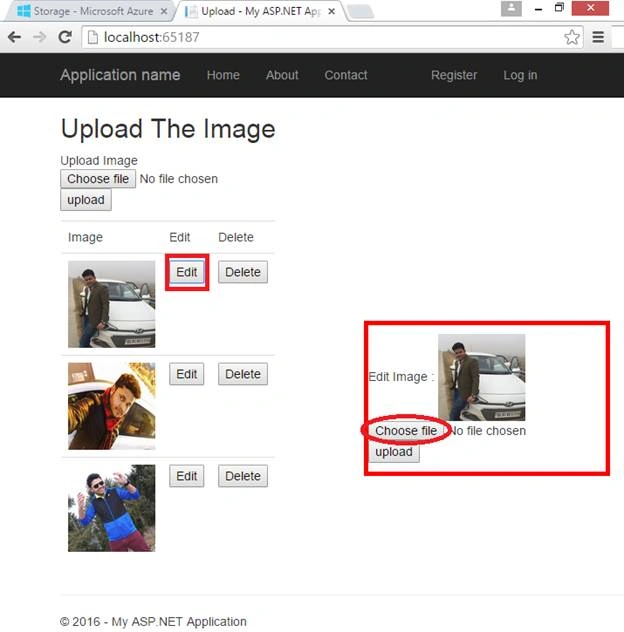
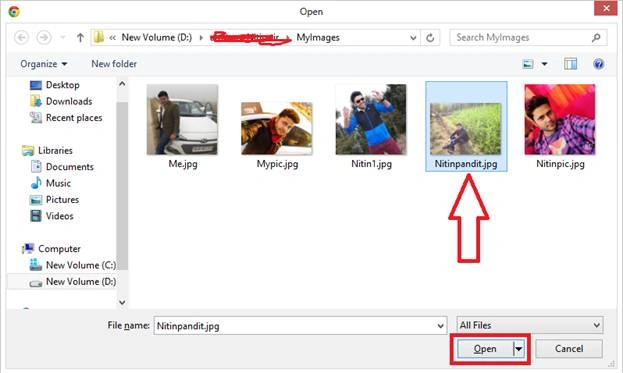
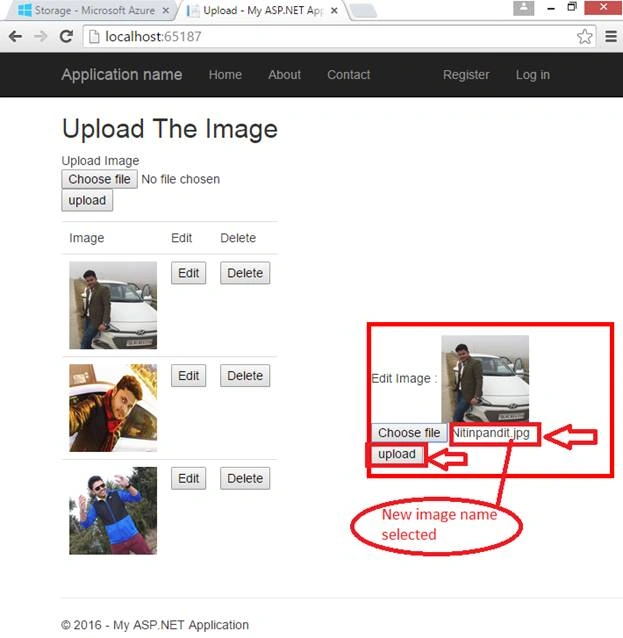
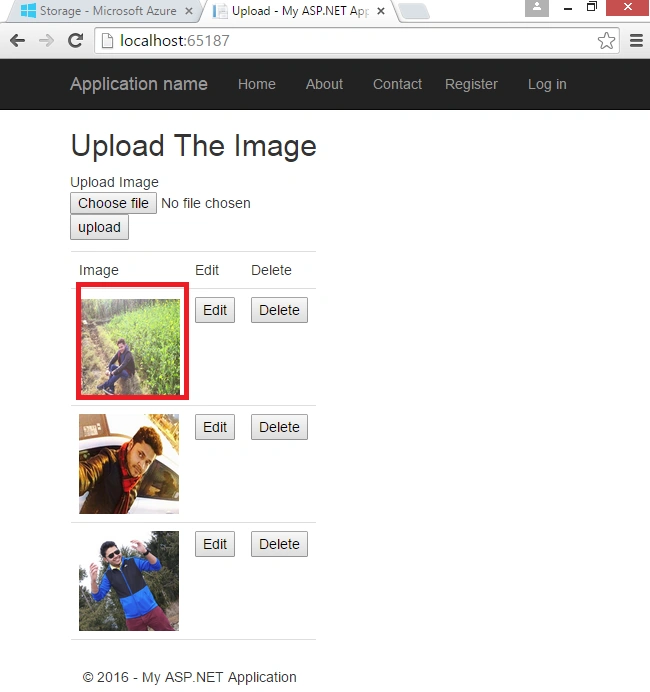
Now we need to add a view for the design that design will be shown on our browser, means that we want to show in the browser.

Asif PatelPosted Dec 9, 2017, 4:40 AM
This is one of the most great walkthrough I came across. Thanks sharing your hard work with us learners. On that note can you help me figure out how can I use the same method or technique to let many users perform text data entry and then query that data table as well as perform edit actions. All this using Azure Storage instead of classic SQL. I have a Azure SQL based web UI but I want to move to Azure Storage.
Santhakumar MunuswamyPosted Jan 17, 2016, 2:24 PM
Thanks for nice article. keep it up
Nanddeep NachanPosted Jan 16, 2016, 5:50 AM
Nice share
Kumaresh RajalingamPosted Jan 16, 2016, 12:49 AM
Good one sir
Debasis SahaPosted Jan 15, 2016, 6:16 AM
Good One..
Shridhar SharmaPosted Jan 15, 2016, 5:31 AM
nice share sir.