

Introduction
In this article series, we will learn how to create a .NET Core API that can do CRUD operations on Azure Cosmos DB and then publish it to Azure Cloud. After that, we will secure the API with Easy Auth using Facebook as Identity Provider.
This is part 2 of the article series. To follow along please make sure you start with Part 1 first.
Learning Objectives
- Deploy .NET Core API to Azure Cloud
- Build Authentication with Facebook as the identity provider
Prerequisites
- Azure account - If you don't have it already you can create one for free by visiting Cloud Computing Services | Microsoft Azure.
- Azure Cosmos DB Setup - If want step-by-step instructions on how to do that please follow this article
- A working .NET Core Rest API with Azure Cosmos DB as backend. Please check Part 1 of this article series where we have created and tested that API.
Step 1 - Deploy the .NET Core Rest API to Azure Cloud
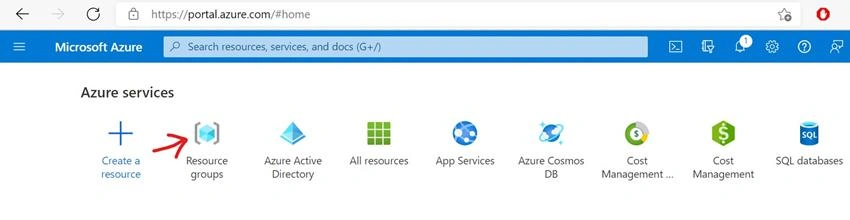
Go to Azure Portal and click on resource groups
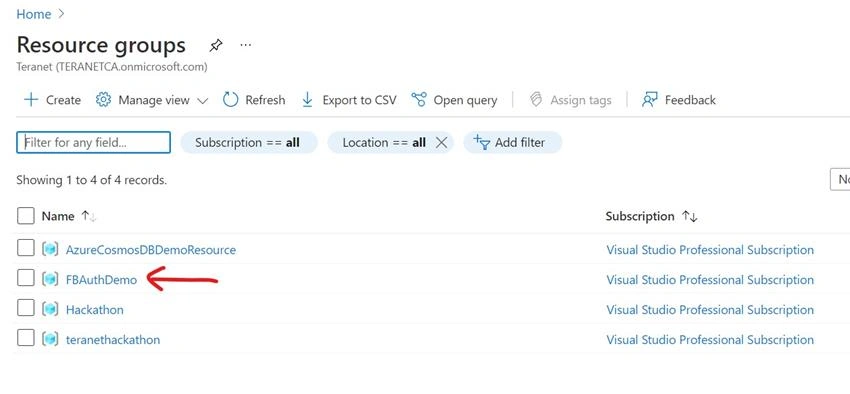
Click on your Resource group. You should have created this resource group when you created the Azure Cosmos DB. I created the resource group "FBAuthDemo" so I will be clicking on that. It's advisable to keep all your related resources in one Resource group so they can be easily deleted when you are done.
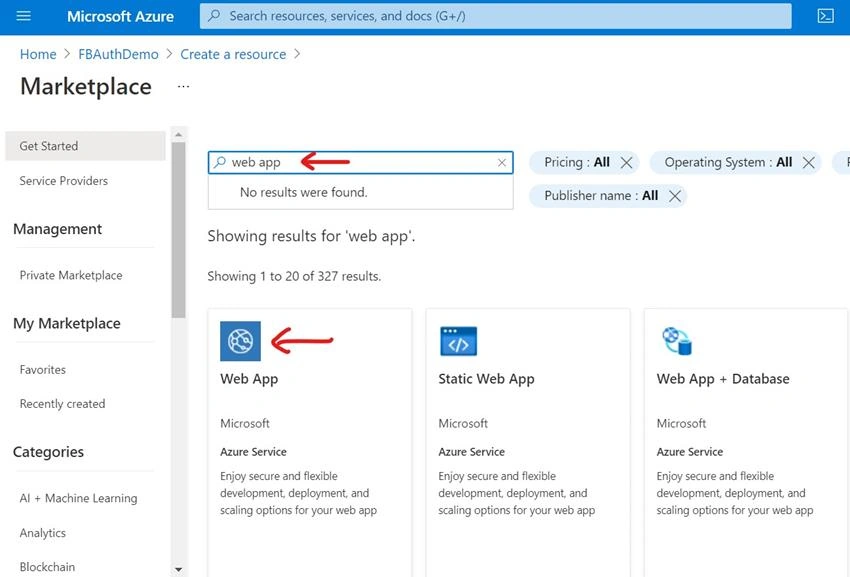
Click on Create Button

In the search box type web app and choose Web App from the result set.
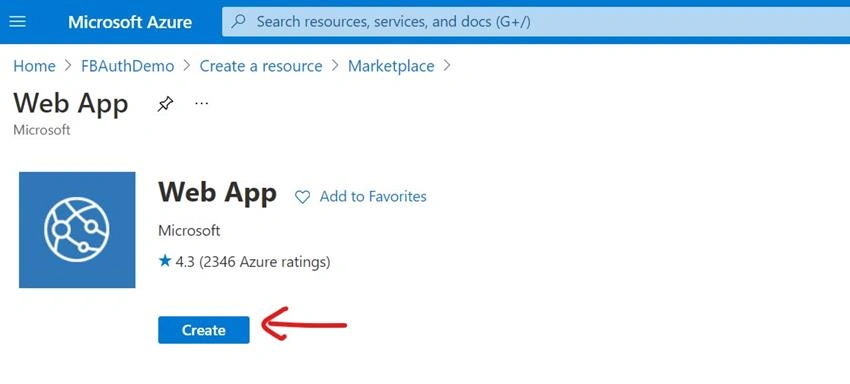
Click on Create button
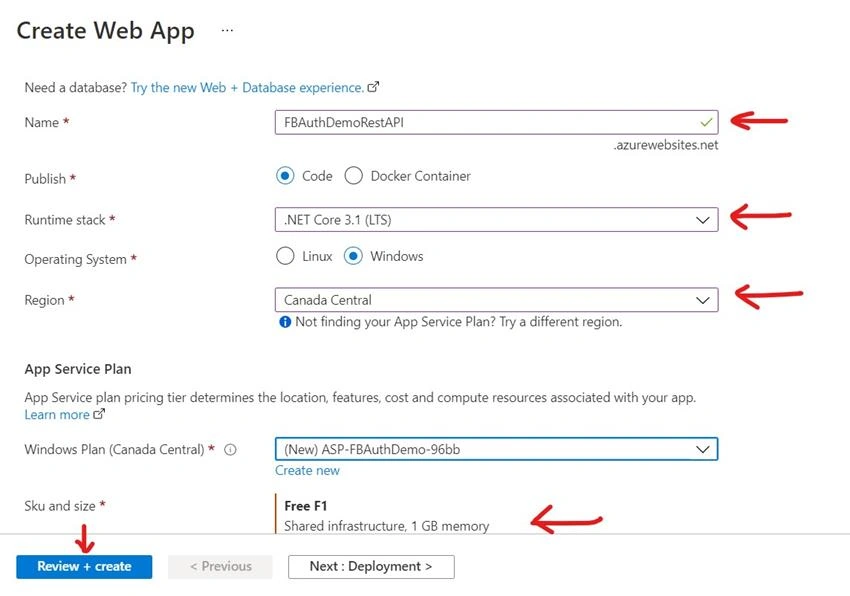
Choose a unique Name for your app, Runtime stack as .NET Core 3.1 (LTS), Region, and SKU and Size (for dev projects we can select the Free Tier). Click Review+Create button
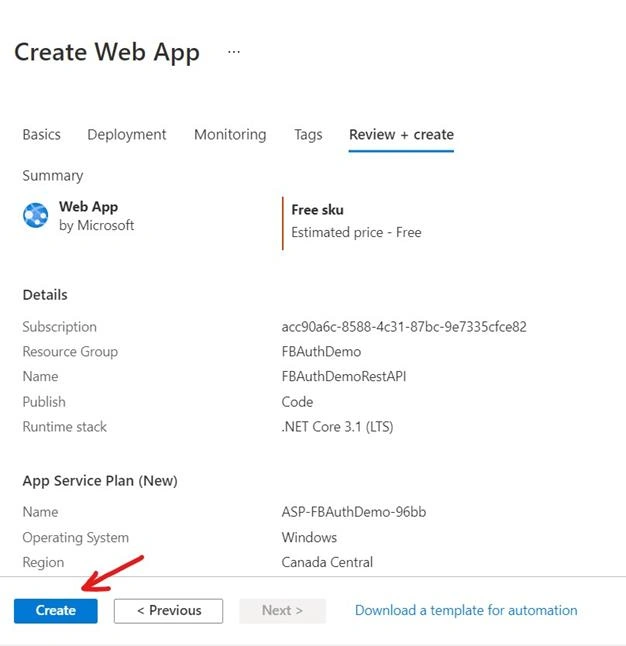
You will be presented with a summary page. If everything looks ok click the Create button
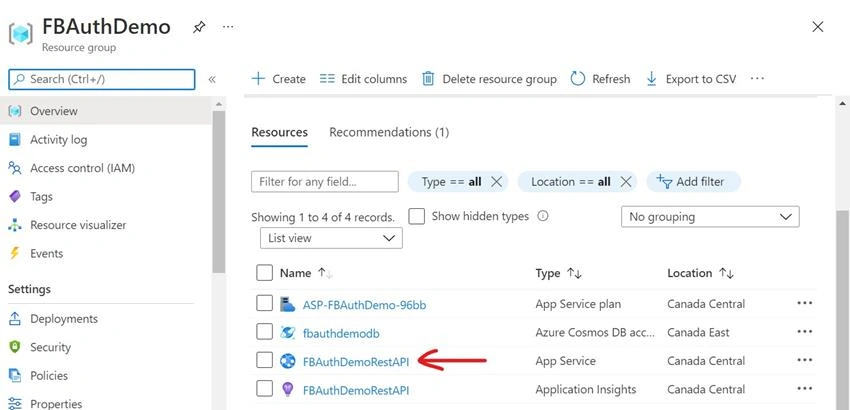
Once your app is deployed go to your resource group to make sure you can see your app there
Step 2 - Publish your REST API to Cloud
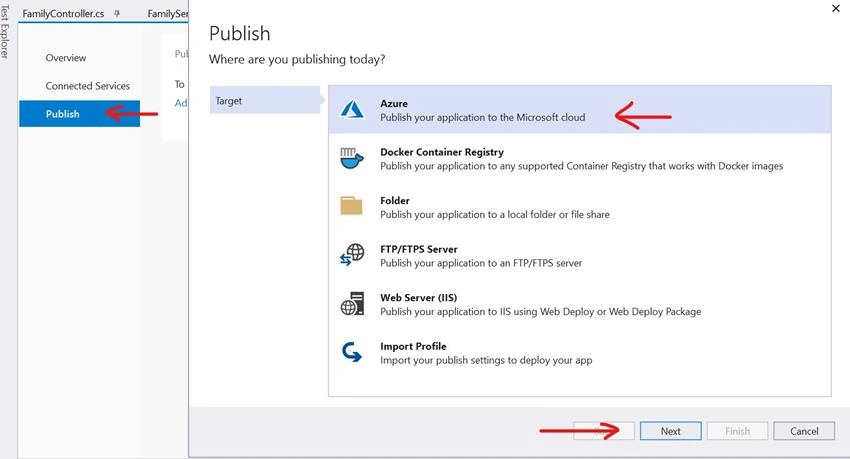
Open your REST API Project in VS 2019 and right-click on Solution Explorer and click Publish

Choose the Publish Target as Azure and click Next
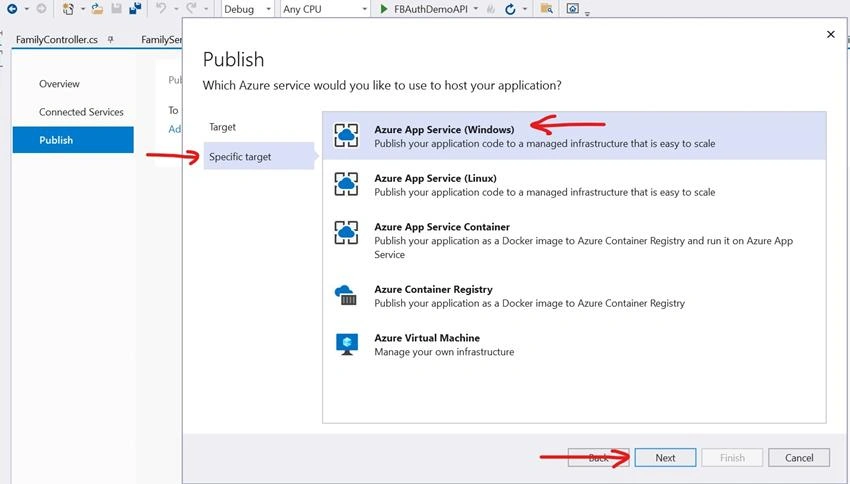
Choose Specific Target as Azure App Service (Windows) and click Next
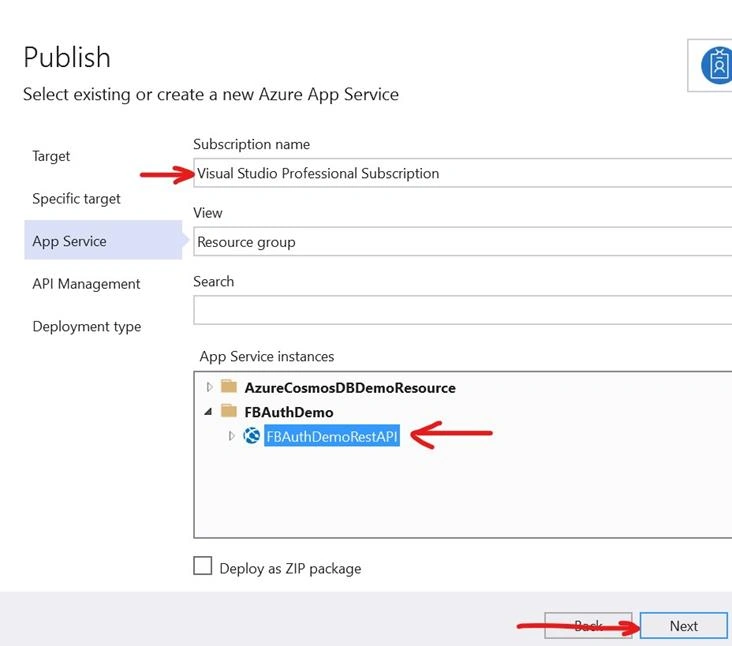
Choose your Subscription Name and select your App Service instance and click the Next button
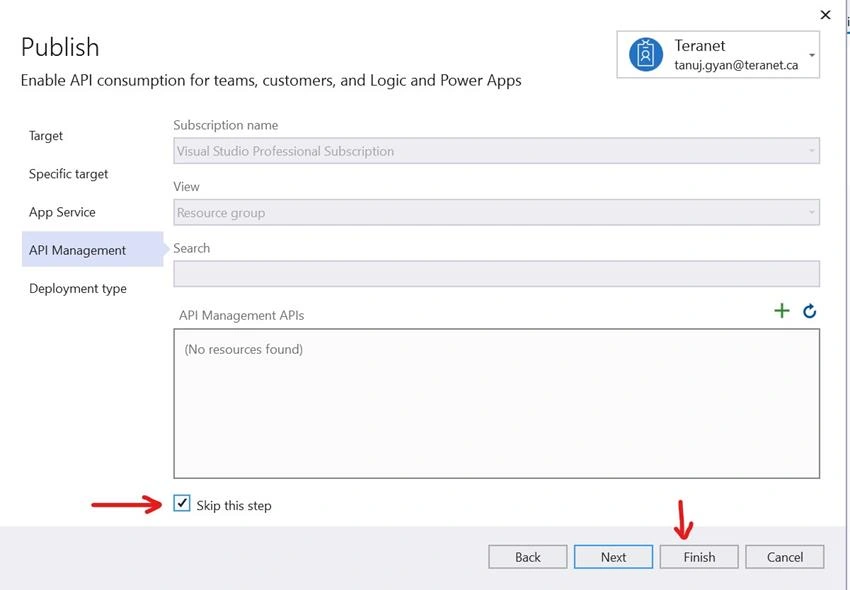
You can skip the next step and click the Finish button
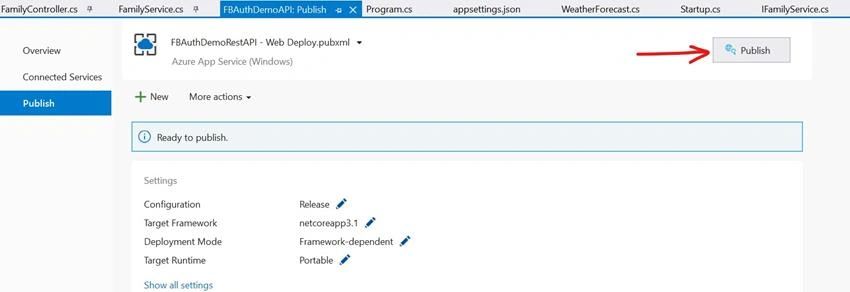
Click on Publish Button
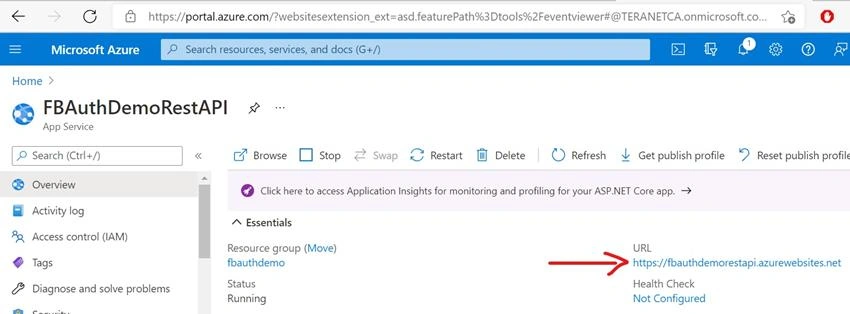
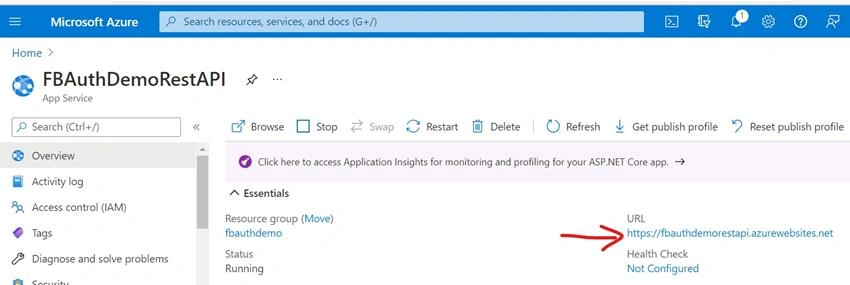
Once the Publish process is completed successfully navigate to swagger by appending /swagger at the end of your app URL. To get the URL go to Azure Portal->Resource Group -> Webapp->Overview.
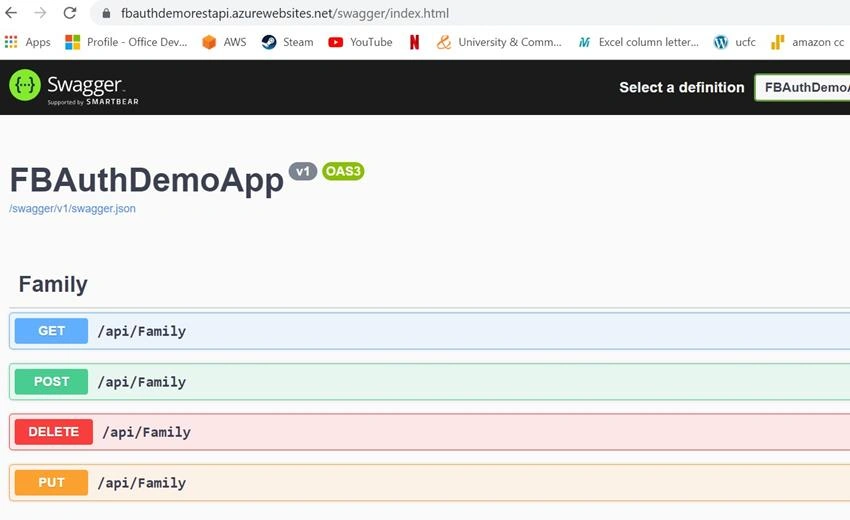
In my case, the app URL is https://fbauthdemorestapi.azurewebsites.net so I will open my web browser and navigate to https://fbauthdemorestapi.azurewebsites.net/swagger
If everything works fine you should be able to access the Swagger UI. Execute the endpoints to make sure you are able to do operations correctly.
Step 3 - Set Facebook Authentication
We will start with creating a new developer's account on Facebook.
Go to https://developers.facebook.com/ and click on Get Started

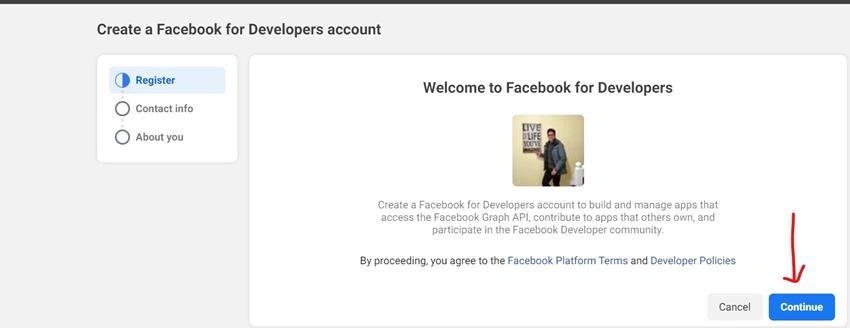
Click Continue
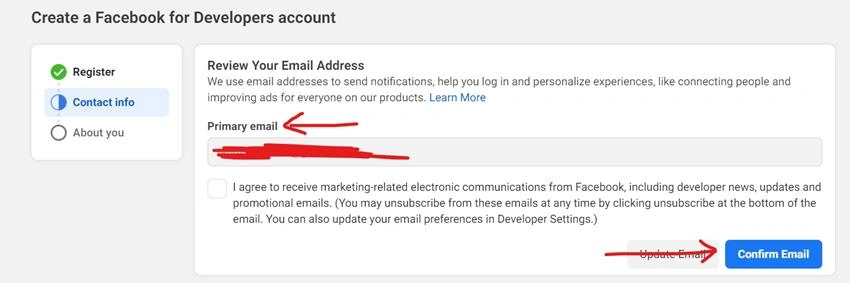
Verify if your primary email is correct and click Confirm Email button
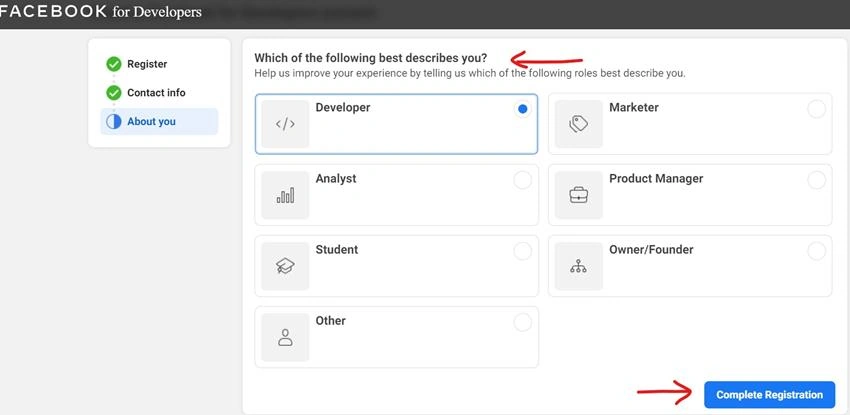
Choose a suitable role and click the Complete Registration button
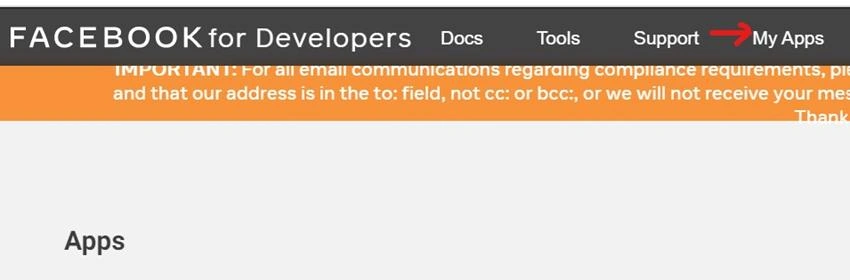
Login to your developer's account and click My Apps
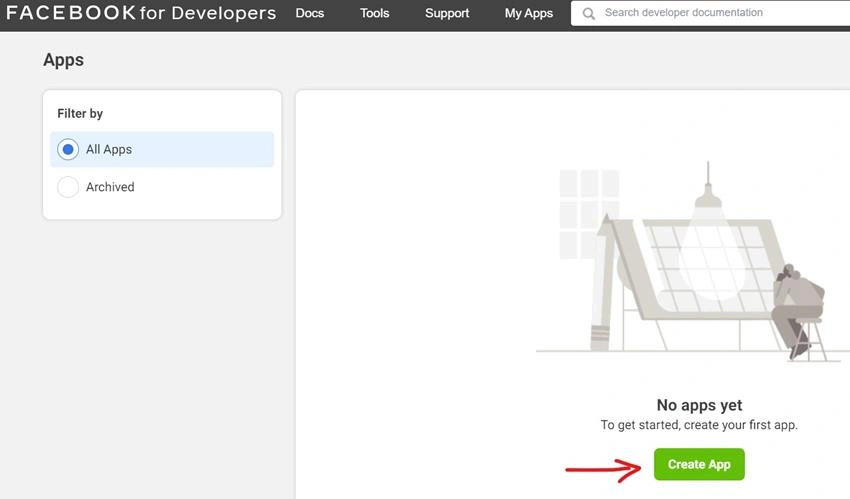
Click Create App
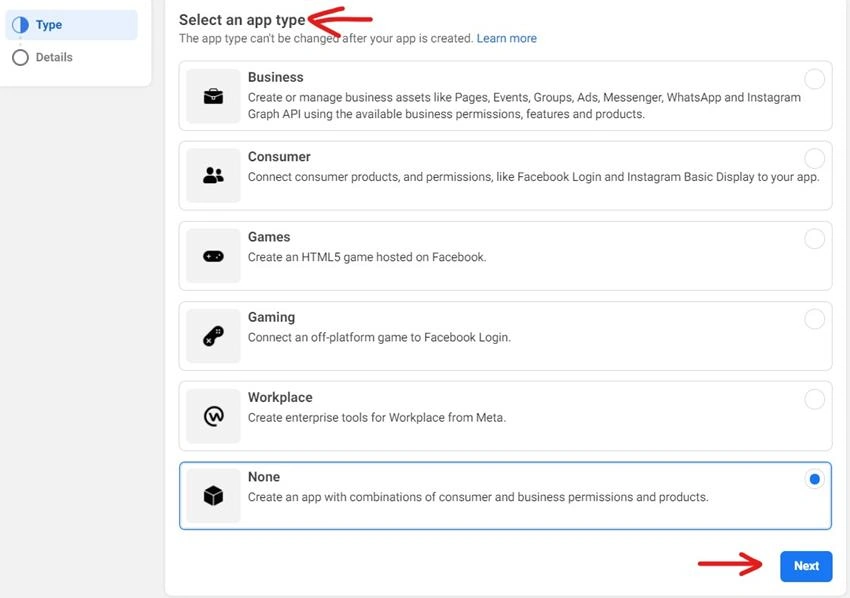
Select an appropriate App type and click Next
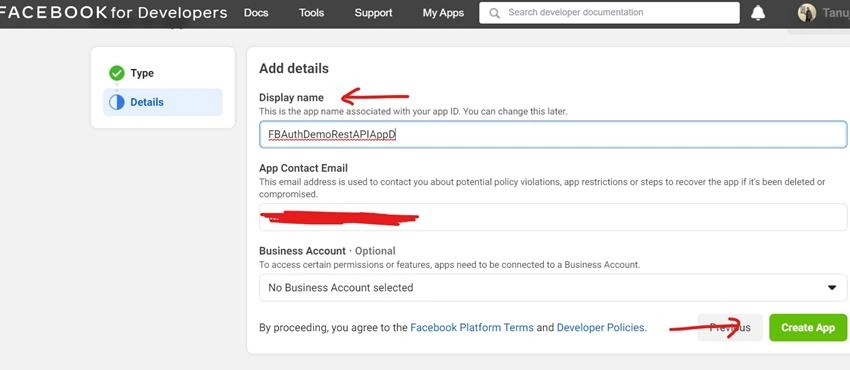
Give an appropriate Display Name and click Create App button
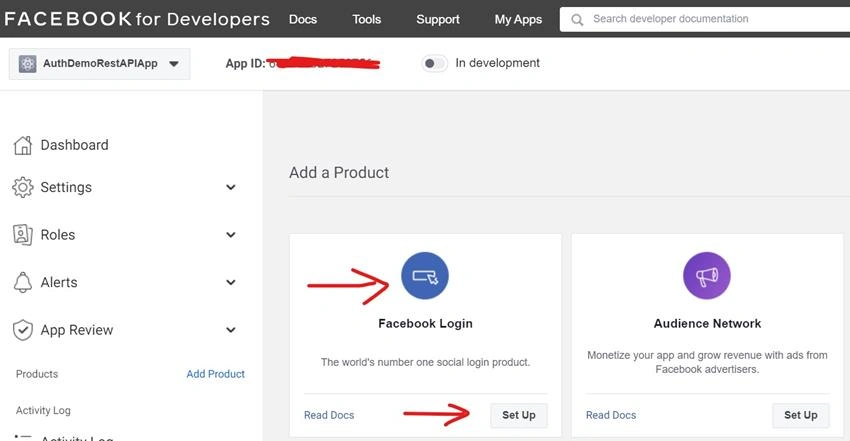
It will open a new page for you. In Add a Product section choose Facebook Login and click Set Up
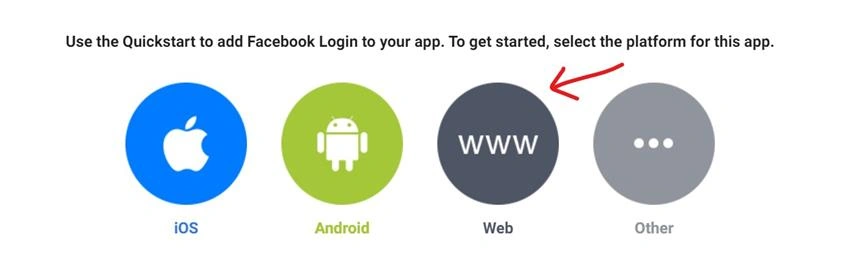
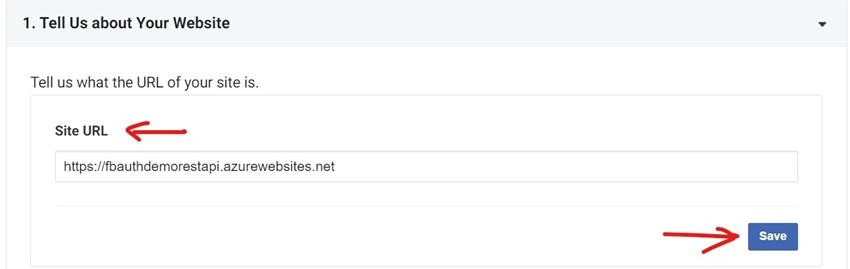
Select Web and give the site URL. Site URL in our case will be the URL of our Rest API. We can get it from Overview section of our webapp on Azure portal
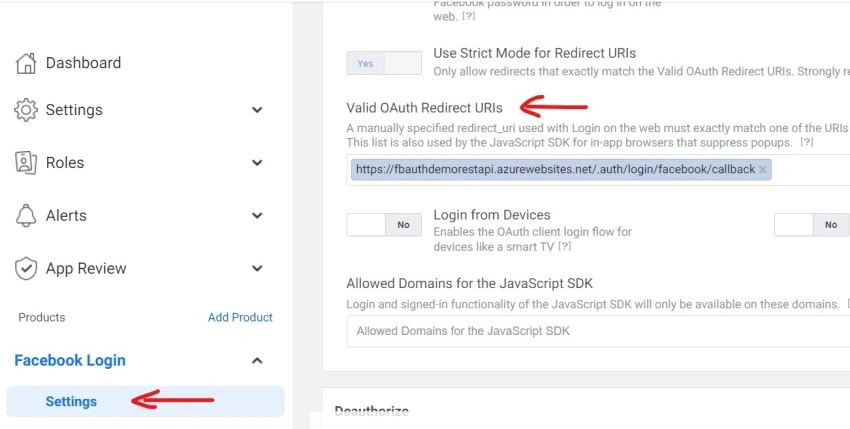
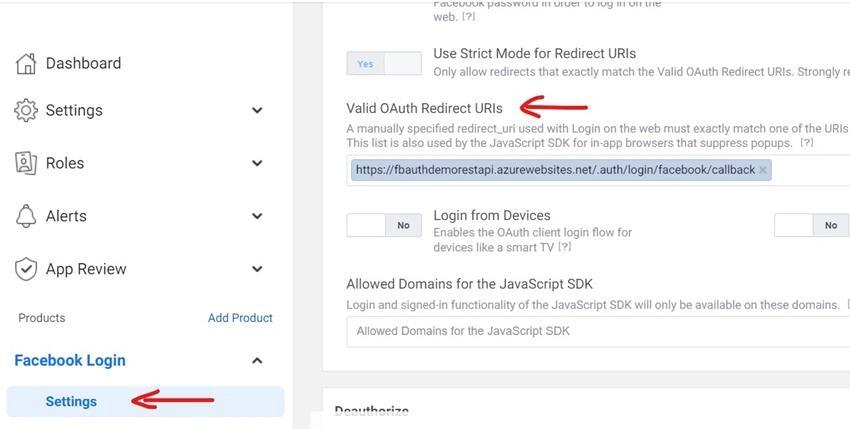
On the left menu under Facebook Login click Settings and give the Valid OAuth Redirect URI as https://<app-name>.azurewebsites.net/.auth/login/facebook/callback.
<app-name> must be replaced by the name of your app.
In my case its fbauthdemorestapi so my URL will be https://fbauthdemorestapi.azurewebsites.net/.auth/login/facebook/callback
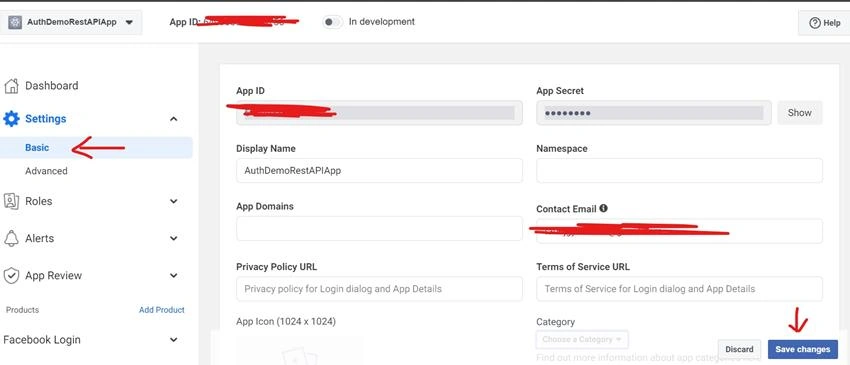
On the left menu select Basic under Settings and copy AppId and AppSecret in a notepad and click SaveChanges
Step - Add Facebook login Information to our Rest API
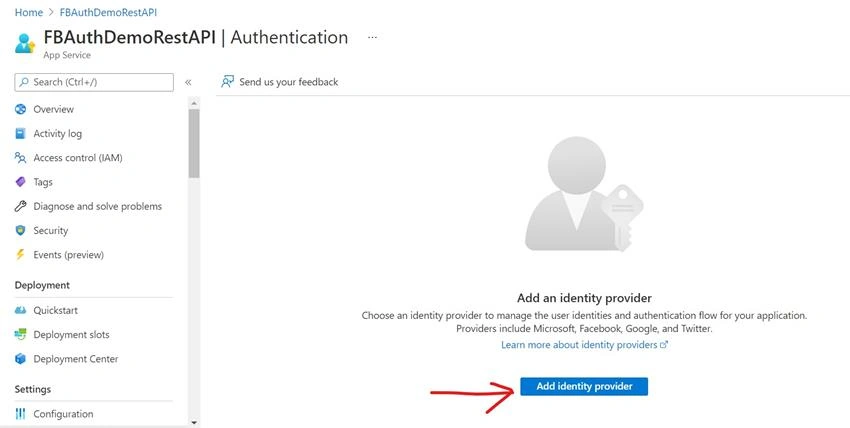
Go to Azure Portal and go to your web app and click Authentication on the left menu
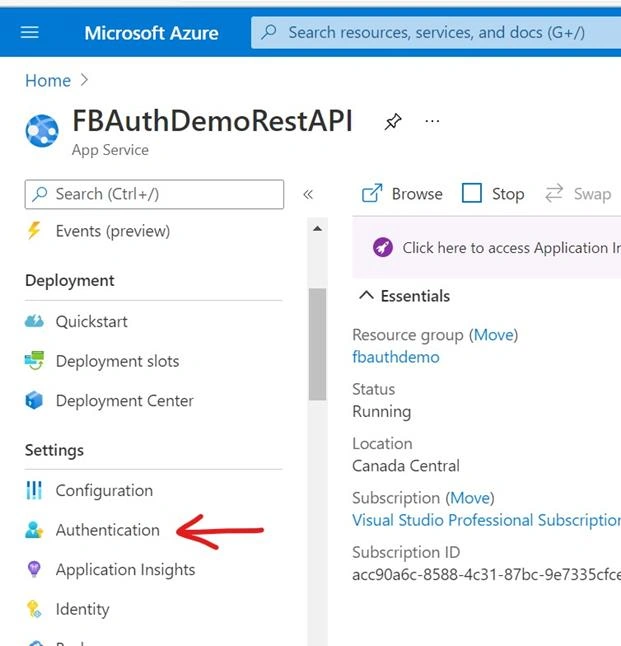
Click on Add Identity Provider
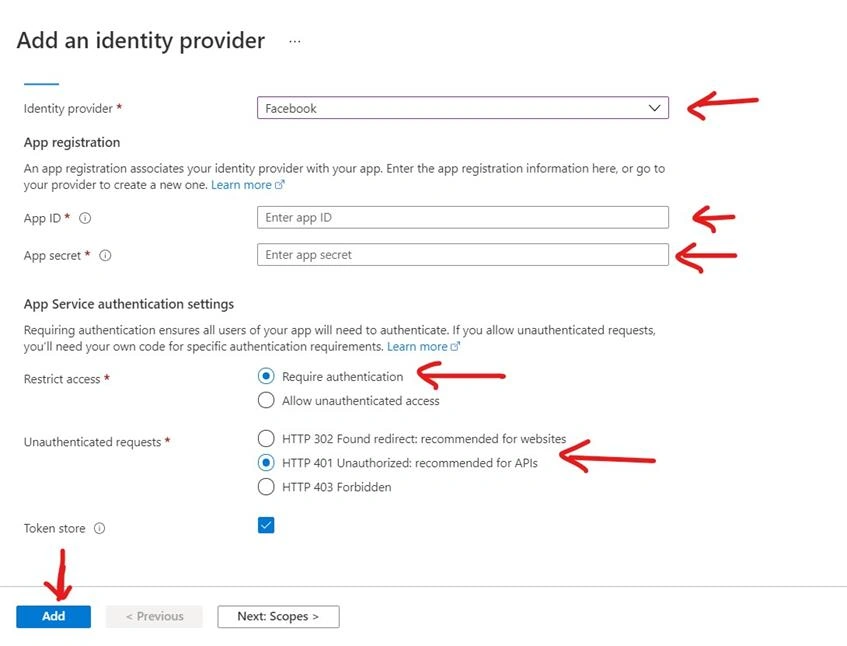
In the next screen,
- Select Identity provider as Facebook,
- Give your app id and app secret (you can go back to your facebook developer's account again and get it if you have not copied them somewhere already),
- Choose Restrict Access as Require Authentication and,
- Unauthenticated Requests as HTTP 401
If everything goes well Facebook will be added as an identity provider for our Rest API.
Step 4 - Testing
Open a new Incognito window and open your Rest API's swagger UI in browser. In our case we will open here.
You should get an authentication page like this
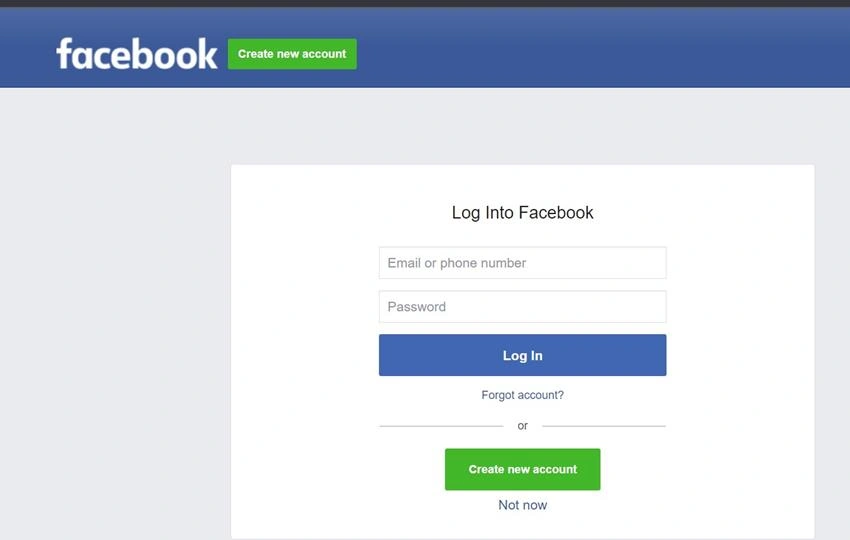
Enter your facebook credentials and then you should be able to access the swagger.
Point to Note
Since this app is still in development only admins will be able to access this app using their credentials. We need to give privacy policy and Terms of use and make the app public to be used by other people.
Summary
In this article, we learned how to publish a .NET Core API to Azure cloud and add Authentication with Easy Auth and Facebook as identity provider.
Join the conversation! Your thoughts help the community grow.