

SharePoint Framework encourages us to host customizations outside of SharePoint. Consisting fully of client-side assets, these customizations can be hosted on public CDNs or other locations optimized for delivery of static resources. But hosting resources externally isn't without downsides. Assuming you're not hosting your organization's customizations publicly, it adds yet another location for you to monitor and maintain. So, to deploy SharePoint Framework web-parts in Private CDNs of the Office 365 CDN there's a new edition of SharePoint Online. In this article, we will discuss the SPFx web-part deployment procedure in Office 356 private CDNs and discuss other possibilities.
Different Types of CDN to deploy SPFx Client web part
Office 365 CDN
Microsoft Office 365 has the capability of both, public and private CDN. Publishing a file to the Office 365-based CDN is as simple as uploading it to a document library. Using a specific URL, the files can be accessed instantly through the CDN. As enabling the public CDN capability on a document library or a folder, its contents becomes publicly available. And, anyone on the Internet with the name of the files can download them without authentication. That’s why a private CDN is preferable over a public CDN for SharePoint.
Azure CDN
Azure storage can be a good option to use as a CDN. Though Azure is combatively high priced, it is very useful for developers as it’s a global solution for delivering high-bandwidth content by caching blobs and static content of compute instances at physical nodes.
Deploy SP Framework client-side web parts
Enable CDN in your Office 365 tenant
As we already discussed, there are two types of CDN capabilities in office 365: Public and Private. I am going to use a Private CDN for the further procedures of this article. And to know about more and to configure the public CDN, this article from Microsoft Dev center can be useful. Now for private CDNs, we don’t need to follow any procedure as any folder or library can be used as a Private CDN from the same tenant.
Create web part folder
As in this article, we are going with a private CDN in the Office 365 tenant. A folder needs to be created in the targeted site where the web part files will be uploaded. Because a web part consists of multiple files, storing them in a separate folder will help to keep all web part files together. Though a lot of people prefer the library to upload these files, it is preferable to upload the file under the site collection root folder. This will make the folder invisible from the users who are browsing the site and only by using SharePoint Designer can this folder be changed.
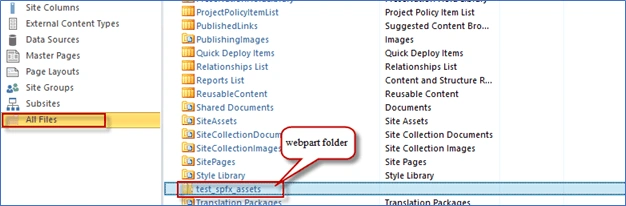
Fig: The Web-part folder under the site collection root folder
Update the web part CDN URL
Before building the package, CDN URL in the SharePoint Framework project needs to be updated. To do this, SharePoint Framework project needs to be opened in the code editor. Then, write-manifests.json file under config folder needs to be opened [./config/write-manifests.json]. And in the cdnBasePath property, the CDN URL of the newly CDN folder needs to be placed.
- {
- "cdnBasePath": "https://Tahmid.sharepoint.com/sites/TestSite/test_spfx_assets"
- }
Need to set the web-part name and group name before building the package. To do that, <WebPartName>.manifest.json file needs to be opened and edited. The file can be found under the targeted web-part [./src/webparts/<WebPartName>/<WebPartName>.manifest.json]. We need to change the property group and title under preconfiguredEntries. This group property is used when the client web-part will be added to the page, and this can be found under a folder with this name. And the web-parts' name will be as provided in the title.
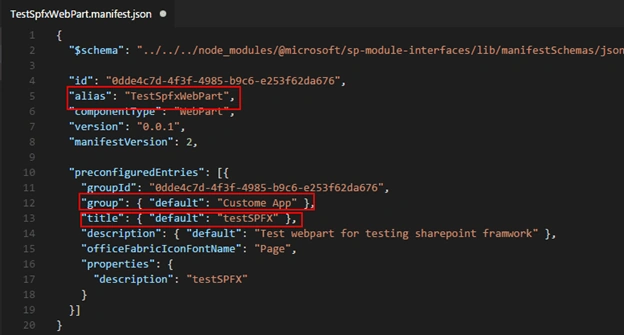
Fig: Snapshot of manifest.jason file of the targeted web-part
To change the package name, if needed, it can be done from package-solution.json file which can be found under config folder as the value of zippedPackege property, location: [./config/ package-solution.json].
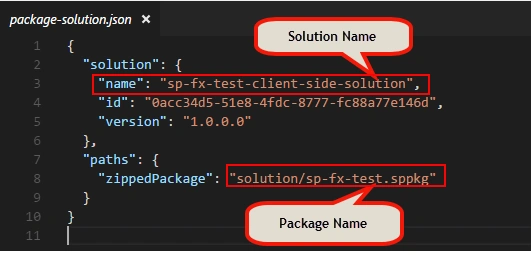
Build the package of SharePoint Framework project
Now open the node.js common prompt. And change the base path to the working solution folder. First, in the command line, execute the command"gulp clean" as this will clean all the previous build files if there are any already.
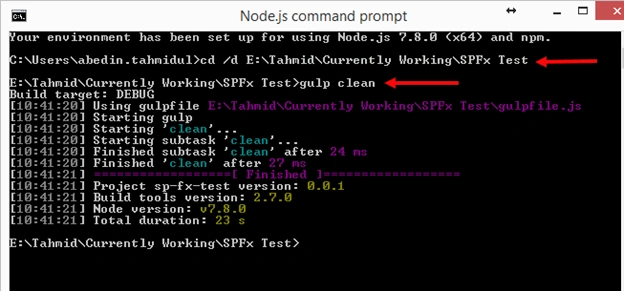
Fig: node command prompt – Running the gulp clean command
Now, run and execute the "gulp bundle --ship" command to build the project files on which the output files of this command are located in the ./temp/deploy folder as specified in the write-manifests.json file. These are the files that in a moment you will upload to the web part folder.
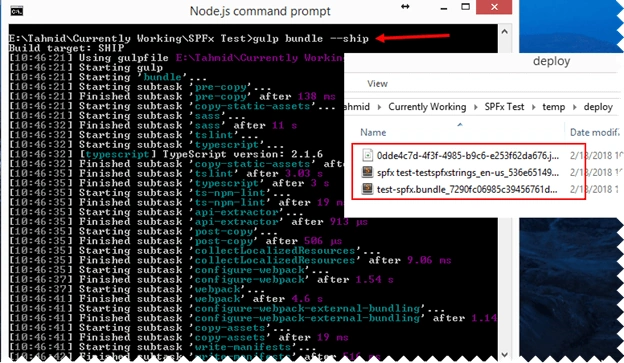
Fig: Web-part files Compiling and their output
To generate the package run the "gulp package-solution --ship" command in the node.js command prompt. A file with .sppkg extension will be generated by containing the information about the web parts in your project and where they are hosted. The generated file will be located in the ./sharepoint/deploy folder.
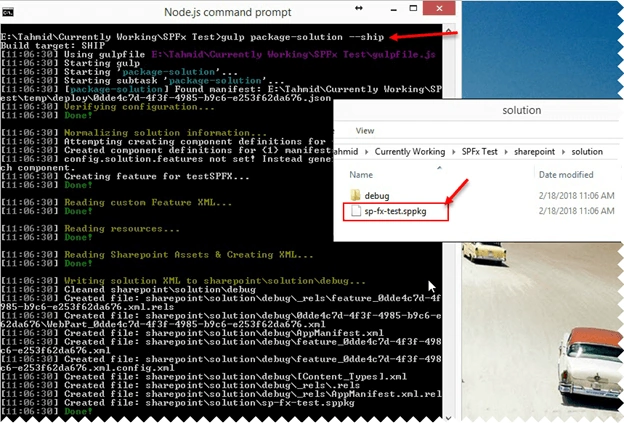
Fig: Generating the Package File of the SPFx Project
So, we make a summery as we had to run three consecutive command lines to complete the package building and related files compilation process. The commands are here below to make it easier to understand for the readers.
- gulp clean //To clean the previous compiled files
- gulp bundle –ship // To Compile the web-part files
- gulp package-solution –ship //To Generate the package file
As the project is already built and packaged, it's ready to be deployed. Web part files are needed to be uploaded in the web-part folder first and then the package file with .sppkg extension needs to deploy in the app catalog. So, to upload the files, go to the ./temp/deploy folder of your project and upload all files to the web part folder in your CDN folder which we have already created in the first part of our article.
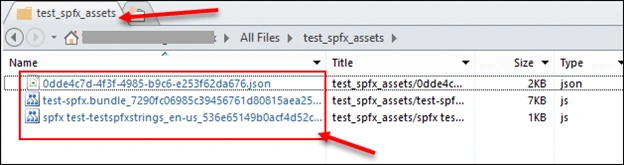
Now, we need to deploy the package file as it will help to use your web parts in SharePoint. The package file needs to be deployed in the app catalog of your Office 365 tenant on which tenant the target site exists. At this moment, deploying.sppkg files to app catalog is possible only in developer tenants, otherwise deploying in different tenants will get an error. To deploy the .sppkg file in the app catalog, open the app catalog site and from the menu navigate to the Apps for SharePoint page and deploy it.
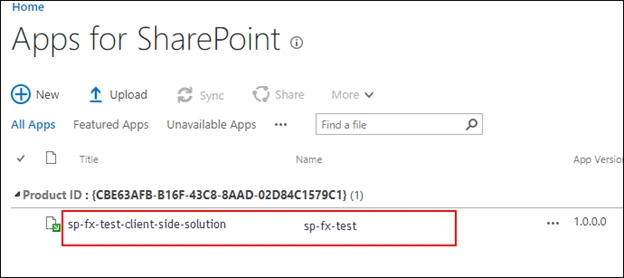
Fig: Deploy the Package File in App Catalog
Install the App on the Site
As all the package and web-part files are deployed accordingly, now start using them on your site. But SharePoint Framework web parts are distributed similarly to SharePoint add-ins, so first we need to add the app to the site. In the target site, navigate to the Site contents view and from the menu choose New App option. Now, search for your solution name and the app will be found.
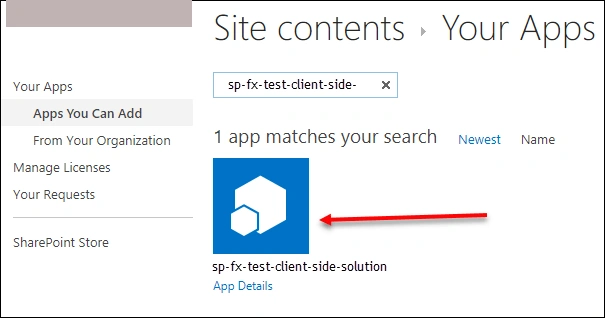
After adding the app in the site, now add the SPFx client-side web parts to pages or in List form as you need in the same way you would add any other web part in SharePoint. The SPFXs will be displayed in the Custom category in the web part gallery as configured under preconfiguredEntries in >/<WebPartName>.manifest.json file at the time of web-part configuration.
Conclusion
Asaduzzaman DipuPosted Mar 11, 2018, 11:33 PM
Nice Writing. It will be better to make it a series on SPFx development.
Piyush AgarwalPosted Mar 8, 2018, 3:01 AM
Thanks Tahmidul for this wonderful article ,, however can you please let us know the real based scnerio where this is required. I am not able to relate where it can be usefull....
Humayun Kabir MamunPosted Feb 24, 2018, 4:44 AM
Thanks Tahmid for this wonderful article...
Gajendra JangidPosted Feb 23, 2018, 3:15 AM
Vary nice article............................................