

Introduction
In this tutorial, I will be showing you how to create Microsoft Azure Web App and deploy an ASP.NET MVC web application on Microsoft Public Cloud i.e. Microsoft Azure, through Microsoft Visual Studio.
Prerequisites
There are minimal requirements to have our web application on Cloud.
- Visual Studio (any edition). In this tutorial, we will be using Visual Studio 2015.
Let’s start.
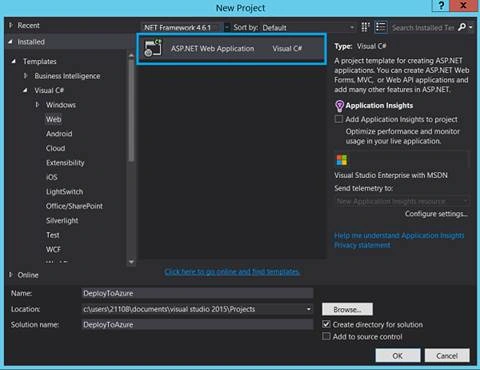
Open Microsoft Visual Studio and create new ASP.NET MVC Web Application.
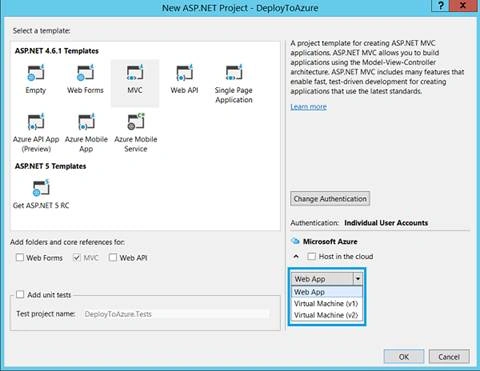
Note: Don't select the checkbox ‘Host in the Cloud’, as we will accomplish our task from Solution Explorer window.
Using two options, you can host the web application.
- Web APP
- Virtual Machine (VM associated with your Azure account would get listed in dropdown, as shown in below image.)
But, this selection does matter when you tick ‘Host in the Cloud’ checkbox.
Just select MVC from Templates section and Click OK to create the application.
Browse the application from Visual Studio.
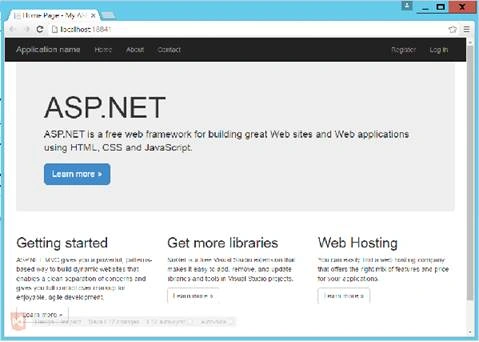
Perfect!
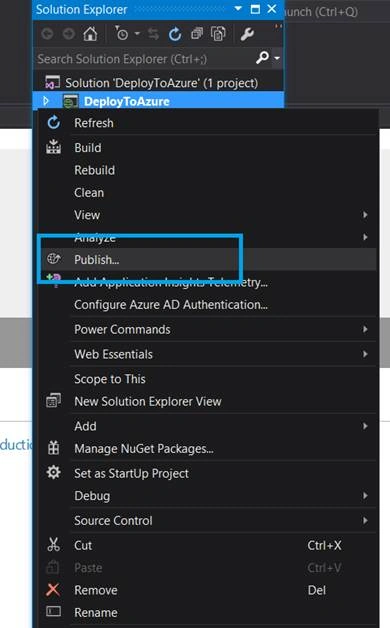
Open Solution Explorer => Right Click on Project => Click on Publish.
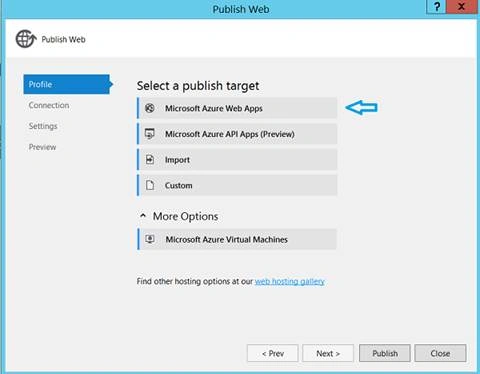
The ‘Publish Web’ window will pop up. Here, four sections/tabs are there which we can go through. The ‘Profile’ tab is initially activated. The remaining three tabs get enabled one by one after we complete the settings of the previous tab. Will go with ‘Microsoft Azure Web Apps’ as Publish Target, as I need to deploy web application into Azure Web Apps.
Other options can also be used as "Publish Target", such as -
- Azure API Apps (Preview)
- Import: This option is used when you have already created a Web App on Azure portal.
- Custom
Also, as mentioned earlier, we can deploy our application to the associated Azure Virtual Machines. Select ‘Microsoft Azure Web Apps’ => Click on Next.
Now, this part is the most important one in this entire process. Here, I will be creating new Web App for deploying MVC Web Application.
It has the following details.
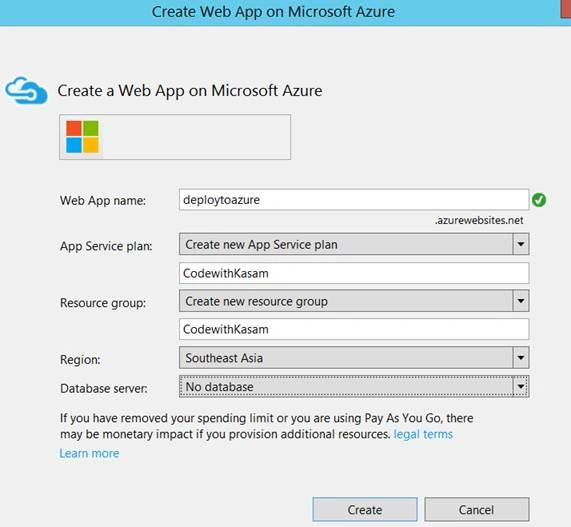
- Web App Name- Enter a Unique name for your Application. This name is unique across Azure.
- App Service Plan- You can select an existing App Service Plan or create new.
- Resource Group- Group of related products / service created on Azure Portal. You can select existing resource group or create new.
- Region- Your Web App will be deployed / host at this given location.
- Database Server- If associated, it can provide details right here. In this tutorial, I am not using any Database, select ‘No Database’ option.
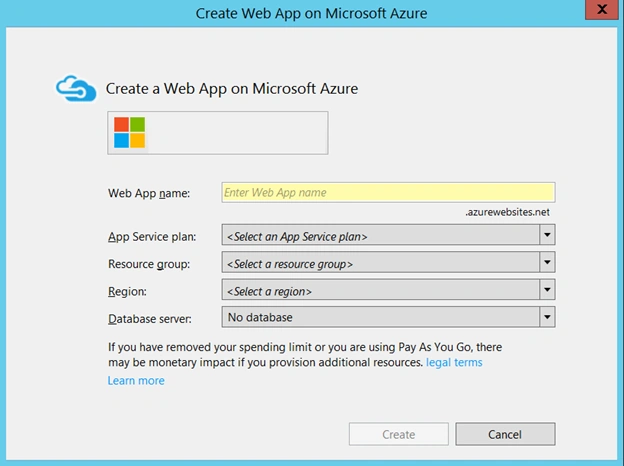
Enter the details and click ‘Create’. This will create an Azure Web App with the submitted details. This could take several seconds to get on to the next tab.
We can see that a new Web App has been created.
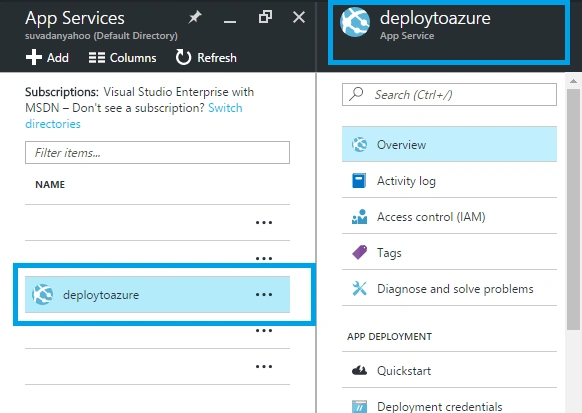
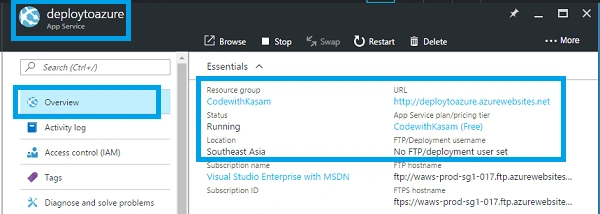
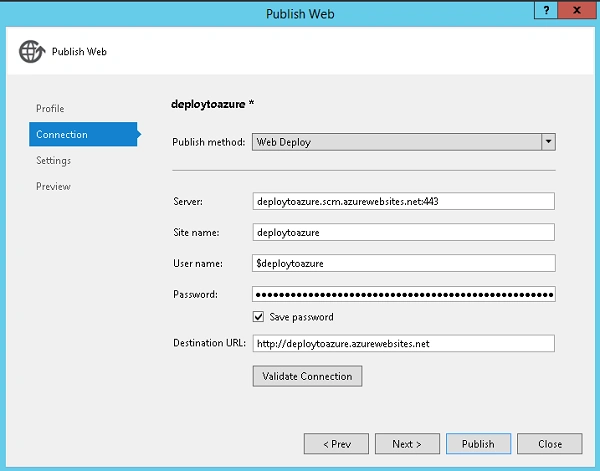
Once Azure Web App is created, as mentioned earlier, other tabs ‘Connection’, ‘Settings’, ‘Preview’ will get enabled. Now, the window moves to Connection tab.
These are the settings used for publishing the files over Azure Web App. You need not to worry about this, as Visual Studio will very well take care of this setting.
Click on Validate Connection button to just verify that all the things are set well! (99.99 % validation will succeed). I recommend developers practice validating the connection once, at least during initial configuration.
Different options for publishing are shown below. We will be selecting the ‘Web Deploy’ method.
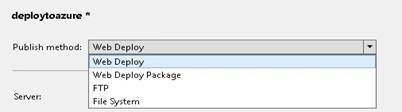
Validate and click on Next.
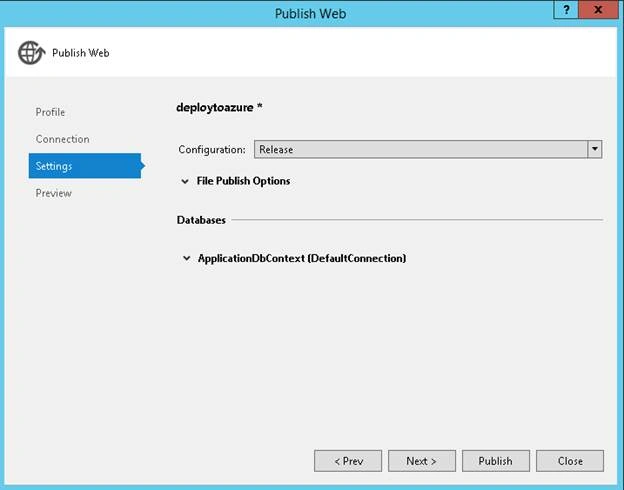
Here comes the Settings tab. Here, you can select between Release or Debug modes. However, I will be selecting the Release mode.
Click on Next.
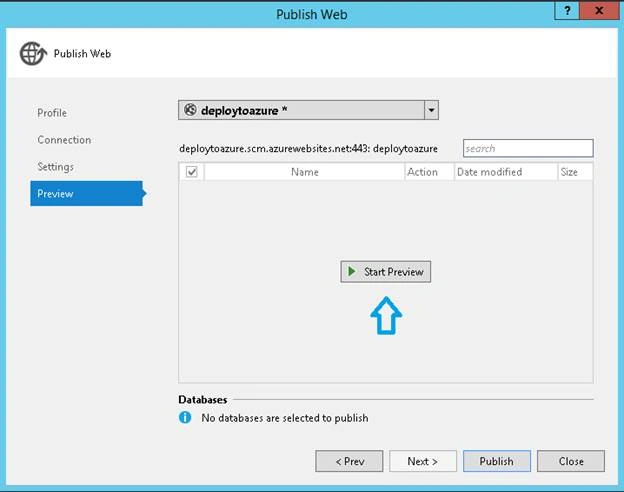
Preview Tab deals with the files details, ready for deployment in project.
Start Preview will list all the files which will be deployed, once clicked on Publish.
As I am publishing for first time, it would list entire file details present in the project.
When done with all the tabs, click Publish.
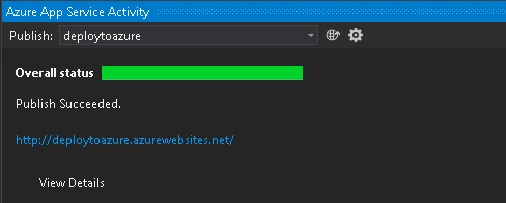
You can view the publish status along with files details in Azure App Service Activity window, a part of Visual Studio, along with the public Cloud URL.
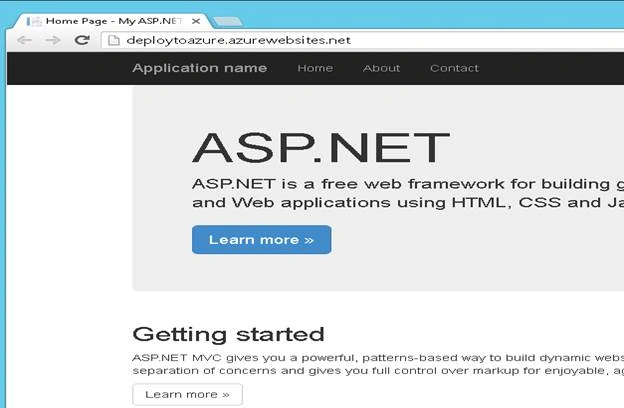
Once publishing succeeds, it will open the browser with our web application running.
Cool ! Our Application is now live.
Now, let’s modify our application.
- Will add one Controller and one View, named as Demo.
- Modify the text in Index View for Home Controller.
Once done with the changes, Right click on Project => Publish.
Navigate to Preview tab and click on Start Preview button.
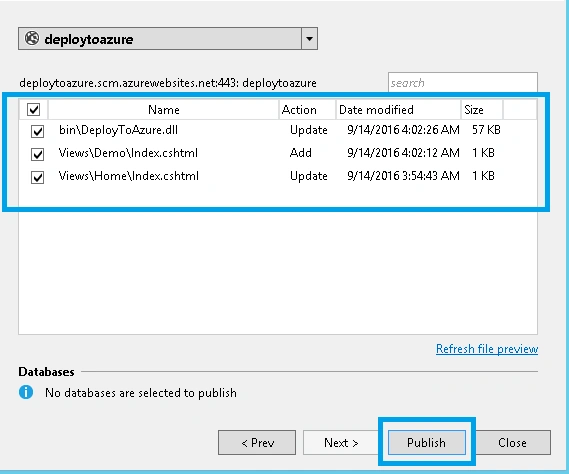
Files would be listed as shown below, with the details of Add/Update action being carried out in project files. You can also select / deselect files that need / don't need to be deployed.
This feature mainly helps to recollect all the modified files from the last deployment time.
Click on Publish.
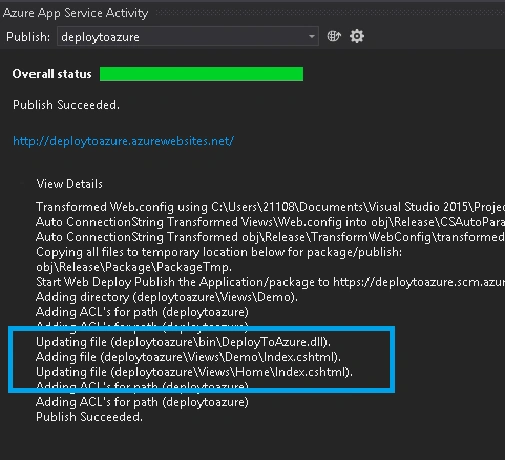
Again, Azure App Service Activity window in Visual Studio will start displaying the status, along with files details getting deployed.
Refer the below Image.
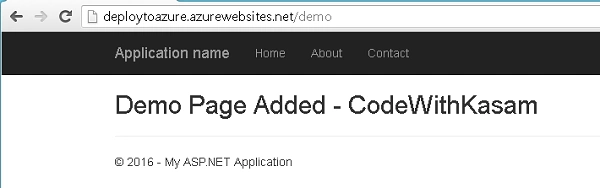
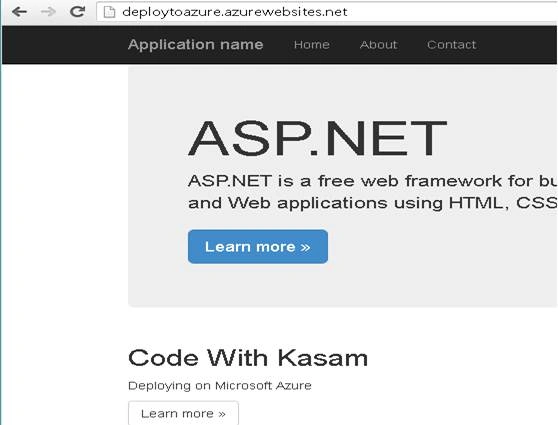
Done! Modified changes are now Live.
Summary
With few clicks, we saw how seamlessly we can create Azure Web Apps and deployed ASP.NET MVC web application through Visual Studio. Also, modifying web application and re-deploying it to Azure was accomplished in minimal efforts.
Do read, Azure Web Apps Overview for diving into more features.
Would highly recommend that you try this out once, in your Dev environment.
Thank You!
Anu RajPosted Jan 9, 2018, 12:24 AM
Hi Team,I can able to perform the above steps from external networks but the publishing fails when I do it from company network.Please let me know what network parameter restricts the publishing. Please help. Below is the error message: Severity Code Description Project File Line Suppression State Error Web deployment task failed. (Web Deploy experienced a connection problem with the server and had to terminate the connection. Contact your server administrator if the problem persists. Learn more at: http://go.microsoft.com/fwlink/?LinkId=221672#ERROR_CONNECTION_TERMINATED.)
Suneel Kumar BiyyapuPosted May 26, 2017, 1:53 AM
Nice article @Kasam Shaik. Keep blogging the good posts.
Bhanu KorremulaPosted Oct 3, 2016, 10:46 AM
Good article what is your opinion about pushing the mvc site through TFS or release management server?
Vignesh ManiPosted Sep 19, 2016, 8:28 AM
Nice
Humayun Kabir MamunPosted Sep 18, 2016, 12:07 AM
Nice...