

Introduction
In this article we will focus on deploying our Blazor WASM .NET Core 3.1 hosted application to Azure App Service. We will be using Azure SQL to store user data..
By the end of the article we will have a fully functional Blazor site running in Azure Cloud.
Prerequisites
This article assumes you have a basic working knowledge of Blazor web assembly, NET Core and Azure.
Microsft Account is required to log into Azure portal and use any Azure Services.
Read my previous articles on creating a fully functional Blazor WASM app
Through this article, we will cover the following topics,
- Creating Azure Resource Group and App service
- Creating Azure SQL database with SQL Auth and Employee table
- Configure our project to use Azure SQL and deploy our application to Azure Sql.
Implementation
This project requires VS 2019 to be installed on your machine.
Step 1 - Creating Microsoft online account
Use this link to create a free Microsoft account.
The account creation will require you to provide your credit/debit card details for validation. The first month of the Azure Subscription is free and you will not be automatically charged unless you upgrade your account manually.
Once the account is created succesfully we can log into Azure Portal using this link.
Home screen will display all recently used Azure resources.
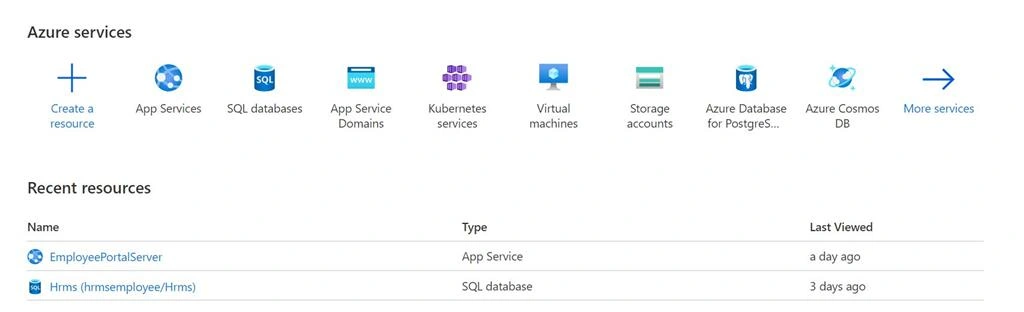
Step 2 - Creating Azure Resource Group and App service
Click on Resource Group on Home screen and it will redirect us to resource pool home screen.
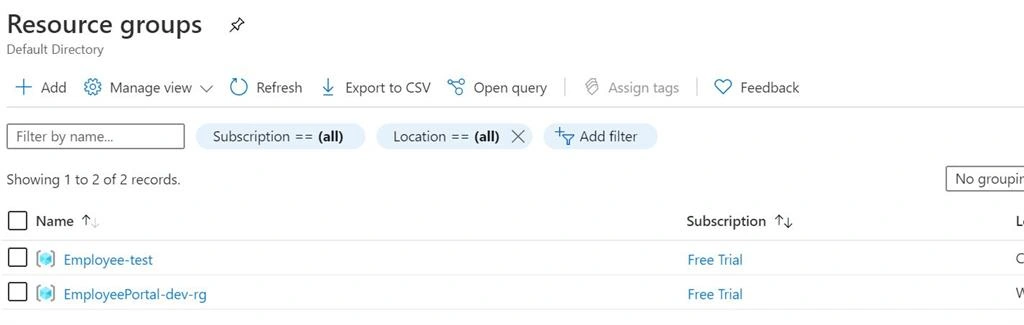
This will display a list of all existing Resource Groups. To Add a new Resource Group click on Add
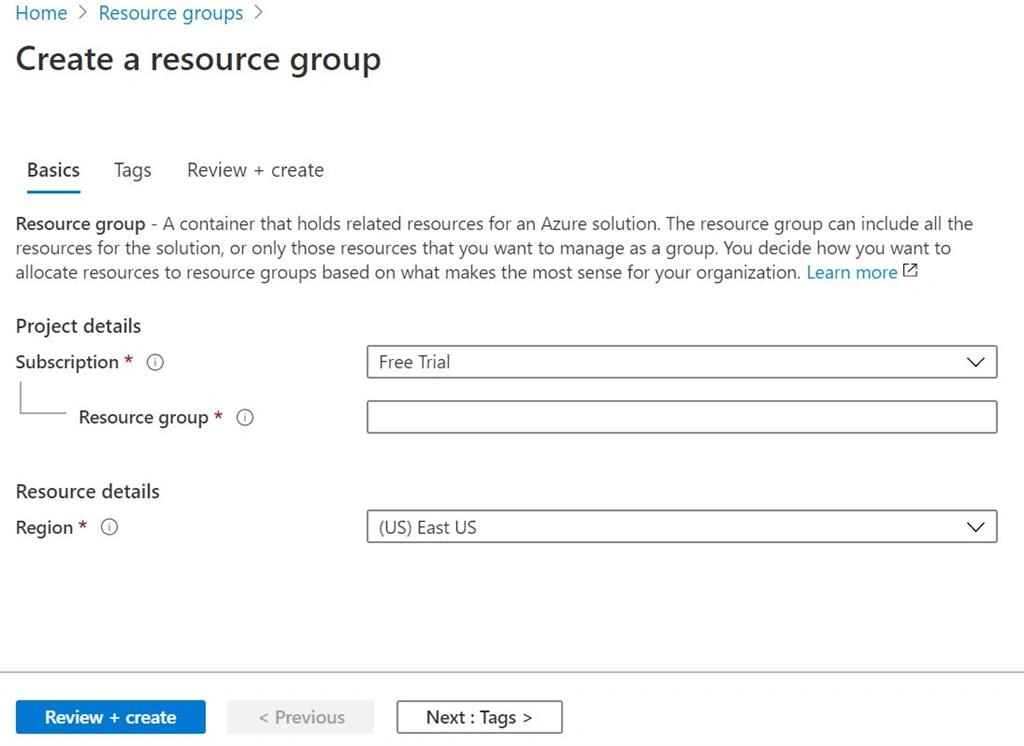
Now that we have created a Resource Group our next step is to create App Service to deploy our application.
Click on App Services on Home screen and we will see a list of all active app services running under your account.
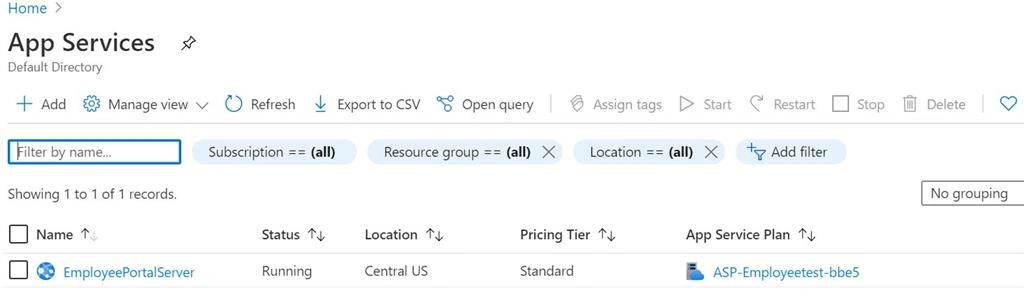
Click on Add to create a new App Service.
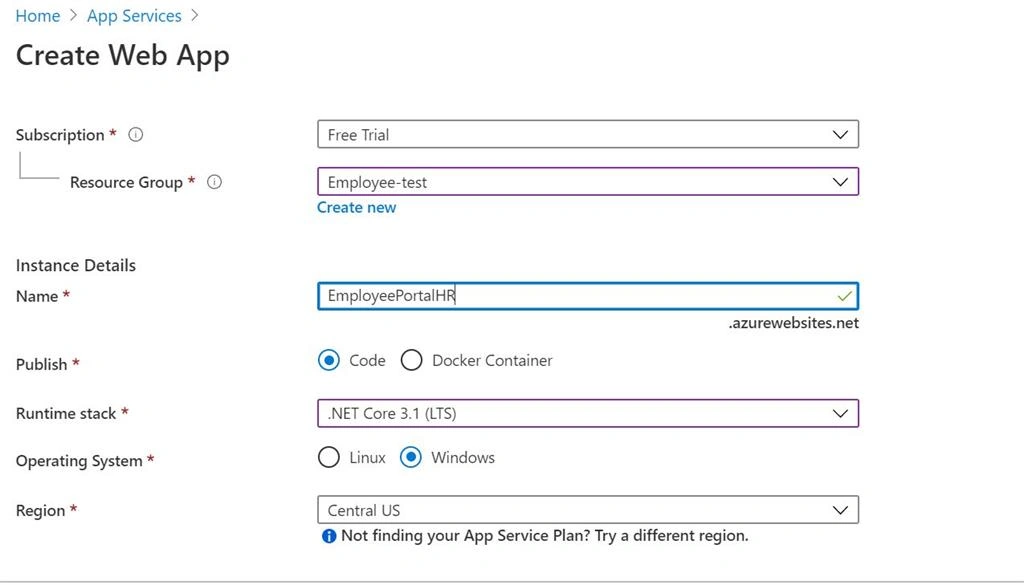
Select the Resource Group which we have created in the previous step.
Specify your site name which is also the site URL.
Publish option should be code as we are not using container for this article.
The Runtime Stack is .NET Core 3.1
Click on create and our App service is now ready and running.
Step 3 -Create and Configure Azure SQL database
Under SQL database on home screen click on create new SQL database.
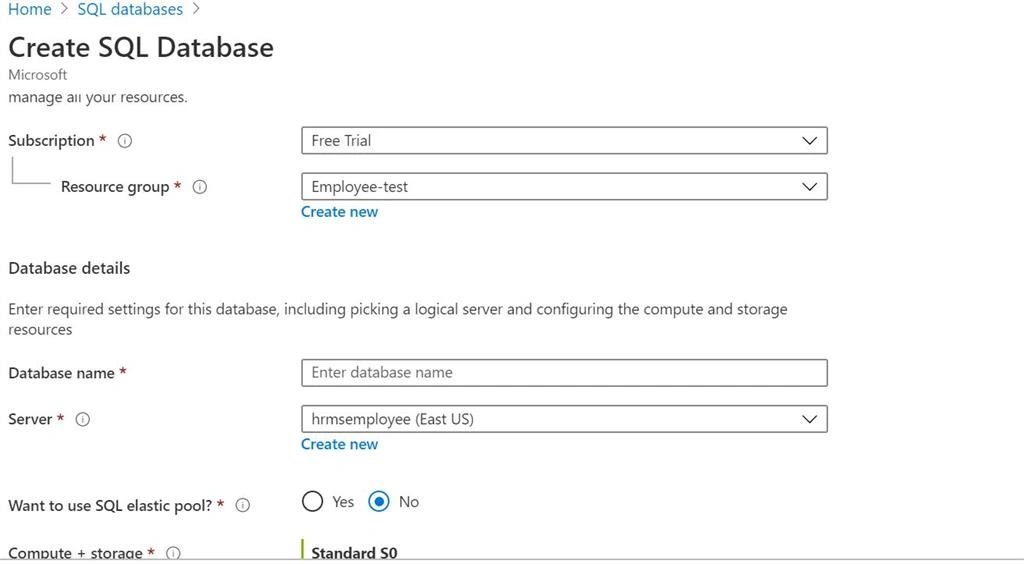
Select resource Group created in step 1 and create new server instance if we dont have an existing one.
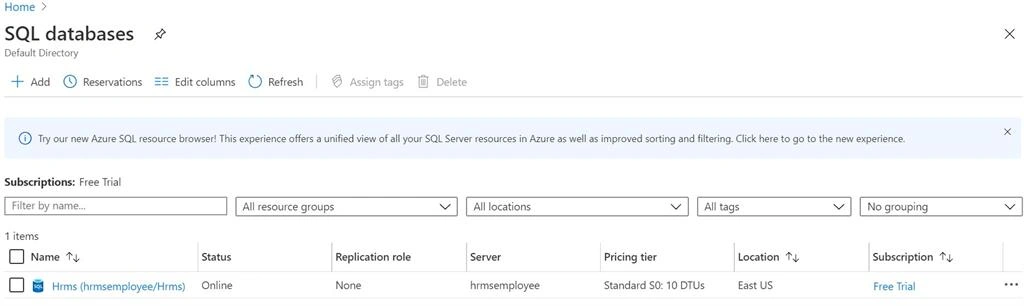
We have our SQL database created in Azure. On our local machine using SQL Mnagement connect to Azure SQL server by specfying sql username and password. You will see your Azure SQL Database
Create a new Employee table with the below script.
- /****** Object: Table [dbo].[Employee] Script Date: 20-08-2020 12:21:38 ******/
- SET ANSI_NULLS ON
- GO
- SET QUOTED_IDENTIFIER ON
- GO
- CREATE TABLE [dbo].[Employee](
- [EmployeeId] [int] IDENTITY(1,1) NOT NULL,
- [FirstName] [varchar](256) NULL,
- [LastName] [varchar](256) NULL,
- [Email] [varchar](256) NULL,
- [Street] [varchar](256) NULL,
- [Zip] [varchar](256) NULL,
- [City] [varchar](256) NULL,
- [PhoneNumber] [varchar](256) NULL,
- [Comment] [varchar](256) NULL
- ) ON [PRIMARY]
- GO
In appsettings.Json of Server specify SQL connection configuration,
- {
- "ConnectionStrings": {
- "DefaultConnection": "Server=hrmsemployee.database.windows.net;Database=Hrms;user=password;password=password;MultipleActiveResultSets=true;"
- },
- "Logging": {
- "LogLevel": {
- "Default": "Information",
- "Microsoft": "Warning",
- "Microsoft.Hosting.Lifetime": "Information"
- }
- },
- "AllowedHosts": "*"
- }
Step 4 -Deploy code to Azure App Service
Open Project in VS 2019 right click EmployeePortal.Server project and click publish.
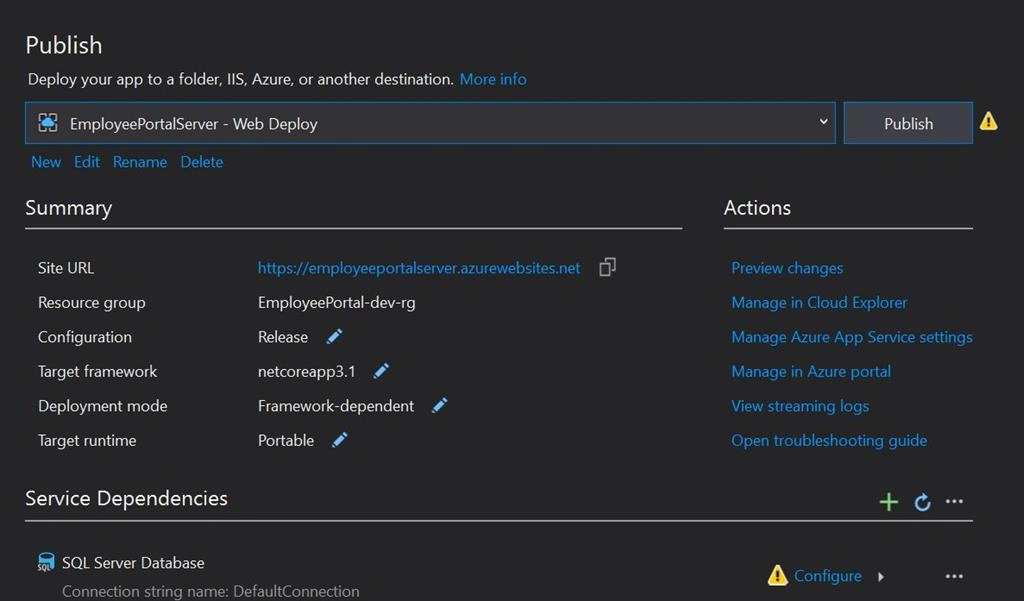
Select Azure App service and validate publish profile and click on publish.
This will publish your Blazor WASM site to Azure App service.
Once publishing is compelete you can now access your site using URL specified in step 3.
Navigate to Azure Portal and check your App pool and we can see application logs and app utilization.
We can configure Azure CI/CD pipeline to autmoated deployments to Azure app service from Azure/GIT Hub repos.
This article will only focus on publishing code through VS.
Summary
Through this article we have learned how to create Azure App service and Azure SQL database and also deploy our existing Blazor WASM to Azure Cloud.
In our next article we will deploy our Blazor application to Linux containers deployed on Azure Kubernetes services.
Thanks a lot for reading. I hope you liked this article. Please share your valuable suggestions and feedback. Write in the comment box in case you have any questions. Have a good day!
Join the conversation! Your thoughts help the community grow.