

In our previous article we had seen how to upgrade package from SQL Server Integration Services (SSIS) 2008 to SSIS 2012.
As we all know instead of deploying packages on File system or msdb database, we can directly deploy the packages into the Integration Services catalog. Before you deploy the package to the integration services server, the server must contain the SSISDB catalogs.
While installing the SQL Server, the catalog doesn’t create automatically; you need to create it manually.
When you open SQL Server, you’ll find a folder named Integration Services Catalogs as shown below.

By default, this folder doesn’t contain anything. Before deploying any packages to the catalog, we need to create the one for the same. We can create more than 1 catalog in a SQL Server instance.
To create catalogs, right click on Integration Services Catalogs as shown below.
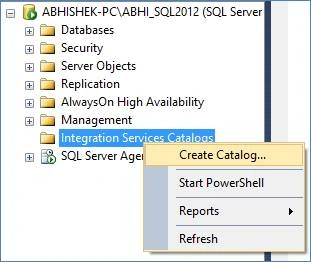
After this you’ll get a Create Catalog window as shown below.
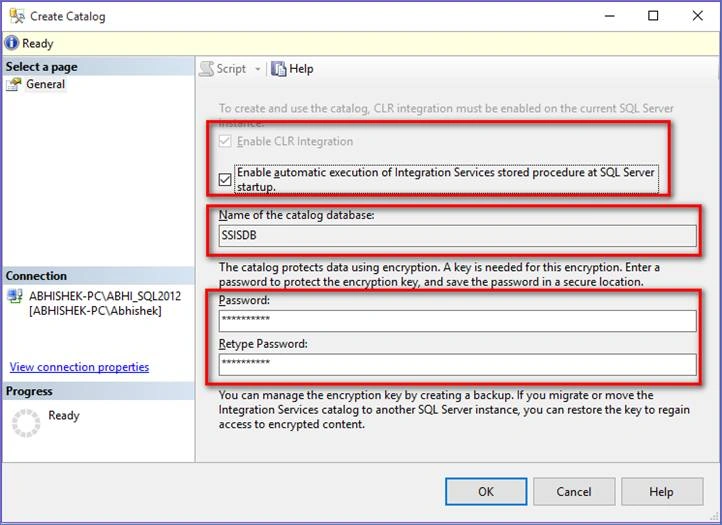
In this window you’ll find below options.
- Enable CLR Integration - check this option.
- Name of the catalog database - check this option as well.
- Password - provide a password.
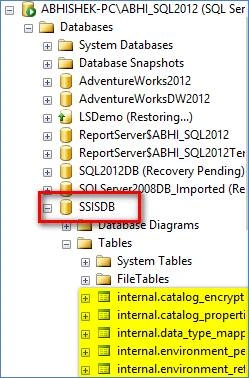
Now let’s begin our deployment.
Open your project, right click on that and select Deploy,

You’ll get ‘Integration Services Deployment Wizard’ which tells you about the steps involves in the deployment.
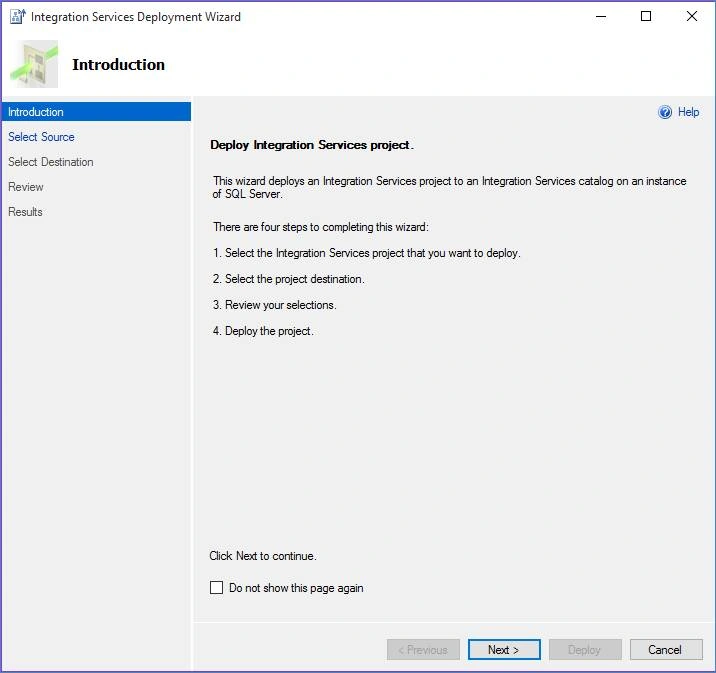
Click on next button and select your source deployment file.
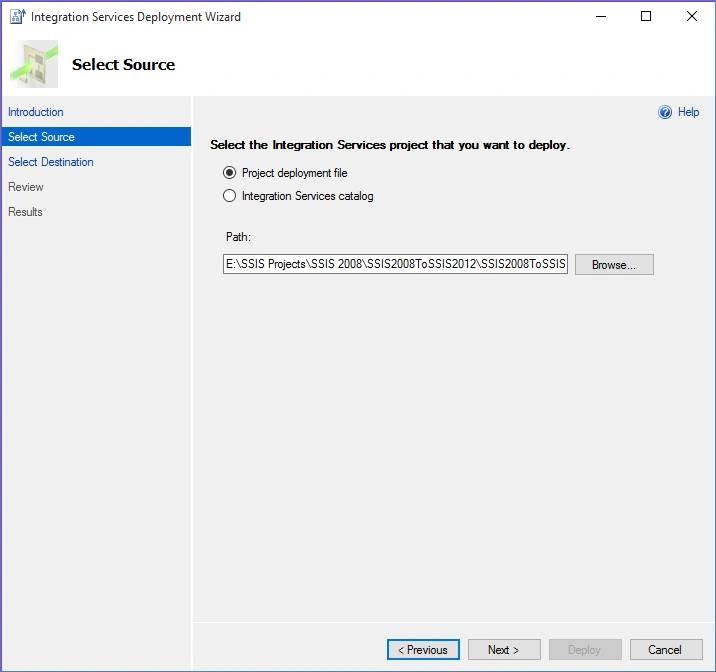
Click on next and "Select Destination", select your server where you want to deploy your package.
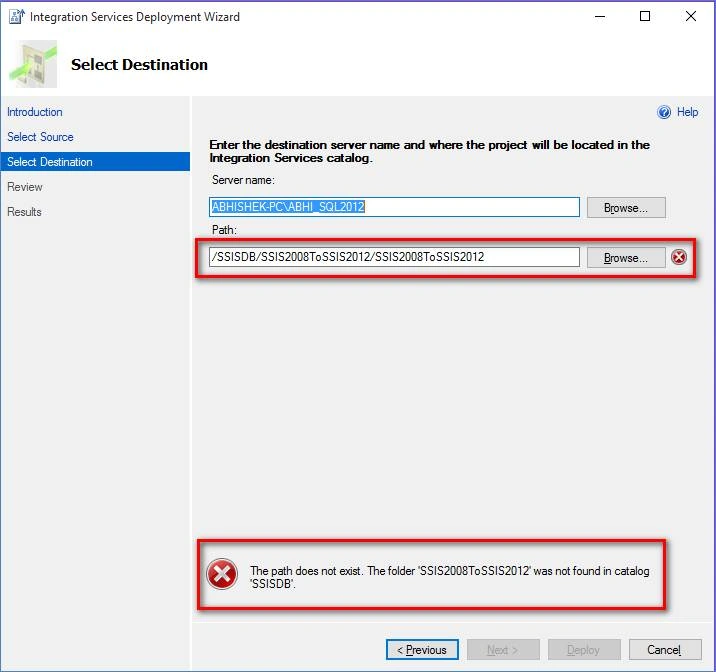
If you notice, you’ll find an error stating ‘The path does not exist’. This is because there’s no folder available in your catalog to settle your package. To overcome from this error, simply click on browse button and you’ll get something like below.
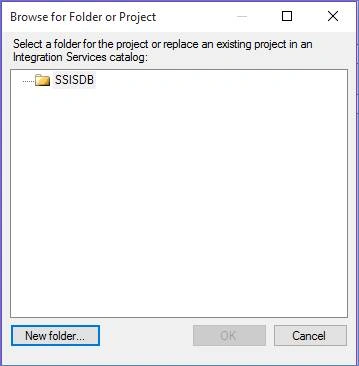
Create a New folder by clicking on the New Folder button and fill the details.
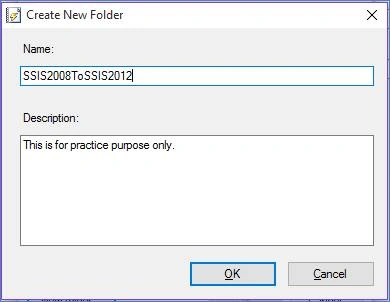
Click OK button and now you can select this as a folder in the catalog.

When you’ll click OK button, error gets disappeared and you’ll get below output.
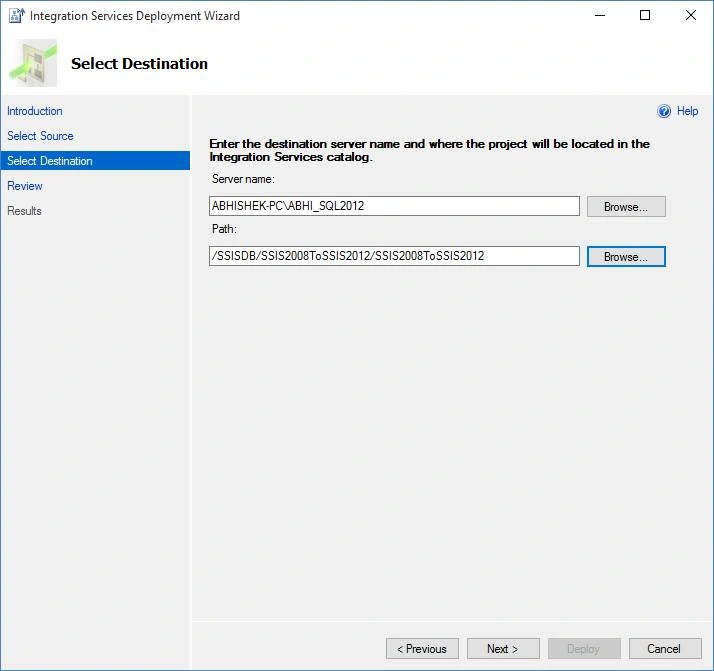
Click on Next button and review your deployment.
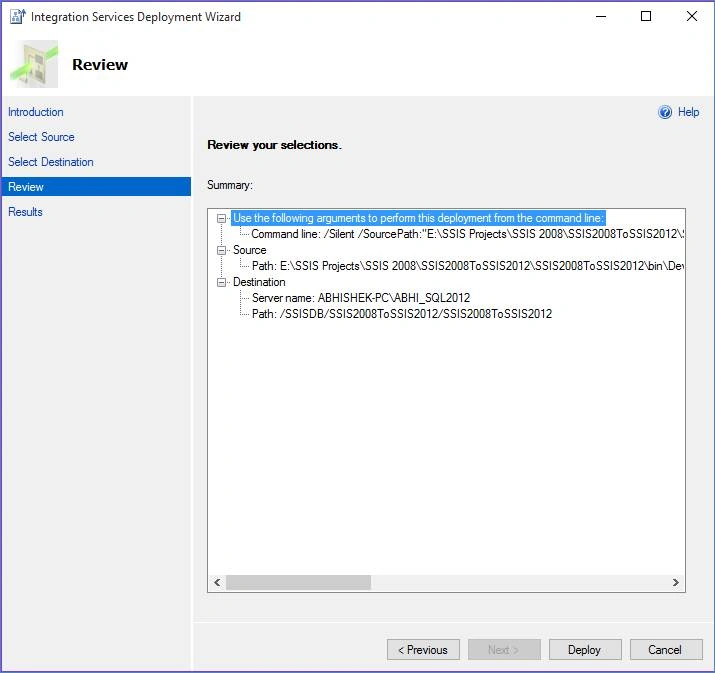
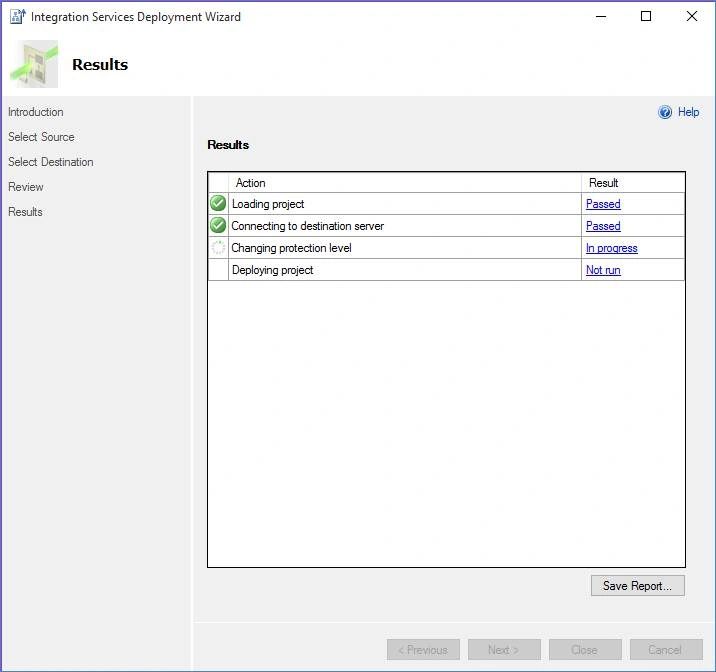
Click on the Deploy button to begin the deployment. Your deployment gets start and you’ll get the following progress window as indication.
On successful deployment you’ll get a Passed result for all the action as shown in below window. Click on Close button.
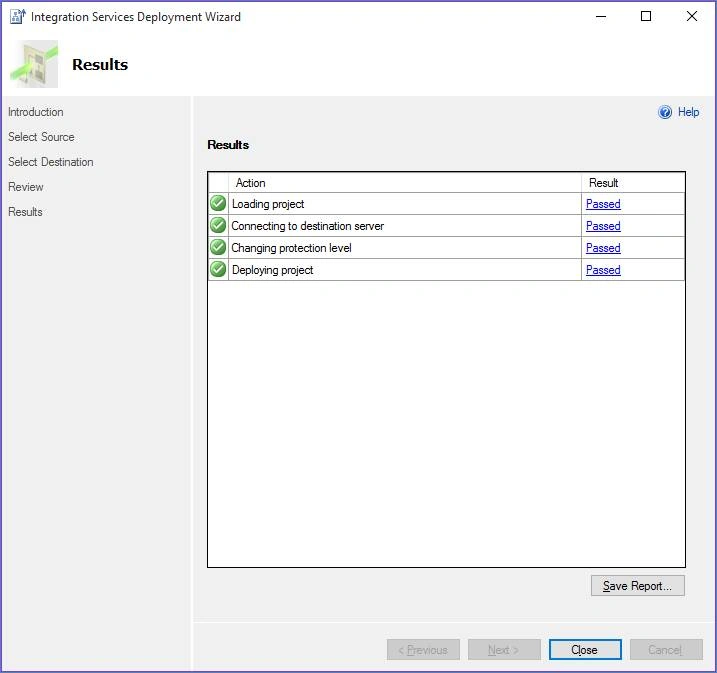
We’ve deployed our package successfully.
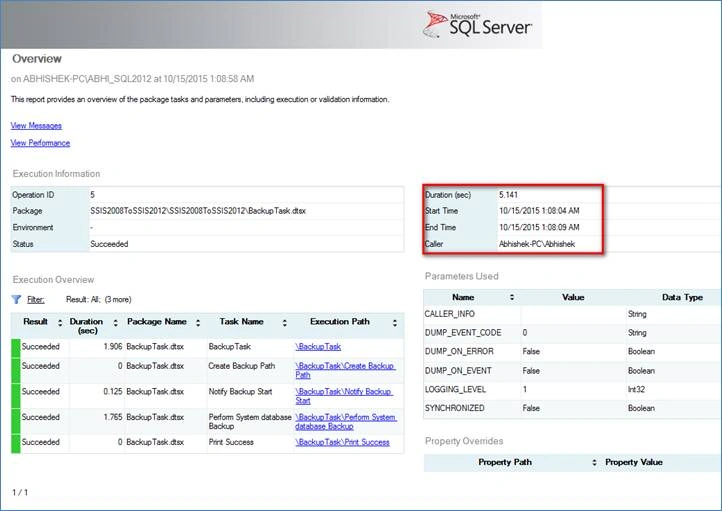
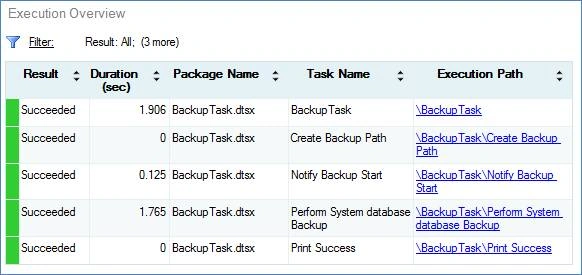
Now when you expand your Integration Services Catalogs folder in SQL Server, you’ll find your packages over there. Below is the screenshot for the same.
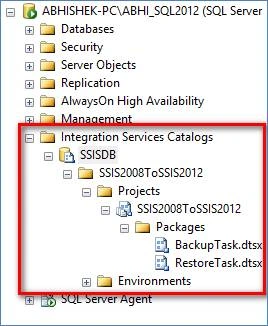
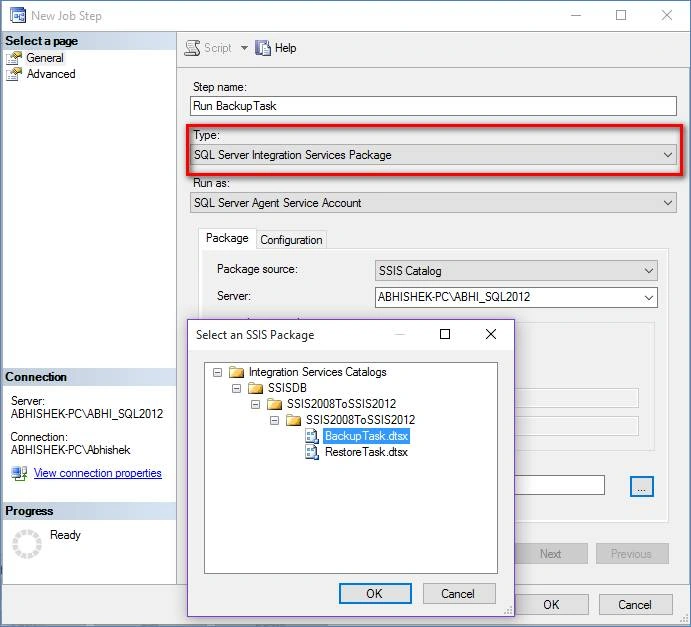
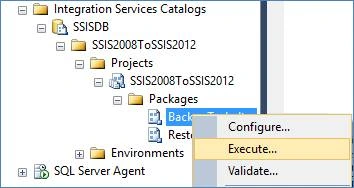
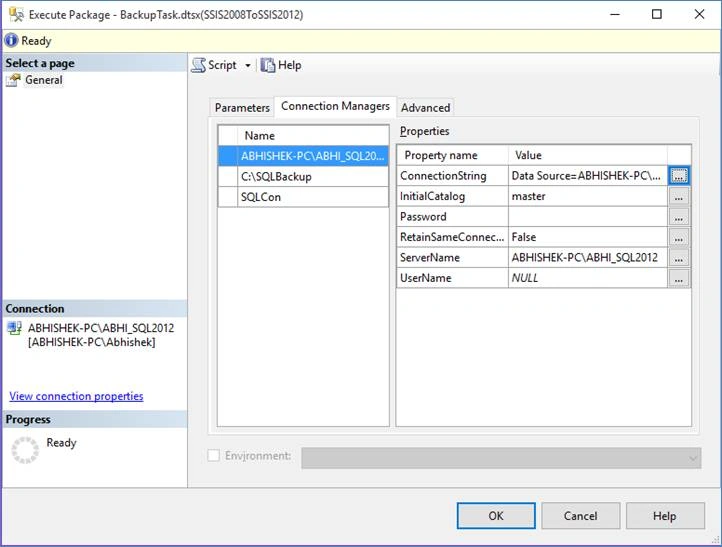
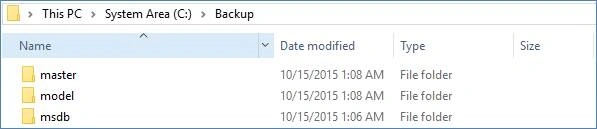
Now you can use these packages in your job or you can execute it manually. We’ll do it by setting up a job.
You can learn how to create jobs in SQL Server from below article.


Kiran RajPosted Apr 22, 2017, 12:57 PM
Thanks for sharing!!
Sibeesh VenuPosted Feb 2, 2016, 4:04 AM
Nice Share
Debasis SahaPosted Feb 1, 2016, 11:42 PM
Nice article...
Yashwant VishwakarmaPosted Feb 1, 2016, 11:12 PM
Nice article, thanks for sharing!!
Raja TPosted Feb 1, 2016, 10:25 PM
Nice, Thanks for sharing
Mohammed IbrahimPosted Feb 1, 2016, 2:05 PM
nice
Santhakumar MunuswamyPosted Feb 1, 2016, 1:49 PM
Thanks for nice article
Upendra Pratap ShahiPosted Feb 1, 2016, 12:24 PM
nice info... thanks for sharing...