

Introduction
This article shows how to create a GUI, in other words, a Graphical User Interface and add a few back-ends functionalities using the NetBeans IDE. You will be able to work with jLabel, jTextField, jComboBox and jButton easily using NetBeans.
Use the following procedure to create the project:
- Select "File" -> "New Project" from the main menu bar.
- Select Java in categories and "Java Application" in the project. Click the "Next" button.
- Write WelcomeApp in the Project Name and specify the path.
- You can choose "Use Dedicated Folder for Storing Libraries" to specify the location for the library folder. This step is optional.
- Deselect the "Create Main Class" CheckBox if selected. Finally, click "Finish". Now your project's initial stage of project creation is complete. Now we will build the Front-End.
Creating the Front-End
- Creating a jFrame Container:
- In the project window you will see a node with your project name, WelcomeApp; right-click on this node and select "New" -> "Other".
- A dialog box with the name New File will appear, select Swing GUI Forms in categories and jFrame Form file type then click "Next".
- Type WelcomeAppUI as class name and my.welcomeapp as the package.
- Finally click the "Finish" button.
After following the preceding steps the NetBeans IDE creates the WelcomeAppUI form and also the WelcomeAppUI class on the WelcomeApp application and finally opens a WelcomeAppUI form in the GUI builder. Our my.WelcomeApp package replaces the default package.
- Adding Components to Front-End:
Now we will be using the palette to populate our application front-end with a jPanel. Then we will be adding some of the components like jLabel, jTextField, jButton etcetera. The design of our application will look as in the following screenshot.
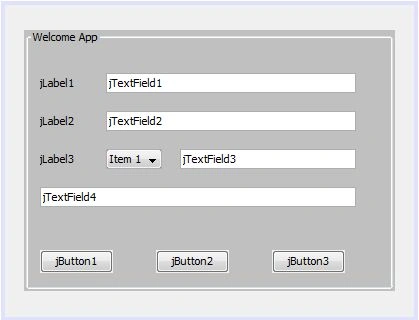
- Pick the jPanel from the Swing Container in the Palette and drop it onto the jFrame.
- Select the border of the jPanel by clicking on the ellipsis (...) button next to Border.
- In the border dialog box, select "Titled Border" from the list and write "Welcome App" for the title TextField provided. And proceed according to the preceding screenshot and design the application.
- Editing the Text of the Components Added:
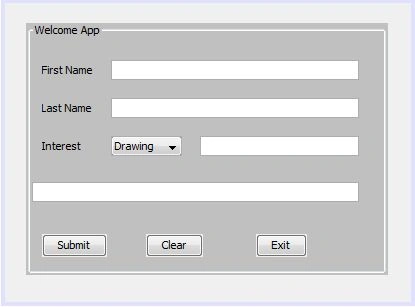
- Double-click on the JLabel1 and rename it to First Name.
- Double-click on the JLabel2 and rename it to Last Name.
- Double-click on the JLabel3 and rename it to Interest.
- Right-click on the jTextFields and select "Edit Text" from the pop-up menu and delete the default text.
- Rename the JButton1, JButton2 and JButton3 to "Submit", "Clear" and "Exit" respectively by right-clicking on each button and selecting "Edit Text" from the pop-up menu.
Finally the Application front-end will look as in the following screenshot.
- Adding Functions to the Buttons:
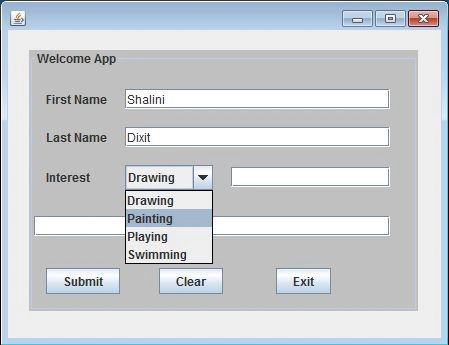
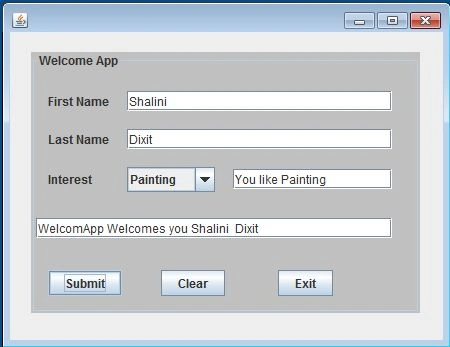
To handle the occurrence of the events, in other words when an action is performed on the button by clicking on it by the mouse or pressing it using the keyboard, it must be able to perform its task. This functionality is provided by using ActionEvent of ActionListener.
- Functionalities of the "Exit" button:
Join the conversation! Your thoughts help the community grow.