
Introduction
This article will help you to develop a basic Universal Windows app, which can work on Windows phone, Windows 10 PC, Surface tab, etc. Let’s get to the work now.
Target Audience
Beginner with basic C# and XAML coding knowledge.
Technical Requirements
- Operating System should be Windows 10 Pro on your PC.
- Visual Studio 2015 or 2017 installed on your PC.
- Developer Mode should be enabled on your OS.
Let’s work now on a basic app which we will be developing, using controls like Text Box, Text Field, Button Click etc. and it can work both on Windows and Windows PC.
Run Visual Studio 2015 in your PC.
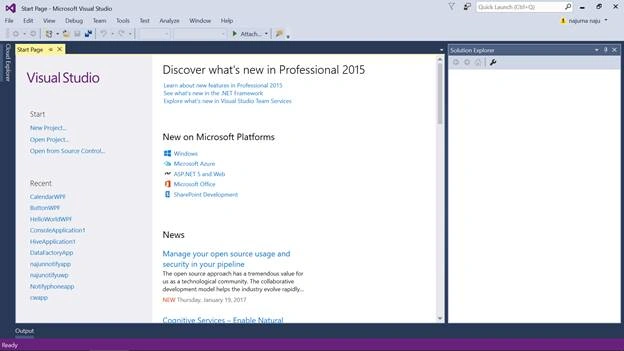
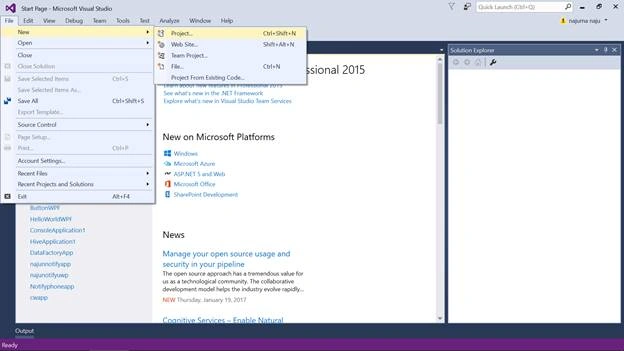
Click File -> New -> Project
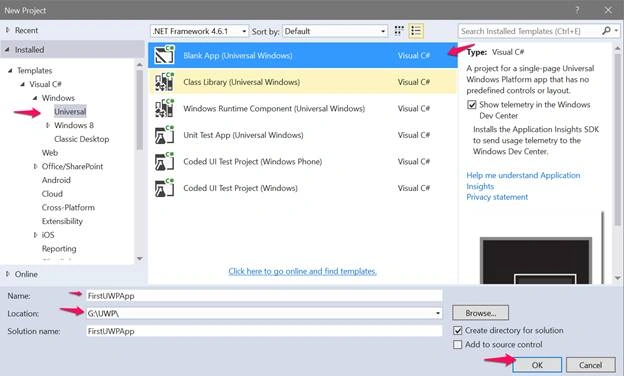
Select Visual C# -> Windows -> Universal -> Blank app (Universal Windows) Visual C#, name your app -> Select the location, where it has to be saved and click OK to create the app project in Visual Studio 2015.
Now, Visual Studio 2015 is ready with all the development related information of Solution Explorer, menu options, coding Window etc.
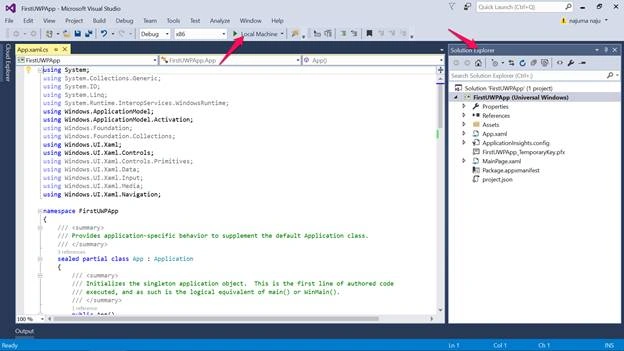
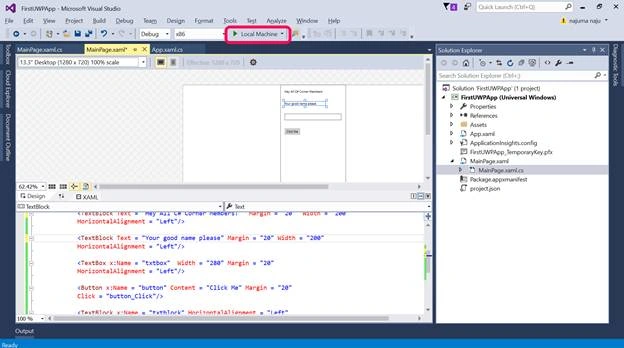
Clicking on Local Machine will help you to run the UWP app in your Windows machine.

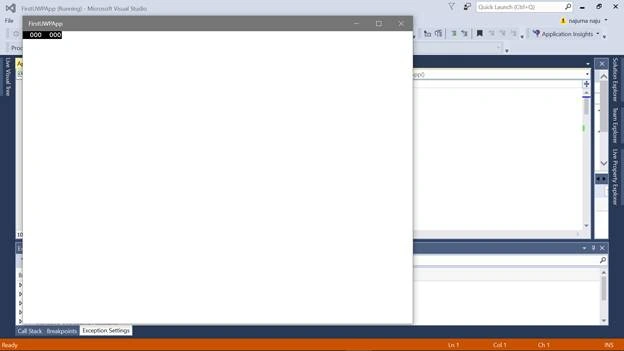
The Blank UWP app is ready now. Let’s work with the control options, which we need now.
Note
Clicking on the Stop button will stop running your UWP app on your PC and you should stop running your app before you switch on to work with your project on Visual Studio 2015.
On your Solution Explorer, you can find two main files named MainPage.xaml and MainPage.xaml.cs. Now, click on MainPage.xaml, where you can find two panes – a graphical designer pane and a coding pane given below.
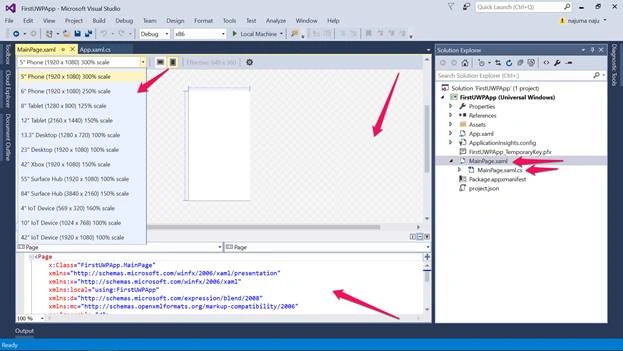
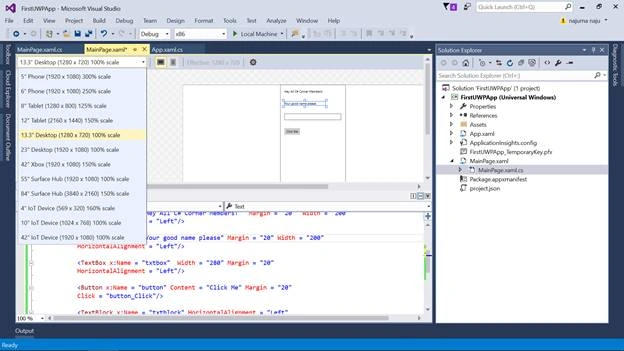
In the top image, you can find different options given below.
- Selecting the options of the phone will help you to build the app for the same code on the phone interface, which can work on the phone and you can find the same preview on the graphical designer pane of Visual Studio 2015.
- Selecting the options of Tablet will help you to develop an app for Tablet and give the graphical designer pane of the same, provided the same code can work on it.
- Selecting the options of the desktop will help you to develop an app for Windows 10 PC and Visual Studio will take you to the designer graphical pane of Windows 10 PC.
- You can also find the coding pane given below in the image given above and other two files of MainWindow.xaml – MainWindow.xaml.cs on your Solution Explorer in Visual Studio 2015.
Adding controls in UWP app
You can add the textblocks, textbox, button, etc., using an option called toolbox, which you can find in 'View a ToolBox', for which just select the tools that you need, use drag and drop it towards the graphical designer Window.
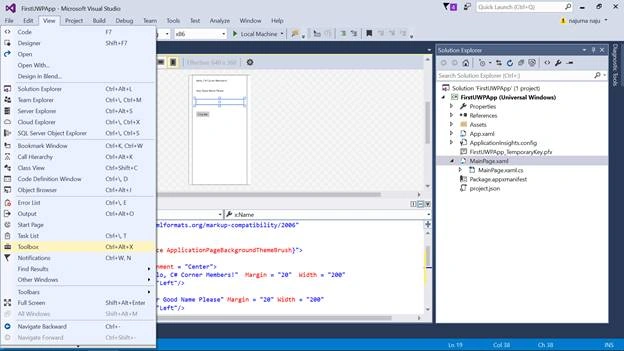
You can even simply go with the coding inside the grid on MainWindow.xaml, if you are familiar with the coding.
Code for MainWindow.xaml
- <StackPanel HorizontalAlignment="Center">
- <TextBlock Text="Hello, C# Corner Members!" Margin="20" Width="200" HorizontalAlignment="Left" />
- <TextBlock Text="Your Good Name Please" Margin="20" Width="200" HorizontalAlignment="Left" />
- <TextBox x:Name="txtbox" Width="280" Margin="20" HorizontalAlignment="Left" />
- <Button x:Name="button" Content="Click Me" Margin="20" Click="button_Click" />
- <TextBlock x:Name="txtblock" HorizontalAlignment="Left" Margin="20" />
- </StackPanel>
Now, the designer pane will look, as shown below.
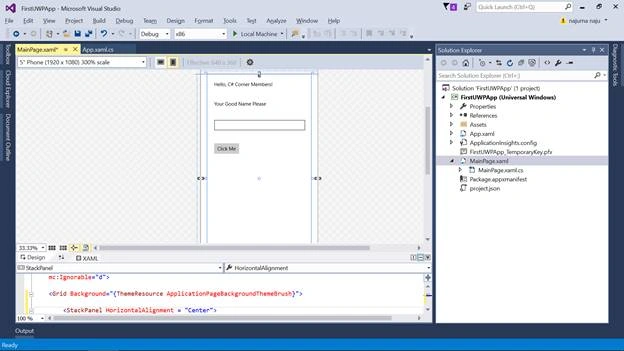
Let’s add a click based event handler for the button added here.
Double click on the button in the Designer Window here.
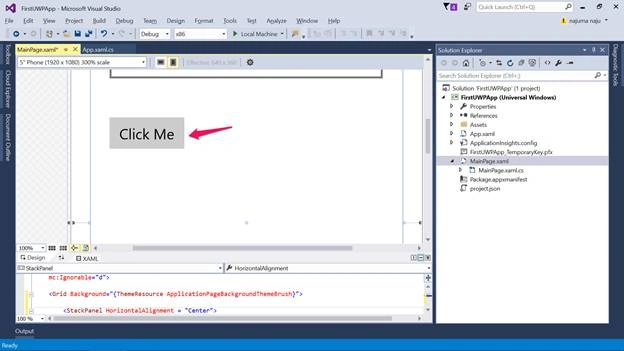
Add a MessageBox.Show code that the given details are saved as such in MainWindow.xaml.cs
Run your app on your own PC
To run your app on your own PC, select the UI, which you need and click on Local Machine to run it.
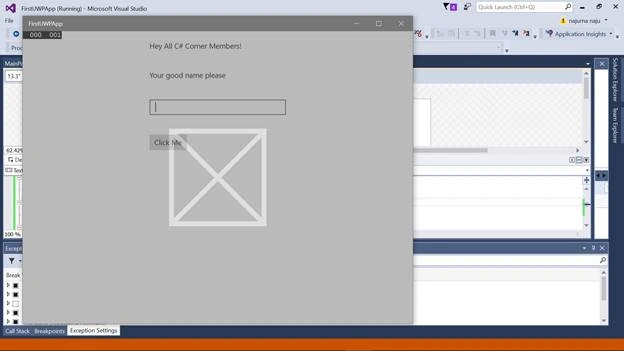
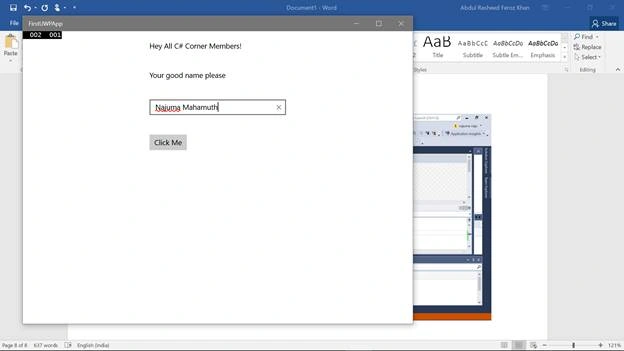
Now, clicking on the button of 'Click Me' will display your message box that the name has been saved. You can also try the same in Windows phone.
Run your UWP app in Windows phone
Note
Make sure that you have a Windows phone or a Windows phone Emulator installed on your PC.
In Visual Studio 2015, select UI as a phone.
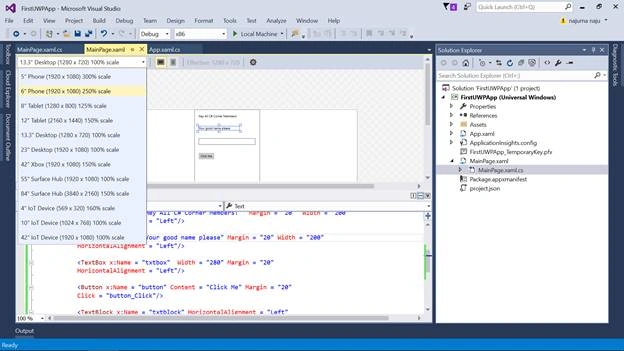
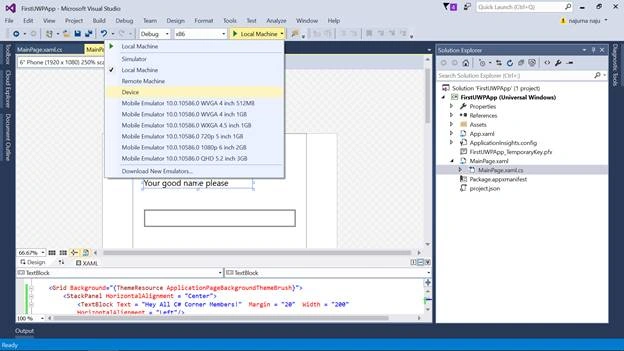
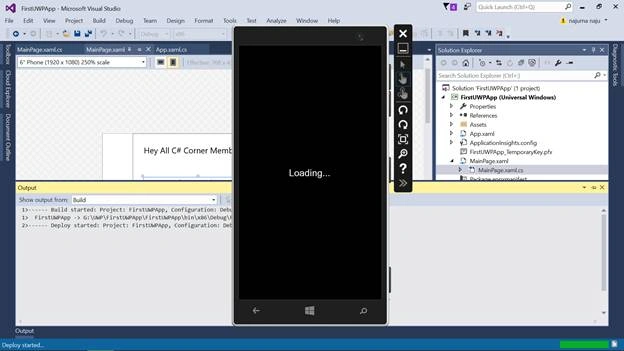
Select device here to run your app on a Windows phone device or if you wish to run it on a mobile Emulator, you can select it.
Keynotes in Short
- About UWP apps.
- Developing UWP app in Visual Studio 2015.
- Run your UWP app in Windows 10 PC.
- Run your UWP app in Windows phone.
Nigel FernandesPosted Jan 27, 2017, 5:07 PM
Good article, I will try this !!
Thennarasu NPosted Jan 27, 2017, 7:51 AM
Super Article and Easy understanding