

Introduction
In my previous articles on the azure IoT series, we have learned about the Azure IoT Hub and Device Provisioning Service (DPS). If you have not read my previous articles about Azure device provisioning service yet, then please read them using the following link
As explained in the previous articles IoT devices to the IoT hub can be connected in two ways that are either using Device Provisioning Service (DPS) or directly to the IoT hub, So let's learn how to enroll the IoT devices with Device Provisioning Service (DPS).
What is Device Provisioning Service (DPS)?
Azure IoT hub device provisioning service is responsible to enroll IoT devices before devices get registered or connected on the Azure IoT hub. Devices can be directly registered with IoT hub, but Azure device provisioning service makes it easier to manage the entire life cycle of millions of IoT devices. Enrollments of devices can be done via the portal as well programmatically with the help of Azure DPS REST services or the SDK. The devices enrolled into the Azure DPS can be registered into the Azure IoT hub with the help of REST Services as well as the SDK. The following diagram will illustrate the Device Provisioning Service (DPS)

What is Device Enrollments?
Device enrollment is the process of adding the pre-configured IoT devices details on Azure device provisioning service and connect to the IoT hub on-demand or based on the requirement without any human intervention. No let's learn step by step how to enroll the IoT devices
Go to the Azure Device Provisioning
Find the device provisioning service which we have created in the Understanding The Azure IoT Hub Device Provisioning Service or if you haven't created then please follow the steps shown in the article and create it. Hope you have DPS services on the portal, Now find the option manage enrollments as shown in the following image

Using Device Provisioning Service (DPS) devices can be enrolled using the following two concepts,
- Individual Enrollment
- Group Enrollment
Add Individual Enrollment
This allows enrolling one device at a time that allows unique configuration per device. To create the individual enrollment select manage enrollment then click on Add individual enrollment as shown in the following image
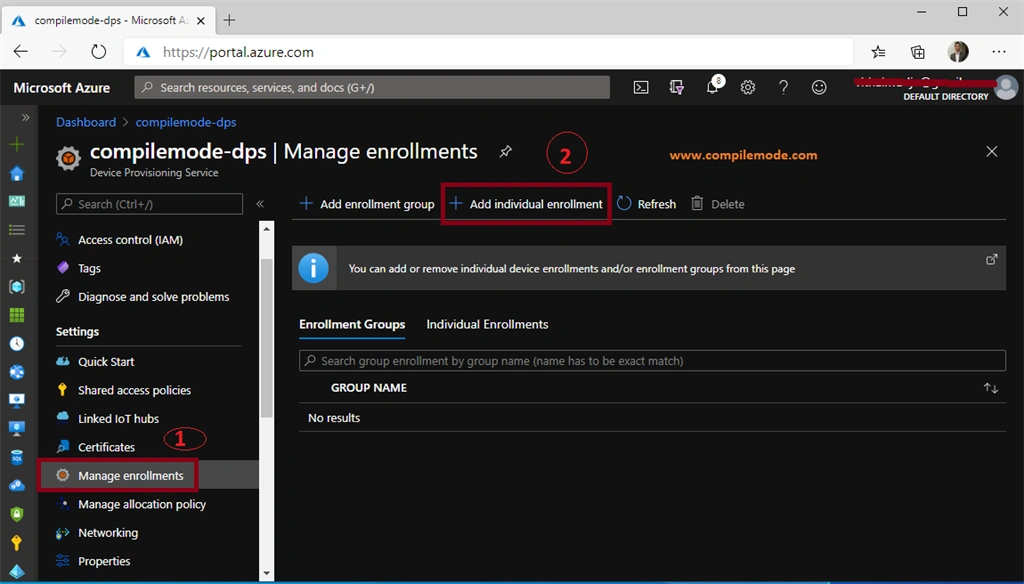
After clicking on Add individual enrollment button the following screen will get appears
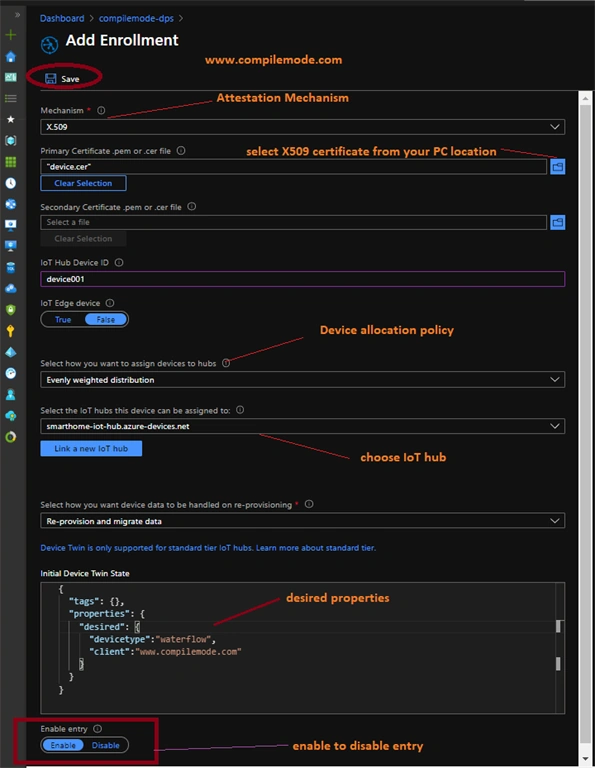
As shown in the preceding image, we need some details to create the enrollment entry,
- Attestation Mechanism
- Primary Certificate
- Secondary certificate
- IoT Hub Device Id
- IoT Edge Device
- Device Allocation Policy
- Choose IoT Hub
- Device Re-Provisioning
- Device Twin State
- Enable Entry
What is Attestation Mechanism?
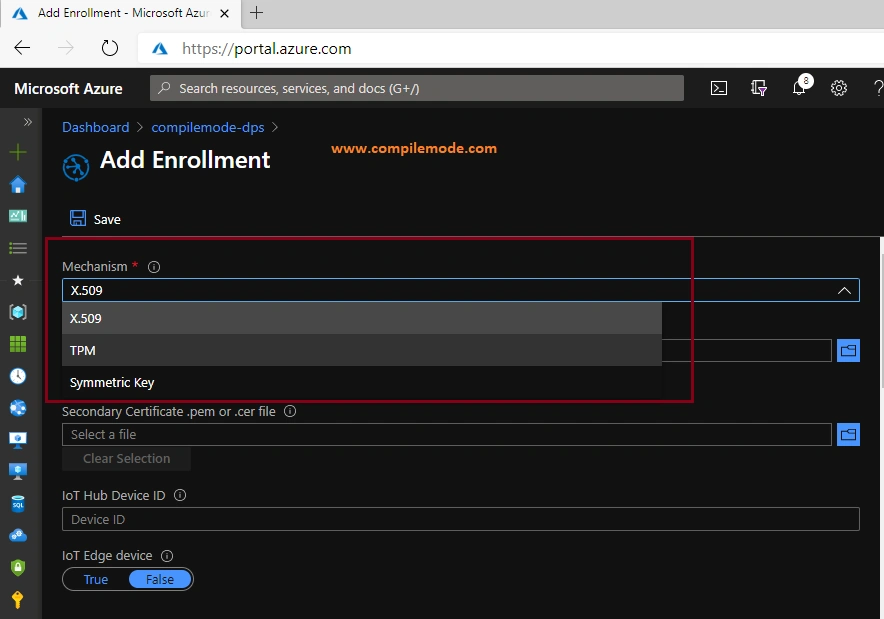
The attestation Mechanism is the process of cross verifying the enrolled device identity during the device registration on IoT Hub, Device Provisioning Service supports the following attestation mechanism
- X.509
- TPM
- SymetricKey
Now let's learn how to enroll devices using the above attestation mechanisms
Device Enrollment Using X.509
X.509 certificate is the security certificate which includes the authentication details about the device, X.509 certificate can be provided by a device manufacturer which they can buy from the authorized certificate provider such as CA.
For development and testing purposes we can create the x.509 certificate by using the tools like PowerShell or Openssl etc. I will show in the separate article how to generate an x.509 certificates.
I have x.509 certificates on my pc which I have generated using the PowerShell
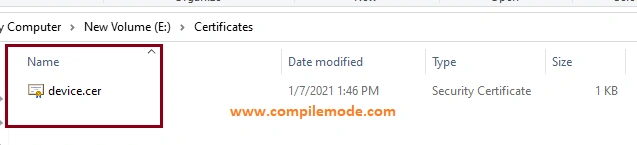
Now choose x.509 attestation mechanism from the dropdown list and choose device.cer certificate as shown in the following image
After uploading the certificate provide the following optional details
IoT Hub Device Id
Provide the Device Id name which is the unique per x.509 certificate, This is optional, if you do not provide the device Id then registration id becomes the deviceid on Azure IoT hub
IoT Edge Device
Choose between true or false which indicates if its true then its as edge device else its an IoT device
Device Allocation Policy
This chosen policy decides how IoT device allocate to the IoT Hub, you can read my previous article on same to understand the details about the device allocation policies
Choose IoT Hub
DPS linked with multiple IoT Hubs, you can choose on which IoT hub device should register or you can let it decide by device allocation policy
Device Re-Provisioning Policy
There may be a requirement to re-provision the device, so during this process, it allows whether to keep the previous data or not.
Initial Device Twin State
The initial device twin allows storing the custom properties about the device or whatever you want. mostly device twin used to keep the device-related information such as the path of device upgrade package file or client details etc.
Example,
- {
- "tags": {},
- "properties": {
- "desired": {
- "devicetype": "waterflow",
- "client": "www.compilemode.com"
- }
- }
- }
Enable Entry
This option allows enabling to disable the enrollment entry
Now providing the all above details click on save, after successfully creating the enrollment entry the following notification will be shown
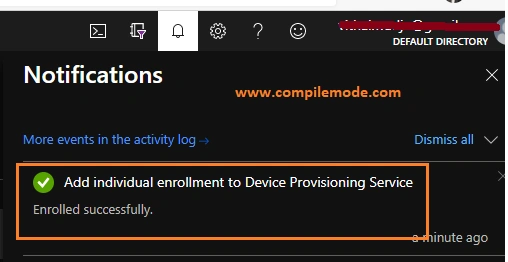
Now go to our created device provisioning service (DPS) instance and see the created enrollment entry as follows
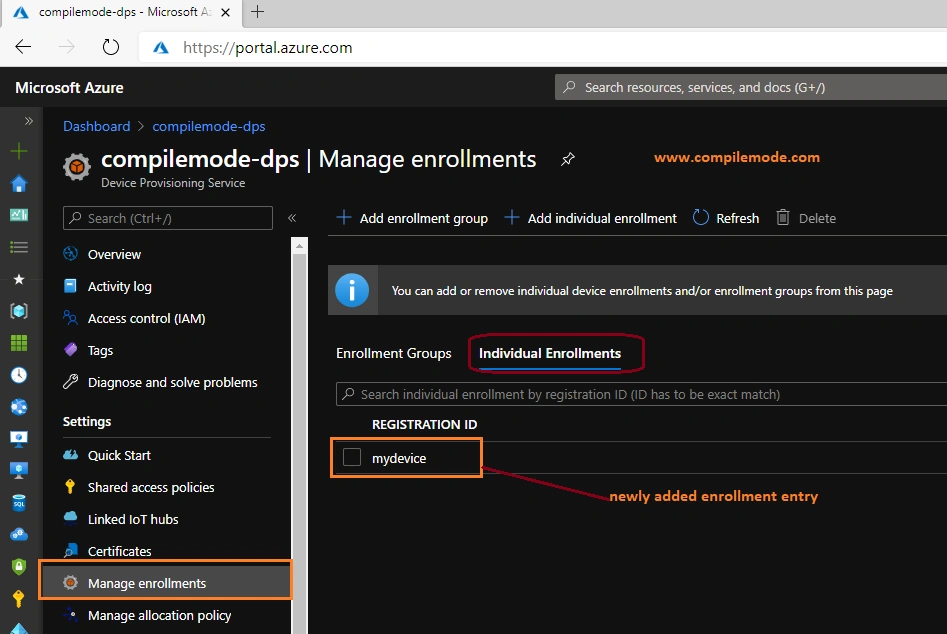
In the preceding image, you see the registration id as my device which is come from the certificate common name (CN).
Device Enrollment Using Symmetric Key
Now choose the symmetric key attestation mechanism from the dropdown list and check on auto-generated keys as shown in the following image
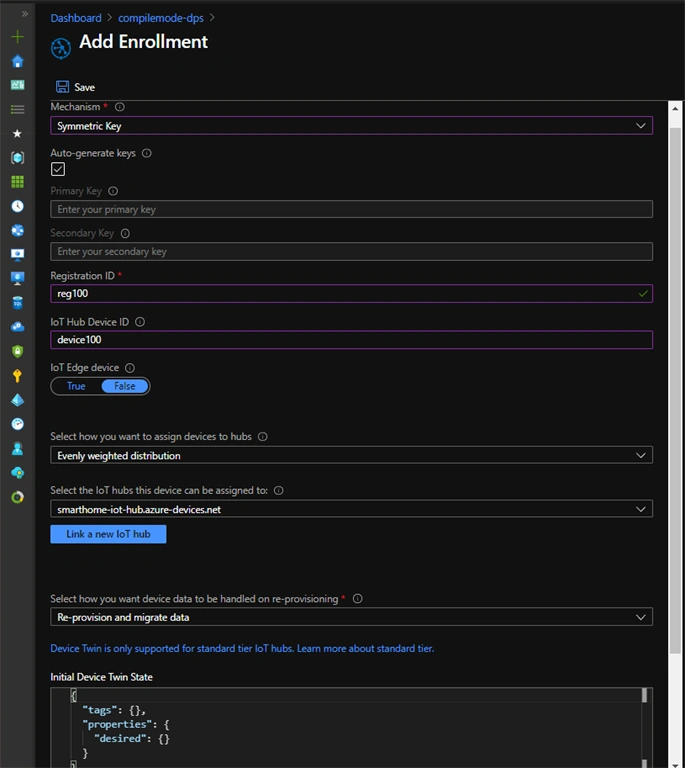
Provide the required details as we did in the x.509 enrollment, in the symmetric key attestation mechanism we need to provide the registration id but in x.509 enrollment the registration id taken from the certificate common name (CN).
Now providing the all above details click on save, now go to our created device provisioning service (DPS) instance and see the created enrollment entry as follows
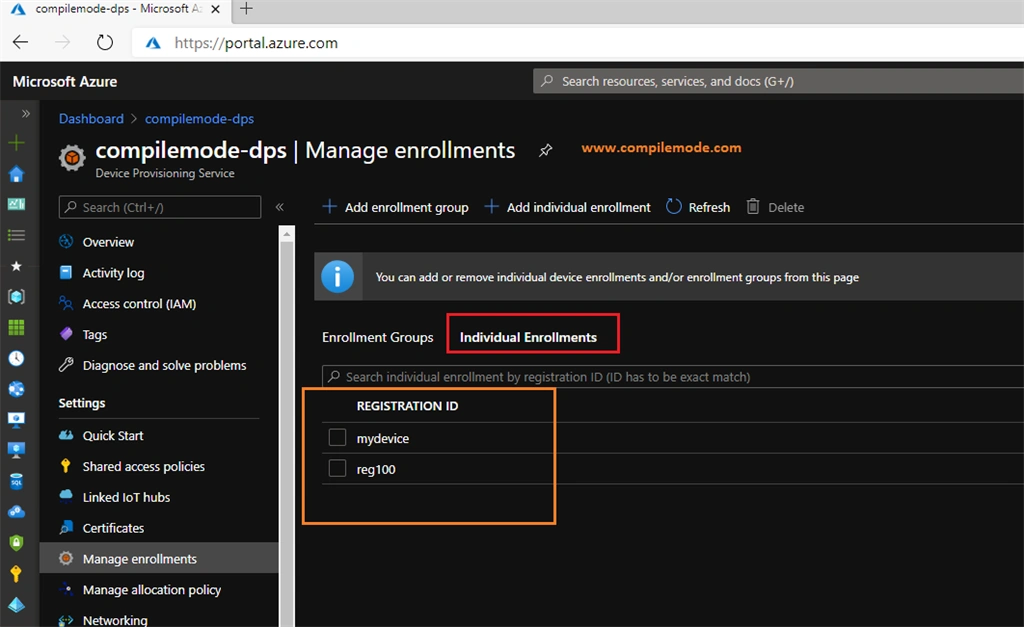
As shown in the preceding image we see the registration id reg100 is go added, follow the same steps for other types of attestation mechanism, and enroll the device
Add Group Enrollment
Group Enrollment allows enrolling the group of devices at a time that allows common configuration for a group of devices. To create the group enrollment click on the Add group enrollment button as shown in the following image
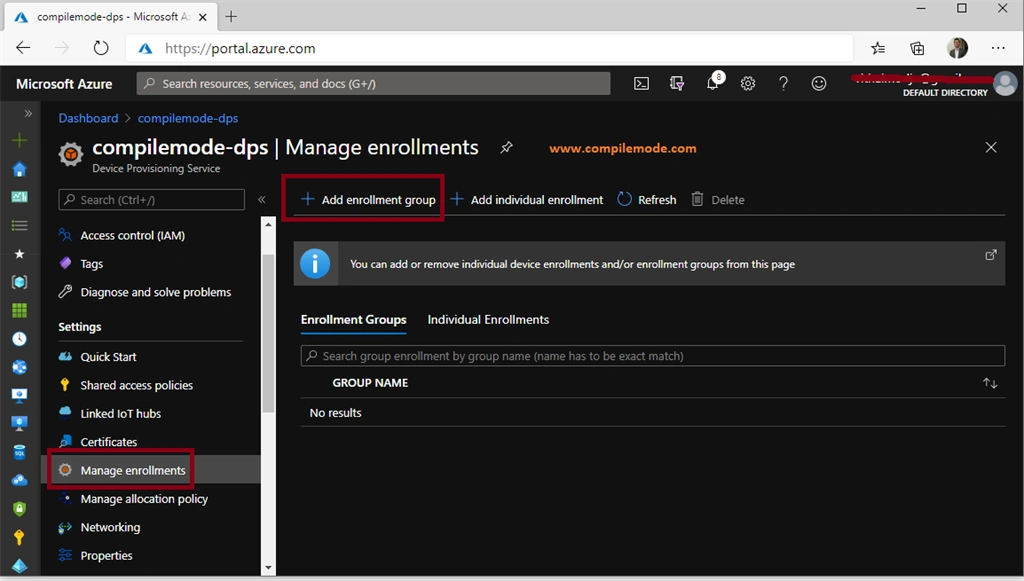
After clicking on the add enrollment group button following screen will get appears
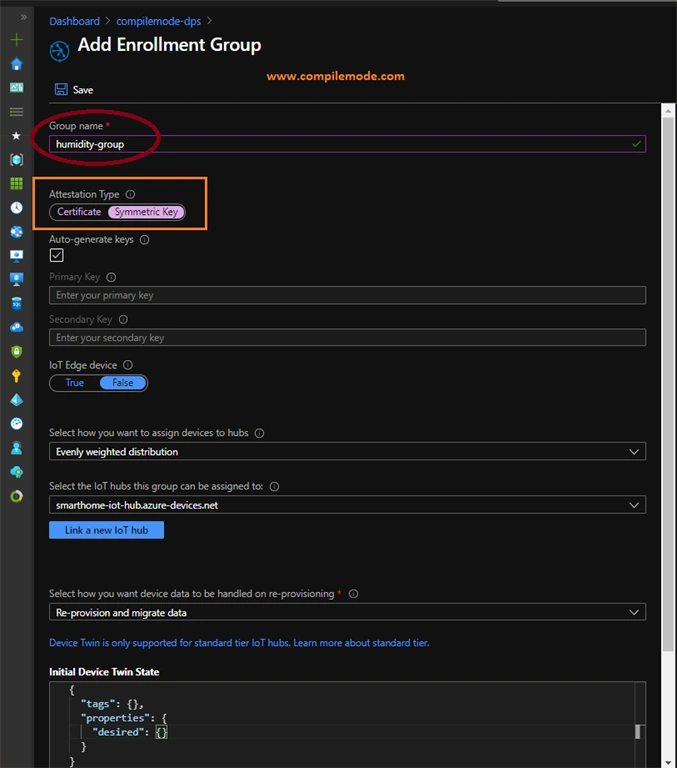
As shown in the preceding image provide the group name, choose the attestation type is symmetric Key and provide the remaining details as we did during the previous enrollment, after successfully creation, the group will be listed under the enrollment group tab as shown in the following image
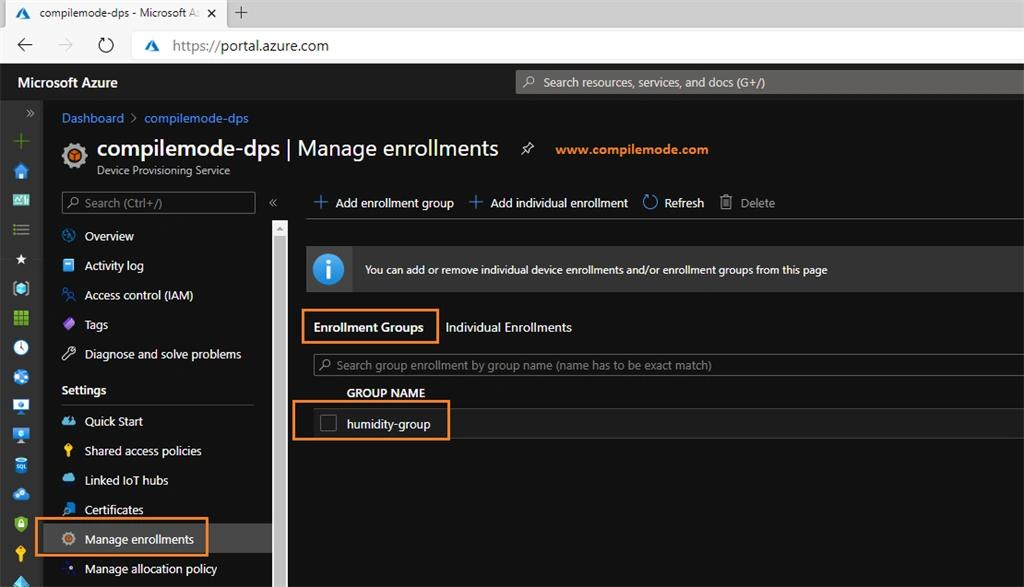
as you see in the preceding image humidity group is got added to the group enrollment list, now click on the group name to see the registered devices
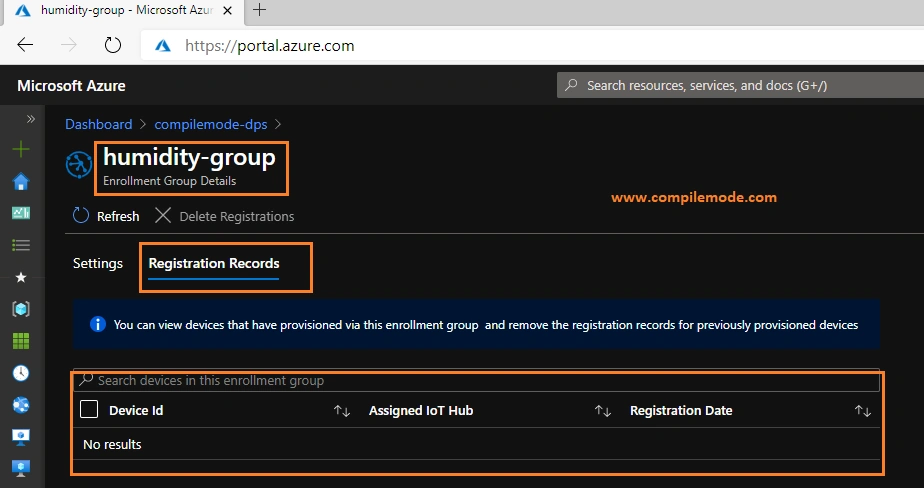
Now in the preceding image you see, there are no devices in the list, I will demonstrate in the separate article how to add the devices into the group.
Summary
I hope this article was useful for understanding the basics of the device enrollments using Azure IoT hub device provisioning service. In this series of Azure IoT, next, we will learn about how to add the devices into the enrollment group.
Read more articles on IoT,
Next Recommended Article >> Consuming ASP.NET Web API REST Service Using HttpClient
Leeladhar LadiaPosted Mar 25, 2022, 1:45 PM
Good one. Thanks
Shahriar NikkhahPosted Jan 17, 2021, 10:08 PM
Very very nice article