

Introduction
In this tutorial, I am going to show you how to code BBC micro: bit using MicroPython and how to display your name and other basic symbols on your micro: bit, by writing Python code manually. So, let's start.
What is BBC micro: bit?
Micro:bit (also referred to as BBC Micro:Bit, stylized as micro:bit) is an ARM-based embedded system designed by the BBC for use in computer education in the UK.
The board is 4 cm × 5 cm and has an ARM Cortex-M0 processor, accelerometer and magnetometer sensors, Bluetooth and USB connectivity, a display consisting of 25 LEDs, two programmable buttons; and it can be powered by either USB or an external battery pack. The device inputs and outputs are through five ring connectors that are part of the 23-pin edge connector. And, we can do pretty cool stuff with this micro: bit. I am going to show you one of them.
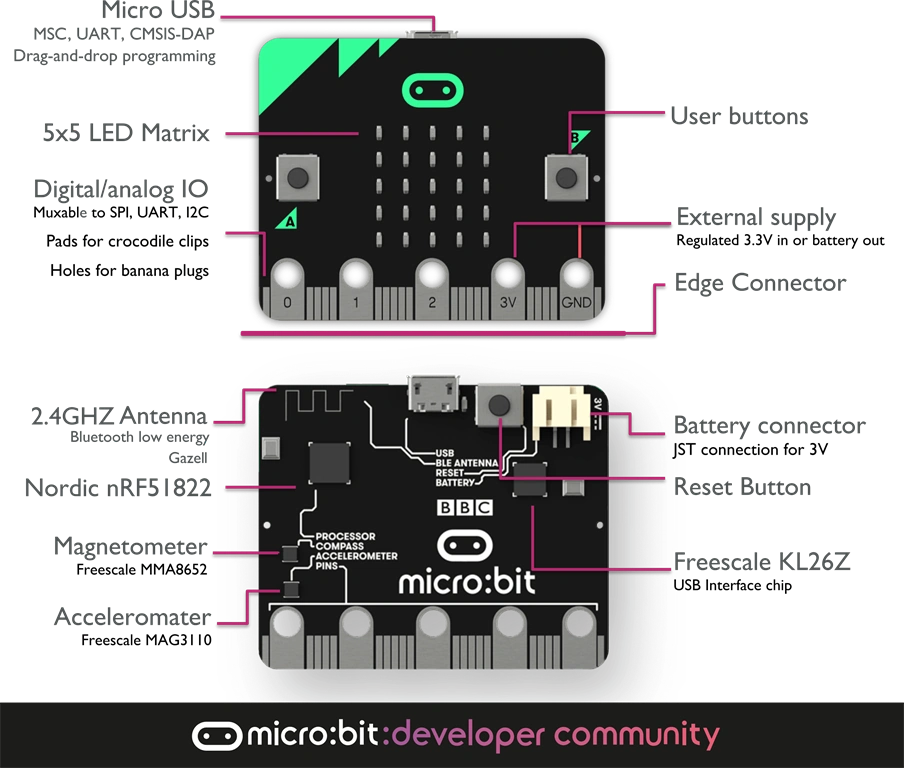
- Micro:bit (1 pcs)
- usb cable (1 pcs)
- Battery AAA 1.5V (2 pcs)
- Battery Box (1 pcs)

- via USB cable
You can test your micro: bit just to see if it is working fine or not. To do so, connect your micro: bit to your computer via USB cable and wait for a second. Your micro: bit will display "HELLO" by blinking LEDs. If it does, then it is working fine.
- via Battery Connector
Insert batteries into the battery box and connect your micro bit via power pins and then see if it is displaying "HELLO". If it is then it is working fine.
Now, let's move to the coding part. Let us see how we can code and display "Our Name" manually. Below are the steps to follow.
Go to https://www.microbit.co.uk/app/
This is a platform which provides an IDE to write our code for micro: bit using different programming languages like JavaScript and Python. Here, we can write our code, compile it, and we can generate a HEX file to run on our micro: bit. So, let us see how can we display our name using MicroPython.
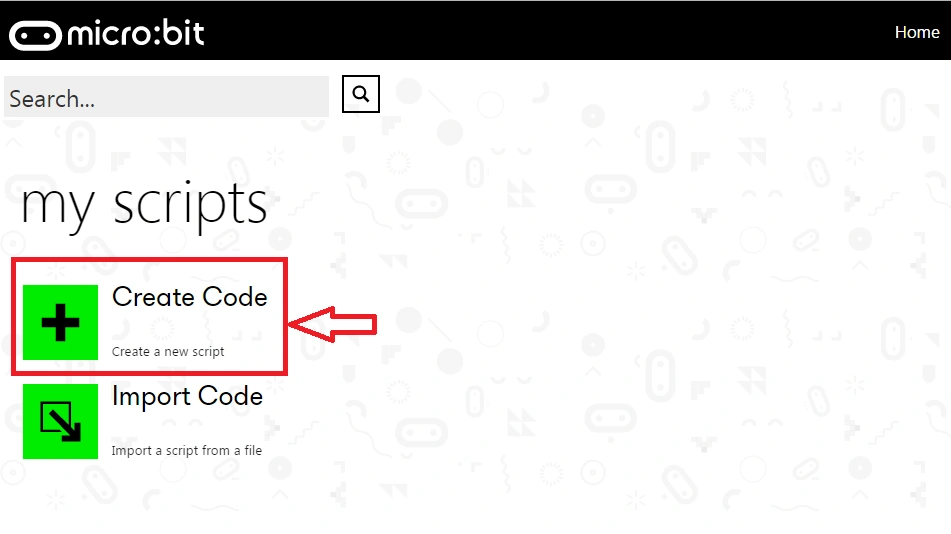
Go to https://www.microbit.co.uk/app/ and click on "Create code".
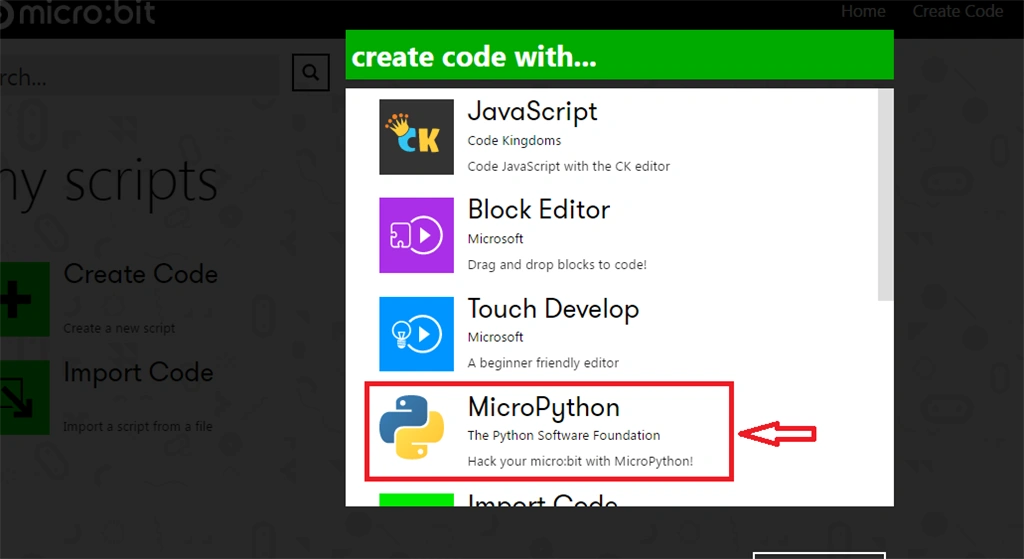
 After clicking, it will ask you to choose a programming language in which you want to code for your micro: bit, like JavaScript, Python, Touch Develop, and Block Editor. Actually, Block and Touch Develop is the easiest method to write code for micro: bit, just by dragging and dropping the blocks as I have shown in this article. But I am going to show how to write code for micro: ibit using MicroPython. So, let's choose MicroPython.
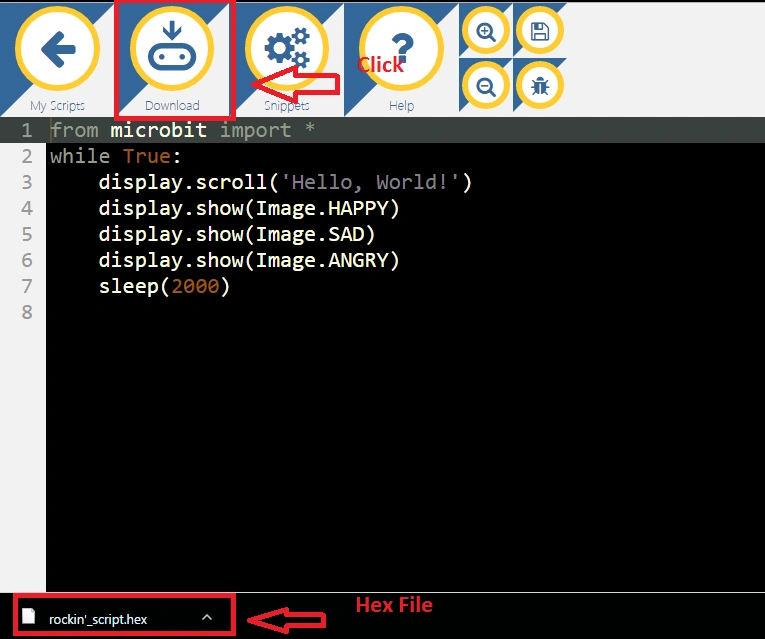
After choosing MicroPython, wait for some seconds. It will prepare things for you and you will be presented with the following screen where you can see there are different sections/ tools, like Download, Snippets, Help and Save.
- Download - This is used to compile your Python code and download HEX file to run on Micro:Bit.
- Snippets - This is used to add code snippets in your program.
- Help - This is used to get some help if you are stuck anywhere in the middle.
And, we can see that there are other buttons to zoom in and zoom out the IDE and save our code there.
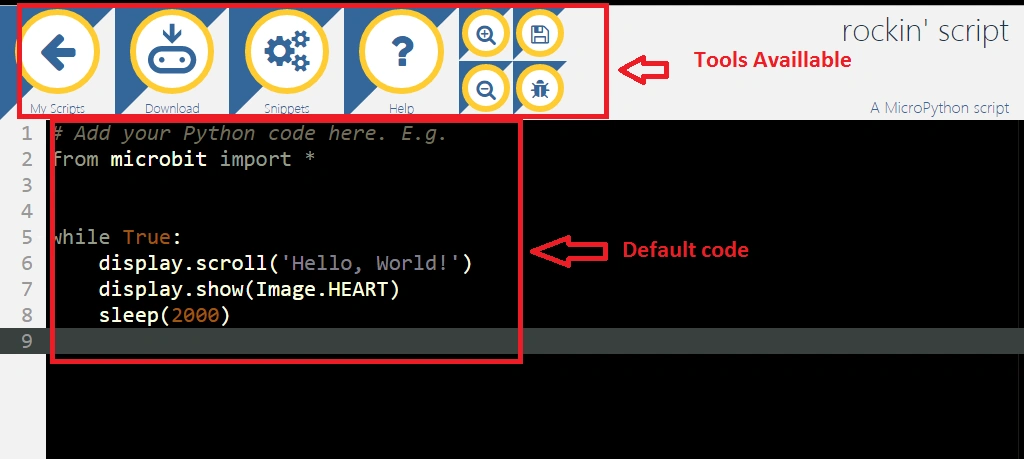
Let's get started and write our Python code and run it on micro: bit. First, you need to delete that default code. You can run this code also but I am going to delete it and write it again with the description so that you can understand it better. So first, delete that code and follow the steps.
I am going to add a micro:bit library by writing the following code.
- from microbit import *
- while True:
- display.scroll('CSHARP')
Hadshana KamalanathanPosted Jul 21, 2018, 7:14 PM
Thanks for sharing..
Ganeshan NPosted Jun 9, 2017, 9:51 AM
Nice sharing ........:):):)