

In this article, we are going to learn how to bind a menu depending on the User Role using ASP MVC.
In our projects, sometimes we need to restrict some modules depending on the user level. Here, we will take a real-time example of a simple inventory management using ASP MVC. Let's see types of roles and module details in our application.
Types of Roles
- Admin
- Manager
- User
Modules
- Home
- Index
- About Us
- Sales
- New Invoice
- Update Invoice
- Delete Invoice
- Report
- Daily Report
- Date wise Report
Description of Roles
- Admin - Admin can see all the modules
- Manager - Manager also can see all modules
- User - User can only see Home (Index, About Us) and Sales (New Invoice). A user cannot have permission to see the report details and he/she doesn't have permission to update or delete the created invoice.
Now, let's see how to implement this in our project, step by step.
Step 1 - Create Database and create the required Tables
First, we will create a database and create the required tables. Here, I have created my database and named it as "SampleMenuMasterDB".
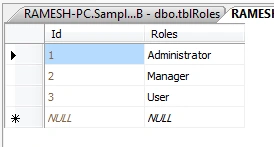
Now, let's create tables. First, we will create a table "tblRoles" and insert some values. Please find the below images for your reference.

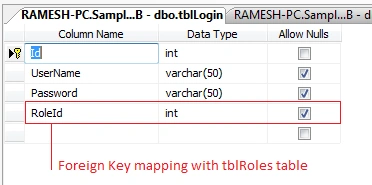
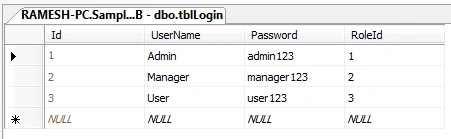
Next, we will create a table "tblLogin" and insert some values. Please find the below images for your reference.
Note
Here, we have mapped foreign key with the table "tblRoles" for column RoleId.
Here, we have mapped foreign key with the table "tblRoles" for column RoleId.
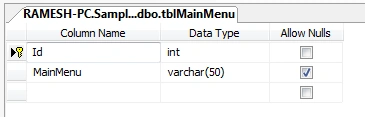
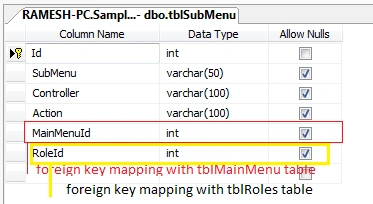
Next, we will create table Menu Configuration tables. Here, I am going to create a table "tblMainMenu" and "tblSubMenu".

Note
Here, I have mapped the foreign key with tables "tblMainMenu" and "tblRoles" for columns MainMenuId and RoleId.
Here, I have mapped the foreign key with tables "tblMainMenu" and "tblRoles" for columns MainMenuId and RoleId.

Step 2
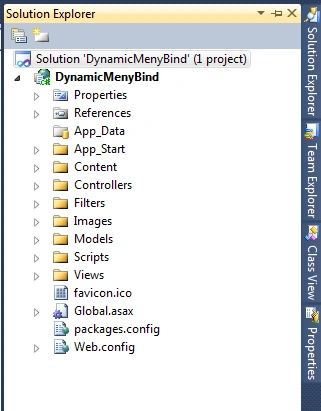
Let's create a simple ASP MVC project and bind the menu according to the user roles. Here, I have created my project and named it as "DynamicMenyBind".
Note - Here, I have selected internet application while creating the project.
Step 3
Let us add a folder "DataModel" to add "ADO.Net Entity Data Model". If you want to know how to add Entity model in our project, please refer here.


Step 4
Next, we will create a "LoginModels" class in our Models folder. Please find the below code for your reference.
- using System;
- using System.Collections.Generic;
- using System.Linq;
- using System.Web;
- using System.ComponentModel.DataAnnotations;
- namespace DynamicMenyBind.Models
- {
- public class LoginModels
- {
- public int UserId { get; set; }
- [Required(ErrorMessage="Please enter the User Name")]
- public string UserName { get; set; }
- [Required(ErrorMessage = "Please enter the Password")]
- [DataType(DataType.Password)]
- public string Password { get; set; }
- public int? UserRoleId { get; set; }
- public string RoleName { get; set; }
- }
- }
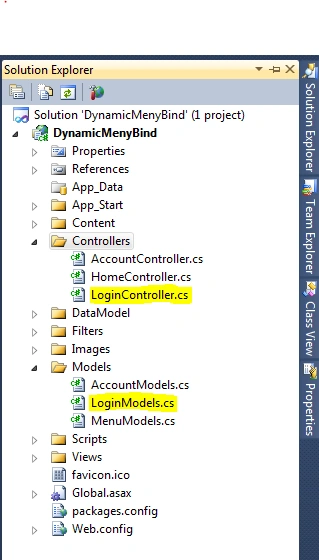
In the Login Controller, let's create a simple "Login" method.
- public ActionResult Login()
- {
- return View();
- }
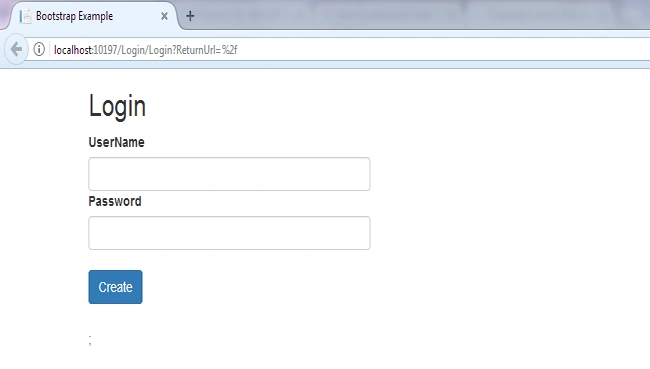
To add a View, right click on the method and select "Add View" option. A new dialog window will appear. In that, select strongly-typed View and select your LoginModels class. In scaffold template, select "Create".

Now, the View will be created.
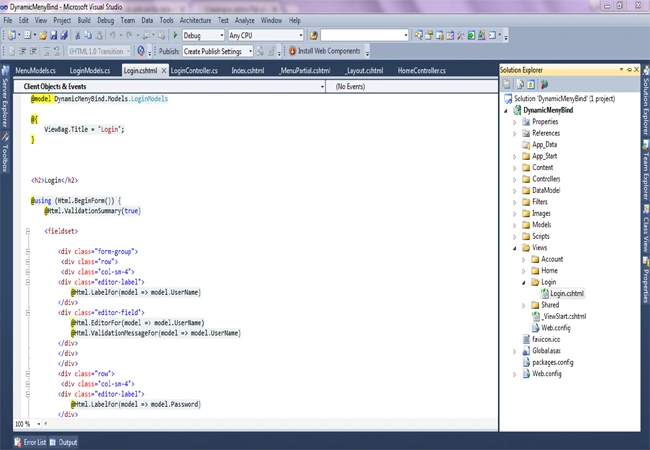
Note - Here, I have removed some fields like user role id and user role name etc. Because in login page, we need only username and password. That's enough for this page.
Step 5
Let's make some changes in _layout page and web.config.
To modify your layout page , go to View->Shared->_layout.cshtml. Please find the below changes.
- <!DOCTYPE html>
- <html lang="en">
- <head>
- @*This CDN links I got from w3 school for Bootstrap Menu*@
- <title>Bootstrap Example</title>
- <meta charset="utf-8">
- <meta name="viewport" content="width=device-width, initial-scale=1">
- <link rel="stylesheet" href="https://maxcdn.bootstrapcdn.com/bootstrap/3.3.7/css/bootstrap.min.css">
- <script src="https://ajax.googleapis.com/ajax/libs/jquery/3.2.1/jquery.min.js"></script>
- <script src="https://maxcdn.bootstrapcdn.com/bootstrap/3.3.7/js/bootstrap.min.js"></script>
- <meta name="viewport" content="width=device-width" />
- </head>
- <body>
- <div id="body">
- @RenderSection("featured", required: false)
- <div class="container">
- @RenderBody();
- </div>
- </div>
- @RenderSection("scripts", required: false)
- </body>
- </html>
Next, let's change the Form authentication mode and redirect the URL page for our login page if the user is not authenticated.
Please make the below changes in your web.config file.
- <authentication mode="Forms">
- <forms loginUrl="~/Login/Login" timeout="2880" />
- </authentication>
Step 6
Let's create one more model class in Models folder for Menu Master. Here, I have created a class and named it as "MenuModels". Please refer the below code for your reference.
- using System;
- using System.Collections.Generic;
- using System.Linq;
- using System.Web;
- namespace DynamicMenyBind.Models
- {
- public class MenuModels
- {
- public string MainMenuName { get; set; }
- public int MainMenuId { get; set; }
- public string SubMenuName { get; set; }
- public int SubMenuId { get; set; }
- public string ControllerName { get; set; }
- public string ActionName { get; set; }
- public int? RoleId { get; set; }
- public string RoleName { get; set; }
- }
- }
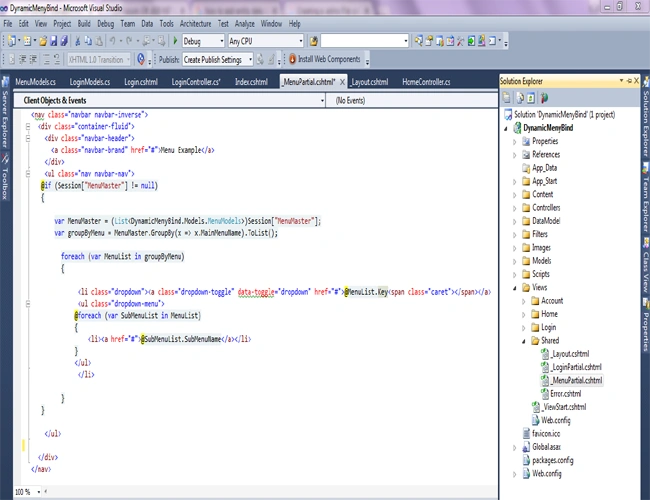
Let's add this Menu partial in the layout page. Please add the HTML code in the layout page.
- <nav>
- @Html.Partial("_MenuPartial")
- </nav>

Step 7
Now, create another action result method in Login Controller to receive the user input. Then, validate the user input and create the session to maintain the user details.
- [HttpPost]
- public ActionResult Login(LoginModels _login)
- {
- if (ModelState.IsValid) //validating the user inputs
- {
- bool isExist = false;
- using (SampleMenuMasterDBEntities _entity = new SampleMenuMasterDBEntities()) // out Entity name is "SampleMenuMasterDBEntites"
- {
- isExist = _entity.tblLogins.Where(x => x.UserName.Trim().ToLower() == _login.UserName.Trim().ToLower()).Any(); //validating the user name in tblLogin table whether the user name is exist or not
- if (isExist)
- {
- LoginModels _loginCredentials= _entity.tblLogins.Where(x => x.UserName.Trim().ToLower() == _login.UserName.Trim().ToLower()).Select(x => new LoginModels
- {
- UserName=x.UserName,
- RoleName=x.tblRole.Roles,
- UserRoleId=x.RoleId,
- UserId=x.Id
- }).FirstOrDefault(); // Get the login user details and bind it to LoginModels class
- List<MenuModels> _menus = _entity.tblSubMenus.Where(x => x.RoleId == _loginCredentials.UserRoleId).Select(x => new MenuModels
- {
- MainMenuId=x.tblMainMenu.Id,
- MainMenuName=x.tblMainMenu.MainMenu,
- SubMenuId=x.Id,
- SubMenuName=x.SubMenu,
- ControllerName=x.Controller,
- ActionName=x.Action,
- RoleId=x.RoleId,
- RoleName=x.tblRole.Roles
- }).ToList(); //Get the Menu details from entity and bind it in MenuModels list.
- FormsAuthentication.SetAuthCookie(_loginCredentials.UserName, false); // set the formauthentication cookie
- Session["LoginCredentials"] = _loginCredentials; // Bind the _logincredentials details to "LoginCredentials" session
- Session["MenuMaster"] = _menus; //Bind the _menus list to MenuMaster session
- Session["UserName"] = _loginCredentials.UserName;
- return RedirectToAction("Index", "Home");
- }
- else
- {
- ViewBag.ErrorMsg = "Please enter the valid credentials!...";
- return View();
- }
- }
- }
- return View();
- }

Step 8
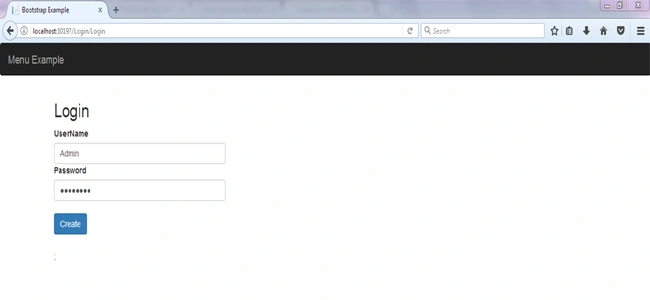
Let's add the logout option to clear the session.Add some HTML code in _menupartial page.
Note
Here, I have validated - if the LoginCredentials session has a null value, the label will be shown like Login. If it is not, it will be shown like "logoff".
- <ul class="nav navbar-nav navbar-right">
- @if (Session["LoginCredentials"] != null)
- {
- <li>@Html.ActionLink("Logout", "LogOff", "Login")</li>
- }
- else
- {
- <li>@Html.ActionLink("Login", "Login", "Login")</li>
- }
- </ul>
Here, I have validated - if the LoginCredentials session has a null value, the label will be shown like Login. If it is not, it will be shown like "logoff".
For logout, we have to add logout action result in the Login Controller. Please refer to the below code.
- public ActionResult LogOff()
- {
- FormsAuthentication.SignOut();
- Session.Abandon();
- Session.Clear();
- Session.RemoveAll();
- return RedirectToAction("Login", "Login");
- }

Here, I have attached my project with Database backup. To know how to restore the database backup, please read my previous article here.
Thanks for reading my article. If you have any comments or queryies, please mention it in the comment box.
Rajesh ThampiPosted Jun 10, 2021, 5:47 AM
Excellent Ramesh. I truly appreciate the efforts to attach the database along with your sample solution. Above all, the explanations are quite structured, giving a clear idea how to proceed at all levels of development. Thank you.
Priya DarshiniPosted Mar 23, 2021, 7:48 PM
Thank you soo much
Nabeel Ur Rehaman ShahPosted Sep 17, 2020, 5:47 AM
How we can do this with web forms
Sheikh FareethPosted Apr 1, 2020, 7:44 AM
Dear sir database not found
sundar NPosted Feb 1, 2020, 10:15 AM
How to configure tblMainMenu and tbsubMenu tables? i not able to see your images to the website
duy duyPosted Nov 6, 2019, 6:17 AM
If you click on the index and move to another page, how can you do it? Can you help me?
Nguyen LongPosted May 19, 2019, 11:16 AM
Very useful. How can I use [Authorize] on Action?
Sheikh FareethPosted Mar 29, 2019, 7:55 AM
Very useful code but i have one doubt so, how to redirect the another page if clicking submenu item
Francisco LopezPosted Mar 12, 2019, 10:44 AM
Muchas gracias por el post , aclaro muchas dudas.
Mohamed AliPosted Nov 20, 2018, 1:16 AM
Meaning full project, i thank you for you supporting those who need supporting
Sanjay KrishnaPosted Aug 9, 2018, 10:48 PM
I want to bind the Same Menu in Side Nav Bar with Links . I means when click AboutUs Link then should open the AboutUs View . Any Adiea ho to achieve it?
ejaz mirzaPosted Jul 6, 2018, 2:16 AM
Its good for sample comes to practical the menu will added into master page that type two view model become conflict error
Renard KabzaPosted Feb 24, 2018, 8:16 AM
It is a very nice project - I will learn a lot from it.Thank you, A few things need to be told. 1. I am using VS 2013. 2. I recovered your DB from *.bak - your backup does not include the FK key between SubMenu and Roles tables. So manually I created it again. 3. I removed existing model from the folder of DataModel 4. web.config a) I left the connection string of DefaultConnection b) I removed the connection string of SampleMenuMasterDBEntities 5. I created my own model (DB first) again using the same name (SampleMenuMasterDBEntities) for the connection string. Since then everything has been working. Regards Renard
Zakir PatwaryPosted Jan 18, 2018, 12:28 PM
This is really helpful
Sokh KheangPosted Jan 8, 2018, 10:48 PM
Hello Teacher! i have error GroupBy// var groupByMenu = MenuMaster.GroupBy(x => x.MainMenuName).ToList();
Md FaridPosted Dec 3, 2017, 4:52 PM
Very Nice code. Helps a lot. Good job Ramesh
Ivin Raj SPosted Nov 30, 2017, 12:56 AM
Please sir help me can you share full code please?
Ivin Raj SPosted Nov 30, 2017, 12:55 AM
This is my mailId [email protected]
Ivin Raj SPosted Nov 30, 2017, 12:54 AM
Sir am in new in this technology can you share your code please ?
Ramesh PalanivelPosted Nov 30, 2017, 12:51 AM
You can create CRUD operation for Menu table using entity framework
Ivin Raj SPosted Nov 30, 2017, 12:40 AM
How to create role and menu using code?
Ivin Raj SPosted Nov 30, 2017, 12:40 AM
Thanks sir it's working fine
Ramesh PalanivelPosted Nov 29, 2017, 8:18 AM
IVIN Raj. Kindly check whether your database has connected properly in entity framework
Ivin Raj SPosted Nov 29, 2017, 7:18 AM
The underlying provider failed on open. entity framework please help me sir
Ramesh PalanivelPosted Sep 23, 2017, 12:29 AM
thank you so much Manav
Manav PandyaPosted Sep 23, 2017, 12:13 AM
Nice one .................
Ramesh PalanivelPosted Sep 22, 2017, 1:48 AM
thanks Satyaprakash Bro..
Satyaprakash SamantarayPosted Sep 22, 2017, 1:45 AM
Nice.......................................