

Introduction
In this article we are going to explore how to bind elements in Windows Phone 7. Further in details we will learn how it is possible to bind elements with others in Windows Phone 7. In this scenario we use an example in which whatever has been entered in the textbox, the text is bound to a TextBlock. You just see the content written inside the TextBox is also written in the TextBox as well. Now Silverlight for Windows Phone 7 data binding enables you to create bindings that allow you to create a linkage between XAML elements. It is called Element Binding. Basically you use element binding when you want to bind to another element's property. It's really useful when you want to connect two objects so that when one object changes the other changes as well. So to do that you should follow the steps given below.
Step 1: In this step first of all we have to open a Windows Phone application; let's see how you will open it.
- Go to Visual Studio 2010
- File->New->Project
- Select the template named as silverlight for Windows Phone
- Select the Windows Phone application
- Give it a name as you want.


Step 2: In this step you see how to bind the Text property of the TextBox which is shown below.
Code:
<TextBox x:Name="textBox"/>
<TextBlock Text="{Binding Text, ElementName=textBox}"/>

Step 3: In this step you just see how to bind the slider value property and the related code is given below.
Code:
<Slider Minimum="20" Maximum="100" x:Name="slider"/>
<TextBlock Text="{Binding ElementName=slider,Path=Value}"/>

Step 4: In this step you just see binding to a custom DependencyProperty of the current page.
XamlCode:
<Button Content="Change DP Value" Click="Button_Click" FontFamily="Comic Sans MS">
<Button.Background>
<LinearGradientBrush EndPoint="0.5,1" StartPoint="0.5,0">
<GradientStop Color="Black" Offset="0" />
<GradientStop Color="#FFC8A8A8" Offset="1" />
</LinearGradientBrush>
</Button.Background>
</Button>
<Rectangle Height="200" Width="100" Fill="{Binding Test, ElementName=myPage}"/>
Xaml.cs code:
public static readonly DependencyProperty MyTestProperty = DependencyProperty.RegisterAttached("Test",
typeof(SolidColorBrush),typeof(MainPage), new PropertyMetadata(new SolidColorBrush(Colors.Red)));
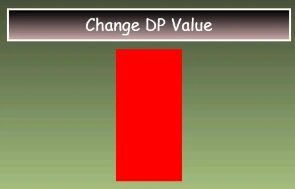
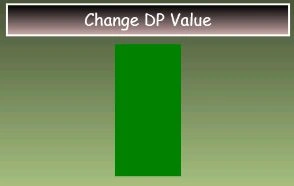
Step 5: In this step we will see the complete code for the MainPage.xaml file of Windows Phone 7 application which is given below.
Code:
<phone:PhoneApplicationPage
x:Class="WP7SampleProject14.MainPage"
xmlns="http://schemas.microsoft.com/winfx/2006/xaml/presentation"
xmlns:x="http://schemas.microsoft.com/winfx/2006/xaml"
xmlns:phone="clr-namespace:Microsoft.Phone.Controls;assembly=Microsoft.Phone"
xmlns:shell="clr-namespace:Microsoft.Phone.Shell;assembly=Microsoft.Phone"
xmlns:d="http://schemas.microsoft.com/expression/blend/2008"
xmlns:mc="http://schemas.openxmlformats.org/markup-compatibility/2006"
mc:Ignorable="d" d:DesignWidth="480" d:DesignHeight="768"
FontFamily="{StaticResource PhoneFontFamilyNormal}"
FontSize="{StaticResource PhoneFontSizeNormal}"
Foreground="{StaticResource PhoneForegroundBrush}"
SupportedOrientations="Portrait" Orientation="Portrait" x:Name="myPage"
shell:SystemTray.IsVisible="True">
<!--LayoutRoot is the root grid where all page content is placed-->
<Grid x:Name="LayoutRoot" Background="Transparent">
<Grid.RowDefinitions>
<RowDefinition Height="Auto"/>
<RowDefinition Height="*"/>
</Grid.RowDefinitions>
<!--TitlePanel contains the name of the application and page title-->
<StackPanel x:Name="TitlePanel" Grid.Row="0" Margin="12,17,0,28">
<TextBlock x:Name="PageTitle" Text="My App" Margin="9,-7,0,0" Style="{StaticResource PhoneTextTitle1Style}" FontFamily="Comic Sans MS" />
</StackPanel>
<!--ContentPanel - place additional content here-->
<StackPanel x:Name="ContentPanel" Grid.Row="1" Margin="12,0,12,0">
<StackPanel.Background>
<LinearGradientBrush EndPoint="0.5,1" StartPoint="0.5,0">
<GradientStop Color="Black" Offset="0" />
<GradientStop Color="#FFD0F1A1" Offset="1" />
</LinearGradientBrush>
</StackPanel.Background>
<TextBox x:Name="textBox"/>
<TextBlock Text="{Binding Text, ElementName=textBox}"/>
<Slider Minimum="20" Maximum="100" x:Name="slider"/>
<TextBlock Text="{Binding ElementName=slider,Path=Value}"/>
<Button Content="Change DP Value" Click="Button_Click" FontFamily="Comic Sans MS">
<Button.Background>
<LinearGradientBrush EndPoint="0.5,1" StartPoint="0.5,0">
<GradientStop Color="Black" Offset="0" />
<GradientStop Color="#FFC8A8A8" Offset="1" />
</LinearGradientBrush>
</Button.Background>
</Button>
<Rectangle Height="200" Width="100" Fill="{Binding Test, ElementName=myPage}"/>
</StackPanel>
</Grid>
</phone:PhoneApplicationPage>
Step 6: In this step we just see the complete code for the MainPage.xaml.cs file which is shown below.
Code:
using System;
using System.Collections.Generic;
using System.Linq;
using System.Net;
using System.Windows;
using System.Windows.Controls;
using System.Windows.Documents;
using System.Windows.Input;
using System.Windows.Media;
using System.Windows.Media.Animation;
using System.Windows.Shapes;
using Microsoft.Phone.Controls;
namespace MyApp
{
public partial class MainPage : PhoneApplicationPage
{
public static readonly DependencyProperty MyTestProperty = DependencyProperty.RegisterAttached("Test",
typeof(SolidColorBrush), typeof(MainPage), new PropertyMetadata(new SolidColorBrush(Colors.Red)));
public SolidColorBrush Test
{
get { return (SolidColorBrush)GetValue(MyTestProperty); }
set { SetValue(MyTestProperty, value); }
}
// Constructor
public MainPage()
{
InitializeComponent();
}
private void Button_Click(object sender, RoutedEventArgs e)
{
this.Test = new SolidColorBrush(Colors.Green);
}
}
}
Step 7: In this step we just see the design of the MainPage.xaml file which is shown below.
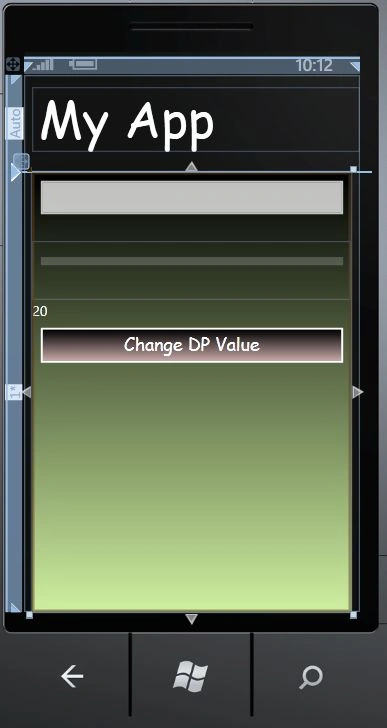
Step 8: In this step we are going to run the application by pressing F5 and the output regarding it is given below.
Output 1: It's the default output is shown below.

Output 2: In this output we will see that whatever we enter into the textbox is also written in the TetxBlock as well as shown below.

Output 3: In this output we will see that the value of the progress bar increases on increasing it's progressing as shown below.
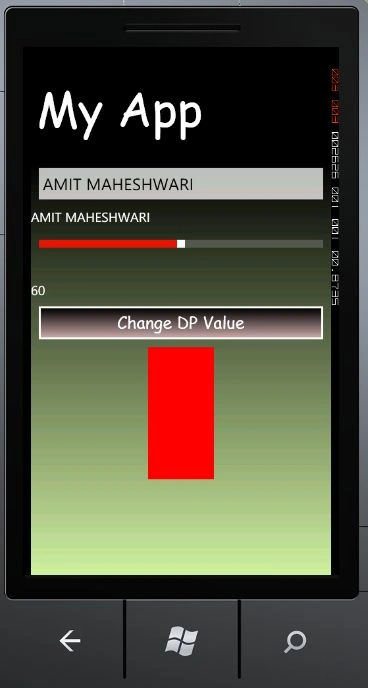
Output 4: In this output we will see how to change the color of a rectangle when a button named Change DP value is clicked; you can see it in the figure given below.

Here are some other resources which may help you.
Working with Elements and Properties in Windows Phone 7
Windows Phone 7 Data Binding using WCF Service
Element to Element Binding in Silverlight 3.0
Data Bindings in Silverlight for Windows Phone 7
System Tray ProgressIndicator in Windows Phone 7.5 / Mango phone
Join the conversation! Your thoughts help the community grow.