

While working with the EF-Core Code-First approach, we first create the classes for our domain entities. Later, we create the database from our code by using migrations. This is the opposite of the Data-First approach, where we design our database first and then create the classes that match our database design.
How Does Entity Framework Core Code-First Approach Work?
- Model First: First, we create a class where we write properties as columns of a data table.
- Database Linked Instance: A DbSet<TEntity> can be used to query and save instances of our Model. LINQ queries against a DbSet<TEntity> will be translated into queries against the database.
- Seed Data: When you want your data table prefilled with data, the OnModelCreating override method is required.
- Adding the Migration: Using Terminal, we can add or update our migrations from classes to the database.
Code Example
- Add a Database Connection to your project’s Program.cs file, you can define your connection string in the appsettings.json file.
var builder = WebApplication.CreateBuilder(args); builder.Services.AddDbContext<ApplicationDbContext>(options => options.UseSqlServer( builder.Configuration.GetConnectionString("DefaultConnection"))); var app = builder.Build(); app.Run(); - Create your Model with getter and setter properties.
public class Category
{
    [Key]
    public int CategoryId { get; set; }

    [Required]
    public string CategoryName { get; set; }

    public int CategoryDisplayOrder { get; set; }
}
[Key] attribute will indicate the field with identity key and primary key constraints.
[Required] attribute will make the field required and Not-Null field.
- Create an ApplicationDbContext class to manage DbContext entities.
public class ApplicationDbContext : DbContext
{
    public ApplicationDbContext(DbContextOptions<ApplicationDbContext> options)
        : base(options)
    {
    }

    public DbSet<Category> Categories { get; set; }
}
Categories will be your table name in the database
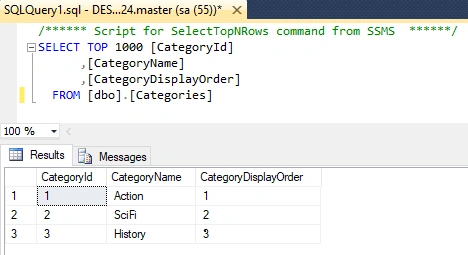
- To add seed data, prefilled into your Category table.
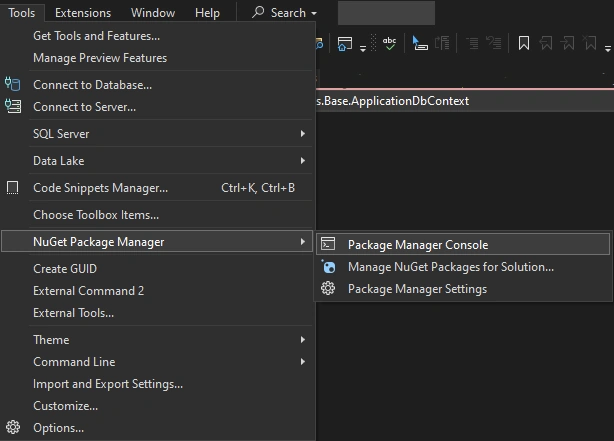
public class ApplicationDbContext : DbContext { public ApplicationDbContext(DbContextOptions<ApplicationDbContext> options) : base(options) { } public DbSet<Category> Categories { get; set; } protected override void OnModelCreating(ModelBuilder modelBuilder) { modelBuilder.Entity<Category>().HasData( new Category { CategoryId = 1, CategoryName = "Action", CategoryDisplayOrder = 1 }, new Category { CategoryId = 2, CategoryName = "SciFi", CategoryDisplayOrder = 2 }, new Category { CategoryId = 3, CategoryName = "History", CategoryDisplayOrder = 3 } ); } } - To add the changes to the database, open a Package Manager Console, Go to Tools > NuGet Package Manager > Package Manager Console.
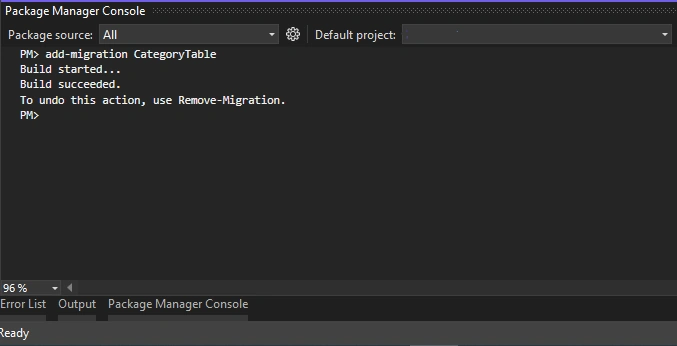
- When Package Manage Console opened; type add-migration <migration_name>, this will create a migration_name.cs file, which you can assess to check if the correct table is being created.
- If the migration comment throws error; Make sure you have a package installed Microsoft.EntityFrameworkCore.Tools
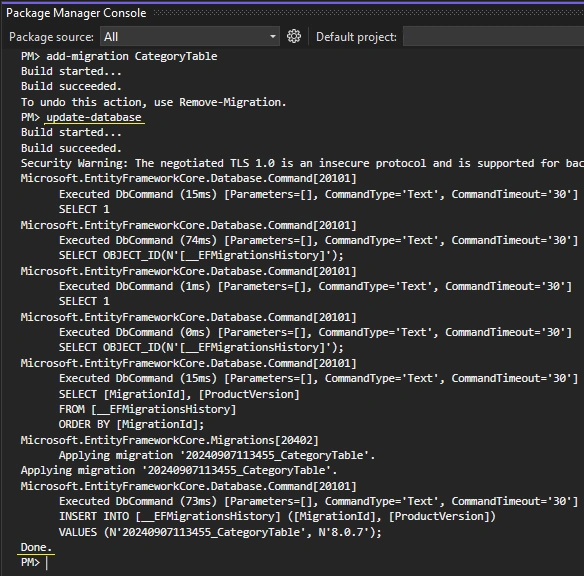
- To reflect all changes to the database, type update-database.
- Now you can check your table in the Database.
You can get the complete code here from this github: https://github.com/arpitsdotnet/EFCoreExample
Join the conversation! Your thoughts help the community grow.