

Introduction
Azure DevOps promotes collaboration between development and operation to faster and more reliable software delivery.
In this article, I am going to demonstrate, How to automate & execute the PnP Powershell using Azure DevOps Pipeline. Let's get started with the below steps.
Step 1. Create Azure DevOps Repository
- Navigate to https://dev.azure.com and log in with your valid credentials.
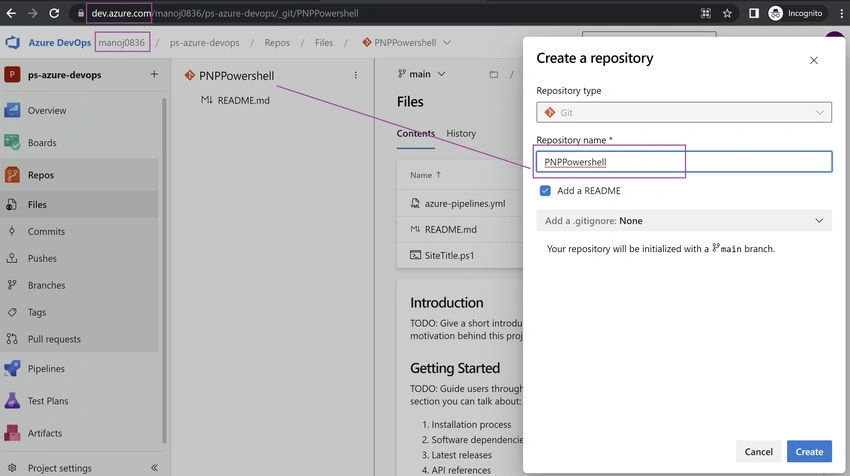
- Select the Organization & Navigate to Repo to create a new repository. (Note, we can use the existing repository also).
- Create a repository with the name PNP Powershell and click save.
- Once it's saved, Created Repository and README.md file will appear as per the below screenshots.
Step 2. Configure the YAML pipeline
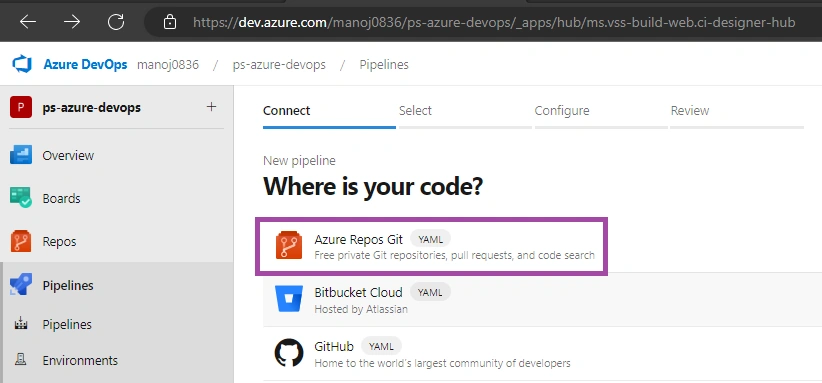
Select the Pipeline from the left-hand side and then select the Azure Repos Git i.e. (free private Git Repositories).
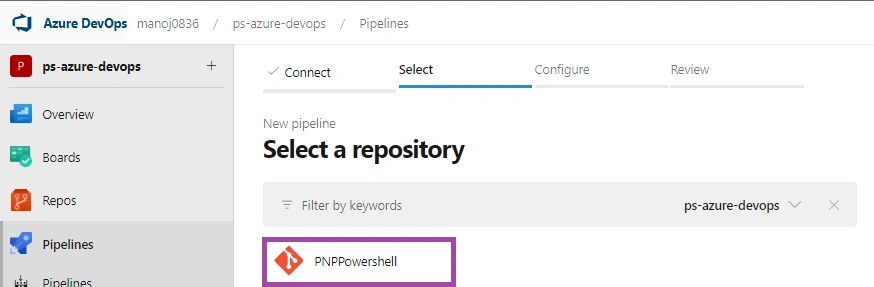
Select the respective created repository (as we created earlier with the name PNPPowershell).
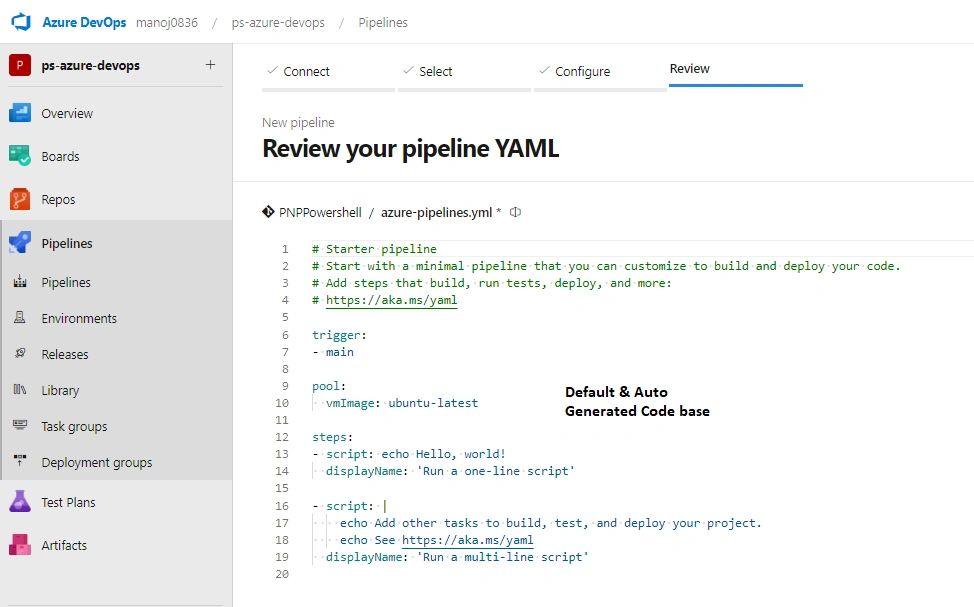
Next step with configuration, Do select "Starter pipeline"
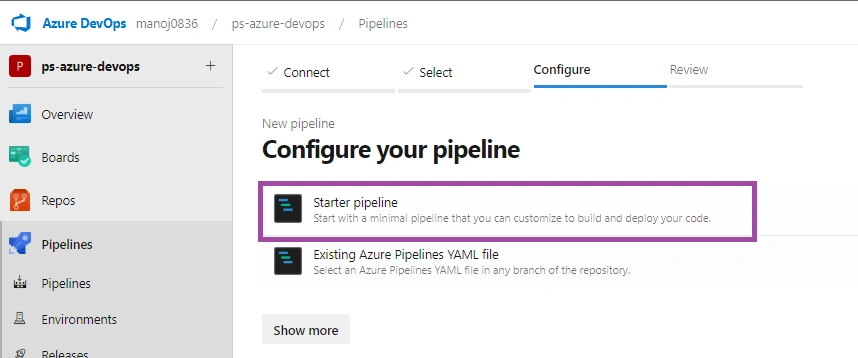
The YAML file will get generated with the below sample code.
Step 3. Create & Upload the PnP PowerShell
PnP PowerShell Code snippet to display the Site Title & credentials is parameterized. It is always a best practice to store the credentials as managed identity or user library group, which exists under pipeline sections.
param (
[Parameter()]
[string]$UserName,
[Parameter()]
[SecureString]$Password
)

# Site URL, It can be parametrize also
$SiteURL= "https://mittal1201.sharepoint.com/sites/commsitehub"

#$SecurePassword = ConvertTo-SecureString -String $Password -AsPlainText -Force
$Cred = New-Object -TypeName System.Management.Automation.PSCredential -argumentlist ($UserName, $Password)

#Connect to PnP Online
Connect-PnPOnline -Url $SiteURL -Credential $Cred

#Get the Root Web
$Web = Get-PnPWeb

#Get the Site Title
Write-host -f Green "Site Title " $Web.Title
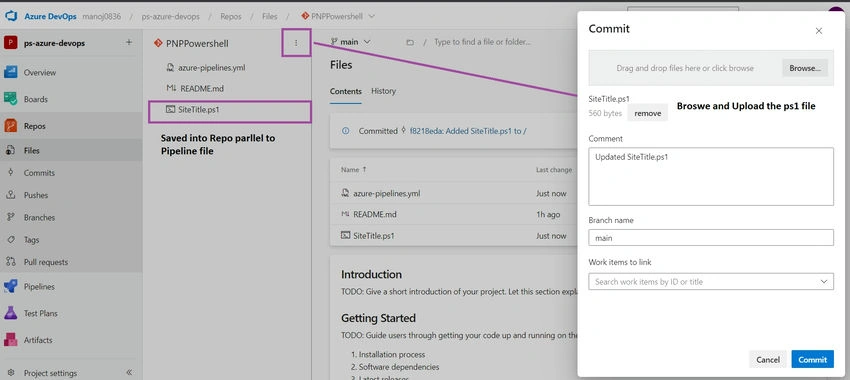
If you have mapped the repo with a local machine, then desired IDE can be used, such as Visual Code, to do check-in & check-out. As part of this demo, I directly uploaded this file with the below click.
- Select vertical dots against the Repo name.
- Browse the ps1 file and click save.
- SiteTitle.ps1 file start appearing parallel to the .yml file.
Step 4. Add Credentials to Pipeline
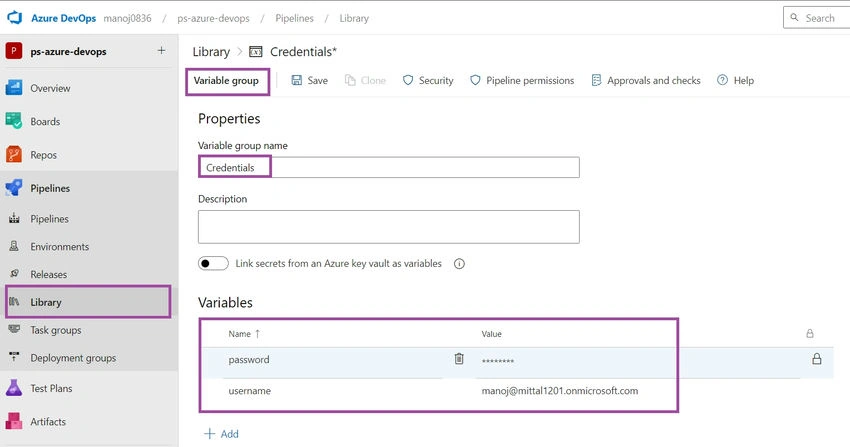
- Select the Library section under Pipelines & choose variable groups
- Give the desired name to the variable group, i.e. credentials
- Add variable as Key-Value pair
- username: email id
- password: **** (lock it)
Step 5. Add YML file task
- The variable used to get detail from Library defined value at run time.
- The steps consist of two tasks
- Install PNP Powershell within the current user context.
- Execute the PnP Powershell with defined credentials into the variable.
# Starter pipeline
# Start with a minimal pipeline that you can customize to build and deploy your code.
# Add steps that build, run tests, deploy, and more:
# https://aka.ms/yaml

trigger:
- main

pool:
  vmImage: ubuntu-latest

variables:
 - group: Credentials
 - name: user_name
   value: $(username)
 - name: pass_word
   value: $(password)


steps:
- task: PowerShell@2
  inputs:
    targetType: 'inline'
    script: 'Install-Module -Name PnP.PowerShell -Scope CurrentUser -Force'

- task: PowerShell@2
  displayName: 'PowerShell Script'
  inputs:
    targetType: filePath
    filePath: ./SiteTitle.ps1
    arguments: '-username "$(user_name)" -password $(ConvertTo-SecureString "$(pass_word)" -AsPlainText -Force)'
Step 6. Create and Execute Pipeline
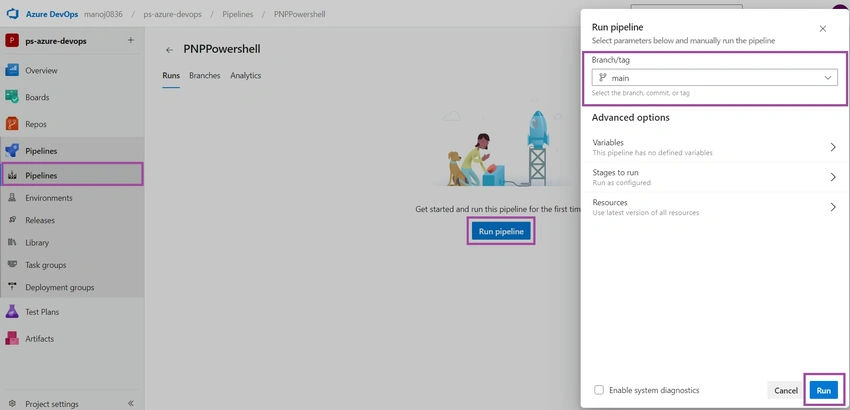
Select Pipeline and click on Run Pipeline.
Under Run pipeline, choose the branch under which yml file exists.
Click Run to execute.
Output
Once the Pipeline execution is complete and we extend the script section under the job, and we can see Site Title has been printed.
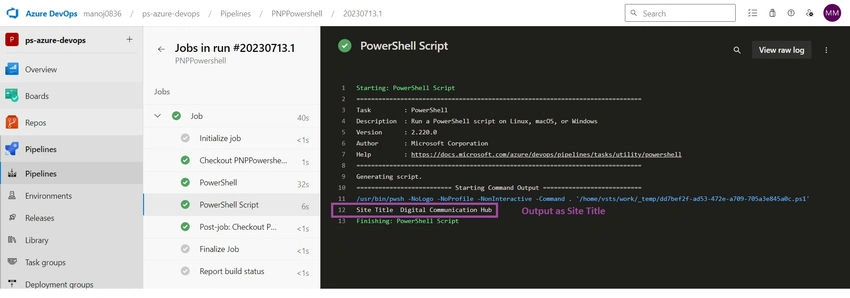
So this is the secure & automated way to execute the PNP Powershell using Azure DevOps Pipeline. Hope you have learned something new and refreshing in this article.
Guest UserPosted Jan 3, 2024, 1:03 PM
Connect-PnPOnline does not allow non-interactive signon when using -Credential $Cred. I d not understand how it should work.