

Preface
This article series is a complete end to end tutorial that will explain the concept of face recognition and face detection using modern AI-based Azure cognitive service i.e. Azure’s Face API service.
Introduction
In the last two articles on learning Azure Face API Cognitive service, we learned how to set up Azure account, how to create Face API on Azure portal and test the services created. We learned the use of Face API SDK and how we can perform the needed operations from the code itself. In this article, we’ll explore how the face identification can be done and what all services are involved to achieve this. We’ll create models and train them and see the result. So, there is a lot of machine learning involved.
Tutorial Series
The entire series on learning Face API cognitive services are divided into four parts. The first part focuses on Azure Functions, Serverless computing and creating and testing Face API on Azure Portal.
The second part explains the use of Face API SDK. The third part will be focused on face identification, where person groups will be created, and identification of faces would be done via training the models i.e. via machine learning techniques. The fourth part is the most interesting part that gives a walkthrough of Face classification application which performs face detection, identification, grouping and finding look-alike faces. Following is the four-part series.
- Face API Cognitive Service Day 1: Face API on Azure Portal
- Face API Cognitive Service Day 2: Exploring Face API SDK
- Face API Cognitive Service Day 3: Face Identification using Face API.
- Face API Cognitive Service Day 4: Face classification app using Face API.
Face Identification
In the last two articles, we saw face detection. In this section, we’ll focus on face identification and check the capabilities of Face API to identify the faces of the people. In this section, we’ll see what all services we can write to perform face identification. We’ll test the services using Postman and in the next section, we’ll walk through a live face identification application.

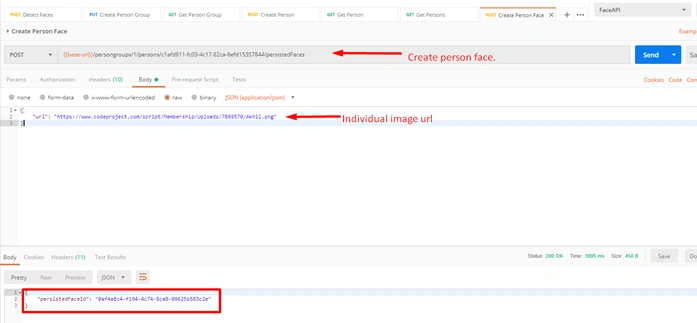
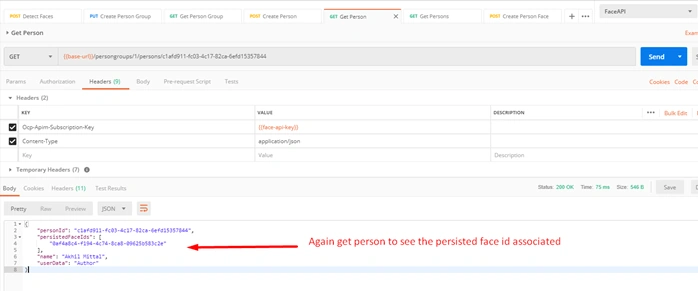
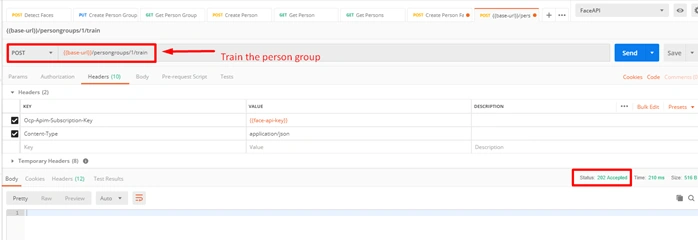
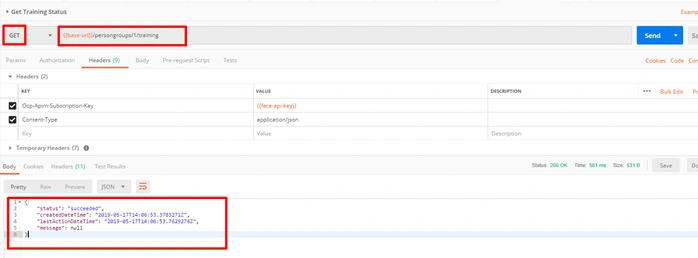
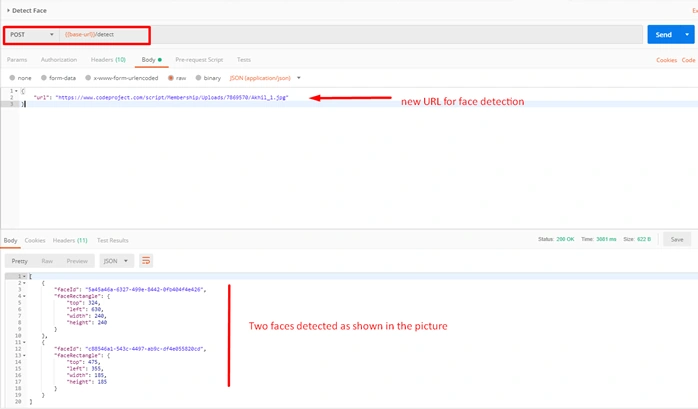
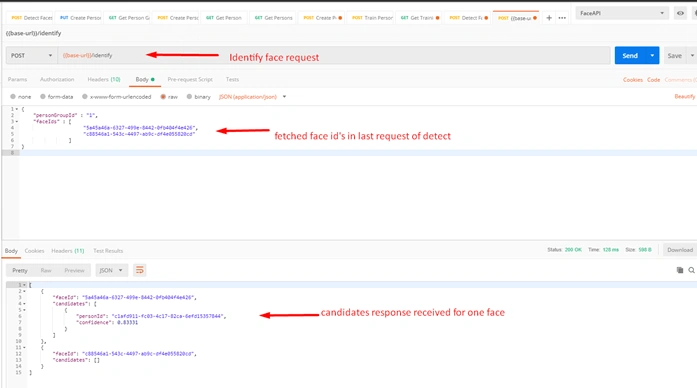
Before we look at the individual operations in detail, it's important for us to first understand the high-level structure and the workflow of how everything fits together. The first thing we need to do is to create a person group. The Face API gives us all the CRUD operations. It gives us all these operations for managing person groups. Once our person group is created, we can add n number of persons to that person group. After we add a person to a person group, then we add n number of faces to each person. Once we've added as many persons and faces to our person group that we want, we then invoke the Face API method to train our person group. Once our person group is trained, we're ready to do face identification. Face identification always starts with face detection. You've already seen face detection. The key result is that we get a unique faceId for each face in face detection. Once we invoke detection, we can finally invoke face identification using the results of our face detection calls along with the person group we want to use for face identification. Let’s do that step by step.
Creating A Person Group
I have used some settings in the Postman to save my base URL i.e. https://centralindia.api.cognitive.microsoft.com/face/v1.0 and the secret key. So I’ll use the keyword {{base-url}} and {{face-api-key}} for URL and key respectively. You can use the base URL and the key you have in place of my keywords.
Make a pull request in the Postman for actions persongroups/1 appended to base URL as shown below. In the body, provide the raw JSON telling the name of the person group i.e. in my case “family” and the userData as a description of the person group. The JSON should be like following.
- {
- "name": "family",
- "userData": "family person group"
- }
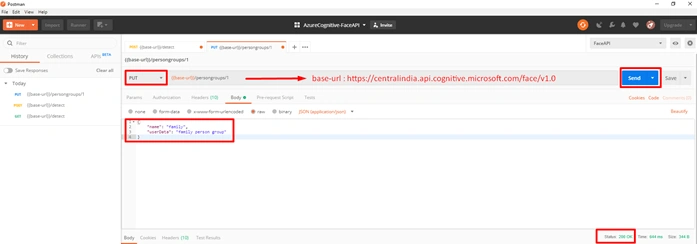
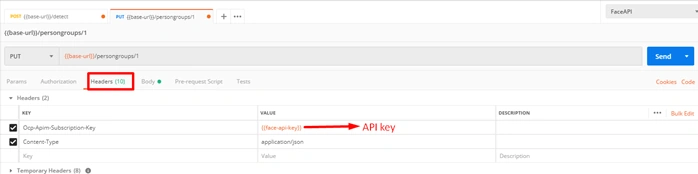
In the headers section, provide two keys i.e. Ocp-Apim-Subscription-Key and Content-Type and their values as your API key and application/json respectively. Hit the send button. Once you hit the send button, you get the response as 200 i.e. OK that means the person group is created.
Get A Person Group
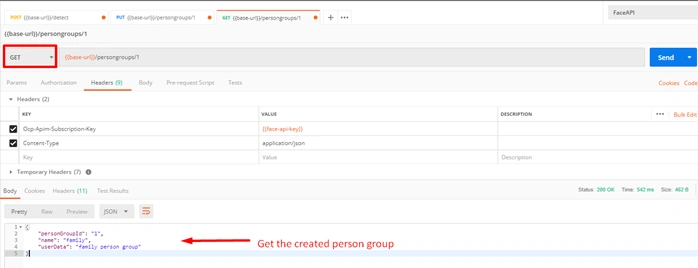
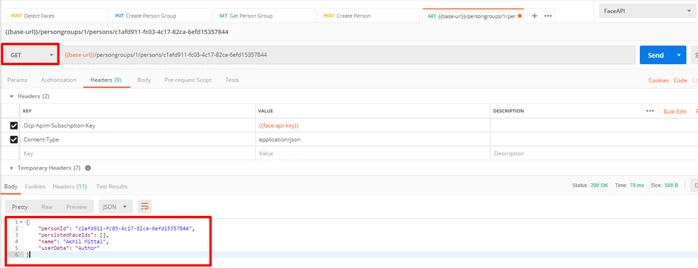
We can check the crated person group by making a get call to the API at here.
And you get the created person group with a person group id, name, and user data. In the next step, we’ll add a few persons to the person group.
Create Person
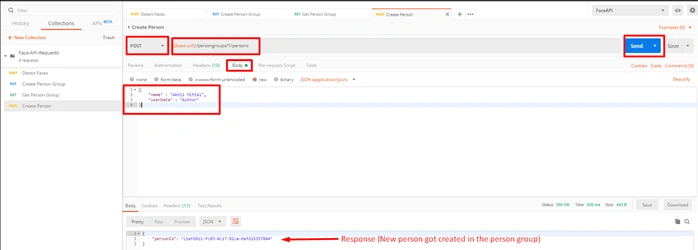
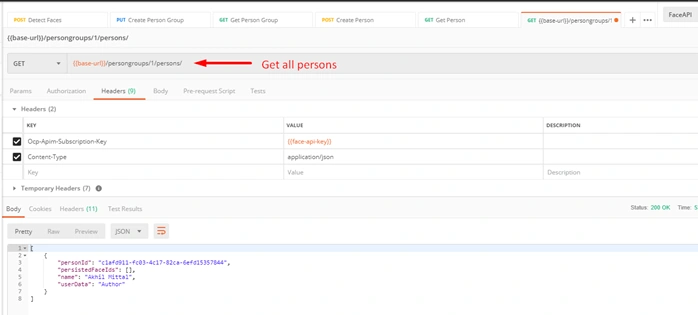
In the person groups created, append the URL with “persons” and in the body section, provide the name and user data of the function as below.
- {
- "name" : "Akhil Mittal",
- "userData" : "Author"
- }
Keep the headers the same; i.e. providing key and content type and hit send button. Make sure the HTTP verb is Post. We get the response with a created person having a person id under person group 1.


saurabh chadhaPosted May 17, 2020, 12:27 AM
I am able to create person group , add person to group , add face , train but when I identify with another image, it says - { "error": { "code": "BadArgument", "message": "'recognitionModel' is incompatible." } }
saurabh chadhaPosted May 16, 2020, 4:05 AM
Done as you guided- 1. PUT request with my url 2. key in header and content-type. It is saying code-404, resource not found. Please help, My email is - [email protected]