

Xamarin.Forms master detail page is a page, which manages two related pages of information – a master page that presents the items and a detail page that presents the details about the items on the master page.
After reading this article, you will learn how to use master detail page in Xamarin.Forms Application for Android and Universal Windows Platform with XAML and Visual C# in cross platform Application development with an example of Fruit Benefits app.
The following important tools are required to develop UWP.
- Windows 10 (Recommended).
- Visual Studio 2015 Community Edition (It is a free software available online).
- Using Visual Studio 2015 Installer, enable Xamarin (Cross Platform Mobile development and C#/.NET, while installing/modifying Visual Studio 2015.
Now, we can discuss step by step app development.
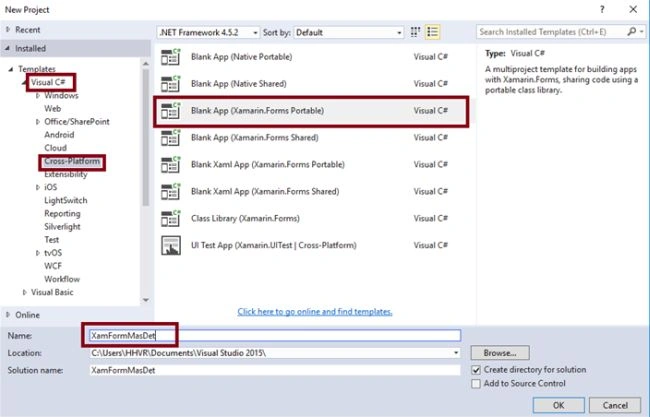
Step 2
Step 3
Step 4
Select ->CrossPlatform-> FormXamlPage-> Give the relevant name.
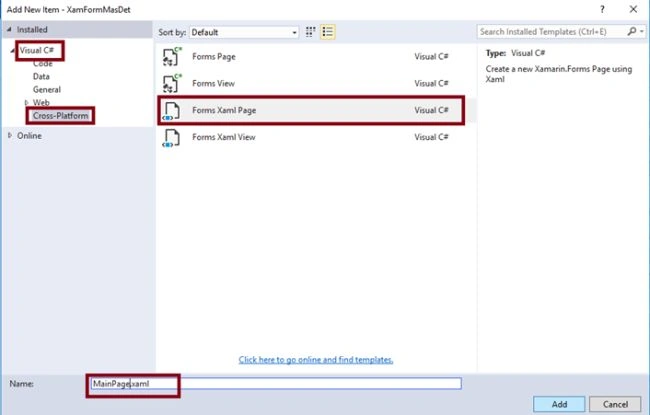
Step 5
In MainPage.xaml, change the content page as master detail page and add xmlns.local reference Add MasterDetailPage.Master and MasterDetailPage.Detail with Button and Label.
- <?xml version="1.0" encoding="utf-8" ?>
- <MasterDetailPage xmlns="http://xamarin.com/schemas/2014/forms" xmlns:x="http://schemas.microsoft.com/winfx/2009/xaml" x:Class="XamFormMasterDetail.MainPage" xmlns:local="clr-namespace:XamFormMasterDetail;assembly=XamFormMasterDetail">
- <Label Text="{Binding MainText}" VerticalOptions="Center" HorizontalOptions="Center" />
- <MasterDetailPage.Master>
- <ContentPage Title="Fruits List">
- <StackLayout Orientation="Vertical">
- <Button Text="Apple" Clicked="OnAppleClicked" />
- <Button Text="Orange" Clicked="OnOrangeClicked" />
- <Button Text="Graphes" /> </StackLayout>
- </ContentPage>
- </MasterDetailPage.Master>
- <MasterDetailPage.Detail>
- <NavigationPage>
- <x:Arguments>
- <local:Apple/> </x:Arguments>
- </NavigationPage>
- </MasterDetailPage.Detail>
- </MasterDetailPage>
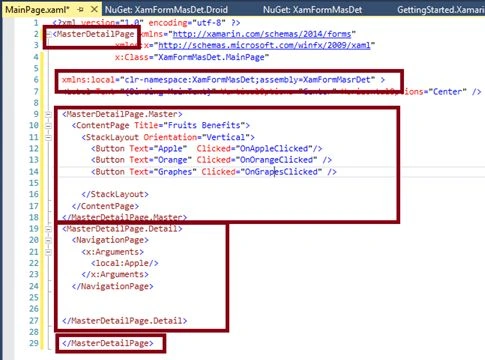
In Apple.xaml, add the code, mentioned below.
- <StackLayout>
- <Label Text="Apple" VerticalOptions="Center" HorizontalOptions="Center" />
- <Image x:Name="imgDisp" Source="Apple.jpg"></Image>
- </StackLayout>

In Orange.xaml, add the code, mentioned below.
- <StackLayout>
- <Label Text="Orange" VerticalOptions="Center" HorizontalOptions="Center" />
- <Image x:Name="imgDisp" Source="Orange.jpg"></Image>
- </StackLayout>
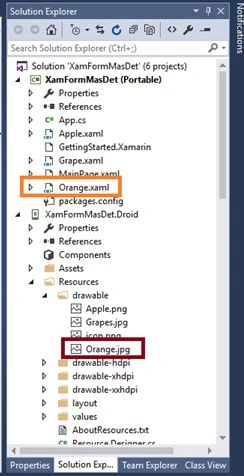
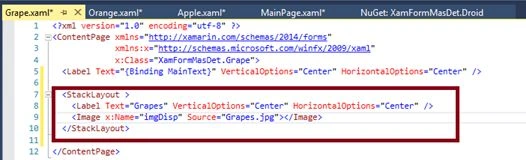
In Grapes.xaml Page, add the code, mentioned below.
- <StackLayout>
- <Label Text="Grapes" VerticalOptions="Center" HorizontalOptions="Center" />
- <Image x:Name="imgDisp" Source="Grapes.jpg"></Image>
- </StackLayout>
Step 6
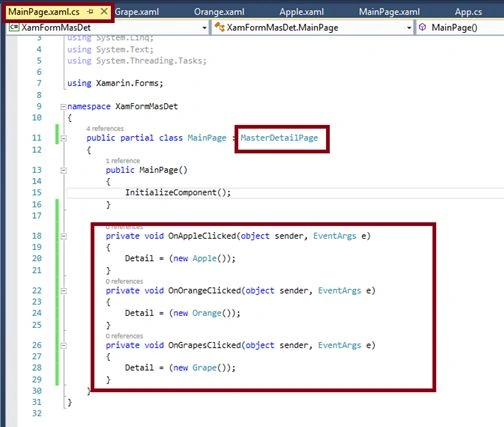
- public partial class MainPage: MasterDetailPage
- {
- public MainPage()
- {
- InitializeComponent();
- }
- private void OnAppleClicked(object sender, EventArgs e)
- {
- Detail = (new Apple());
- }
- private void OnOrangeClicked(object sender, EventArgs e)
- {
- Detail = (new Orange());
- }
- private void OnGrapesClicked(object sender, EventArgs e)
- {
- Detail = (new Grape());
- }
- }
Step 7
Step 9
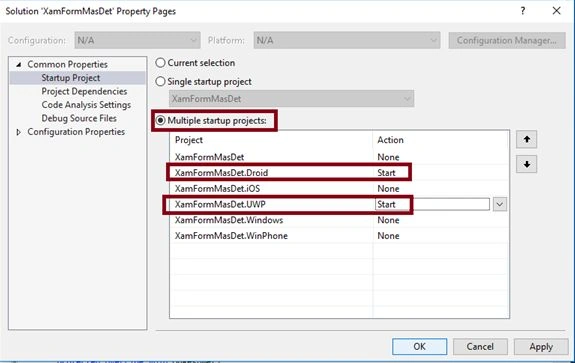
Uncheck all the Build and deploy options to the iOS, Windows, WinPhone, check the Droid and UWP.

Step 10
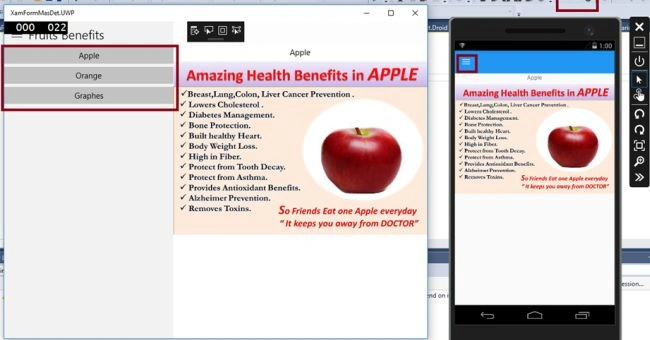
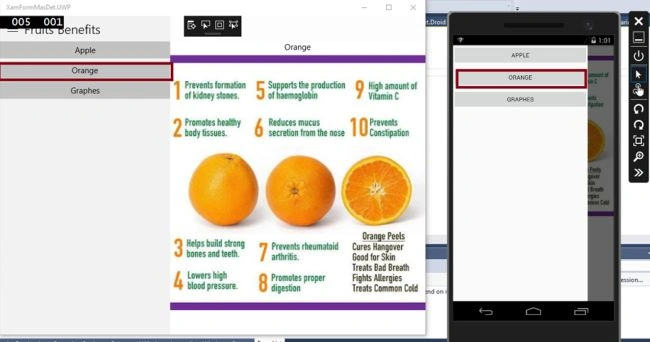
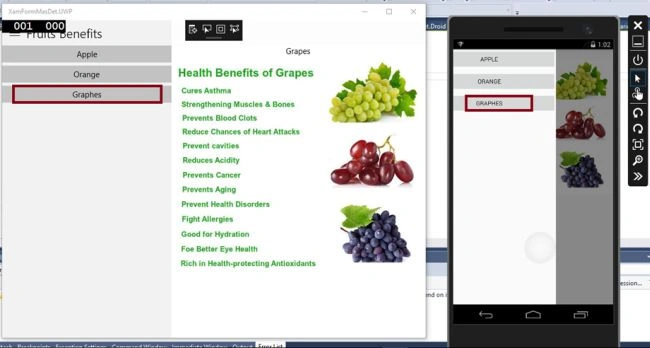
After Clicking the Grapes button, the screenshot is given below.
Summary
Now, you have successfully created and tested Fruit Benefits app, using master detail page in Xamarin.Forms Application for cross platform Application development, using Visual C# and Xamarin.
Join the conversation! Your thoughts help the community grow.