

Background
There are lots of Web APIs that are exposed in Real-world, few are open to consuming and few need a license to consume those Web APIs. All the Web APIs has a different specification to implement at client side. The implementation part at the client side is hectic and a lot of developer effort is required. To speed up the development task with zero lines of code and ready to use the Web API at the client application, here we have an interesting tool to generate the client code by using NSwagStudio or Open API – Swagger.
If you are new to Swagger integration with ASP.NET Core, I would encourage you to go through the article link - Integrating Swagger with Web API .Net Core using Entity Framework, there I have demonstrated to integrate a Swagger library into an ASP.NET Web API using Entity Framework.
Tools download References
- NSwagStudio
- Unchase OpenAPI – Swagger: Install through Visual Studio ‘Manage Extension’
Both the tools are similar with features, however ‘OpenAPI – Swagger’ can be integrated with Visual Studio and use as instantly in the new project to create a client code.
Approach 1
Once NSwagStudio is installed and the home screen looks as below,
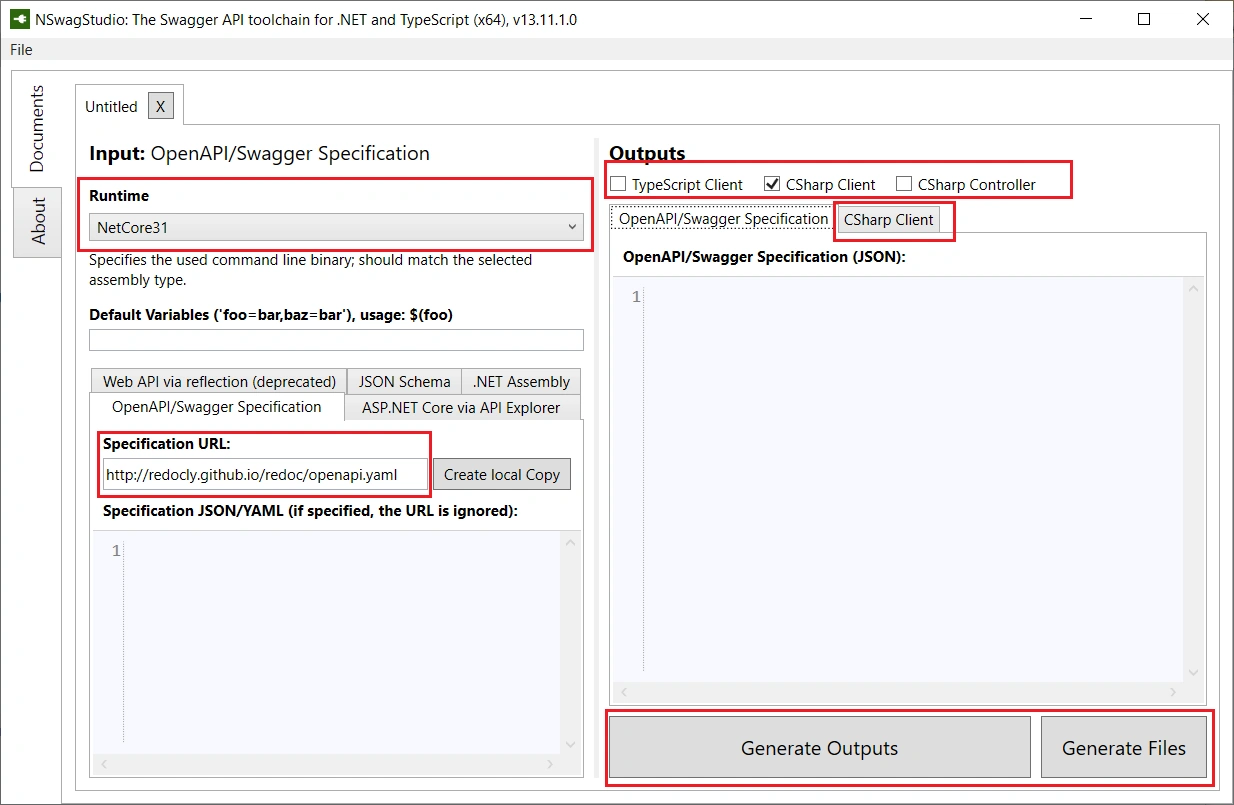
Select the Runtime of the Application, Web API Specification file or URL, Type of client code, setting of client code.
Approach 2
Unchase OpenAPI – Swagger in ‘Manage Extension’. Install this extension and restart the Visual studio.
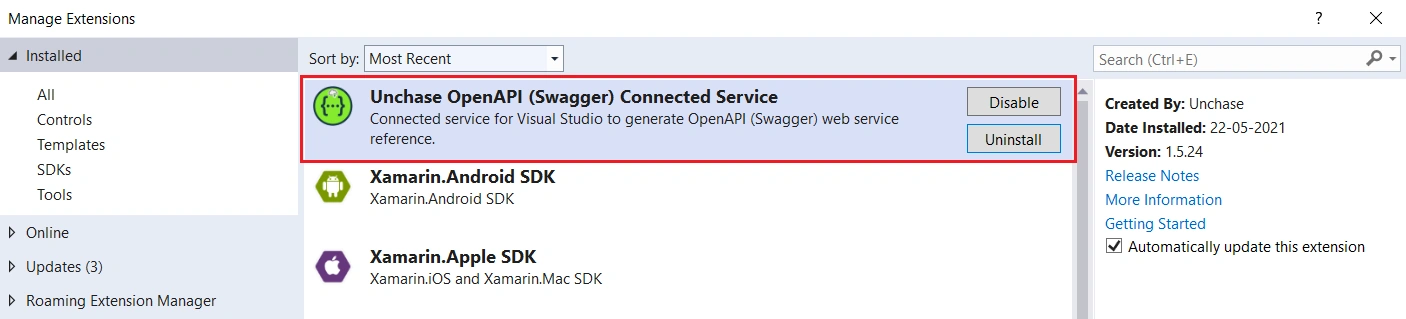
In this article, I am going to demonstrate Approach 2 - “Unchase OpenAPI – Swagger” extension and the generation of client code instantly. This extension is a connected service and Visual Studio it’s getting easier to connect your application to Azure services via Visual Studio Connected Services.
Client code generation by Unchase OpenAPI – Swagger
Step 1
Create a new Console app of the .Net Core project and give the name of the project. E.g., Project name as ‘CompanyWebApiClient’
Step 2
To access Visual Studio Connected Services, go to your projects, “Overview” which can be accessed by right-clicking on your project and select “Overview” OR Right-clicking on your project, "Add" Connected Services.
Step 3
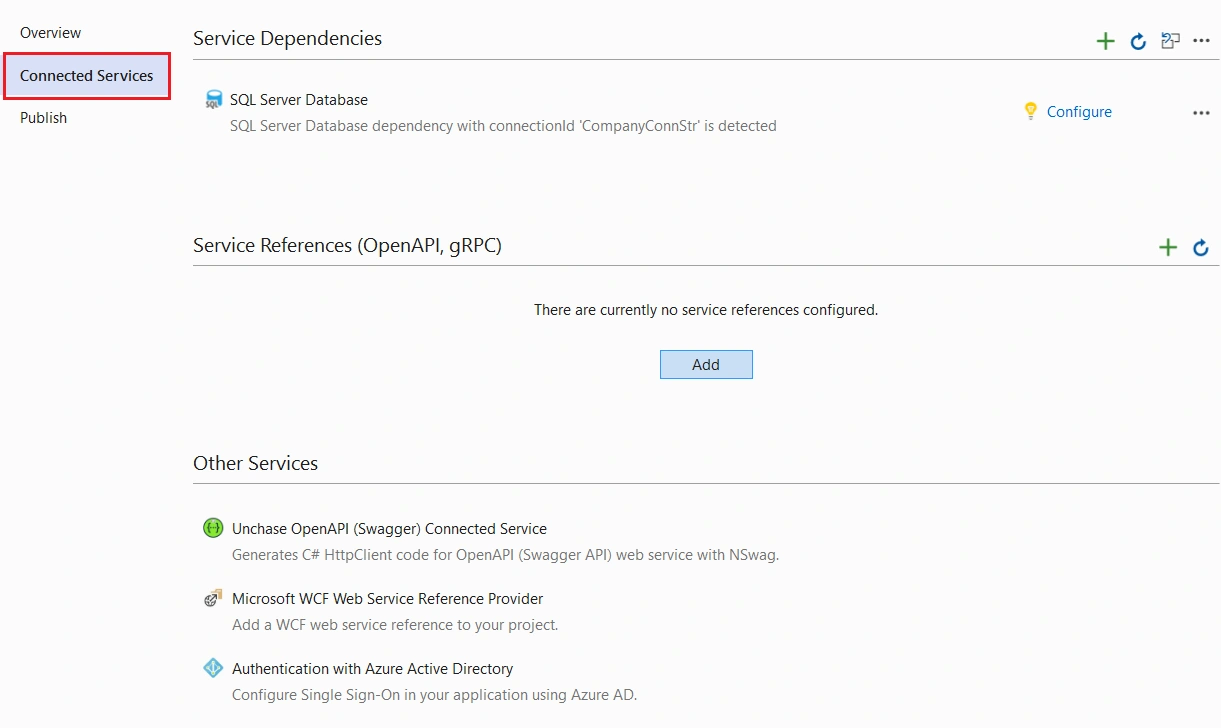
Then select the “Connected Services” tab on the left to show the list of Connected Services available in your Visual Studio instance.
Step 4
Once the OpenAPI swagger extension is installed successfully, you should able to see the OpenAPI service in the “Connected Services” section.
Step 5
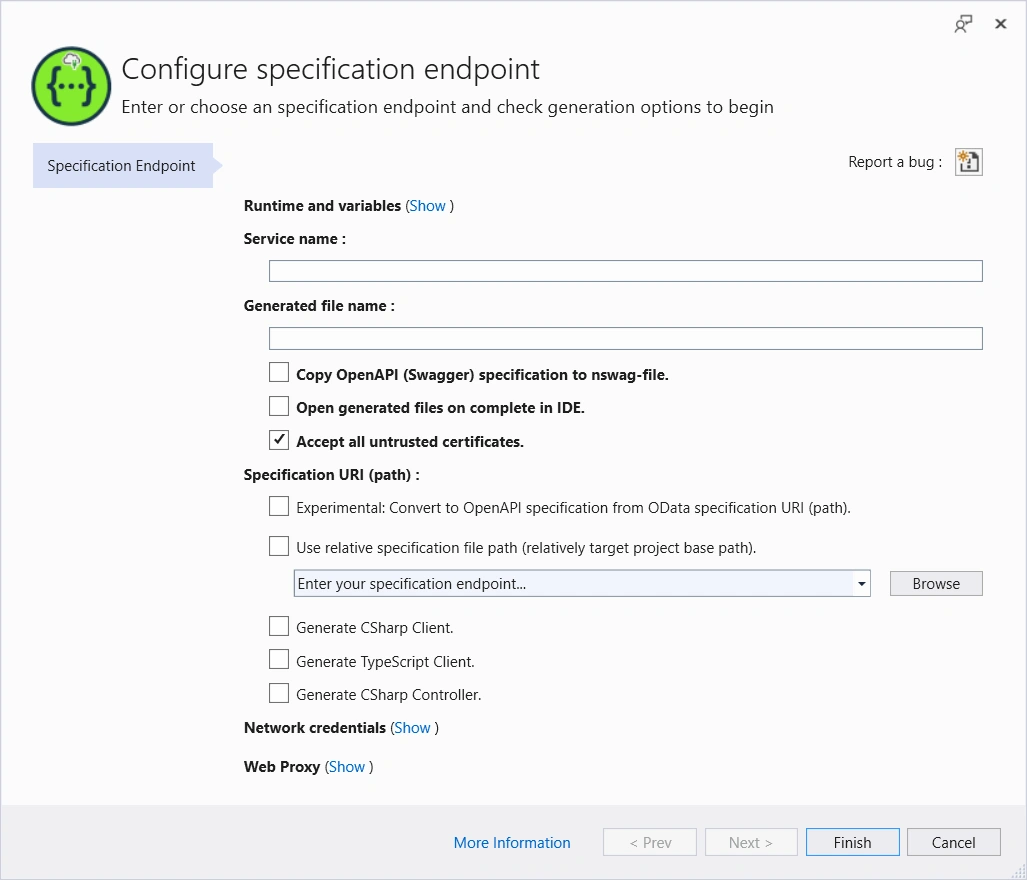
Click on “Unchase OpenAPI (swagger) Connect Service” and will pops-up a dialog as below,
Step 6
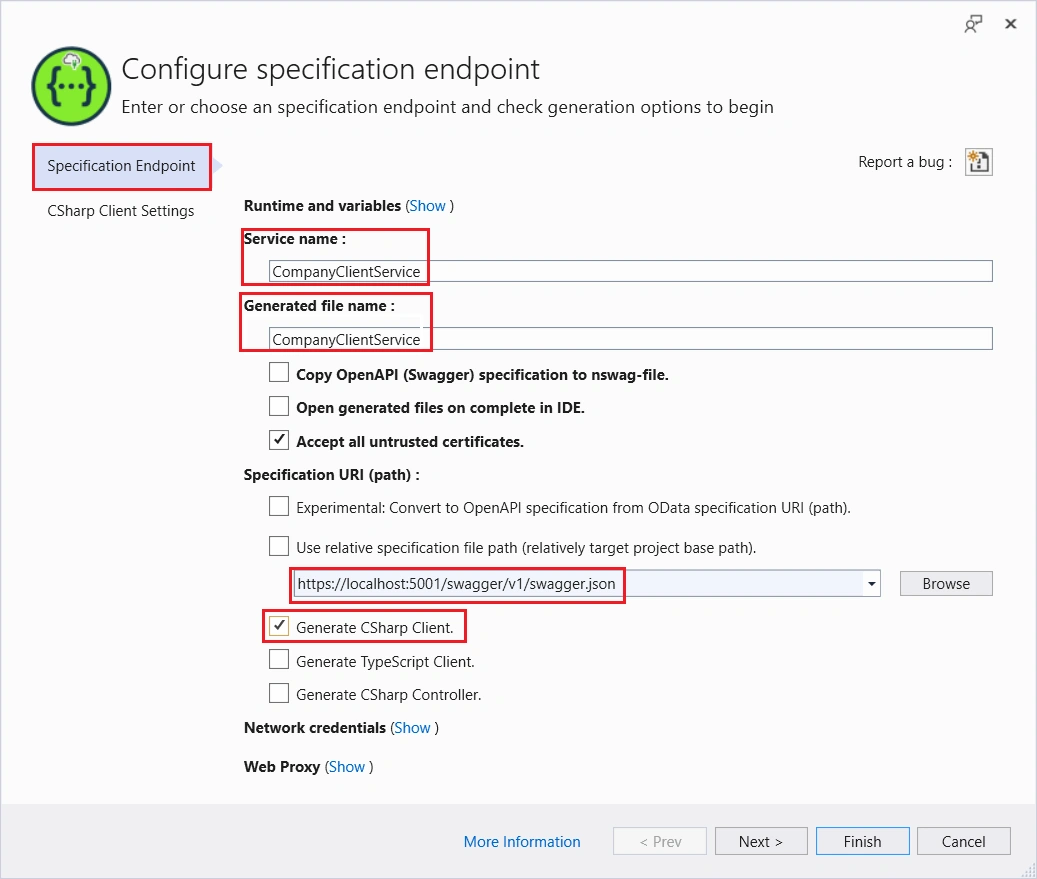
Set the following parameter with Service Name, Web API specification document, and type of client code generation as below.
6a. Specification URL – Web API document, Refer to the article link - Integrating Swagger with Web API .Net Core to set up a swagger in ASP.NET Core and generate the Web API specification document.
Step 7
Here we find three types of client code generation.
7a. Generate CSharp Client – Generates the actual CSharp class which has the implementation of HttpClient to call all the Web APIs
7b. Generate TypeScript Client – Generates the actual Typescript which has the implementation of HttpClient to call all the Web APIs
7c. Generate CSharp Controller – Generates Web API controller.
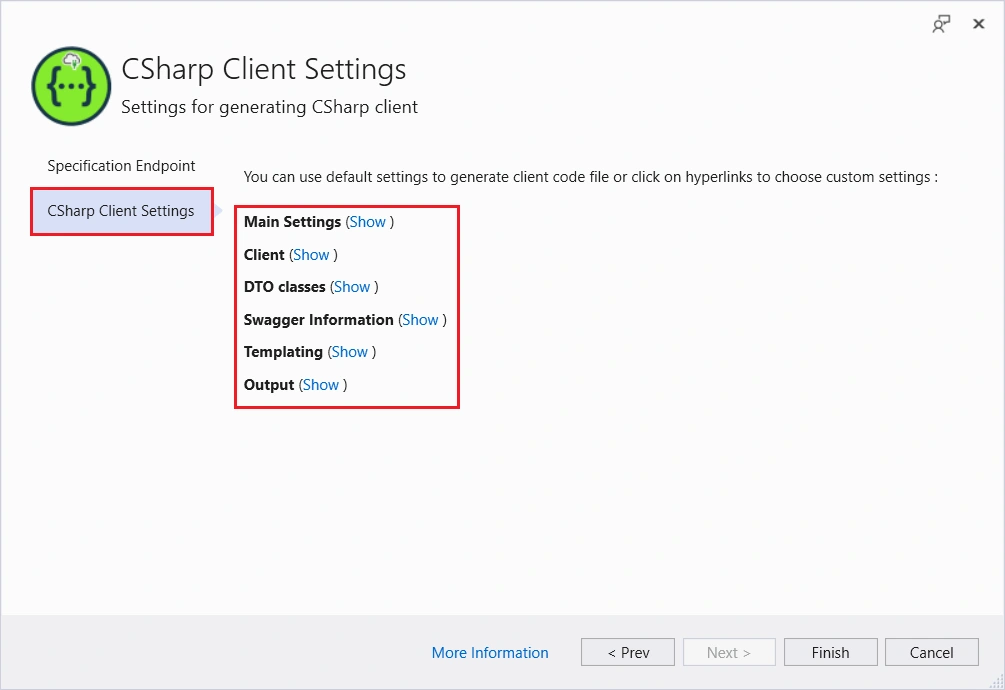
7d. In the CSharp Client Settings, the following sections as below to tweak the client code.
Step 8
In the CSharp Client Settings, the following sections as below to tweak the client code.
Step 9
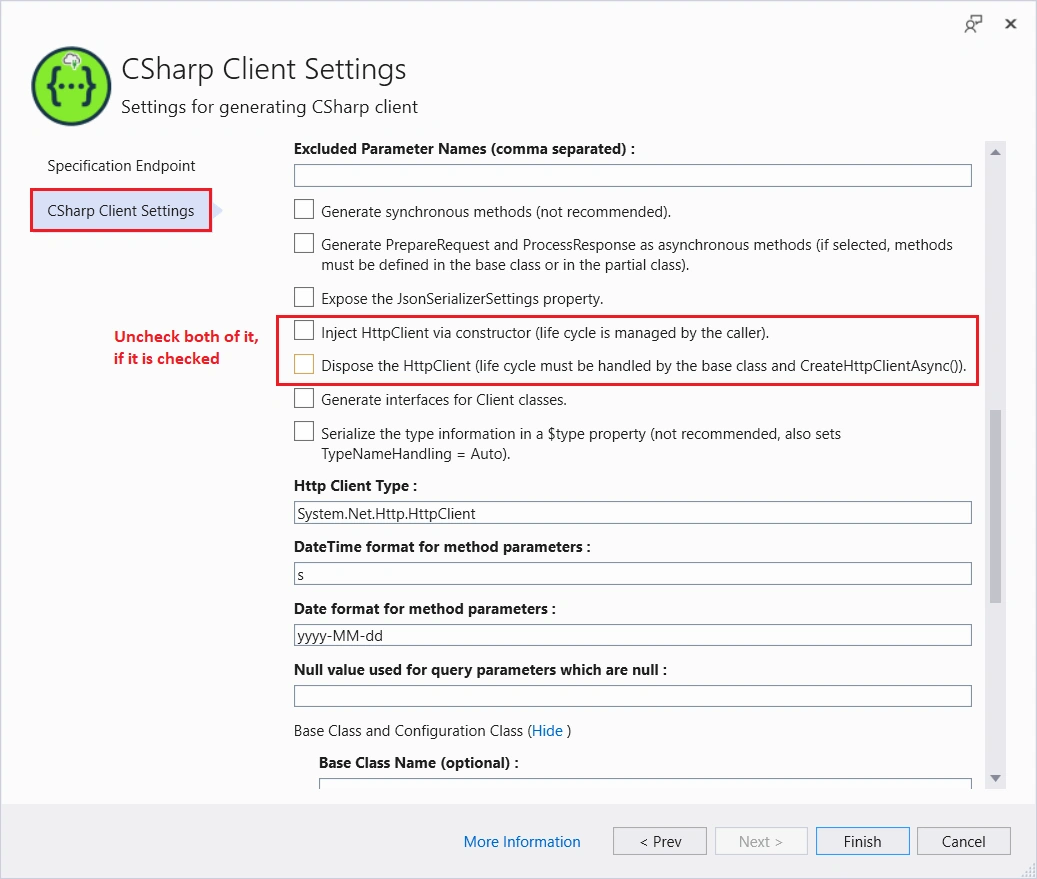
Do the following settings in the “Client” section.
`
Step 10
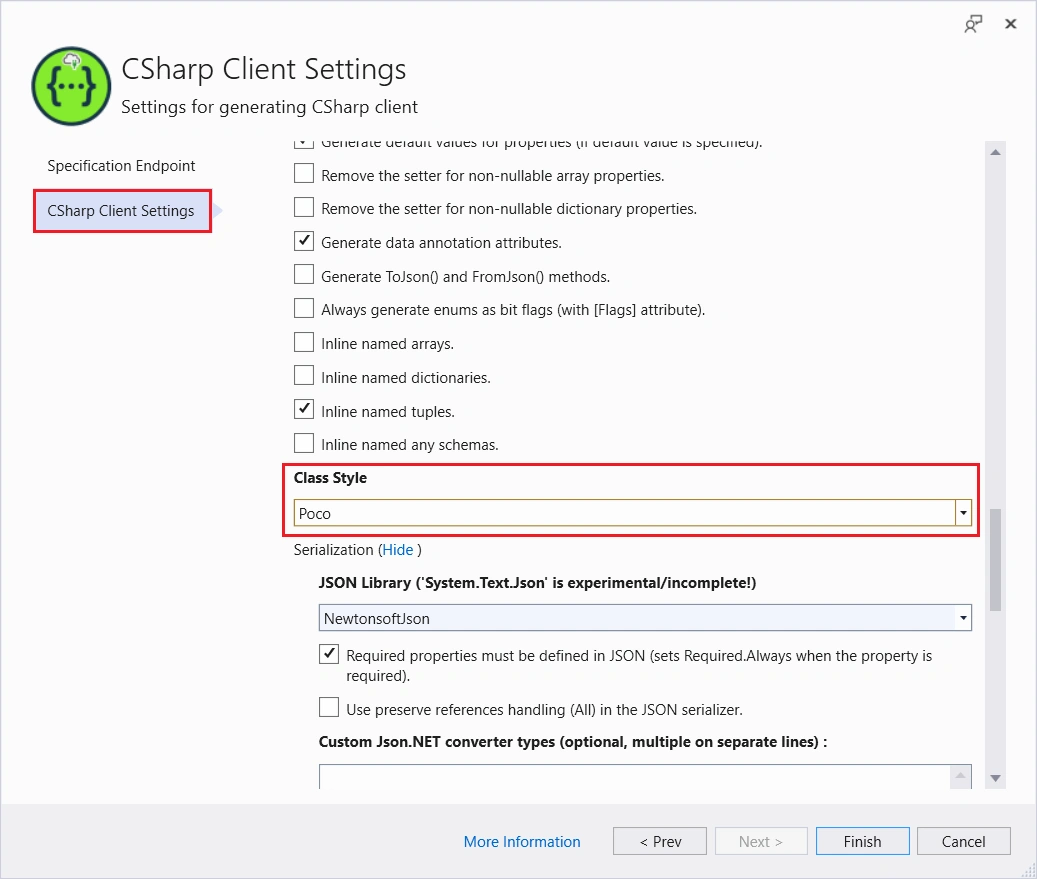
Do the following settings in the “Data Transfer Object - DTO Classes” section. Keep all the settings as default for a first try. Later, you can tweak a few settings and observer the changes in client code generation. This is very interesting to play around with settings and I keep this deep activities for yourself 😊
Step 11
Now, let’s click on the “Finish” button to generate the client code. This will take a few seconds to generate based on Web API specification.
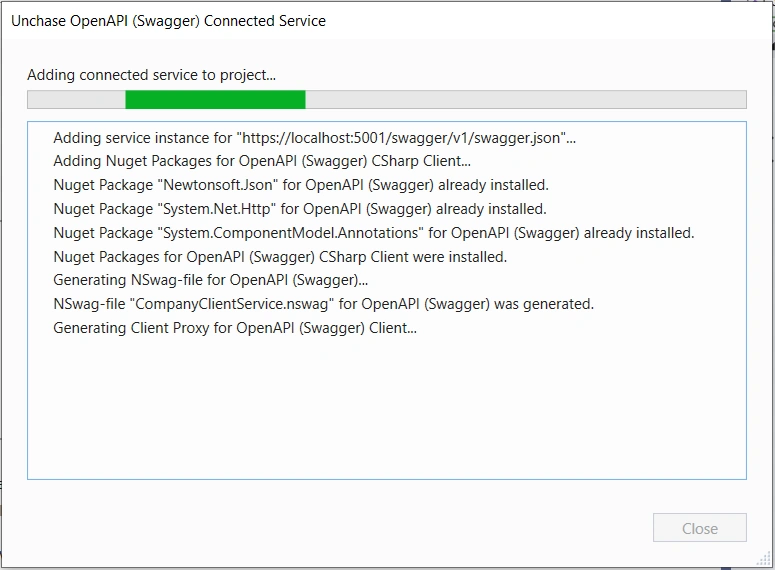
Step 12
Once the process of generation is completed and should able to see the connected services in the project. Here “CompanyClientService.cs” has the client code implementation to consume the Web API.
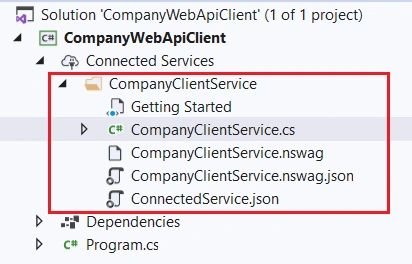
Step 13
Now, will use the generated client code to call the Web API in “Program.cs”.
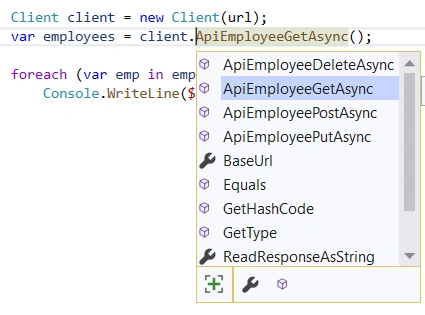
Step 14
Let’s get all the employee details by the client.ApiEmployeeGetAsync();
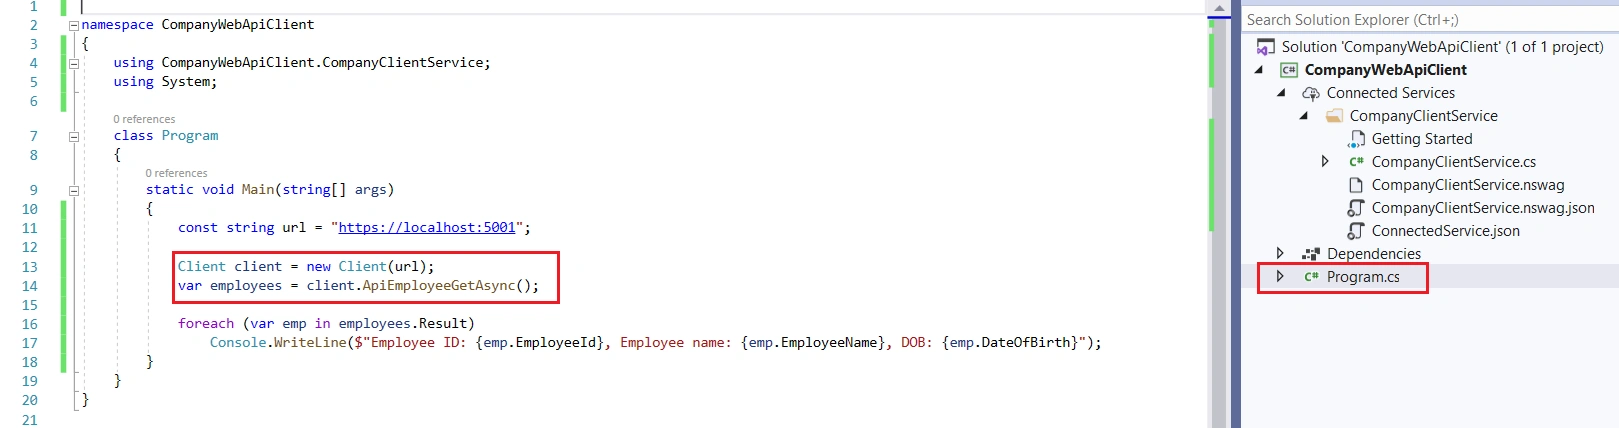
Step 15
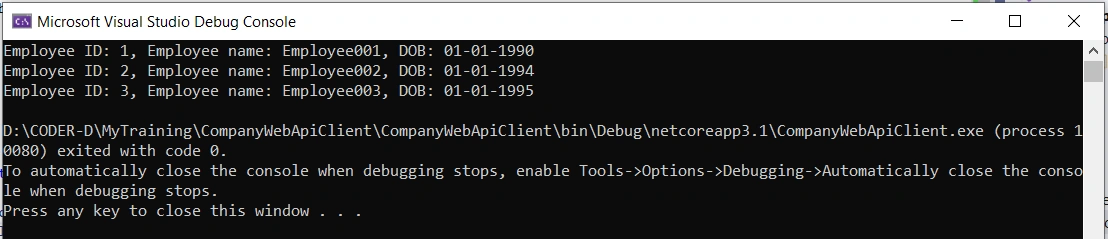
The output of the above Web API call.
Step 16
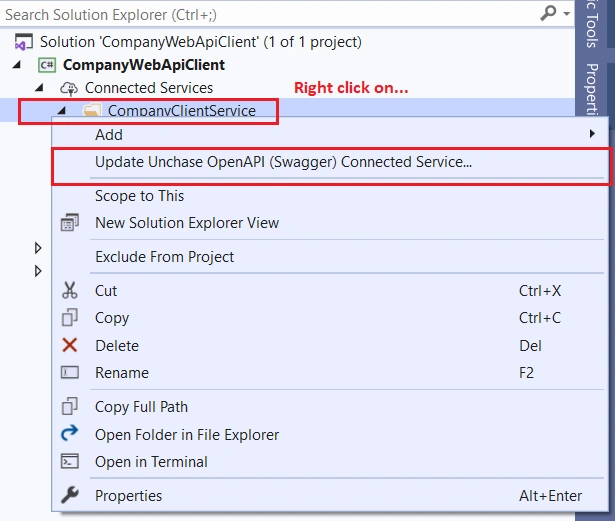
It is very simple to update the client code when Web API specification has been updated. Just follow a simple step as below and your client code will be up-to-date 😊
It’s very fun to execute the Web API calls without writing a single line of code of HttpClient and need not worry about the Web API specifications updates.
Summary
We have explored generating the client code of Web API with the ‘Unchase OpenAPI’ extension using a Swagger API specification document. We have observed that not a single line of code has been implemented on the client-side to consume the Web API. This has been reduced the developer effort and increased the productivity of the developer, this makes the developer smarter in the organization 😊
I hope this article helps you to understand the simple approach. Thanks for reading the article.
Join the conversation! Your thoughts help the community grow.