
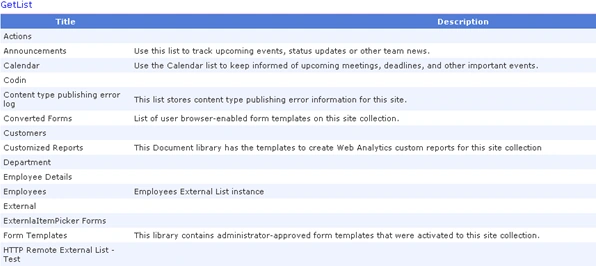
In this article you will see how to get all the lists using a Web Service (_vti_bin/lists.asmx) and display the list title and description in a SharePoint 2010 Visual Web Part.
Create an Empty SharePoint Project using Visual Studio 2010:
1. Open Visual Studio 2010.
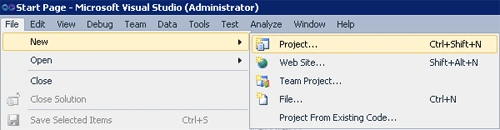
2. Go to File => New => Project.
3. Select Empty SharePoint Project template from the installed templates.
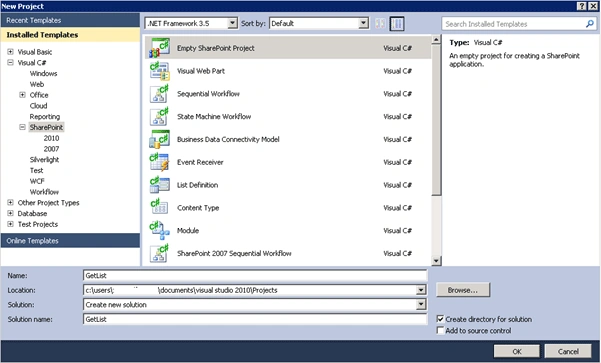
4. Enter the Name for the project as GetList and then click on Ok.
5. Select the local site that will be used for debugging and select "Deploy as a
Farm Solution".
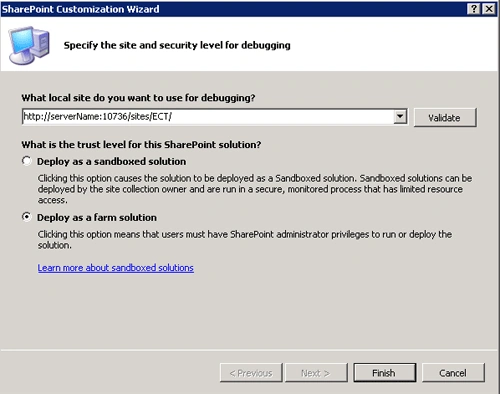
6. Click on Finish.
Add Visual Web Part to the Empty SharePoint Project:
1. In the solution explorer, right click on Solution and click on Add.
2. Click on "New Item".
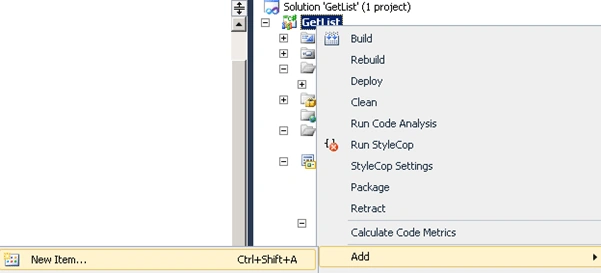
3. Select Visual Web Part template from the installed templates.
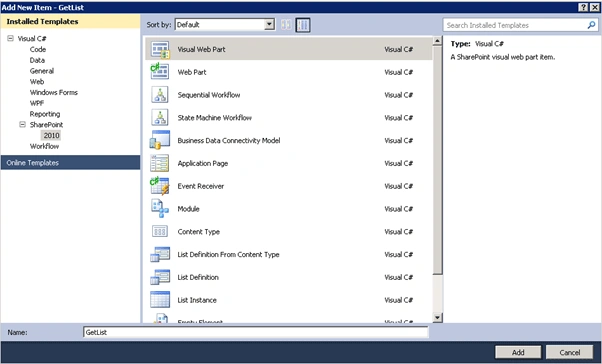
4. Enter the Name for the Visual Web Part as GetList and then click on Add.
Add Web Reference to the solution:
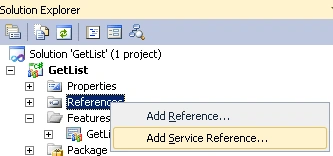
1. Right click on References folder and then click on "Add Service Reference".
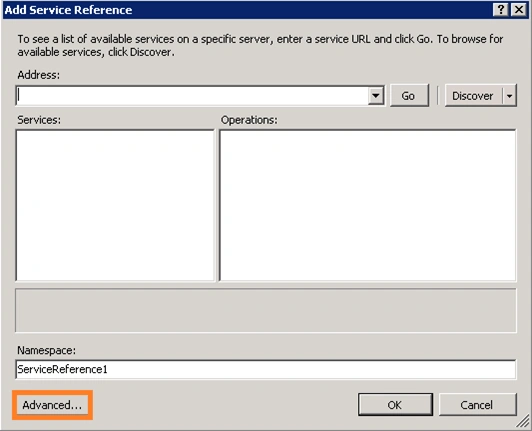
2. In the "Add Service Reference" wizard click on "Advanced..." button.
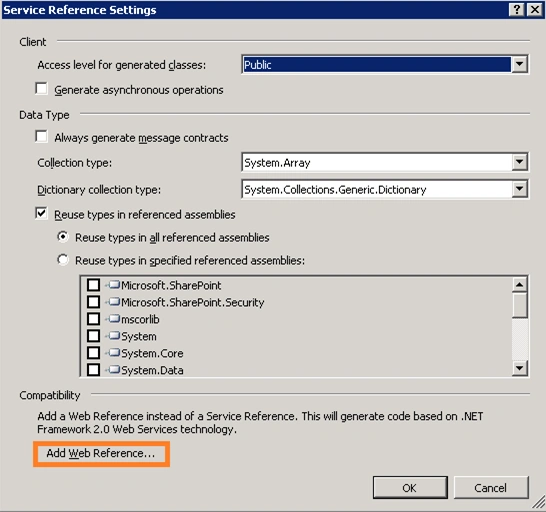
3. In the "Service Reference Settings" wizard click on "Add Web Reference...".
4. In the URL section, enter the lists web service URL and then click on enter.
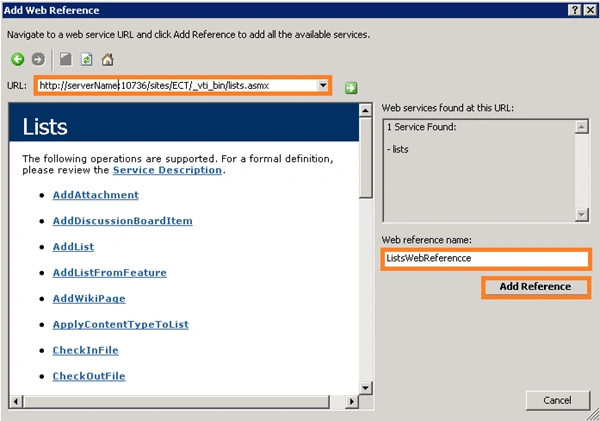
5. Enter the Web Reference Name and then click on "Add Reference" button.
6. Click on Ok.
7. Web Reference will be added successfully.
GetListUserControl.ascx:
1. Replace GetListUserControl.aspx with the following
<%@
Assembly Name="$SharePoint.Project.AssemblyFullName$"
%>
<%@
Assembly Name="Microsoft.Web.CommandUI,
Version=14.0.0.0, Culture=neutral, PublicKeyToken=71e9bce111e9429c"
%>
<%@
Register Tagprefix="SharePoint"
Namespace="Microsoft.SharePoint.WebControls"
Assembly="Microsoft.SharePoint,
Version=14.0.0.0, Culture=neutral, PublicKeyToken=71e9bce111e9429c"
%>
<%@
Register Tagprefix="Utilities"
Namespace="Microsoft.SharePoint.Utilities"
Assembly="Microsoft.SharePoint,
Version=14.0.0.0, Culture=neutral,
PublicKeyToken=71e9bce111e9429c"
%>
<%@
Register Tagprefix="asp"
Namespace="System.Web.UI"
Assembly="System.Web.Extensions,
Version=3.5.0.0, Culture=neutral, PublicKeyToken=31bf3856ad364e35"
%>
<%@
Import Namespace="Microsoft.SharePoint"
%>
<%@
Register Tagprefix="WebPartPages"
Namespace="Microsoft.SharePoint.WebPartPages"
Assembly="Microsoft.SharePoint,
Version=14.0.0.0, Culture=neutral, PublicKeyToken=71e9bce111e9429c"
%>
<%@
Control Language="C#"
AutoEventWireup="true"
CodeBehind="GetListUserControl.ascx.cs"
Inherits="GetList.GetList.GetListUserControl"
%>
<asp:GridView
ID="gvGetList"
runat="server"
CellPadding="4"
EnableModelValidation="True"
ForeColor="#333333"
GridLines="None">
<AlternatingRowStyle
BackColor="White"
/>
<EditRowStyle
BackColor="#2461BF"
/>
<FooterStyle
BackColor="#507CD1"
Font-Bold="True"
ForeColor="White"
/>
<HeaderStyle
BackColor="#507CD1"
Font-Bold="True"
ForeColor="White"
/>
<PagerStyle
BackColor="#2461BF"
ForeColor="White"
HorizontalAlign="Center"
/>
<RowStyle
BackColor="#EFF3FB"
/>
<SelectedRowStyle
BackColor="#D1DDF1"
Font-Bold="True"
ForeColor="#333333"
/>
</asp:GridView>
GetListUserControl.ascx.cs:
1. Add the following Namespaces

Get all lists using Web Service in SharePoint 2010 Visual Web Part
Join the conversation! Your thoughts help the community grow.
Sign in to leave a comment
It is the same account you read, post and publish with — and you will come straight back to this page.
James VeronicaPosted Dec 16, 2011, 5:25 AM
Nice Post http://www.codinghub.net/2011/12/new-feature-of-sharepoint-in-visual.html