

In this article, we are going to discuss Microsoft Azure Service Bus Queues. First, we will see what is Azure Service Bus and then discuss more about queues. We are also going to build a simple application to send and receive messages in queues using ASP.NET Core. So let’s grab a cup of coffee and start learning.
What is Azure Service Bus?
Azure Service Bus is a message broker service that is hosted on the Azure platform and it provides functionality to publish messages to various applications and also decouple the applications.
According to Microsoft documentation,
Microsoft Azure Service Bus is a fully managed enterprise integration message broker. Service Bus can decouple applications and services. Service Bus offers a reliable and secure platform for asynchronous transfer of data and state.
Data is transferred between different applications and services using messages. A message is in binary format and can contain JSON, XML, or just text.
Microsoft service bus comes in different flavors,
- Queues
- Topic (we will cover this in the next articles)
Azure Service Bus Queues
Queues follow a First-In-First-Out (FIFO) pattern. Queues provide one-way transport the sender is going to send the message in the queue and the receiver collects messages from the queue. In queues, there is a 1:1 relationship between the sender and receiver. Messages are present in the queue until the receiver processes and completes the messages.

The queue contains a secondary sub-queue, called a dead-letter queue (DLQ). Whenever we create a queue DLQ is automatically added in our main queue. When the messages are not delivered to the receiver or cannot be processed by the receiver then such messages are pushed to DLQ.
Now we have discussed enough regarding Queues so let's create queues in Azure and build a simple application to send and receive messages from the queue.
Creating a simple application to send and receive messages from the queue.
Prerequisites
- Azure account(If you don't have an Azure subscription, create a free trial account).
- Basic knowledge of Asp.net Core Web API
Overview of the application
We will be creating a simple application which consists of 3 parts,
- Create Azure Service Bus Queue using Azure Portal (Covered in this article)
- Create Web API to push the message into Queue (Covered in this article)
- Create a Background Service to receive a message from Queue (Covering in Part 2)
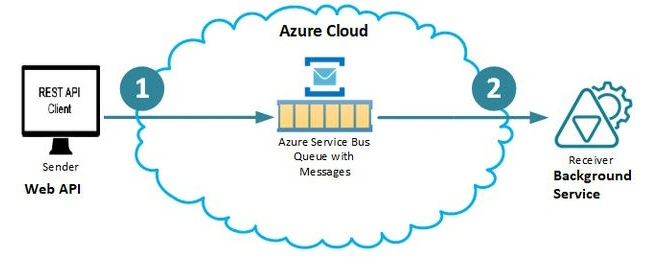
- Creating Azure Service Bus Queue using Azure Portal
- Login to Azure and click on the Create a Resource button.
- In the search box type service bus and select it.
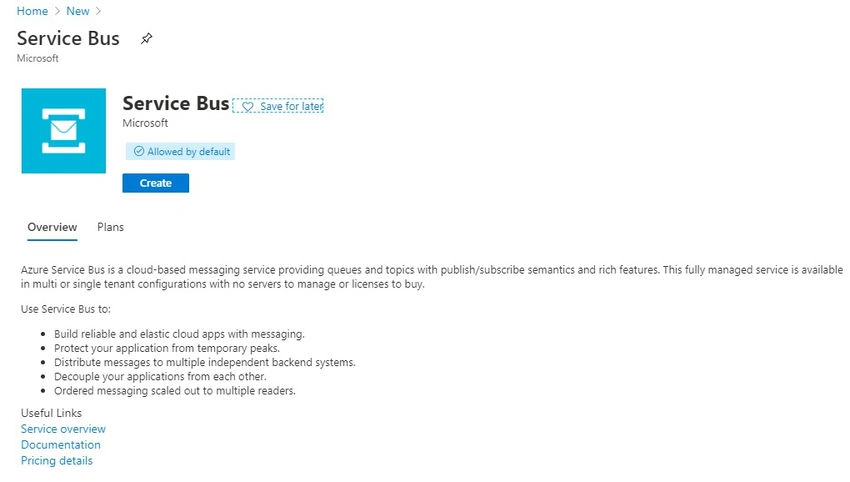
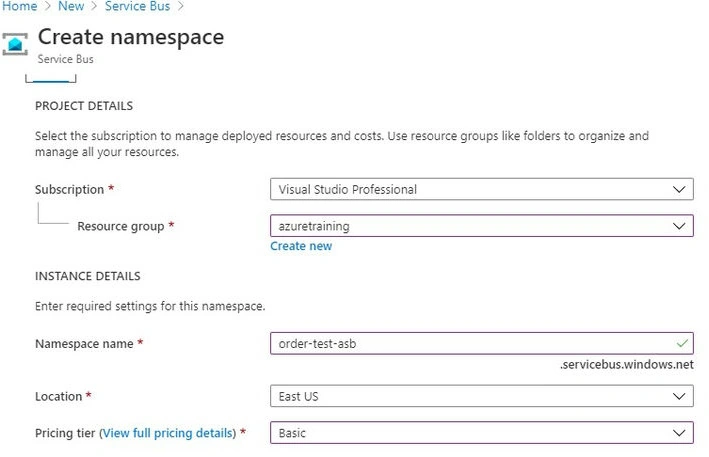
- Click on the Create button. You will see the Create Namespace page.
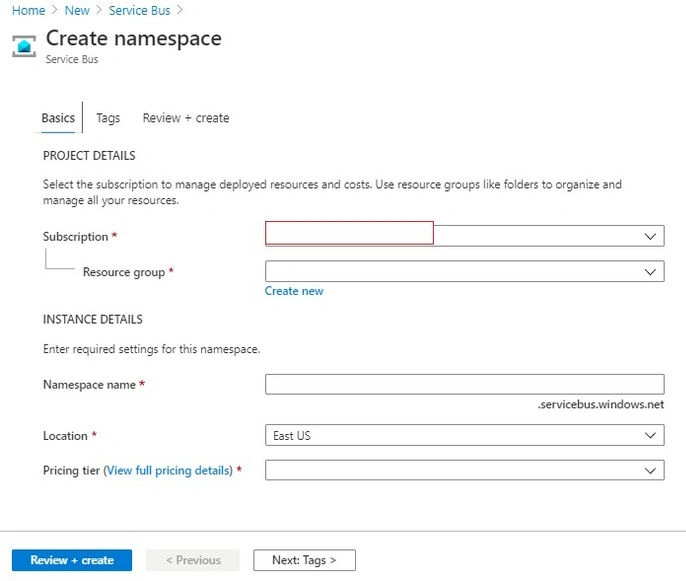
- Azure has Resource Groups (RG) which acts as a container for your resources. So now we are going to create a Service bus resource. First, we need to create a Resource Group. If you have already created RG then you can use the same here. Under Resource group click on Create New button and give a unique RG name.
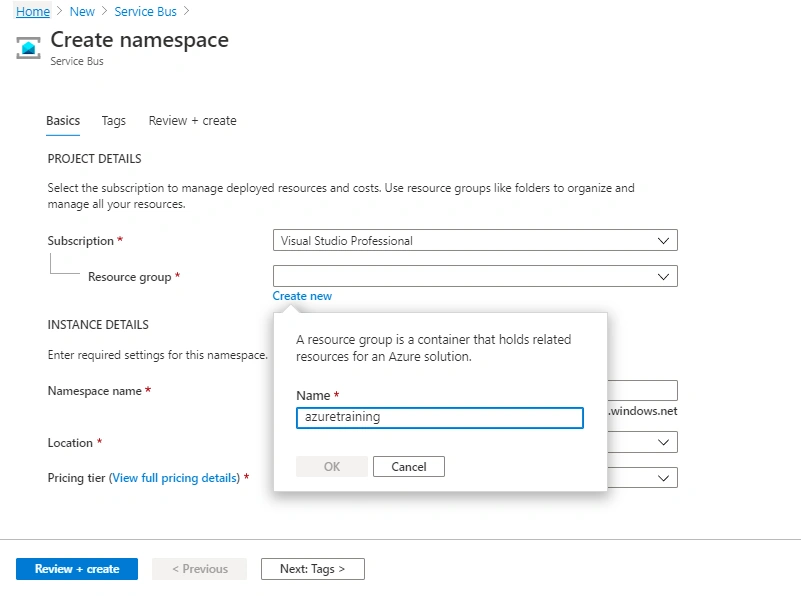
- Now we have to specify the Namespace name. A namespace is a container for all messaging components. Multiple queues and topics can be in a single namespace, and namespaces often serve as application containers.
- Select the location.
- Select pricing tier. Azure provides 3 pricing tiers,
- Basic
- Standard
- Premium

- We have filled in all details so click on the Review + Create button.
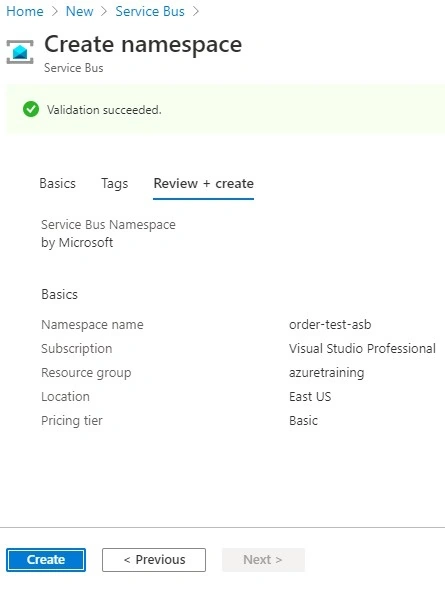
- Review everything is added property and finally click on the Create button.
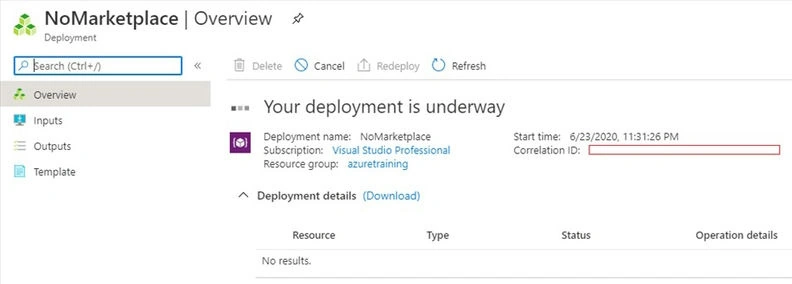
- Creating resources will take time.
- Now our order queue is created successfully.
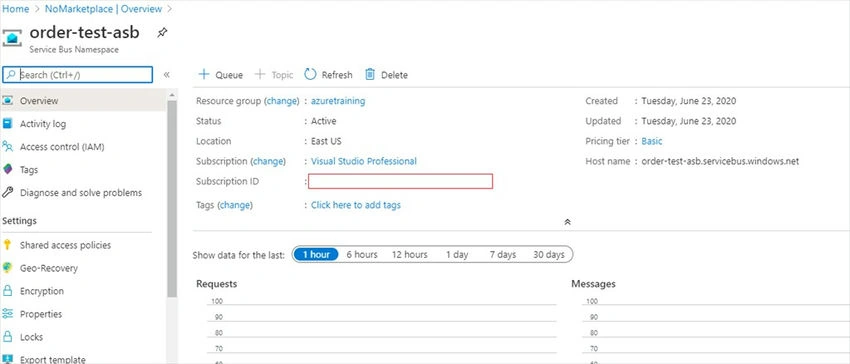
- Go to the Queues section in the left panel click on Queue give a unique name for the queue and click on the Create button.
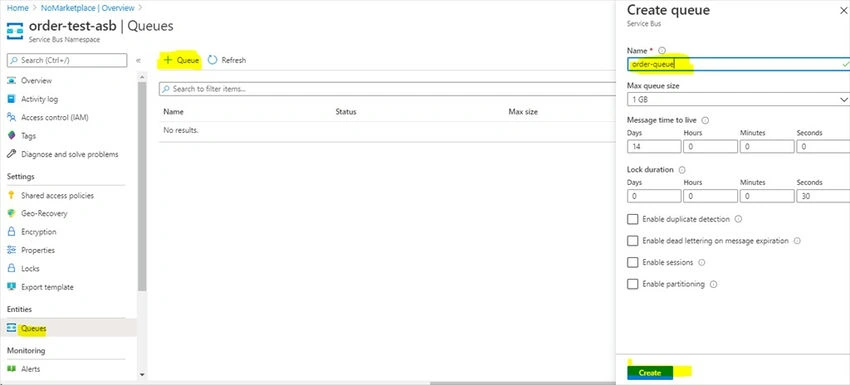
That's it. We have created our first queue.
Create Web API to push the message into Queue
Prerequisites
- Visual Studio 19(if you are using .NET Core 3.1)
- .NET Core 3.1 SDK installed
The first thing is to create a new ASP.NET Core Web API project. For those who are new to ASP.NET Core, I have listed down the steps to create a new Web API project.
- Open Visual Studio and click on File -> New -> Project. Then select ASP.NET Core Web Application and click on the Next button.
- Give the project name and click on the Create button.
- After that select API and click on Create button.
- So now your ASP.NET Core Web API project is set up.
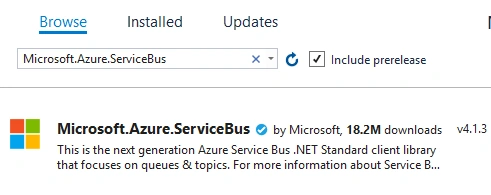
- First, we need to install the Azure Service Bus NuGet package.
Create a new class called Order.cs and add below properties,
namespace Order.Web.API
{
    public class Order
    {
        public int Id { get; set; }
        public int Quantity { get; set; }
        public decimal Price { get; set; }
    }
}
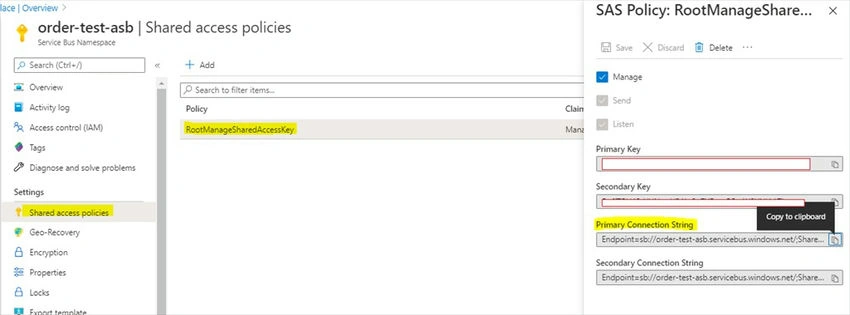
To interact with Azure Service Bus Microsoft.Azure.ServiceBus package provides something called QueueClient which accepts queue connection string and queue name as input and returns the QueueClient object. First, we grab the connection string of Queue from Azure Portal. So open the queue and click on Shared access policies then select RootManageSharedAccessKey and copy it into the appsettings.json file.
appsettings.json
{
  "QueueConnectionString": "<replace your RootManageSharedAccessKey here>",
  "QueueName": "order-queue",
  "Logging": {
    "LogLevel": {
      "Default": "Information",
      "Microsoft": "Warning",
      "Microsoft.Hosting.Lifetime": "Information"
    }
  },
  "AllowedHosts": "*"
}
Create a new controller called OrdersController and add the below code to push messages into the queue,
using System;
using System.Text;
using System.Threading.Tasks;
using Microsoft.AspNetCore.Mvc;
using Microsoft.Azure.ServiceBus;
using Microsoft.Extensions.Configuration;
using Newtonsoft.Json;

namespace Order.Web.Api.Controllers
{
    [Route("api/[controller]")]
    [ApiController]
    public class OrdersController : ControllerBase
    {
        private readonly IConfiguration _configuration;

        public OrdersController(IConfiguration configuration)
        {
            _configuration = configuration;
        }

        [HttpPost]
        public async Task<IActionResult> CreateOrderAsync([FromBody] Order order)
        {
            IQueueClient queueClient = new QueueClient(_configuration["QueueConnectionString"], _configuration["QueueName"]);
            var orderJSON = JsonConvert.SerializeObject(order);
            var orderMessage = new Message(Encoding.UTF8.GetBytes(orderJSON))
            {
                MessageId = Guid.NewGuid().ToString(),
                ContentType = "application/json"
            };

            await queueClient.SendAsync(orderMessage).ConfigureAwait(false);

            return Ok("Create order message has been successfully pushed to queue");
        }
    }
}
So we created the QueueClient object and then we created Message. We used the SendAsync() method to push messages to the queue.
We are testing this using Postman. Run the app and hit post API to push the order into Queue.
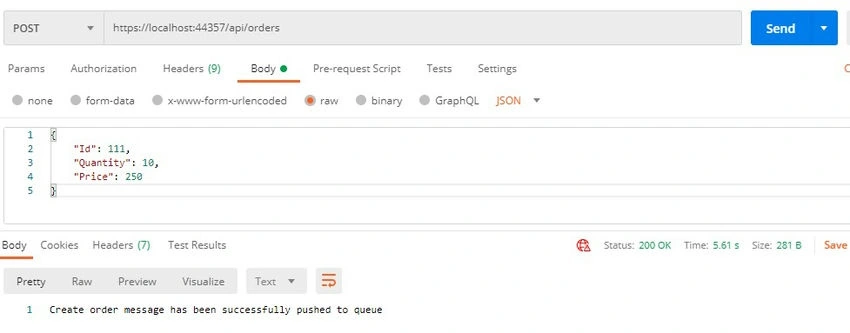
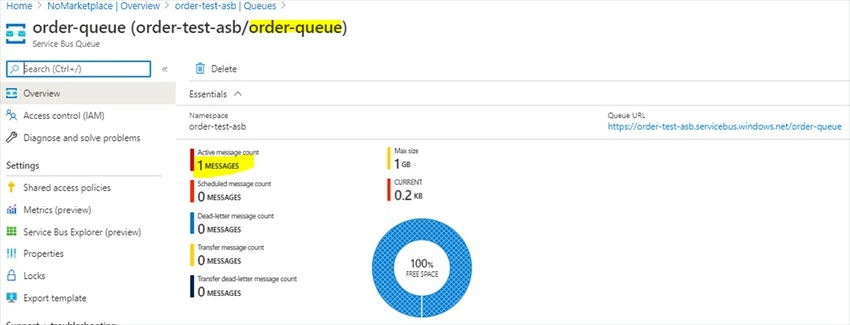
After a successful POST call let's go to Azure Portal and see if the message is pushed to the queue. So we have 1 active message in the queue.
Conclusion
In Part 1 of the Azure Service Bus Queue series, we have learned how to create a queue through Azure Portal and also we have created a Web API that pushes a message to the Queue. In Part 2 we will create a Background Service which will read messages from the Queue.
I really hope that you enjoyed this article, share it with friends and please do not hesitate to send me your thoughts or comments.
You can follow me on Twitter @sumitkharche01
Happy Coding!!
Josue Benjamin CenturionPosted Aug 18, 2024, 12:29 AM
Thank you for this tutorial, especially the screenshots which are really useful.
Arjun DhilodPosted May 12, 2022, 10:08 AM
Thank you Sumit ,
Anish PalPosted Jan 18, 2022, 4:32 PM
Well explained, thanks for sharing
Karan EkkawalaPosted Apr 7, 2021, 7:00 AM
Can you please the link where and how we process the message of the queue, then it will be great
Hamid KhanPosted Dec 17, 2020, 2:40 AM
Thanks for sharing... Keep posting
Hamid KhanPosted Dec 17, 2020, 2:40 AM
Very good and useful post .