

Introduction
Before reading this article, I highly recommend reading the previous parts:
- Getting Started With ASP.Net Web API 2: Day 1
- Getting Started With ASP.Net Web API 2: Day 2
- Getting Started With ASP.Net Web API 2: Day 3
- Getting Started With ASP.Net Web API 2: Day 4
- Getting Started With ASP.Net Web API 2: Day 5
- Getting Started With ASP.Net Web API 2: Day 6
The validation behavior of ASP.NET Web API 2 is the same across multiple hosts. We try to demonstrate the validation mechanism in two ways. The first way is using DataAnnotations and the second is using a third-party library called FluentValidation. This library can be downlaoded using the NuGet package Manager.
Prerequisites
There are the following things we need to use when developing a Web API 2 application.
- Visual Studio 2013
- ASP.NET Web API 2
Getting Started
In this section we will follow some important procedures and these are:
- Create ASP.NET Web API
- Add Web API 2 Controller
- Add a class inside the model and use Validation inside the Model class
We need to use a basic procedure to do it when we use the validation in the Model class. Let's learn how to use DataAnnotation in the model class.
Step 1
Open the Visual Studio 2013 and click New Project.
Step 2
Select the ASP.NET Web Application and provide a nice name for the project.

Step 3
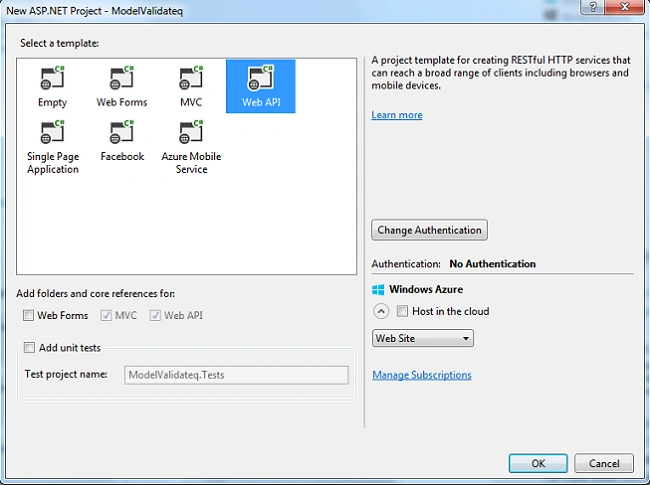
Select the Web API template and click the OK button, by default it will choose MVC along with the Web API.
Step 4
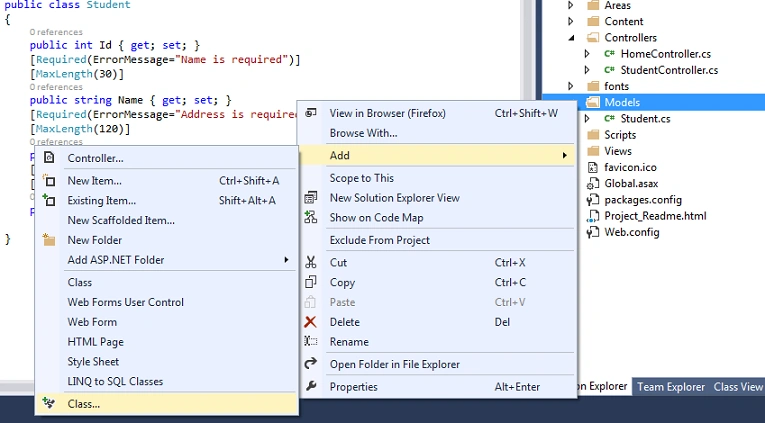
Right-click on the Model folder and add a Student class to the model where we define all the necessary fields. In the following image, I have defined some fields like Id, name, Address and Number.
Arweb AroshanzamirPosted Feb 9, 2015, 3:45 PM
nice one.. thanks sir